Workshop Design - well it's a build really.

UKworkshop.co.uk

Help Support UKworkshop.co.uk:

This site may earn a commission from merchant affiliate links, including eBay, Amazon, and others.
Hi dibs, As it happens I worked in the bottling industry - lots of broken glass. So I am sorted for boots and safety glasses for a while; but the bolle look good.
At the moment we are using gardening gloves, rather like the builders gloves with the latex palm and fingers, but a bit heavier.However, they are more expensive than the gloves4work site, so we will use them when more are required, thanks for the links.

Hope you managed to get some more done to the floor, isn’t work a nuisance.
We have finally had dry weather so are moving on with the brickwork. A brickie would laugh at our pace, but we are getting there...TTFN...****.
 
Update: Progress. Well not at last, but slowly been getting there.

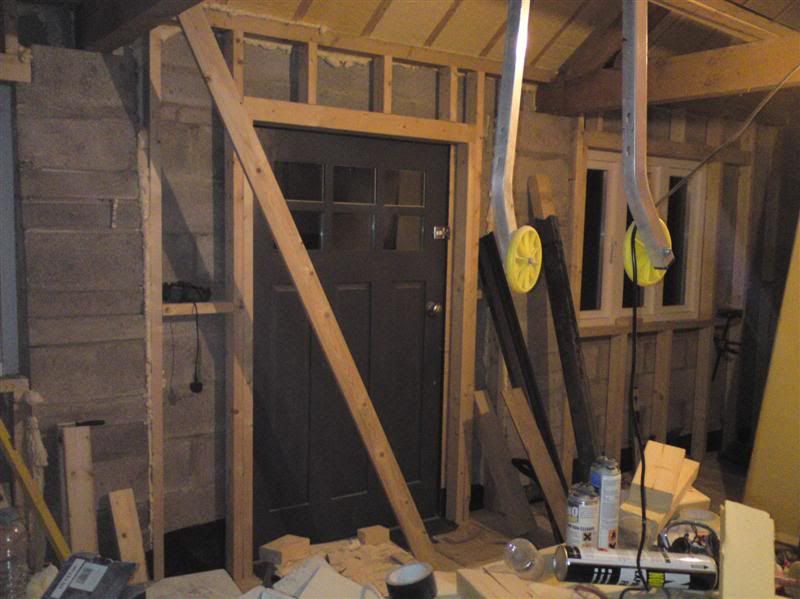
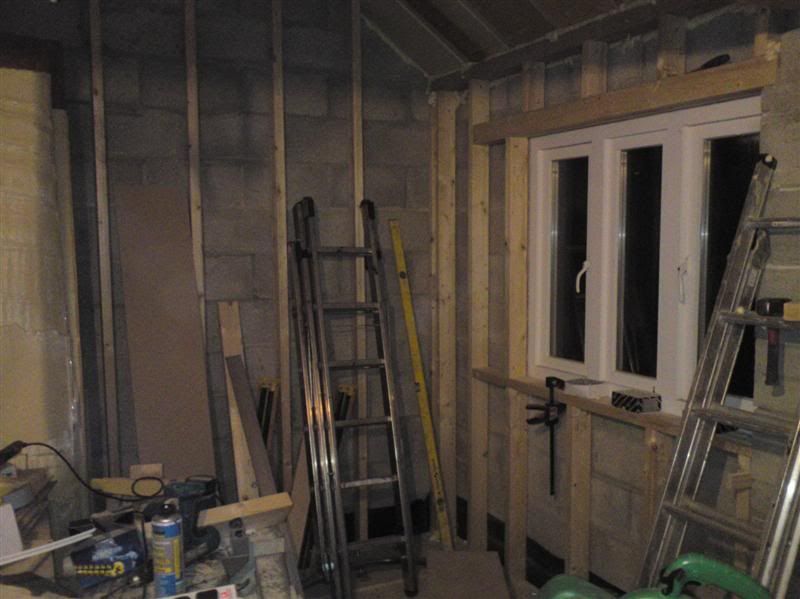
Built up almost all of the stud walling on the 3 walls. The wall that butts up against the garage (yet to to be built) - I'm not bothering.

View of the front - showing LH (if looking from the outside) window

right_window_door.jpg


RH (if looking from the outside) window,

left_window.jpg


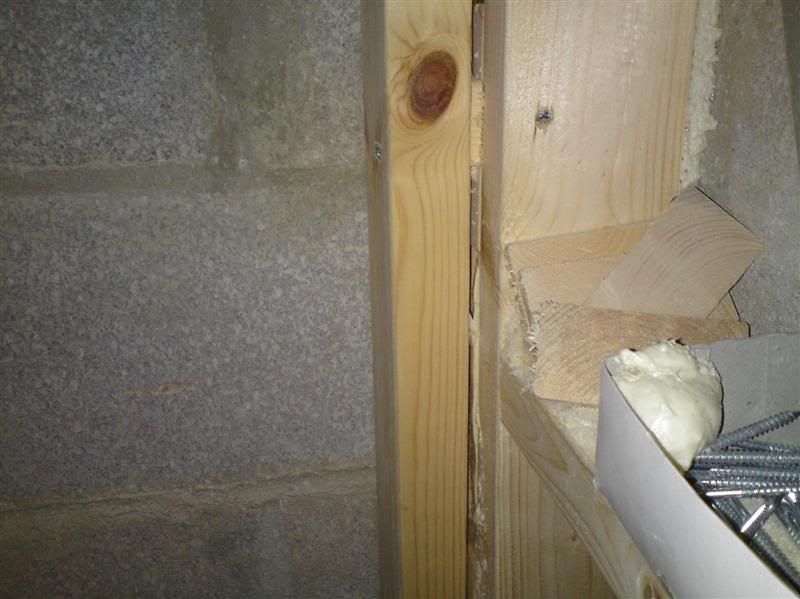
I was so thankful that the stud wall on the gable and the front met without complicating matters, i.e. everything on 16" centres. The above picture - there is one more stud to go on the gable end. You can see it better here,

Corner.jpg


Just have the nogins on the gable wall and the RH bay to do.

RH_Bay1.jpg


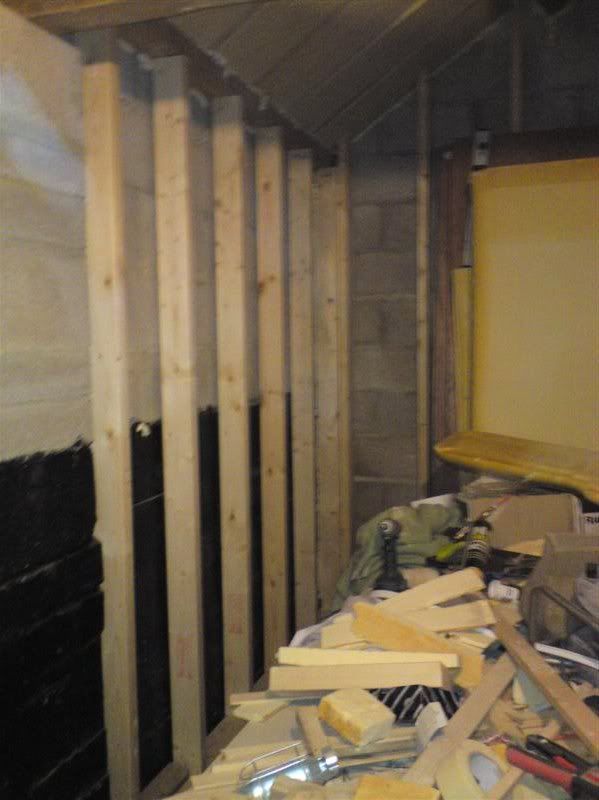
The back wall due to the "return\dwarf wall" - the only way I could figure out to do is,

back_wall.jpg


i.e. 1 length of 4"x2" on it's side - half on the "return" (there is only about 2" of it sticking out anyway) and half on lengths of 4"x2" turned sideways.

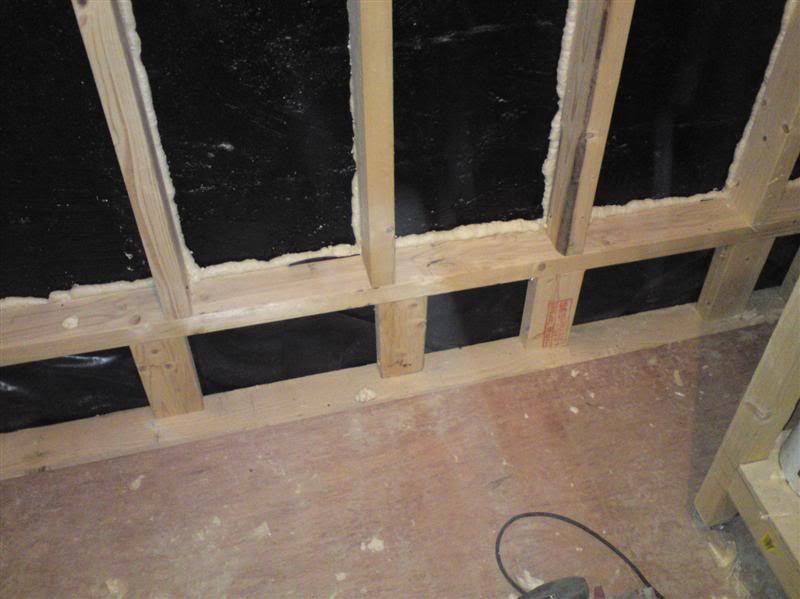
The foam - that was just a bit of experimenting - had half a can (gun grade) so just filled in the small gaps behind the studs, on the reason that weak adhesion over a large area would be a stronger bond than say a strong force over a small area. Sort of a wall ties if you know what I mean. Obviously not thermally broken and doesn't break the Synthaprude coating either.

Got the BR chap coming round hopefully Wed am - so should be able to put all that batt insulation where it belongs as opposed to constantly getting in the way.

Just need to hunt down some polythene or similar of the correct gauge as the vapour barrier. Any thoughts as to what the correct('ish) thickness should be? Obviously doesn't need to be anywhere the same thickness as DPM!

Cheers

Dibs
 
Hi Dibs,

It's looking good. I see you have used wbp ply for the floor; is it t & g or butted? I was considering the same for my floor.
I have cast around the net and it seems that 500 gauge is the thickness used.
Are you sure that you need a VCL? Do you sweat a lot, or are you going to take baths in there? :wink: I would suspect that the RH will be greater outside (especially at this time of year) than in the workshop. Just an observation, having worked outside all day. It was damp as hell this morning and then again after five ish. Even the open fronted barnette felt drier. I seem to remember Mike Garnham suggesting not to bother, and just paint the osb/ply.

Having been reading the American 'Building Science' site, vapour transmission is a complex affair. It's about where the dew point is reached that is critical.
This is usually at the external sheathing which then rots - not that you will have that problem. I wonder whether more vapour would come from the block wall than from the inside of the workshop? I don't mean to alarm you, just giving you something to ponder.

Regards...****.....PS. I have sent you a PM.
 
Cheers ****. The vapour barrier is just a belt and braces approach. The building spec is that for a dwelling just incase there is a PP change of use in the future.

I'm going to line the walls with fireline plasterboard not osb. Just personal preference.

Thanks for the steer on the vapour barrier gauge.

The flooring is 18mm wbp ply, Selco had it on special offer for around 14 quid a sheet when i bought it. Will be laying it butt jointed.

Cheers

Dibs.
 
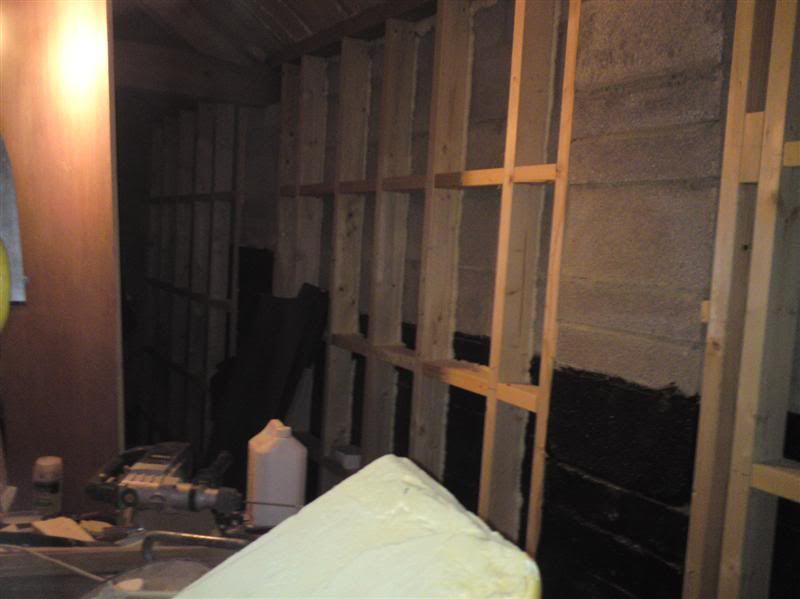
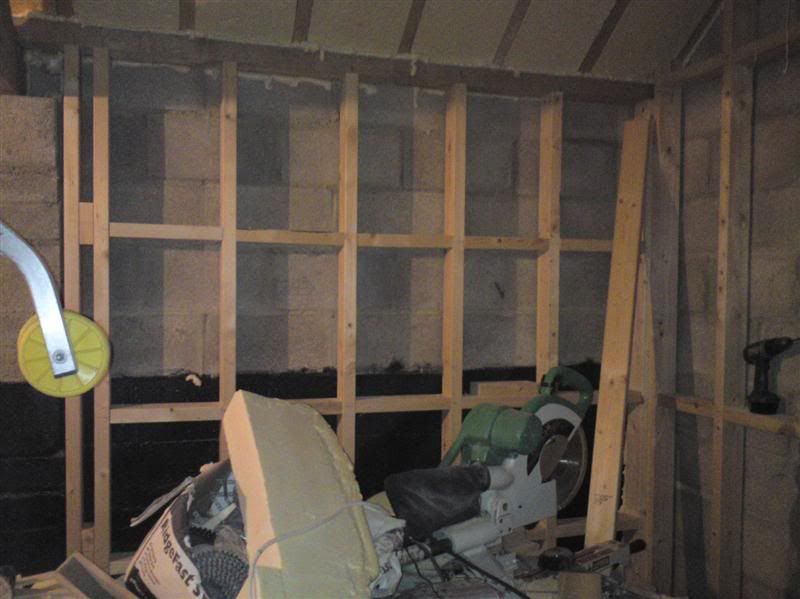
Update: Had the Building Inspector in last week and he wants the inner stud walls ply lined as they load bearing. Also 3 rows of noggins breaking up the wall into 4 similar sized sections.

back3.jpg


And additional uprights up against the piers - screwed into the piers. Didn't have to bother on the gable end as the studs there aren't load bearing.

back2.jpg


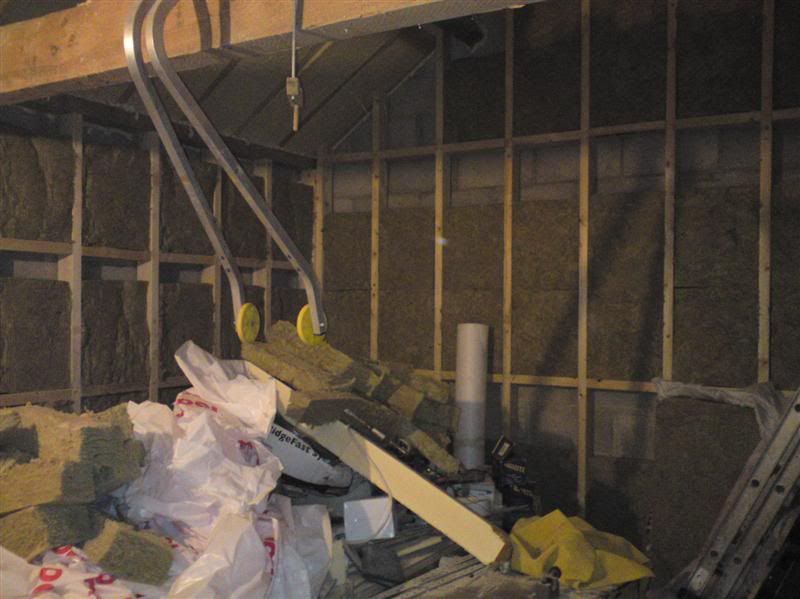
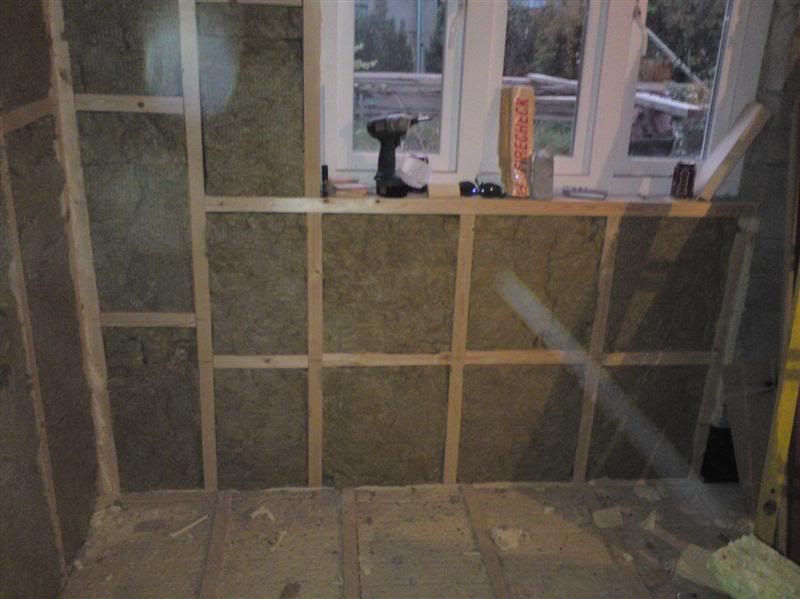
Then on with the Rockwool insulation - after the initial "God this is a bit thick" and realising that I'd cut 2 batts in half and not realised. Once that penny dropped - just plodded on. Got all the "sections" filled in as much as possible with single pieces and then went back with the offcuts.

insulation_started.jpg


Finally finished all the insulation yesterday evening. In one or two places - like where 2 studs are very close only leaving a couple of inches - I fitted some Kingspan stuff instead. And some expanding foam in others.

front.jpg


I'd started with 15 bundles or Rockwool - how many have I got left 7! How on earth I'd ordered 15 I don't know, add to that 20 boards of the rigid stuff. I haven't quite freed up as much free space as I'd wanted! :oops:

I had bought enough of the rigid stuff for the garage roof as well. I have enough of the Rockwool stuff for the garage or it's basement but not both - so I can't see it as having been bought, as it was cheap. Will have to count a little better next time.

Going to vapour barrier the gable as it's only getting drywalled, and laying the floor down by Wed evening. Thursday - all the 1/2" ply is coming for the walls and roof - along with some extra sheets for the garage & it's works (going to take 1/2 the garage down so need to close the end off and the adjoining drystone wall is coming down so need to erect some temporary hoarding along 5m of boundary).

Dibs
 
Looking really good dibs. Not far to go now now. and you'll have the workshop to end all workshops.

I must have misunderstood something though. I was under the impression that the roof rested on the block work but you seem to be implying that, at the back at least, the roof rests on the stud work?
 
wobblycogs":e1ctdqtg said:
Looking really good dibs. Not far to go now now. and you'll have the workshop to end all workshops.

I must have misunderstood something though. I was under the impression that the roof rested on the block work but you seem to be implying that, at the back at least, the roof rests on the stud work?

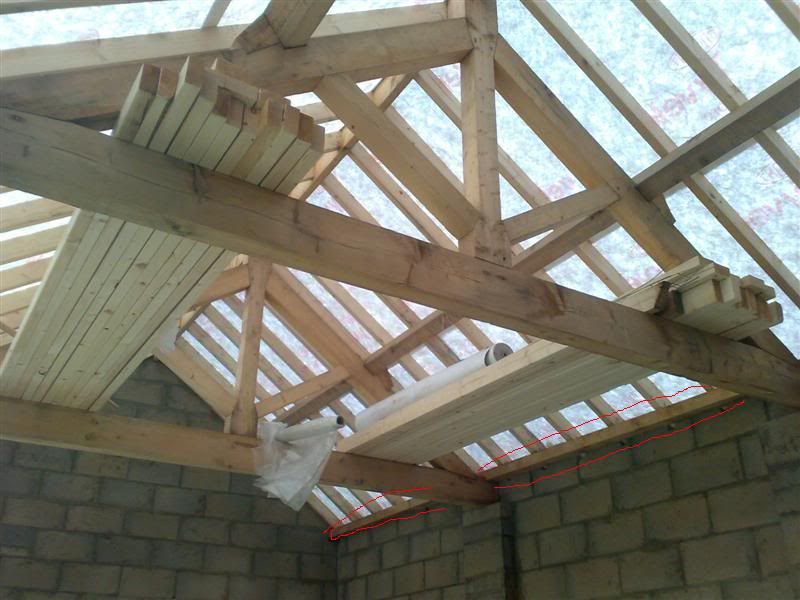
The only thing that rests on the front & back walls is the ends of the King Post trusses - directly on the piers. The purlins rest in the gable walls. Pole Plates (according to the old books that I came across) are cogged into the Truss ends and go into the walls. These sit inside the block walls.

Hopefully a piccy is worth a thousand words.

pole_plate.jpg


If you look at the above piccy - you see the Pole Plates - I've sort of ringed it in red. These are inside the blockwork. You will also see the "notches" in the block work for the rafter feet.

My stud work (front & back) is therefore loadbearing. Hence the 3 rows of noggins and ply over boarding. Whereas if you look at the Gable end, the studwork there isn't load bearing, so no overply and less noggins.

Hope it's clearer than mud.

Dibs
 
Hi Dibs,

You are really steaming ahead now, as Wobbly Cogs said. With all those noggings, I think that you have had as many cuts to make as I have...just at 90°though :wink:
It must be a lonely existence, doing it all on your own, does it bother you,or do you prefer it?

Regards...****.
 
Keep up the good work, Dibs!

Still very impressed by your roof. If i end up building a workshop, i'll look into if i can build something similar here.
 
****

You are right, at times it is boring and lonely but a lot of things fall into that category.

Thankfully the timberwork hasn't been boring.

I just stick my headphones on and listen to music on the phone or a radio station. So time passes well. The most mind numbing had to be bringing all the blocks from the front, down the drive onto the dig. Equally boring was bringing all the rosemary tiles from the patio, stacking them on the front, climbing up and then stacking them on the back. Glad to see the back of that, I can tell you that.

Cheers

Dibs

Cegidfa":3om0r9j4 said:
Hi Dibs,

You are really steaming ahead now, as Wobbly Cogs said. With all those noggings, I think that you have had as many cuts to make as I have...just at 90°though :wink:
It must be a lonely existence, doing it all on your own, does it bother you,or do you prefer it?

Regards...****.
 
Thanks for the (very clear) explanation.

I must admit that at first I thought why not just rest the roof on the walls but now I think about it that's a really clever design. The stud work front and back neatly hides the pillars and, since it had to be there anyway for the insulation, it's not taking up extra space. Presumably as well there are no fascias or soffits to go wrong either since only the ends of the rafters protrude past the wall.
 
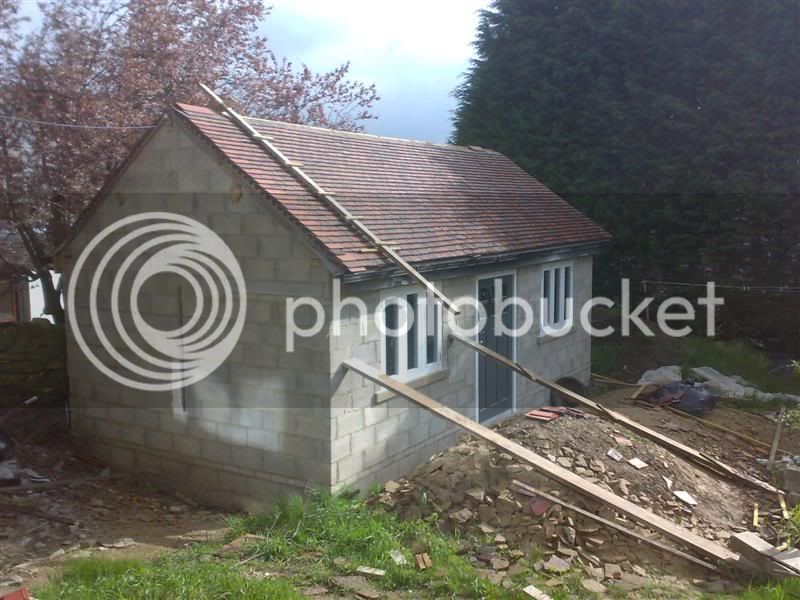
There are fascias on the outside - I didn't want the ends of the rafters just left as they are. Besides it matches the look of the house as well.

almost_finished.jpg


There will be soffits - but this is just 6mm ply that will be screwed at 90degrees to the fasicas just to close in the space behind the rafters for the 10 or so inches outside the wall.

The soffits might be overkill - but on the main house, we had a squirrel infestation - so it's just now SOP to close them in, even tho the roof is counter-battened and has Tyvek, so no ventilation required behind the fabric.

Cheers

Dibs

wobblycogs":3nu9eyxc said:
Thanks for the (very clear) explanation.

I must admit that at first I thought why not just rest the roof on the walls but now I think about it that's a really clever design. The stud work front and back neatly hides the pillars and, since it had to be there anyway for the insulation, it's not taking up extra space. Presumably as well there are no fascias or soffits to go wrong either since only the ends of the rafters protrude past the wall.
 
Update: So much stuff gets in the way, I kinda need another workshop for the the stuff. Mostly overbought insulation (rigid & batt), but it'll get used up in the garage\basement - so will just live with it for now.

Emptied all of it out into the garden - prompting comparisons from Wifey to the kids about the Princess & the Pea. :oops:

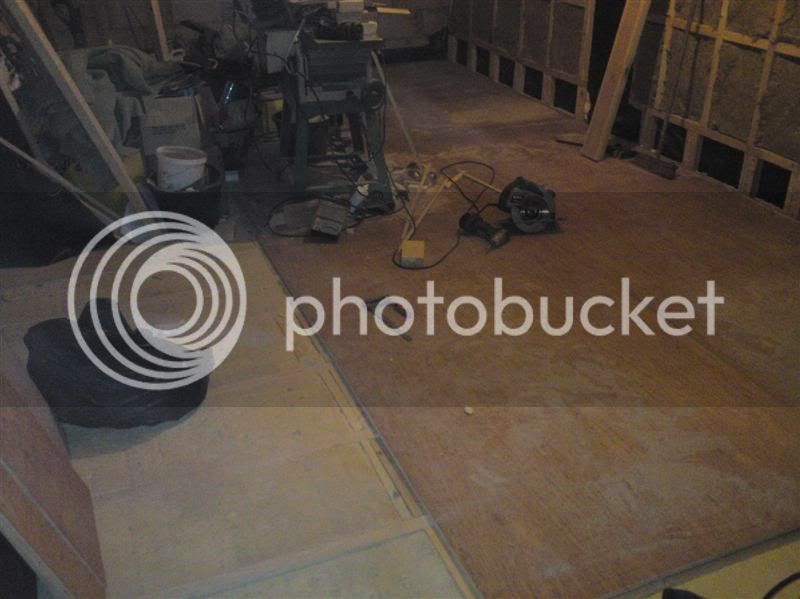
Started with the flooring at the back and then the whole boards in the middle. Took a few hours and a fair few "trims" to get it all so that any gaps were a couple of mm at the most - then just 4 or so screws to hold each board down. Just in case I feel the need to adjust anything.

Here's a piccy - haven't seen it that empty for ages!

floor1.jpg


Working out the nbr of boards - I'm just over halfway.

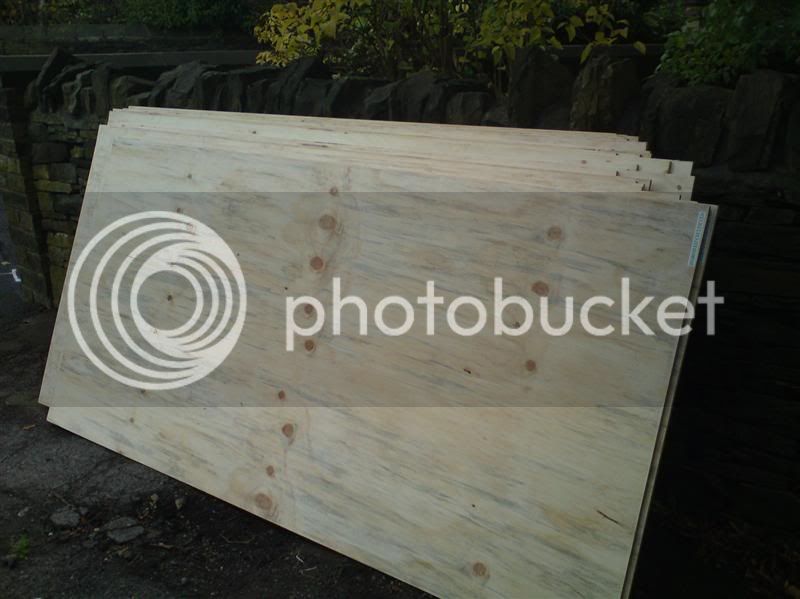
That was Wednesday evening. I'd worked out how many boards (1/2") I required for the walls\roof, plus a few extra possibly for external "fencing" - when I take a section of adjacent drystone wall down. This was paid for on Wed lunchtime and turned up Thurs am,

ply_arrived.jpg


Manually getting them off the truck as they turned up in a flatbed. Thankfully between me and the driver took about 15 mins.

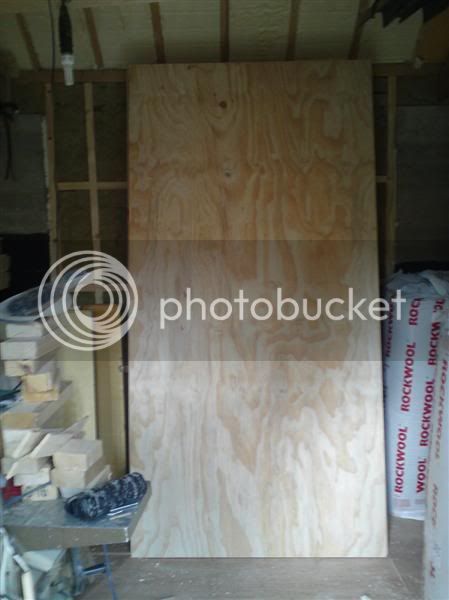
Then me on my own - talk about mind numbing - getting them down the drive and into the workshop - without taking off in the wind or doing myself in. Finally all 30 of them!

ply_moved.jpg


Hopefully make some progress on the flooring this evening.

Dibs

p.s. I'm using 2"x #8's for screwing the ply to the floor and studding. Expecting to have it around 6"-8" on centres. Probably less on the flooring - say every 12". Any thoughts?
 
Hi Dibs,

Just checked in the TRADA book and they recommend 150 centres at the edge of boards and 300 everywhere else. Not many people do it, but each board
for walling and flooring should be gapped all round by 3mm, to allow for expansion. The fixings should be a minimum of 8mm from the board edges.
I also checked a manufacturer's site and the same applied.

Regards...****.
 
Can i give you a little tip on the floor boards - before its to late

do not put the floor boards under the wall, You never know if you would want to lift one, and if they are under the wall you cannot do that anymore

Just use a skirting later.

You never know if you would like to put some electrics or airlines under the floor
 
Cheers for the advice there.

At the moment the flooring is about 1" away from the studs - this should cater for the ply and plasterboard\drylining. Although if it does look like it will cover the flooring - I'll trim the board. The intention was to always cover the final gap with skirting.

The floor is full fill insulation so might have problems with running utilities in it. :lol:

Spent all day Sat in there and to be honest it doesn't look any more advanced than it did before I got in there! :shock:

The penny dropped that the edges of the boards didn't catch the noggins - or to be precise - some caught them fully whilst others didn't. So lifted the boards - having marked where they sat and repositioned all the affected noggins. About 3/4's in total! :evil:

Not very happy I can tell you! But at least all the board edges are now sitting on the noggins. Would have been immeasurably harder had I used nails instead of screws! At one point I went thru a "sod it, let's leave it phase!" but also knew the flex in the board edges would p!ss me off over time and when it's full (fuller I suppose as it's not empty at the mo either) would be near impossible to rectify.

Sunday - nothing, as I spent all day replacing the 20yr (or something) TRV's on all the rads and fitting one of those Magna Clean widgets just after the boiler. Now that Wifey has CH working (and on), I can get back to the workshop.

Cheers

Dibs

Mcluma":3smyi12s said:
Can i give you a little tip on the floor boards - before its to late

do not put the floor boards under the wall, You never know if you would want to lift one, and if they are under the wall you cannot do that anymore

Just use a skirting later.

You never know if you would like to put some electrics or airlines under the floor
 
Hi Dibs,

What a pain, It’s at times like these that you can ‘**** a snook’ at all the smart @rses that say ‘use nails, it’s cheaper’. My very reason for using screws, and, the joints are stronger.
Replacing TRV’s what a joyful job - not, but necessary. The Magna Clean is a sensible idea.
I have had to stop the shed roof trusses to give a hand with the house roof. The chimney on the end of the house is leaking and less than upright, so we are taking it down and roofing over. What a beautiful day for it, and grand views from the top of the scaffolding.

Regards...****.
 
Looking damn good Dibs. Nearly there. 8)
I'm busy with my own shop at the mo similar build, block build. I'm at the stud out, 3"x2" and insulate cavity batts outside walls. I was just wondering why you foamed the back of the studs and if there will be any condensation issues without this been a vented cavity, I'm planning similar. Did BC or architect spec it? I'm going to be fitting vapour barrier over stud before boarding with soundblock plasterboard. Definitely thinking of foam the back of studs now as don't want sound bridging outside wall. Just head and floor plate fixed.
Anyway thanks for posting excellent WIP. Thoroughly enjoyed following.
:D
 
Alex":2ds2b24j said:
Looking damn good Dibs. Nearly there. 8)
I'm busy with my own shop at the mo similar build, block build. I'm at the stud out, 3"x2" and insulate cavity batts outside walls. I was just wondering why you foamed the back of the studs and if there will be any condensation issues without this been a vented cavity, I'm planning similar. Did BC or architect spec it? I'm going to be fitting vapour barrier over stud before boarding with soundblock plasterboard. Definitely thinking of foam the back of studs now as don't want sound bridging outside wall. Just head and floor plate fixed.
Anyway thanks for posting excellent WIP. Thoroughly enjoyed following.
:D

Hi Alex

The foaming behind the studs - that was just a little experiment. Didn't go anywhere in the end. In the end I just drilled a hole right the the stud (every 2nd stud) and inserted a RapierStar screw straight into the block work. To affect the same sort of thing as a wall tie. Made a massive difference in the gable wall - even tho the stud isn't load bearing there.

There shouldn't be any condensation issues there - i.e. warm moisture laden air meeting cold air\surface - as I'm over boarding with 12mm ply. It seems fairly universal that using ply - due to it's glue lines - negates the need for a vapour barrier. In the case of the gable wall - which won't be getting ply'd - I'll be putting a vapour barrier up first and then the drywall.

Update: Floor is down, except the last piece in front of the door, but I need to remove the Aluminium weather bar and fit a timber threshold and weather bar first.

Due to my less than perfect block work and the fact that the roof got tiled before the inner stud wall went up, a few issues arose when fitting the studs. When the studs where fitted - I made sure that each was plumb, but as there are effectively 3 wall sections at the back - there was always going to be a possibility that they wouldn't all be in line. Also the face of the piers - there was about 5-10mm difference between top & bottom, i.e. not perfectly plumb. :oops:

I realised this when fitting the studs and it was accepted that I would "fix" this later. I ran a string line across the back wall - almost at the top and almost at the bottom. The front face of the studs were at different depths from the string.

So yesterday - ran several lengths of 4"x2" thru the table saw cutting pieces (shims or whatever the word is) to bring the front face to a consistent depth from the string line, and allowing the ply to go straight across the piers. Thickness ranged from 10-20mm. Nailed these on with brad nailer - I'll screw thru these when the ply is fitted. So now the variation is within several mm's - which I'm much happier with. Altho I suspect - overkill.

Annoying thing was the brad nailer jammed last night, Aldi el-cheapo seems to have packed up. Will try to fix it this evening - but have ordered a new Bostich Brad nailer - for tomorrow. - http://www.screwfix.com/prods/71212/Pow ... Nailer-18g in case anyone is interested. Better than paying £130! And certainly better than having El Cheapo's go bang. Mind you for the peanuts I paid for El-Cheapo - it did well.

Back in tonight - bit of luck might just get the wall ply'ed. Altho - probably do the roof 1st, as the offcuts can then be used elsewhere.

Will post up some piccies tomorrow.

Cheers

Dibs
 
Thanks for replying. I thought maybe the the foam was for cold bridging or stopping damp. I might staple some 4"DPC to the back of my studs to protect from damp/cold bridging, foam just look so much easier. :wink:
The nailers not for fixing the ply on is it? Drywall screws and impact driver what you need but you knew that. :wink:
Are peers going to be uninsulated then?
I build mine on the outside to avoid faffing about. I might have to put some pics on here so you can see I'm not trying to take the mick. :oops:
 

Latest posts

Back
Top