WIP Comp Entry - Jewellery Box (withdrawl from comp)

UKworkshop.co.uk

Help Support UKworkshop.co.uk:

This site may earn a commission from merchant affiliate links, including eBay, Amazon, and others.

StevieB

Established Member
Joined
29 Apr 2003
Messages
1,719
Reaction score
46
Location
Chatteris, Cambridgeshire
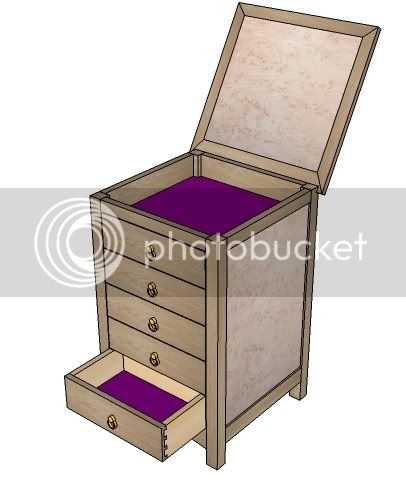
My design brief was to design a jewellery box in two contrasting timbers with a secret compartment of some description. The design brief also stated a number of drawers or a sliding tray for storage. After sketching out a traditional box with a sliding tray however it became clear that adding a secret compartment to this design was going to be problematic if the compartment was to be of a sufficent size to hold anything useful. Thus, after discussion with SWMBO and a bit of playing with sketchup the design is going to be based on a tower of drawers as shown below.
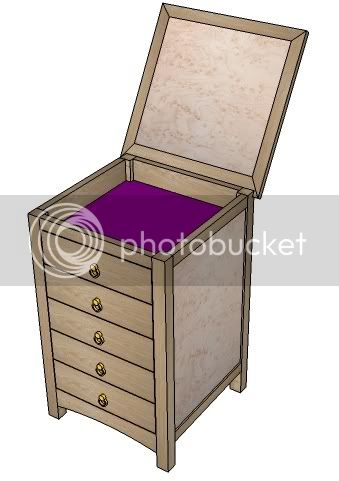
jbox1small.jpg


This is frame of oak with birds eye maple veneered panels. The top will be hinged with a false drawer front. I may also put a removable tray in the top depending on how the frame pans out. The purple is SWMBOs request for felt/velvet in that colour but I am not convinced by the colour yet. The drawers will be oak fronts with solid maple sides and back:
jbox2small.jpg


I am aiming for dovetails on these drawers, perhaps optomistically. Handles are yet to be decided, I have not looked for any yet so these are just a rough idea I knocked up in sketchup. I am tending towards brass however rather than timber handles. Overall size will be approximately 400mm high, 250mm wide and 250mm deep.

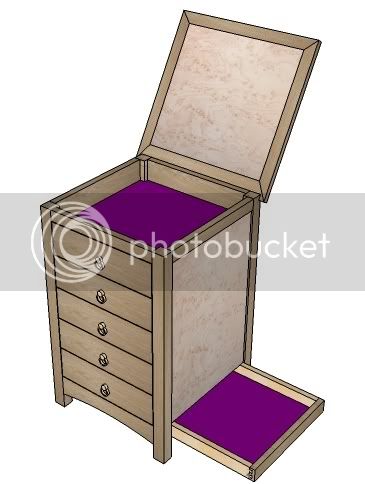
As for the secret compartment, I currently have two options. The first is to make a false cross-member on the side and have this as a drawer front for a slim drawer that slides out from the side:
secret1small.jpg


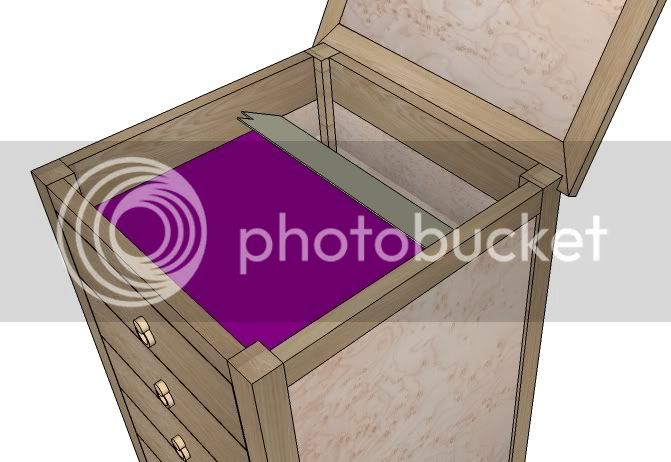
The second option is to make the drawers slightly shallower than the carcass and leave a space behind them. This would be accessed by folding back the bottom of the top space. To make this less obvious I could embedd a metal bar under the flap and thus you would need a magnet to open the flap. This avoids the need for a finger hole. Alternatively I could leave a small pilot hole and use a bent piece of wire to lift the flap, or finally I could make it more obvious by using a small lock and having a key hole in the felt ( a drop in tray for that top box would then make this less obvious).
secret2small.jpg


I have a couple of items I am not sure of yet. The first is the veneered panels. I was initially going to have them as floating panels ie set back into the cacass by 2-3mm. For the lid however I wanted to lip the panel so the birds eye panel was flush. I am not sure whether to do this for the side panels or not as well. The second issue is the length of the legs. On the figures above they are approx 50mm. Is that too short to put a taper on them? Should I taper them at all, or should they be longer than 50mm?

All comments welcome!

Steve.
 
Steve

Probably not what you had in mind but I think you could put a taper on the outside of the legs, well actually a concave curve, not a taper - so that they're narrow in the middle and flared at the ends
 
If this is to live on a desk of some sort then, I would probably leave the legs as short as they are. If it's floor-standing, I'd be inclined to make them longer - at least 75mm, I think. I don't think they're long enough to be tapered either.

You could always leave them square for now and decided on that once the unit's dry-assembled - maybe even get some comments from SWMBO! :wink: You could even leave the legs over-length and trim back later if necessary, provided all your marking out is done from the top. :)

Personally, I prefer the lower secret drawer compartment. If she wants to keep things in the top then they'd only get in the way of accessing the other one inside the top.
 
Thanks for the comments. Not convinced by the curve on the legs all the way up Ironballs, if I am using a veneered panel in the centre I think the panel would also have to be curved to prevent the ground showing. Thats a bit beyond what I have the time and expertise for I think.

OPJ, thanks. It will not be large enough to be floor standing, although a Krenov style chest on legs is a possibility I hadn't considered..... It is supposed to sit on a chest of draws in the bedroom though so perhaps as you suggest leave them slightly overlong and trim back once constructed.

The birds eye maple veneer has arrived and I have even tidied my workshop in preparation for starting, but didn't really have any spare time to do anything practical over the bank holiday what with other jobs :roll: Still not sure on which secret compartment. I agree the lower will be more practical, but part of me says a secret compartment should be, well, secret. I have my doubts about how well I will be able to blend in the lower drawer, wheras the back compartment will be easy to disguise unless you measure the drawer depth and realise there is room for a void. More thinking required I think :D

Steve.
 
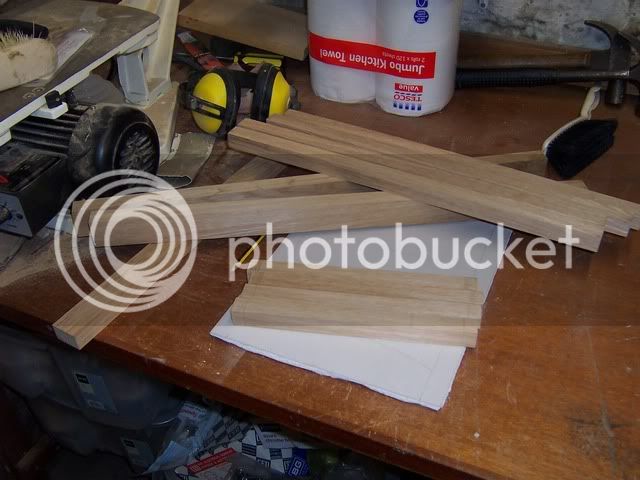
Well alot has happened since I did the sketchup design for this, and I am very unlikely to finish before the deadline but I aim to give it a go anyway! So as of this weekend I have made a start on the building. First cut some of the frame components in oak after preparing from sawn timber with my PT and thicknesser

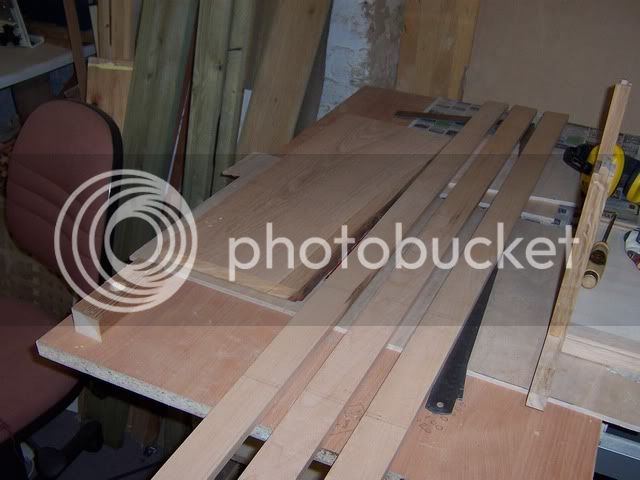
components_1.jpg


Not very clear, but the components are sitting on a full size layout of the front of the cabinet drawn on a spare piece of plasteboard - now the council will not let me take it to the tip I have to use it for something :wink: This is the first time I have been organised enough to do a full size plan but with so many frame components and a very messy workshop it is an attempt to stop me getting confused!

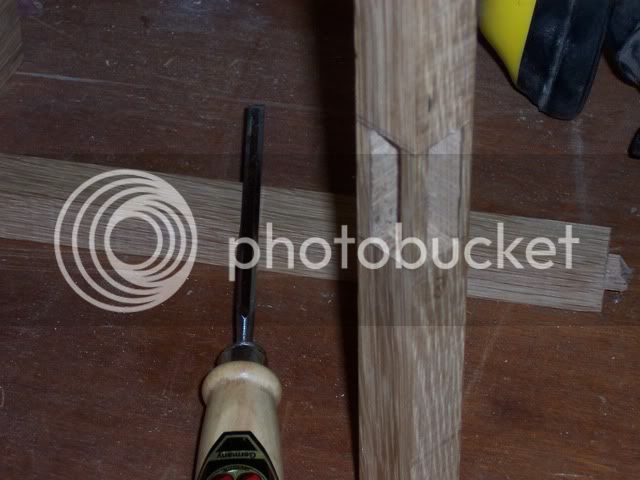
Most of my woodwork to date has been house bashing and general DIY. ie no fine dovetails, no accurate mortices and tennons and certainly no cabinet work. This design is therefore a bit of a new venture for me and I have a sneaky feeling I have bitten off more than I can chew. However, if I can learn then that has to be a positive. So, for the first time ever, I have tried to cut an accurate mortice and tennon. After cutting the first one I realised that actually I was going to have to cut double mortices in the same alignment at 90 degrees to each other for the upper and lower rails

mortice_2.jpg


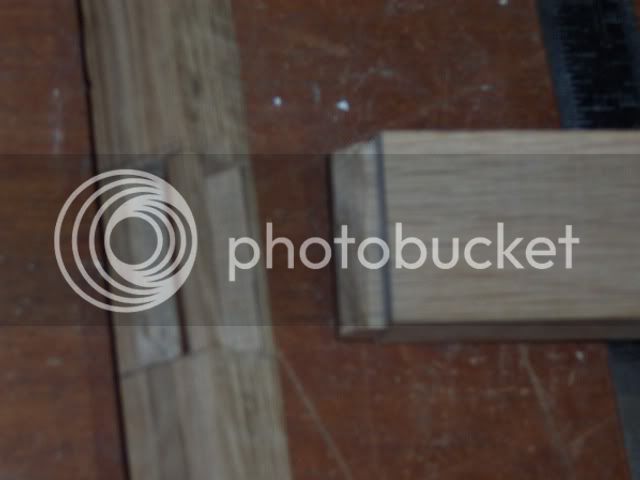
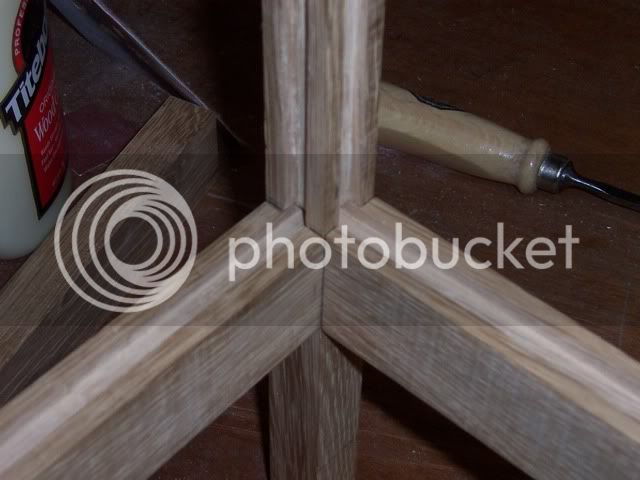
And then when I tried fitting two rails together, realised that I would have to angle the tenons to get them to fit

morticeandtenon_3.jpg


The tenons were cut square on the bandsaw then trimmed with a fine tooth saw. The mortices I was going to drill the waste and then chisel square but realised in time my own limitations and picked up a morticer from Axminster with 20% off in their clearance sale. It is the one with the X Y table and boy is it fantastic. Very controllable and makes morticing if not a doddle then at least much more accurate than I ever would have been with a drill and chisel :D

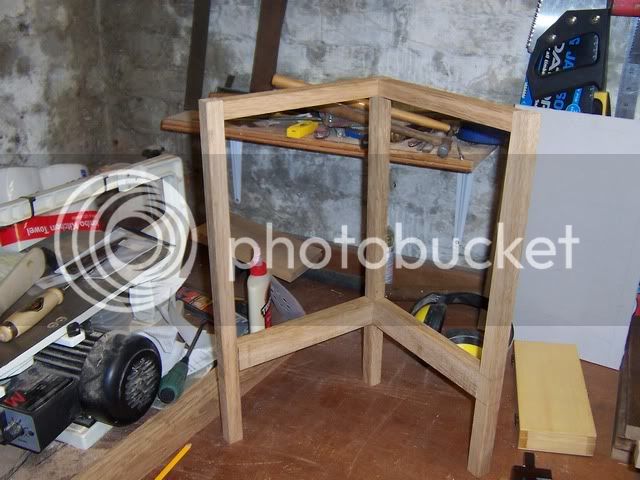
Not being able to resist, I have put together the two sides of the frame I managed to mortice and tenon this weekend and they are at least square and stand upright!

halfframe_4.jpg


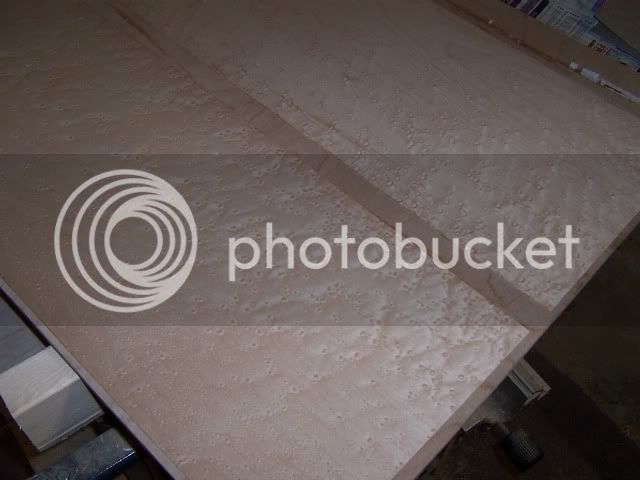
I still have the second half of the frame to do and some mortices in the existing frame to cut, but all the rails are done ready at least. Since time is limited I have also started veneering the panels for the sides of the carcass. I have always wanted to do something with birds eye maple, and since my design brief called for two contrasting timbers I have the perfect opportunity. I used 0.6mm birds eye maple veneer and have attached it to 6mm birch ply in my state of the art veneer press

veneer_5.jpg


I had to do this in two goes and you can just see the first leaf already attached while the pressure is applied to the second leaf. I decided to attach them to a large piece of ply and cut panels to size rather than veneer the correct size panel. May be a bit wasteful of veneer but it was the easier option as I am trying to do things all at once rather than in a logical order. This way I don't need to know the exact size of the panel before veneering the veneer to a background. The panels, once cut to size, will be set into routed grooves in the frame. And that is as far as I have got this weekend.

Things I have learnt so far:

Just because you can cut an accurate mortice, doesn't mean you can get away with a sloppy tennon.

If you try and work on a messy workbench you will take twice as long to do anything.

Numbering your components as you go will save alot of head scratching later in the build.

Things I am worried about:

Is the double mortice going to weaken the frame too much?

The lid - still not happy with this in the sketchup design above and am seriously considering going for a veneered panel top and drawers only.

The secret compartment - this need planning now at the early construction stage as it is integral to the design brief, but I am not exactly sure how or where to incorporate it yet

Drawers - do I risk cutting dovetails for essentially the first time ever?!

Steve.
 
Bit of a result today - had the day off work to do some painting but due to the weather managed to grab a couple of hours working on this instead. First job was to rout the grooves for the panel sides in the frame pieces I had already made

routed_6.jpg


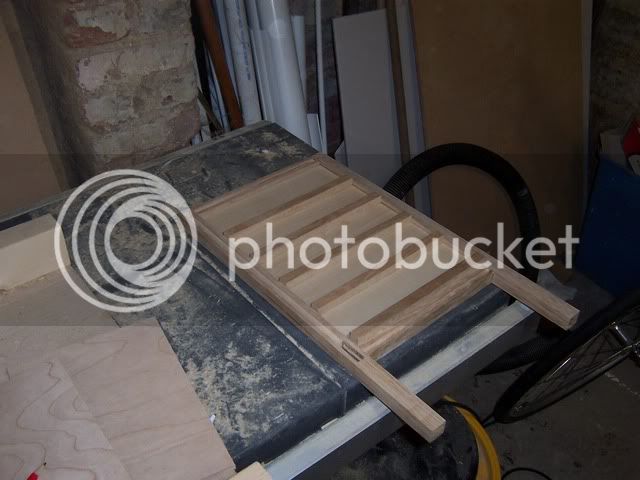
The grooves are centered on the rails and legs to accomodate the 6mm panel and 2 0.6mm veneers so with a 6mm straight router cutter it took a bit of trial and error to get the settings right. By passing the timber through once then flipping it round and passing it again I got an acceptable width groove centered on all the components. These are stopped on the legs but full width on the rails. I then quickly made the rest of the frame and cut the remaining grooves before I could absentmindedly disassemble the router table setup and lose my settings

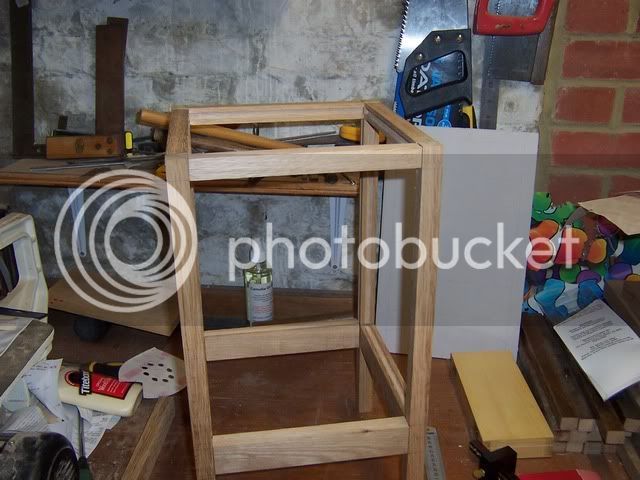
frame_7.jpg


So the basic frame is now at the dry fit stage. I have given everything a very quick tickle with sandpaper at this stage (very quick as most of the layout pencil lines are still visible) and got the layout the way I wanted it. The back two legs and top rails are double grooved for the side, back and top panels, and by more luck than judgement the groove depth was not sufficient for the two grooves to meet and drop the internal corner of the leg or upper rail :oops:

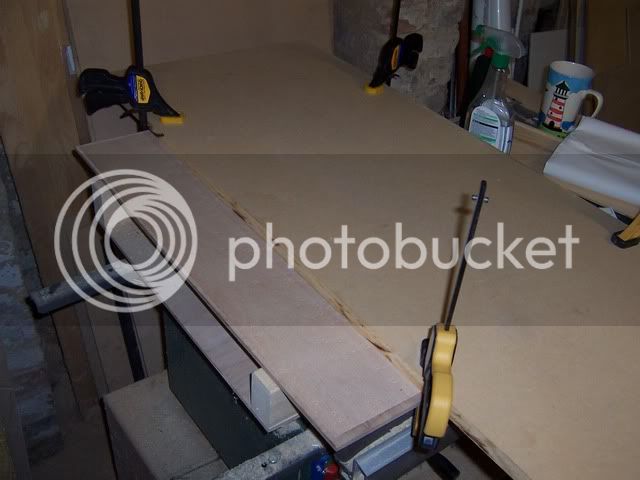
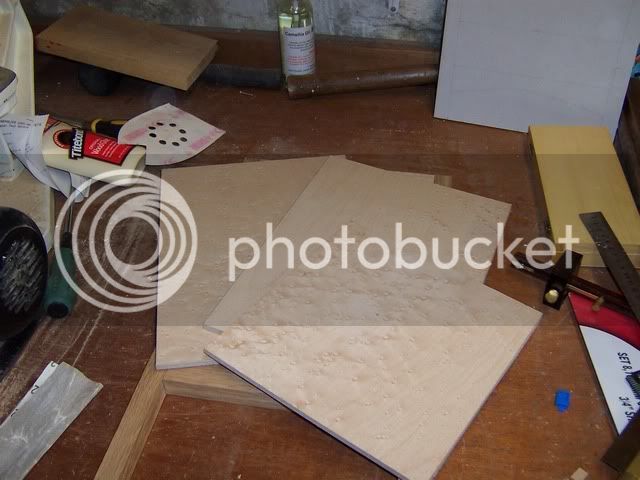
So onto the veneered panels. After taking apart the state of the art veneer press I was left with this

veneer_8.jpg


Which are the birds eye maple veneer on one side only. Rather than veneer the second side in this form I decided to cut the panels to the correct size now then fit oversize plain veneer to the backs and trim to size. Regarding my dilemma over a solid top or a lifting top, as you can probably tell in the end I shied away from a lifting top and went for a solid panel construction to match the sides and back. The main reason for this is that I was worried that the whole thing may be a little fragile, so for rigidity decided on the top panel with just drawer openings in the front of the carcass. It does give me one extra drawer to make as with a lift up lid there would have been a false drawer front for the top drawer. It also narrows my options for the secret compartment since I cannot now make one that is accessible from the top. I am therefore left with trying to design something in the base behind the deep rail. I have some initial thoughts about how to go about this but need a bit more thinking time first! So with the panels cut

panels_9.jpg


I couldn't resist dry fitting one to see the effect

panel_10.jpg


The three panels and the top are now being veneered overnight with a background veneer for balance. Since this is going to be inside the box I used some rippled sycamore I had in the cupboard. The ripple is extremely faint and didn't really deserve the title 'rippled' in my opinion so a perfect choice for an internal area where it wouldnt be seen.

Back to work tomorrow so progress will probably slow somewhat again, but a good start nonetheless from my point of view.

New things I have learnt:

Trying to dry fit 4 legs and 8 rails requires tight M&T joints to prevent the entire structure toppling before you can take a photo

Spending time to test cut on scrap with the router table is a good idea despite the time involved in getting it right

Think carefully before routing a groove in two adjoining faces - if the depth if the groove exceeds the space between the groove and the corner between the adjoining faces you will drop out that corner. Another 2mm and I would have had to prepare another leg.

New things I am worried about:

Floating pnels or glued panels? Would really like to fix them and birch ply is stable. I think I will need the rigidity the fixed panel would provide.

Secret compartment - needs to be planned before I start gluing because if I need to router grooves in the deep bottom rails it will be very difficult later on.

Overall design - looks a bit 'clunky' and square. Still may taper the bottom of the legs and am considering a curve on the bottom rails, but that decreases my secret compartment options. Hmm, decisions decisions!

Steve.
 
Bit of a delay over the last week as SWMBO had to go into hospital for surgery. Its looking more and more unlikely I will finish this by the end of October!

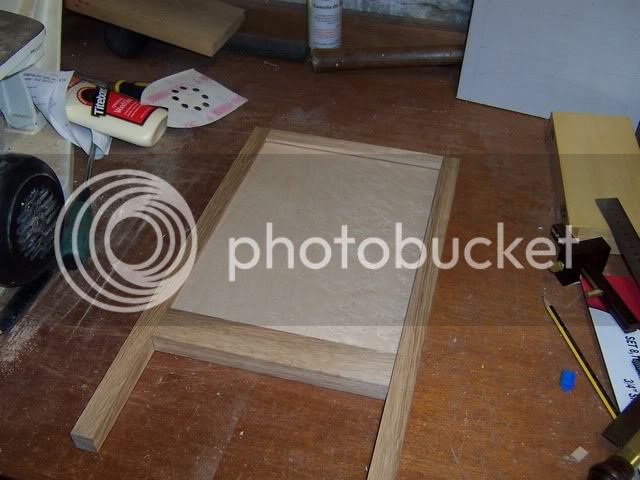
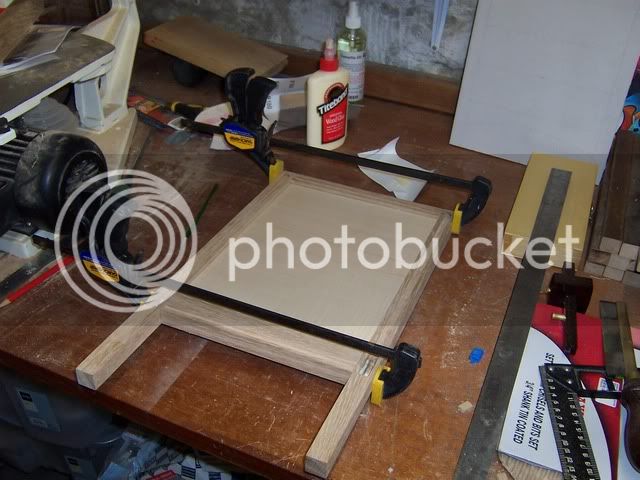
Started on the glue-up of the side panels after routing a groove in the bottom crossrail for the base. Both sides are now glued and square. In the end I did glue the panels into the frames rather than leave them loose. I guess in time I will know whether this was the correct decision or not but for now I am hapy that I did

panel_11.jpg


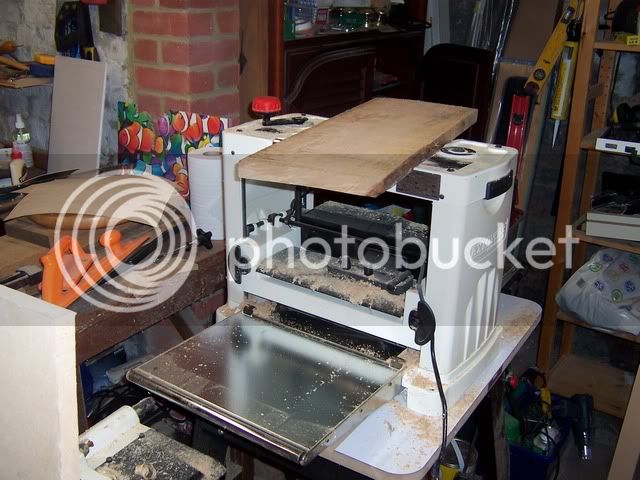
While these were set to one side I had a sort out of a piece of timber for the drawer fronts. Ideally I wanted a piece with good figure that could make all of the fronts in one go to maintain the grain pattern across the drawers. In the end however it turned out I only had one piece of sufficient width so I had to go with that. I did toy with the idea of using birds eye maple veneer on the drawer fronts and ideally would have liked to as I think it would have given the cabinet a more consistent look. Time and my concern over making a thin oak beading to wrap the drawer fronts however meant oak fronts was the safer option, even if the less visually appealing one. Prior to putting through the PT

front_12.jpg


I thicknessed this down to 20mm, the same as the frame thickness. Perhaps a little too thick for what should be a delicate jewellery cabinet, but this is turning into something a bit bulkier than I originally envisaged. While I was at it I also thicknessed some maple down to 12mm for the drawer sides. I am going to be going with 5 drawers at 6cm deep. After thicknessing but before cutting to length

front_13.jpg


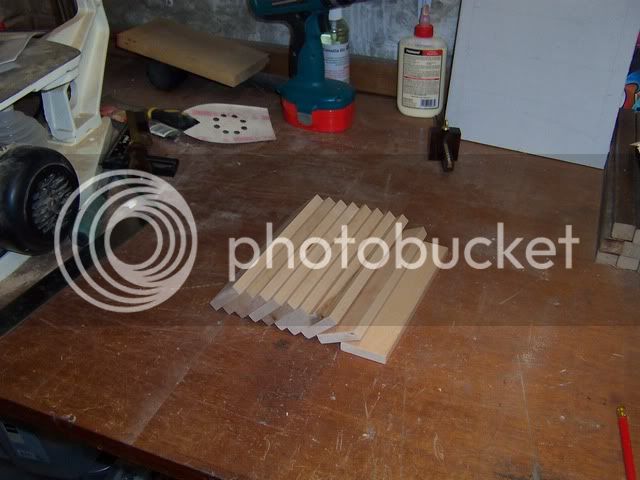
And the drawer sides cut to length

sides_14.jpg


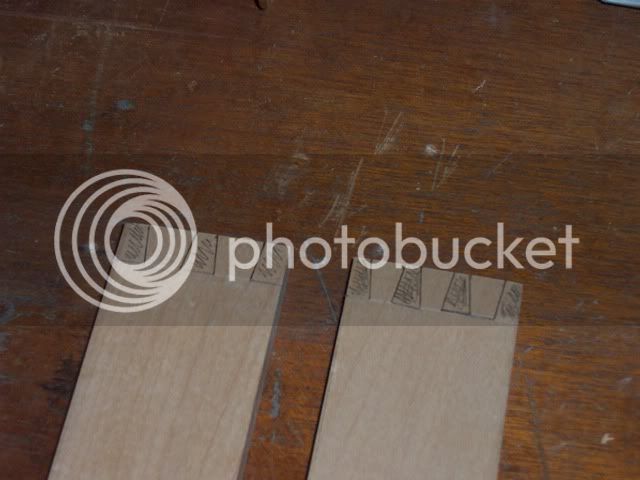
Now it is decision time. Do I try and go for my first ever hand cut dovetail?! Since I never could get on with the dovetail jig and router I decided to give it a go. Not only that, but wanted to do half blind ones. This could be a monumental mistake. OK, after taking the plunge time to decide how many pins to go for - 2 or 3

tails_15.jpg


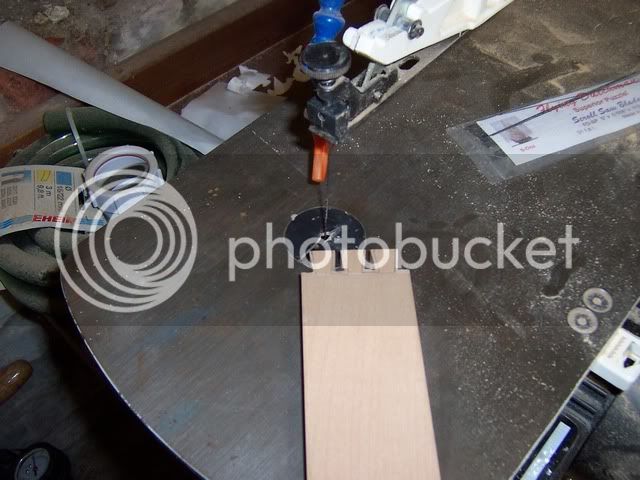
Decided on 3 - in for a penny in for a pound! Hogged out some of the waste on the scrollsaw rather than the bandsaw as I didn't want to be too aggressive at least to start with. Even with a #7 blade the maple still jumped a bit, although increasing the speed of stroke helped. Next time I will try the bandsaw

tails_16.jpg


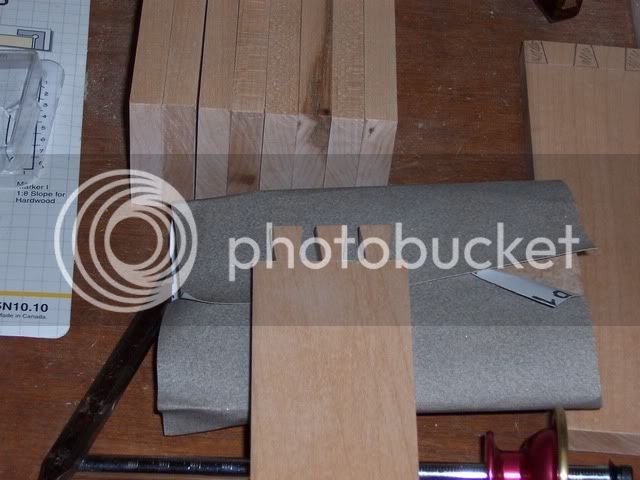
Then on to the chisels to pare down to the line. Pretty much as soon as I started I knew I should have gone with 2 pins not 3. These are too delicate for a first attempt and the spacing only just allowed me to get the chisel tip into the waste. Something else I should have done before I started and didn't - mark out the tails and waste on the back of the piece as well as the front. I scribed the shoulder line all the way round and scribed the front and end with a marking knife but not the back. This made it difficult to pare square to the face and is something to make a note of for the next one. Eventually I managed to produce something resembling half a dovetail

sides_17.jpg


1 down and 9 to go!

I have pretty much decided that even if I do finish this by the end of October I am unhappy enough with it that I feel a bit as though I embaressing myself. There are numerous things I would do different if I could start again, from the design, which to my eye is looking less and less delicate, to the manufacture, materials and layout. Because of that I may well just treat this as a learning piece and 'play' with the rest of the build. Thus I may try 2 tails not 3 on one of the drawers, and experiment with a finger joint or one large dovetail at the rear of the drawer.

I still have the secret compartment to figure out also. I was going to use push magnetic closures in a false base but there is not really enough room to fit the behind the bottom rail. I may therefore try and put in a wooden spring latch to open a false base once the drawers are removed, assuming I can find a springy enough piece of timber to act as the latch.

Things I have learnt this time:

Paring square to a board is more difficult than it looks. I may clamp a square edge above the pare line and hold the chisel to that until I am a bit more confident.

A 1:8 dovetail doesn't look as much like a dovetail as I thought it would.

Go with your gut instinct on layout. I knew 2 tails was correct but wanted to be delicate and may have ended up making a mess of the drawers due to a lack of experience and hand tool skills.

Things I am worried about:

Designing the latch for the secret compartment. I wanted the compartment to be more than a lift up false base, with a proper mechanism.

Cutting the half blind sockets. Do I need two skew chisels to get into the corner of the socket? I do not have any and have no real chance of buying any.

Making a piece of work that looks so bad I am embaressed to put it where it can be seen, and will leave it in the workshop to store sandpaper and odds and ends.

Steve
 
You may be feeling 'embarrassed' about this now but, trust me; once the job is finish, I bet that every other person who views it loves it and cannot find a single fault! We've all been there and, as often is the case, we (as the makers) are the only ones who will ever know! :wink:

I love the look of the bird's eye maple and you made no mistake in gluing the veneered panels in place. In theory, you can even put a dab of glue on the centre point of the edge of a solid timber panel, as this would still allow for movement across the board's width.

With dovetails, I always try to set them out so that my tails are significantly wider than the pins. Where possible, I also try to have a tail in the centre of the board, rather than a pin (although, this isn't always practical with narrow drawers, I know). Another good tip is to cut your timber several inches over length, so you can have a couple of attempts before deciding a joint you are happy with. :)

Keep going! You're doing well and there's still time for you to join the minority who will complete their entries in time!! :wink:
 
Not much progress and the deadline is very near - always seems to be something more important to do unfortunately! I have managed to cut the dovetails on the rest of the drawer sides and added some oak strips as drawer runners to the carcass sides for the drawers

runners_18.jpg


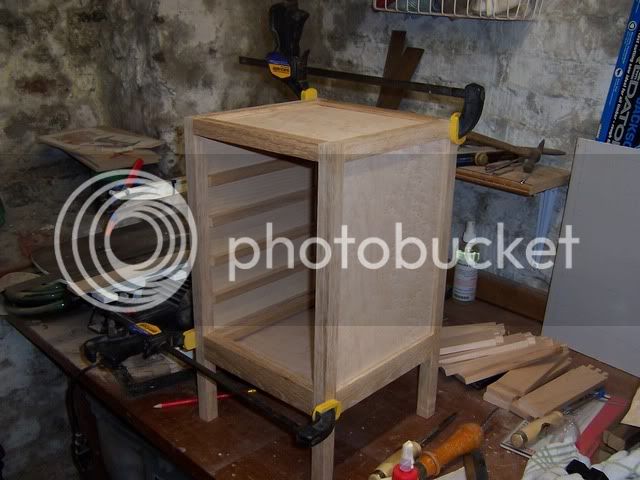
And then managed to put the entire carcass together in final glue-up

carcass_19.jpg


And thats all the progress I have made. The drawer runners are a bit of a compromise due to a lack of maple for the drawer sides. I originally wanted to run them in a groove in the middle of the drawer side but have now positioned them so the drawers sit on the runners. This means the drawer front has to be higher than the drawer sides to allow the sides to fit between the runners. As an advantage however, since the drawer fronts are the same depth as the timber legs the runners act as stops for the drawer front.

The secret compartment is still causing me to think somewhat, although I now know where it is going to be. Its more the way of opening it that is causing me some head scratching.

Things I have learnt this time

Plan ahead - positioning the drawer runners first before doing the drawer sides would have saved me some head scratching

Titebond does indeed have a fast grab!

Things I am still worried about

Mainly time, or lack of it, to finish.

Cutting the sockets for the drawer fronts.

Steve.
 
OK, so this evening I have officially given up on this project in terms of the competition. I have cut sockets in drawer fronts for 4 of the 10 drawer sides and I am not happy with any of them. In fact I feel they are so bad that I am not even going to post a photo. I am quite happy to accept that I bit off more than I could chew, thinking that I could handcut dovetails for the first time to a good standard, and now realise I have some major practicing to do. I think my marking out was too sloppy to be honest, compounded by less than perfect hand tool skills.

While I was happy enough with the frame and mortices, the drawers have been a bit of a let down to say the least. To salvage the project I will probably put a door on the front of the cabinet and some shelves and use it for storing something in the workshop as a constant reminder of my own folly :?

Thing I have learnt this time:

Marking out accurately is one of the most important things you can do after good timber preparation

Things I am still worried about:

Nothing - its a bit of a relief (and also a disappointment) to bring this project ot a conclusion, at least in terms of the competition.

Steve
 
That's a shame Steve, why don't you keep it as a back burner project and still do the hand cut dovetails. If you're not happy with them then practice is the only way.

Look forward to seeing it when it does get finished
 
Sorry to hear you're out of the compo. But please carry on posting piccies. I'm learning from you on this one, so I've been finding your posts really useful.

Good luck with the dovetails :D

Boz
 
Nice WIP photos, thankyou. Now you've pulled out of the comp. and don't have any feeling of time running away with you I'd like to see you take a break - then finish it. Don't worry about the dovetails, no-one's any good at the beginning, and a great many (like myself) discover that a prolonged period without cutting any dovetails mean you start at the beginning again ](*,) - with the added frustration of knowing you were good at this, once.
 
Sorry to hear you've pulled out of the competition. I'd suggest that you put the project on the 'back burner', cut a few practice d/ts in slow time and then pick it up again later on - Rob
 
Thank you gentlemen for your kind words and advice. You are of course correct and it would indeed be a shame to stop half way through and just slap a door on it to get it out of the way. I made my post after coming up from the workshop and as such was not in the best frame of mind to be posting. I will still not be entering the comp - my aim was to have a go at hand cut dovetails and to quickly machine or jig cut them now just to make the deadline, while feasible, would be something of an anti-climax in terms of my own personal satisfaction. I will, as you have suggested, put it to one side for a while and come back to it at a later date - hopefully not too late. When I do, I will continue this thread. Without this forum it would probably have been cast into oblivion so for avoiding that fate at least, I thank you all :D

Steve.
 
I'd just like to add my words of encouragement! I love that birds-eye maple. And anyone who never has a setback in any of their projects just isn't pushing the boundaries hard enough.
 
Back
Top