Derek Cohen (Perth Oz)
Established Member
The underbench cabinet is done ....
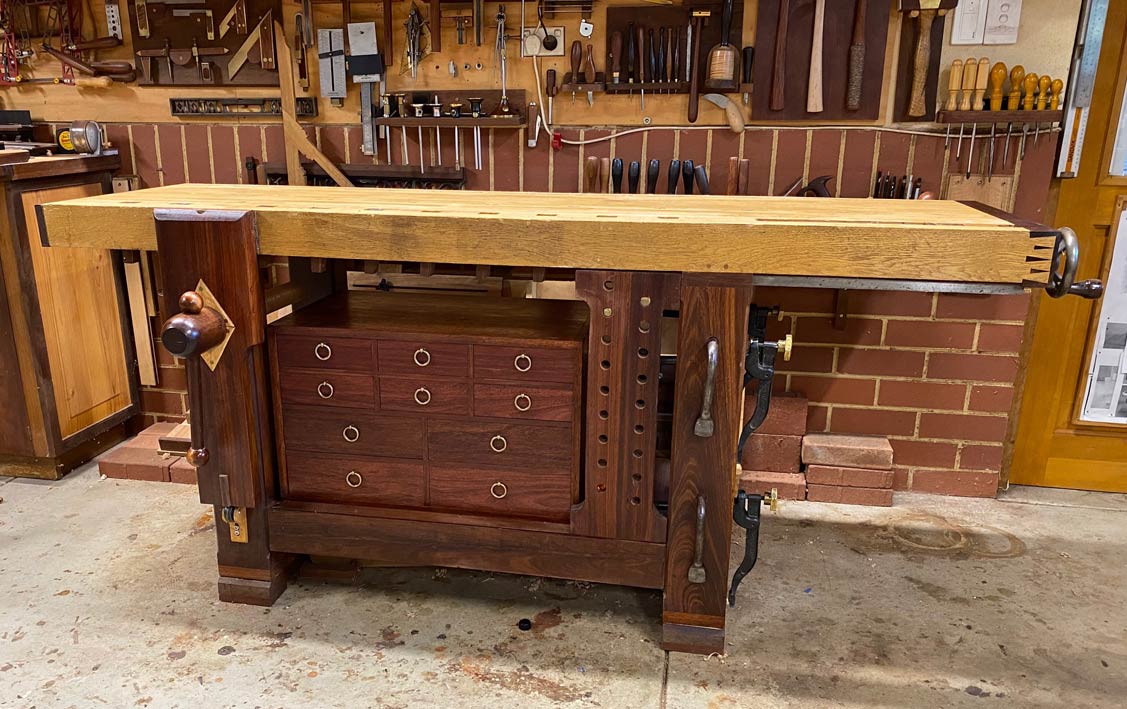
... and now the drawers are being filled, starting with the centre drawer in the top row.
There are 10 drawers in all, and the aim is to use the space as efficiently as possible. Into this cabinet will be those tools I want close at hand, and to access readily.
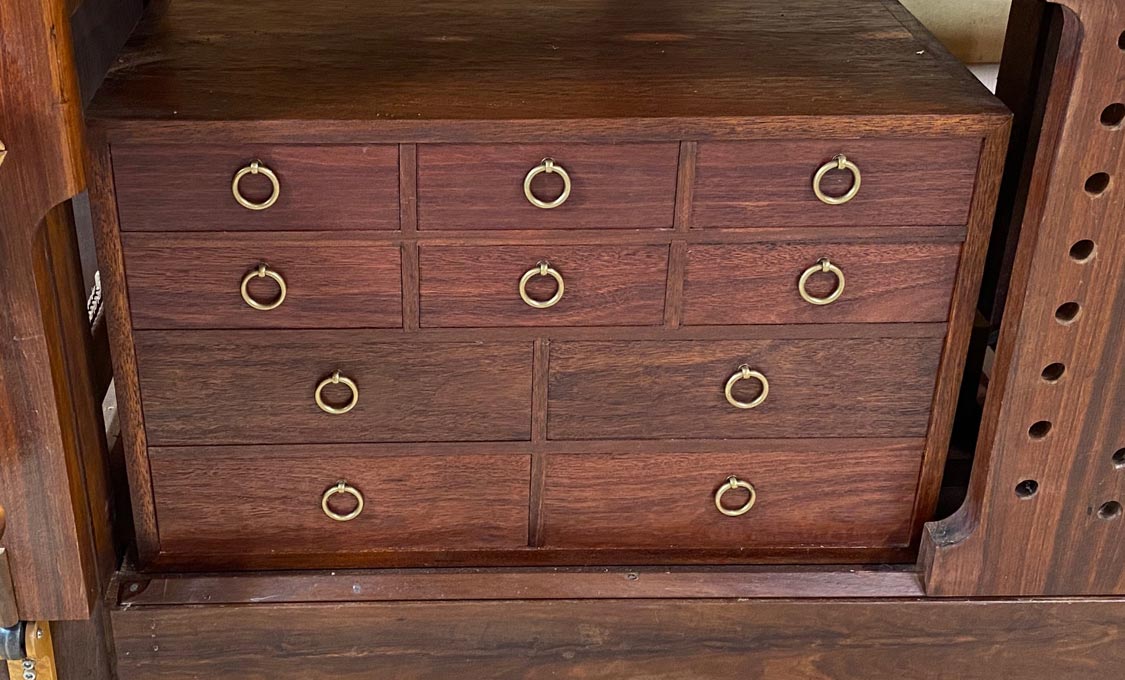
The centre drawers in the top two rows are for marking tools. The top drawer will be for squares I use all the time.
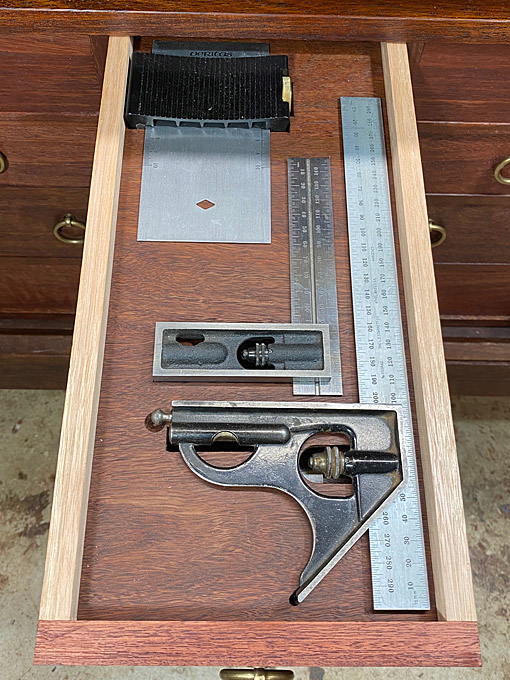
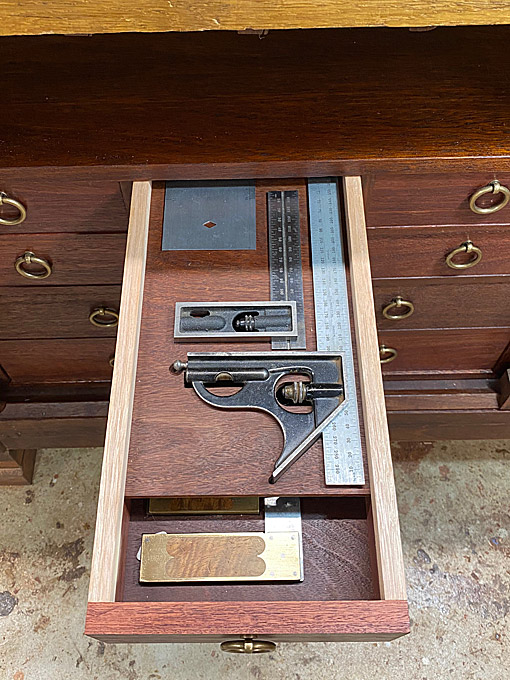
Opening the drawer produces a 300mm Starrett combination square, a 150mm Starrett double square, and a Veritas Sliding Square. these are french fitted into a Jarrah panel (more on the french fitting shortly). ...
Now you know how I like secret drawers - well, if you slide this panel back ...
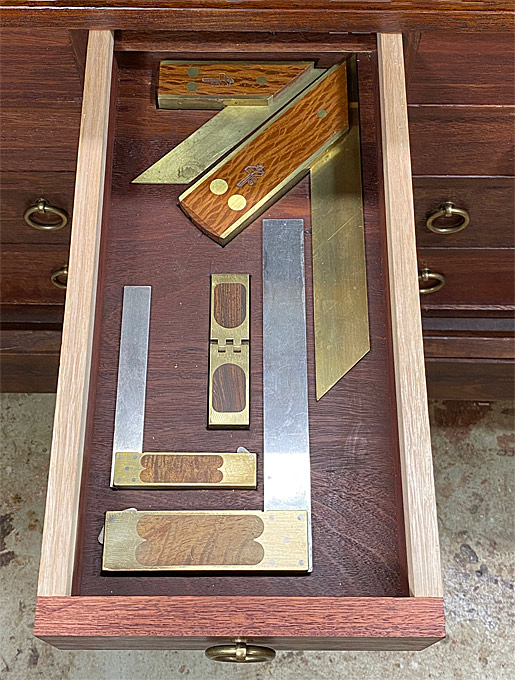
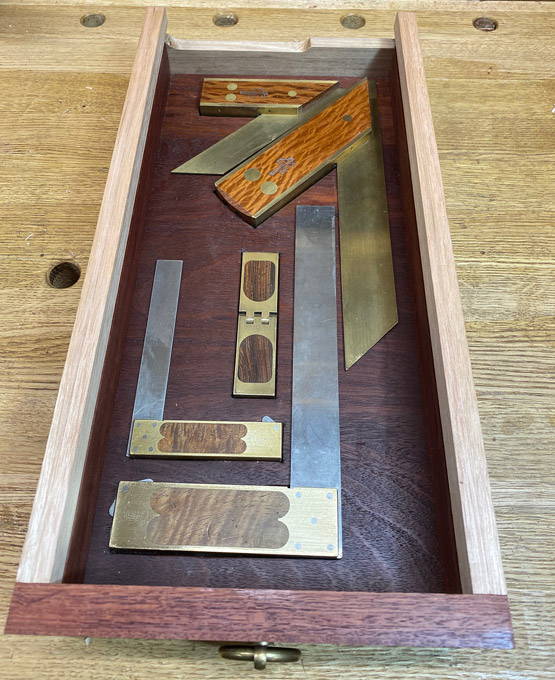
... you find the treasure drawer with a pair of Colen Clenton mitre squares infilled in Sheoak, and pair of Chris Vesper 4" and 7" squares infilled in Tasmanian Blackwood, and a 2x2" Bridge City saddle square ...
The Jarrah panel for the latter squares is a loose fit, snug at the sides and about 5mm of expansion space at the end. At the right side of the photo are the rails, which were glued to the sides (but not the loose panel)
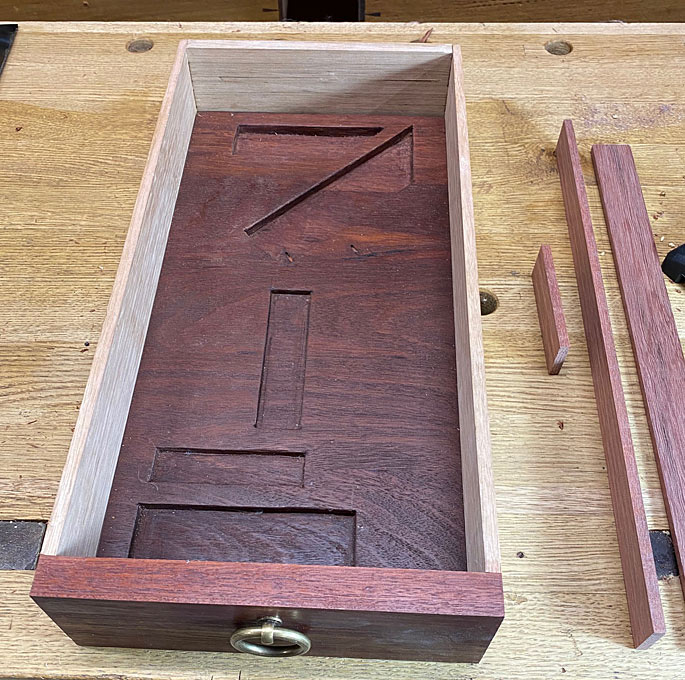
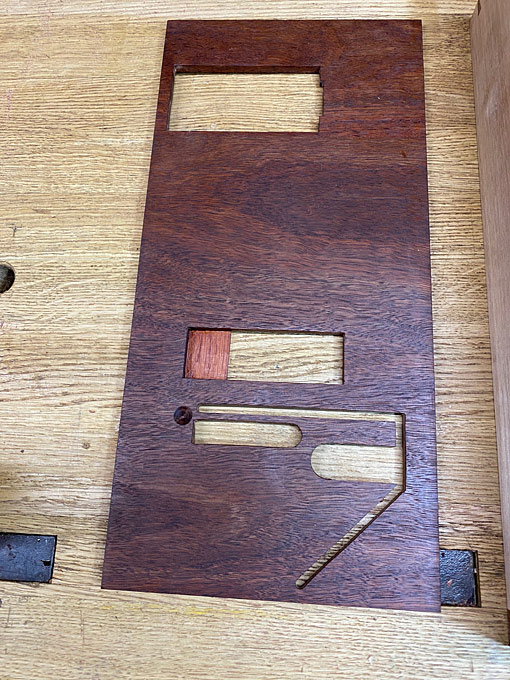
Below is the upper panel for the Starretts and Veritas squares. The panel needed to be thin - it is 6mm thick - and cut outs made rather than french fitted. This was to save space by having the tools handing down rather than sticking up.
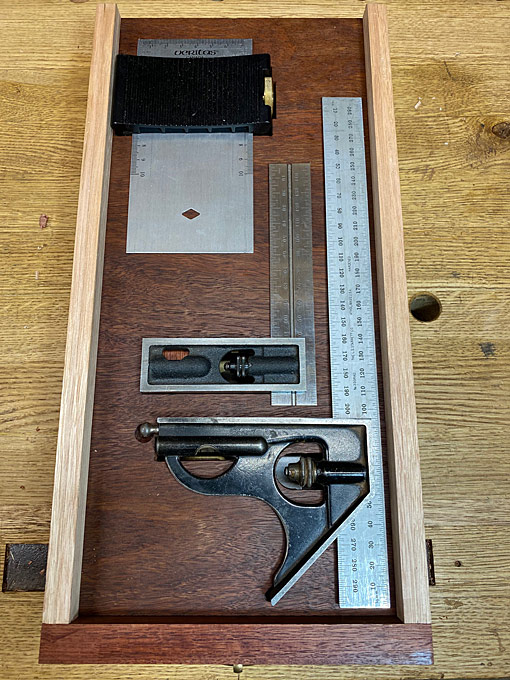
The eagle eyed will have noticed that the rear of the drawer was cut away. This was to allow for the upper tray to slide past the drawer back, which takes advantage of the space behind the drawer when it is opened.
There was a little extra shaping as the body of the Veritas hung down lower than the other squares.
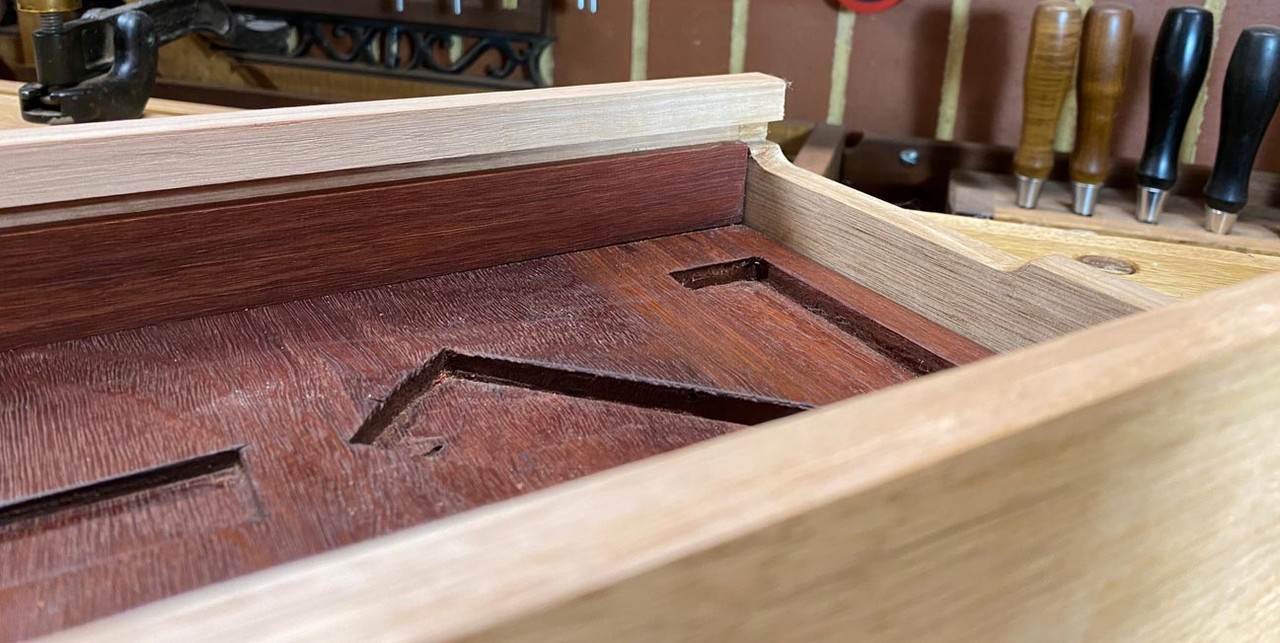
The upper tray runs on the Jarrah rails attached to the inside of the drawer sides. Finally, there is a rail added above the tray to prevent it tipping as it is slid back. This is in the same Tasmanian Oak as the drawer sides.
The drawer manages about 90% extension without any support.
Regards from Perth
Derek

... and now the drawers are being filled, starting with the centre drawer in the top row.
There are 10 drawers in all, and the aim is to use the space as efficiently as possible. Into this cabinet will be those tools I want close at hand, and to access readily.

The centre drawers in the top two rows are for marking tools. The top drawer will be for squares I use all the time.
Opening the drawer produces a 300mm Starrett combination square, a 150mm Starrett double square, and a Veritas Sliding Square. these are french fitted into a Jarrah panel (more on the french fitting shortly). ...

Now you know how I like secret drawers

... you find the treasure drawer with a pair of Colen Clenton mitre squares infilled in Sheoak, and pair of Chris Vesper 4" and 7" squares infilled in Tasmanian Blackwood, and a 2x2" Bridge City saddle square ...

The Jarrah panel for the latter squares is a loose fit, snug at the sides and about 5mm of expansion space at the end. At the right side of the photo are the rails, which were glued to the sides (but not the loose panel)


Below is the upper panel for the Starretts and Veritas squares. The panel needed to be thin - it is 6mm thick - and cut outs made rather than french fitted. This was to save space by having the tools handing down rather than sticking up.


The eagle eyed will have noticed that the rear of the drawer was cut away. This was to allow for the upper tray to slide past the drawer back, which takes advantage of the space behind the drawer when it is opened.
There was a little extra shaping as the body of the Veritas hung down lower than the other squares.

The upper tray runs on the Jarrah rails attached to the inside of the drawer sides. Finally, there is a rail added above the tray to prevent it tipping as it is slid back. This is in the same Tasmanian Oak as the drawer sides.
The drawer manages about 90% extension without any support.
Regards from Perth
Derek


