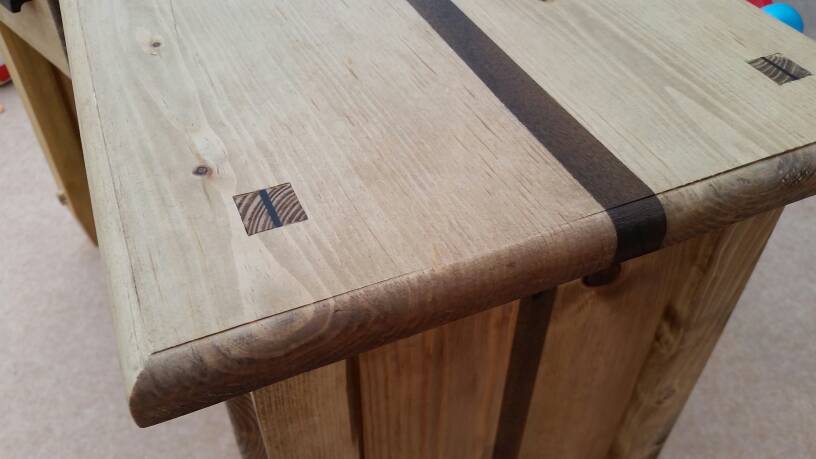
Here's how I was taught to do wedged tenons for first quality hardwood furniture (the joinery boys may well do things differently, but this is a cabinet maker's wedged tenon), this is the Edward Barnsley method.
-The mortice is always tapered, typically by about 3mm on each side. Incidentally, this
may bring an added advantage if you use a morticing machine, typically the augur will often run out minutely beyond the perimeter of the square chisel, leaving a tiny crescent shape which renders it unusable for first quality through-tenon work, however if you can arrange for the crescent to be located in the tapered part it doesn't matter as this will be chiselled away. If you can't then there's no alternative to cutting the mortice by hand, using precise setting out and chiselling in from each face.
-The taper is cut into the mortice with a hand chisel, and you aim to terminate the taper about 1 or 2mm before it breaks through to the other side
-The tenon has two saw kerfs (there are always two wedges) and they are angled and therefore terminate about 1mm away from the side of the tenon allowing the tenon to "hinge" open and to remove any risk of a crack propagating along the tenon component. The two kerfs are cut so as to divide the visible face of the tenon into three equal parts.
-The wedges are sized precisely to be 3mm thick (to correspond with the mortice taper) at about 1 or 2mm less than their fully inserted position. The wedges are also orientated so the end grain forms a pleasing herringbone pattern. Each wedge is numbered to correspond with its precise location.
-The glue up is arranged with elaborate cramping blocks that allow the wedges to be inserted and tapped home so that each wedge is the identical thickness. Great care needs to be taken so that the wedge enters square and doesn't tip over, which might bruise the edge of the workpiece surrounding the mortice. You're aiming for absolutely no gaps (which is why diagonal wedges aren't used, they almost always result in a pinprick sized gap in the corner) and invisible glue lines all round.
-After the glue has set the tenon (which is about 1mm proud) is flushed off.
This is a diagram of the general arrangement,
These are a couple of shots showing the typical cramping arrangements for wedged tenons,
Is this all a giant faff? Too right it is, but that's what first class cabinet making is all about!
Good luck!


