


Derek Cohen (Perth Oz)
Established Member
There are at least a dozen (or more) chapters to this build. Find them on my website, at the end of this Index Page ...
http://www.inthewoodshop.com/Furniture/index.html
This is the conclusion of building the drawers.
One of the least pleasurable areas of drawer making is fitting drawer bottoms. Why? Because there always seems more to do than anticipated - there are more panels to machine to thickness and area, and this feels like it is endless. Mindless.
Before starting on the bottoms, the drawer fronts are planed, chipped dovetails repaired, and fine-tuning of the bottom-less drawer is completed ...
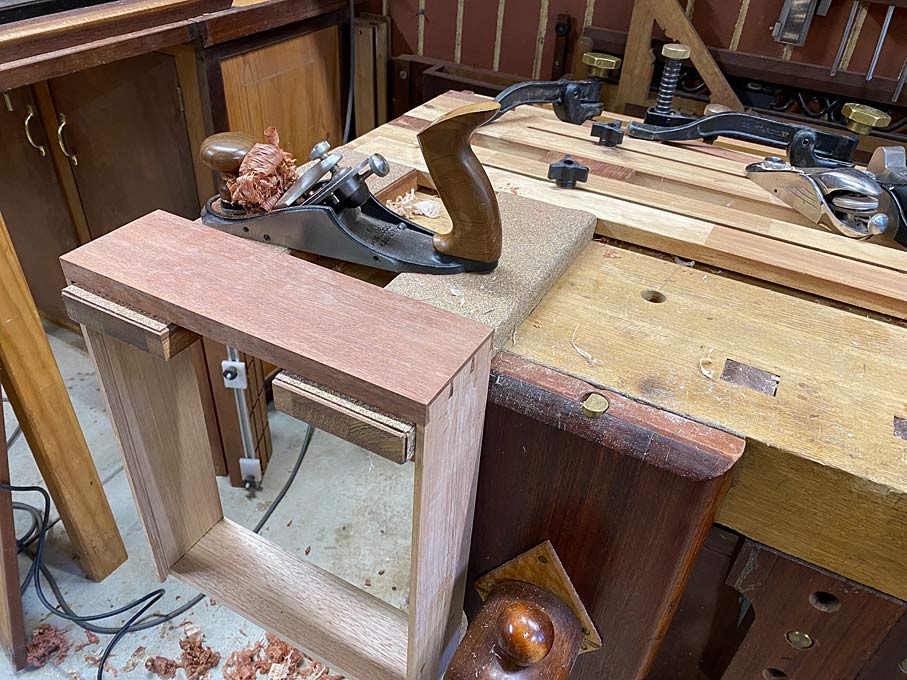
Link to the fixture here: http://www.inthewoodshop.com/ShopMadeTools/DrawerPlaningFixture.html
One of the rules I set for myself at the start of this project was that, being a just for the workshop, I would use as much scrap or cheap wood as I could scrounge up. The Jarrah drawer fronts are the exception. The case is Merbau stained to match the Jarrah drawer fronts.
Over various projects, I save bits which I think may be used ... don't we all") For now, offcuts of Tasmanian Oak, which make great drawer sides and drawer bottoms.
For now, offcuts of Tasmanian Oak, which make great drawer sides and drawer bottoms.
Modern machines, such as jointers and thicknesser/planers, enable the redesign of cabinet parts. In this case, drawer bottoms. One can use the minimum thickness, saving weight and wood.
I am very fortunate to own a Hammer A3-31, which turns the scrap into usable boards ...
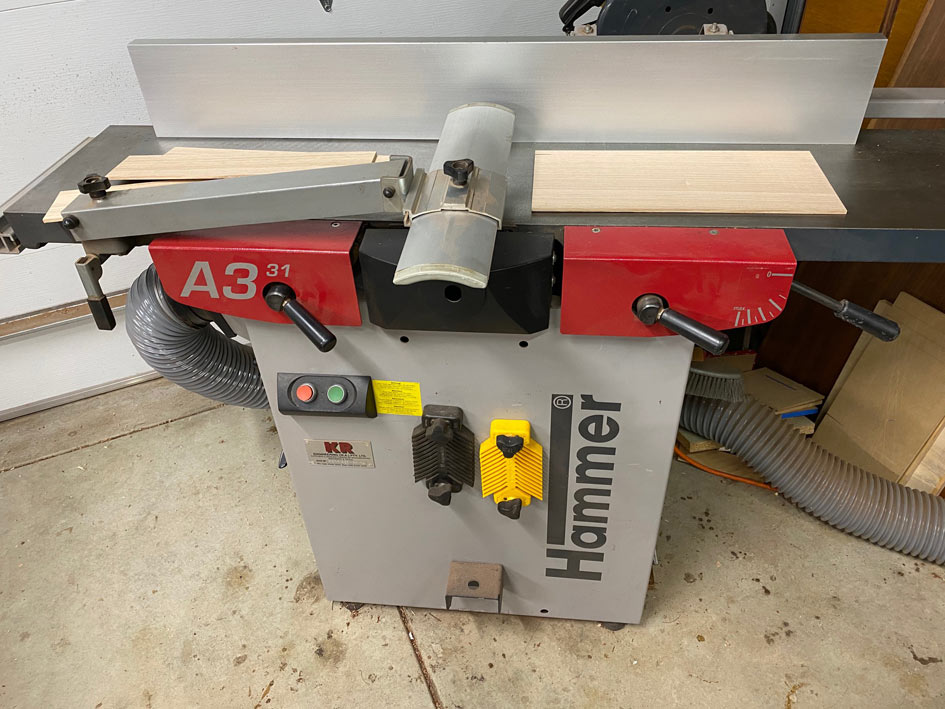
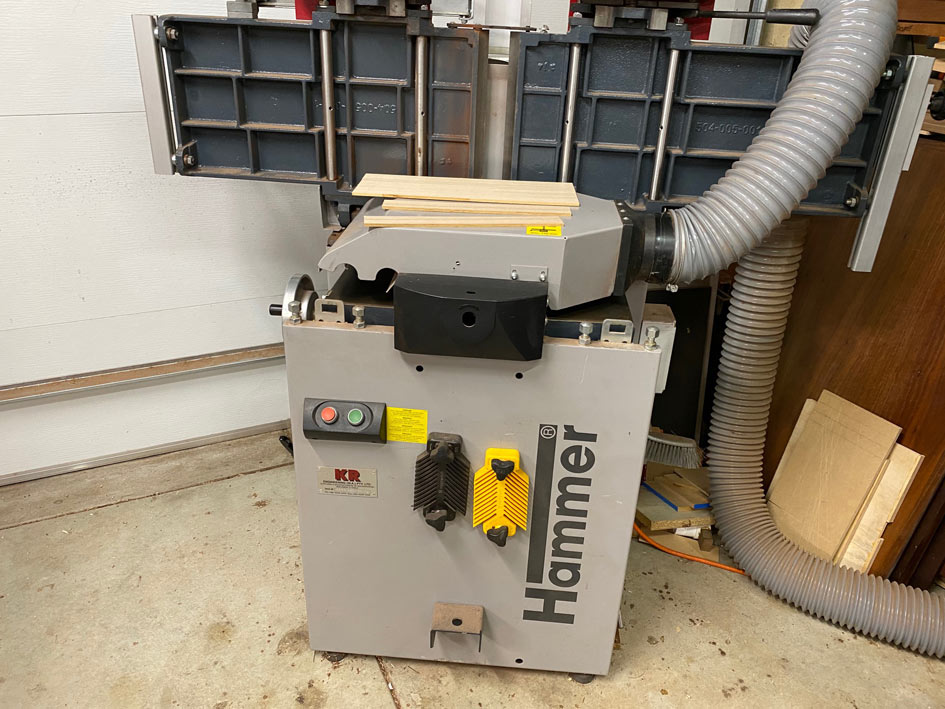

These boards ended up a smidgeon over 5mm thick. The grooves in the drawer sides are 5mm wide and 3mm deep. The drawer sides are 6-7mm thick.
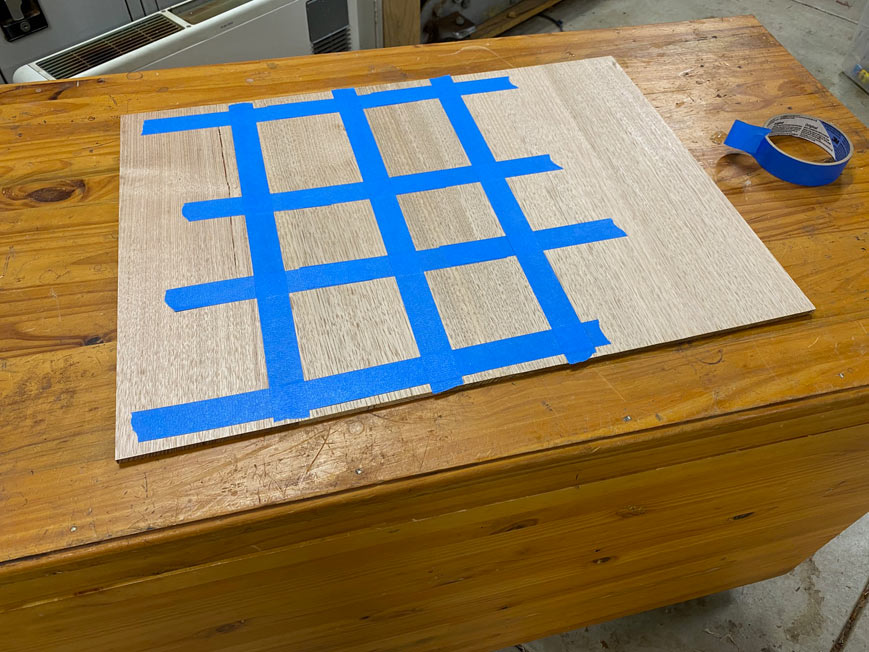
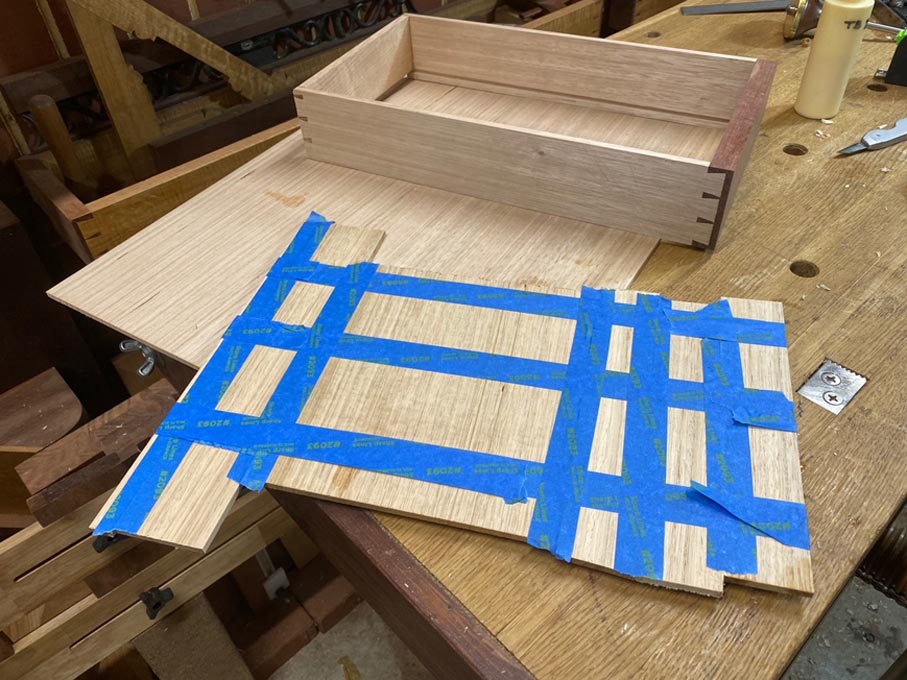
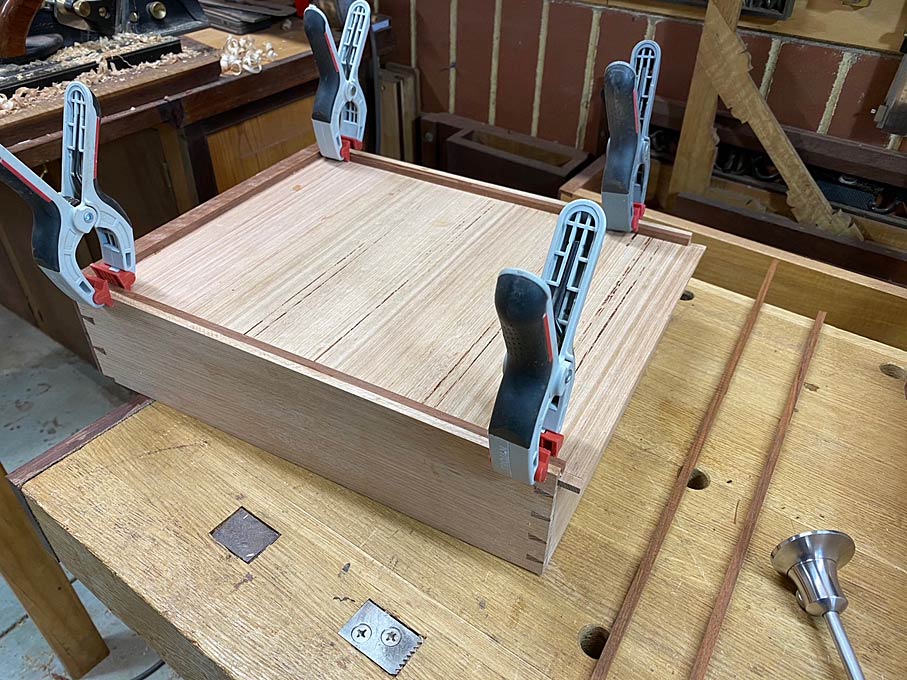
Joining such thin boards is quite easy - no clamps used. Just blue tape
Butt two boards, and stretch the tape across the join. The blue tape has some flex to it, and the stretch contracts and pulls the joint tight ...
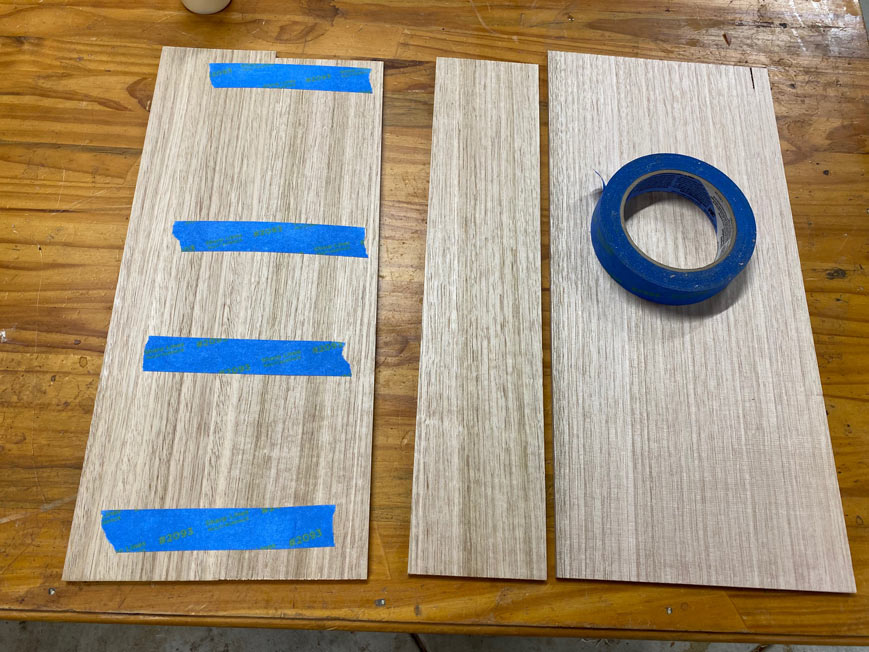
Do this with all the joins, and then lay a strip down the seam (which is to prevent glue squeezing out ...
Flip the boards and insert glue into the seam. Wiggle the boards open-and-closed to spread it evenly.
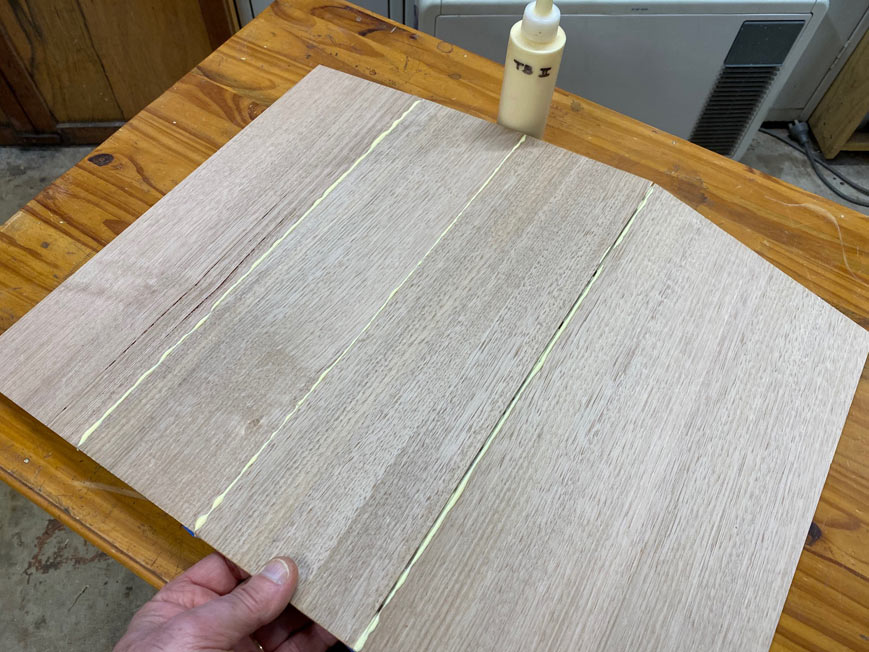
Lay flat and wipe away the glue (Titebond II) squeeze out with a wet rag. Freshen this for each join.
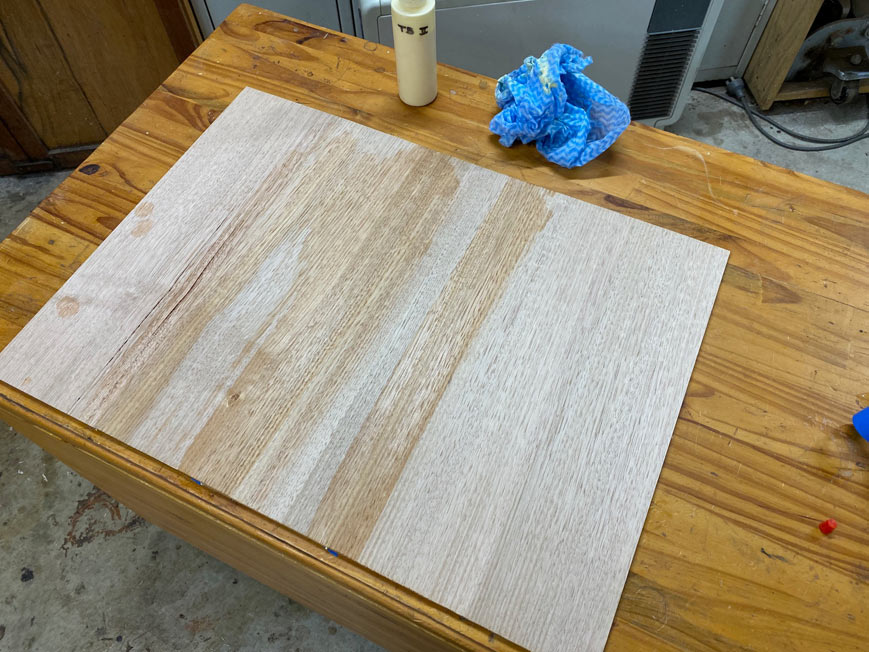
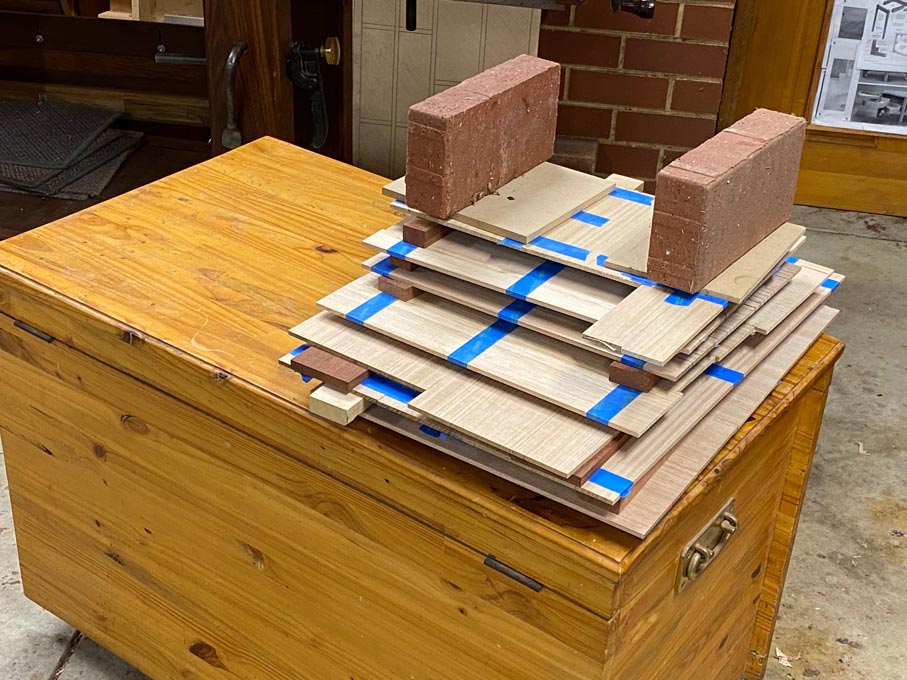
Yes, I know many warn against this practice, but I have not experienced any problem with finishes. Once clean, tape the side to hold the joins tightly together ...
The machining and glueing takes all day, and finally ...
Of course - Murphy's Law - the next day I discover that I am going to be one drawer short, and more offcuts are found and glued together. Smaller pieces this time ...
Then it is time to unwrap the presents and make a blue tape Christmas tree ...
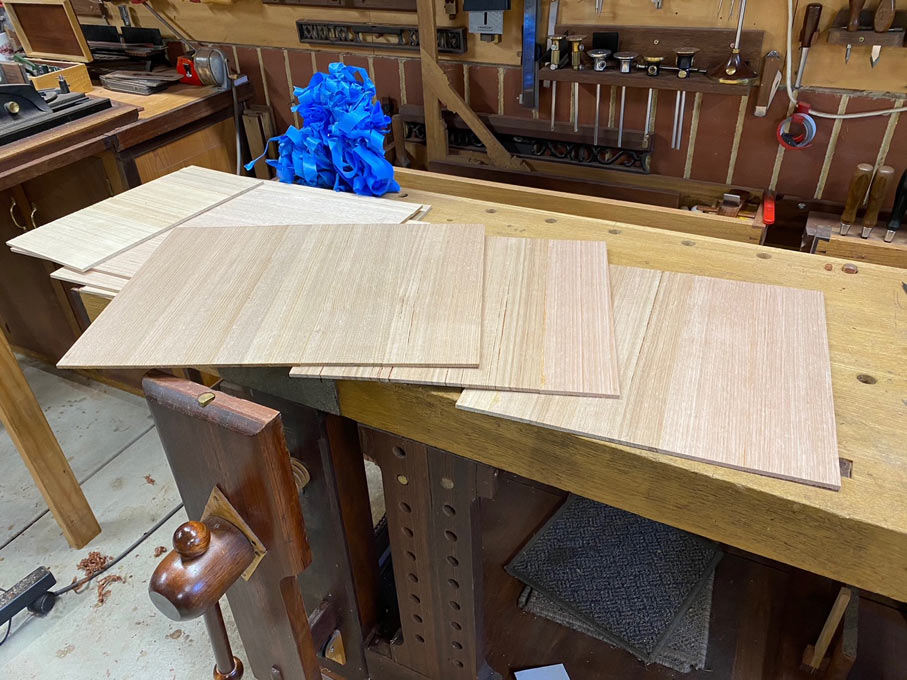
The drawer bottoms are roughly sized, and the top side is sanded to 240 grit (the underside will not be seen, so just leave it be) ...
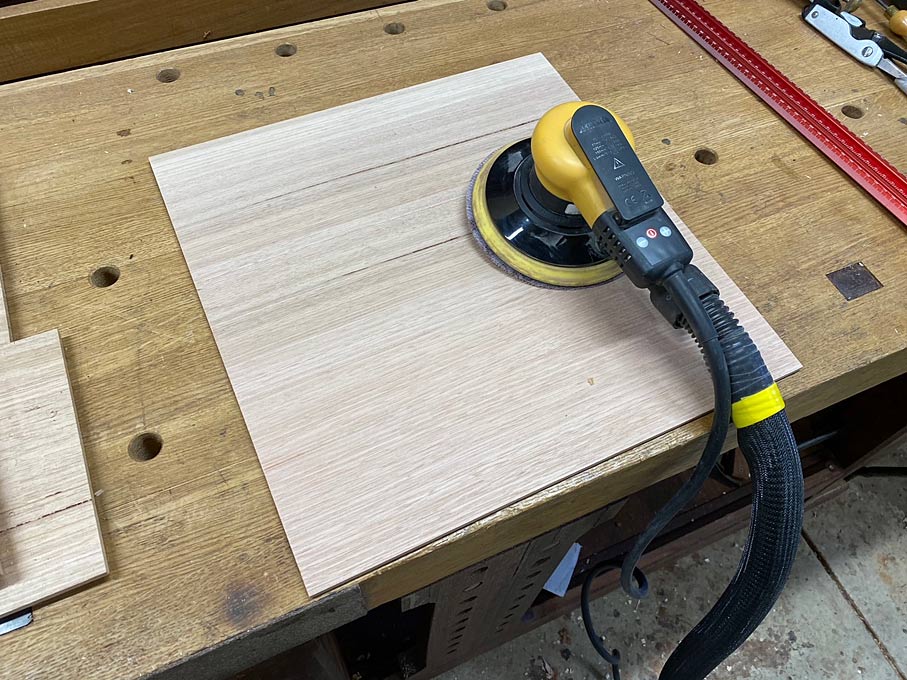
Why sand? Well, it is just easier. The panels are curvy, not flat, and would be too awkward to hand plane. This is what sanders are for. What I have here is a Mirka Ceros, which uses Abranet mesh. Hooked up to a vacuum cleaner, the result is the closest thing to dustless sanding.
One edge on the underside receives a very shallow rebate. This is to enable the panel to fit the groove. The plane here is a Veritas skew block plane, which has a nicker as it is planing across the grain. It has a fence and a depth stop. Great little plane ..
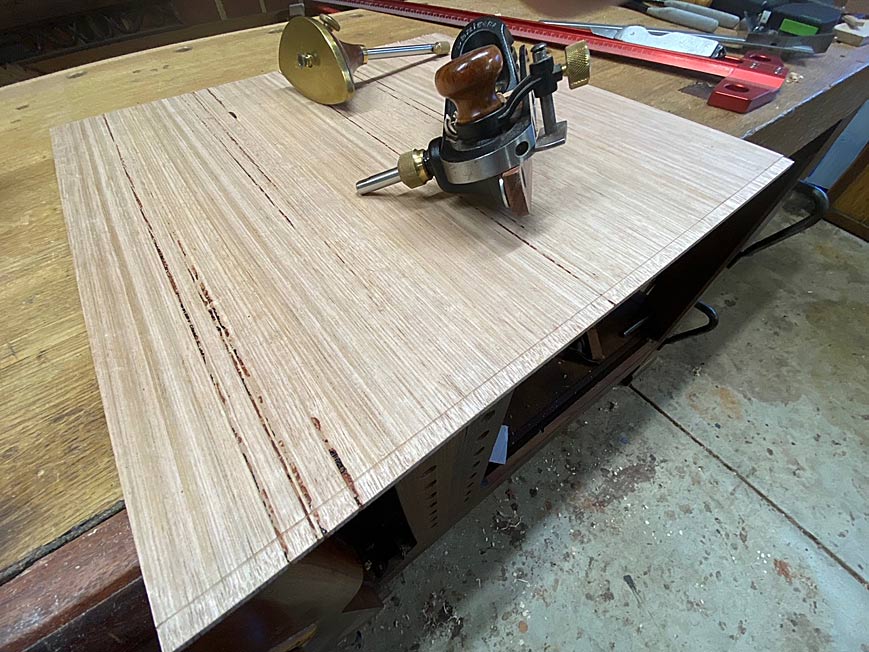
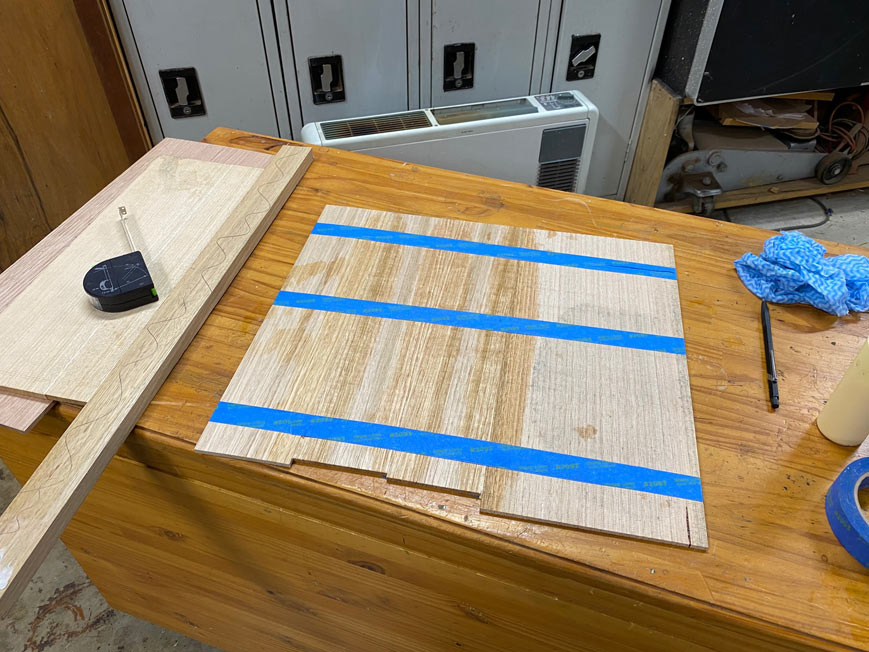
The width of the panel is measured. Note that the drawer bottom runs across the drawer (expansion then takes place front-to-back) ...
After ripping to size on the table saw, fine tuning takes place with a shooting board ...
Time to fit the drawer bottom.
Of course, if it is too tight, it will not run smoothly. But even if it appears to run smoothly, it can be creating a potential problem.
In the earlier chapters (Dovetailing for Blood), one aim was to make the dovetails an exact depth so that the newly glued drawer could dry in the drawer case. The other aim was to fine tune the drawer (minus the drawer bottom) to move smoothly in the drawer case. Now, if when adding the drawer bottom, the smoothness is lost, then we know that something is wrong.
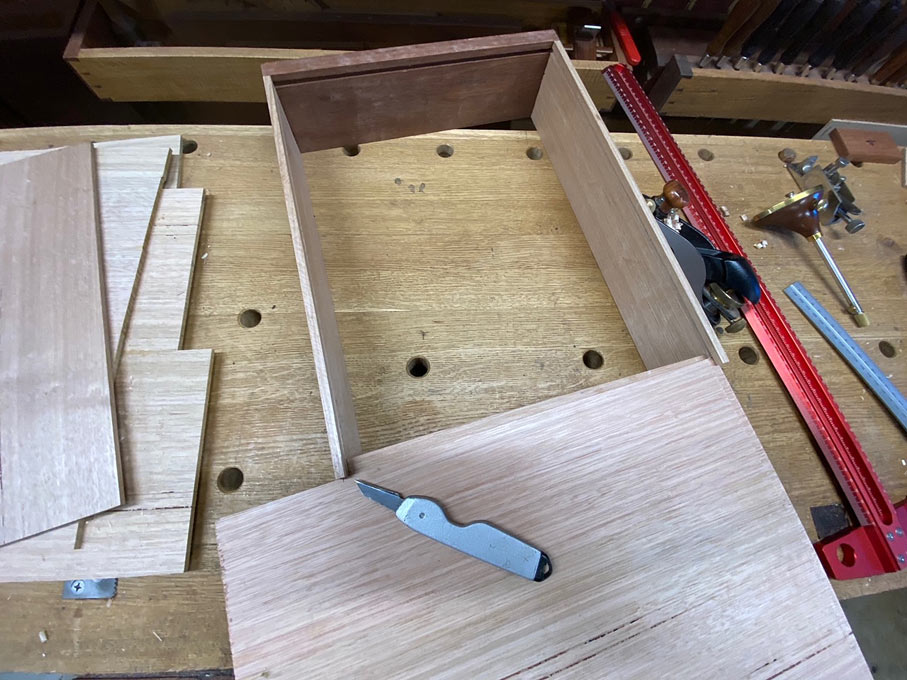
So, the drawer bottom is dropped part way ...
... and this is presented to the drawer case at this point. Will it run as smoothly as before?
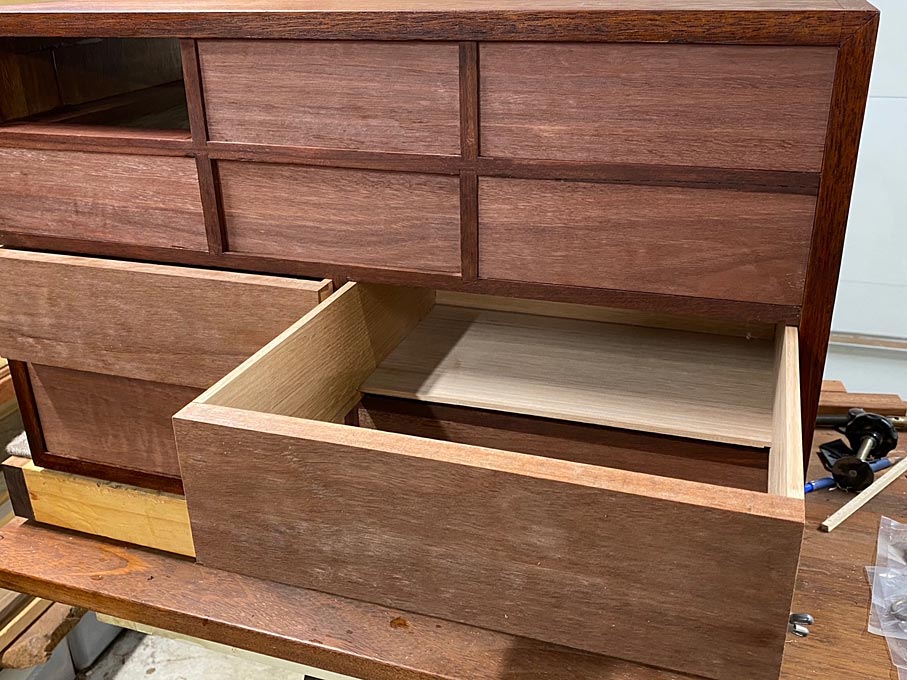
If the drawer appears to have tightened in the case, the problem may be that the sides are slightly bowed. Try tapping the sides to push them flat ...
The drawer bottom is lowered further, and again tested for fit ...
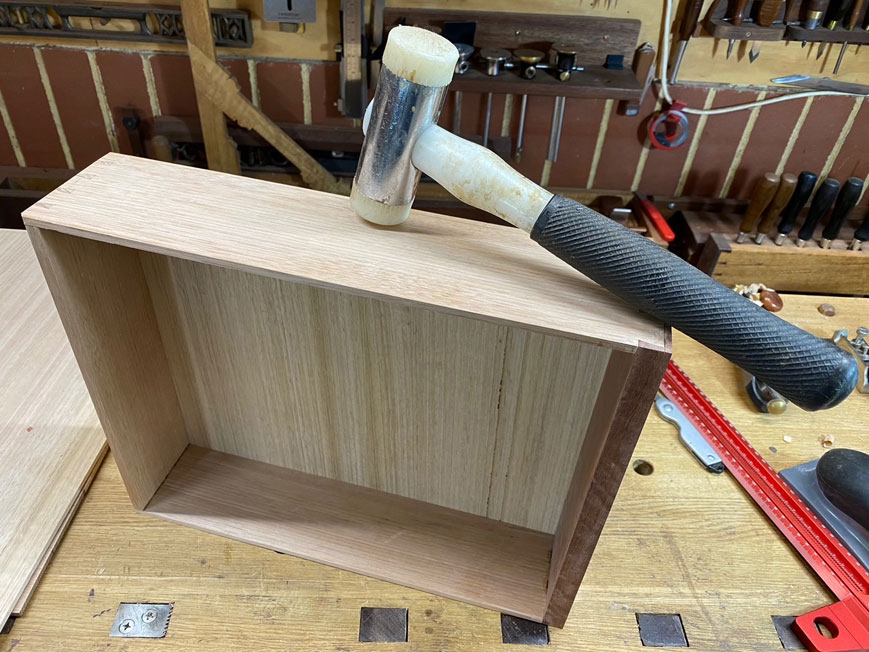
All good, and the bottom is tapped into the groove behind the drawer front. A good fit
Slips are a traditional way of reinforcing thin drawer sides to increase the surface area and reduce wear over time to the runners. Usually when making slips, I would groove the slip rather than, as here, the drawer side.
Here is one of Richard Jones' wonderful illustrations ...
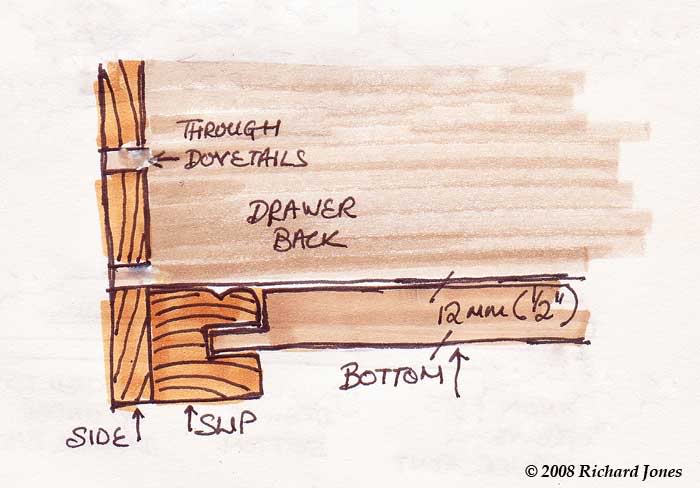
I decided to do something a little different this time. I am not sure whether this can be termed a true slip, but it functions exactly the same way. The drawer sides have a shallow 3mm groove. To support the thin drawer side, as well as support the drawer, a 6mm square Jarrah section was glued to the drawer side directly under the drawer bottom. Care was taken to allow the drawer bottom to remain free to move.
Drawer stops were added ...
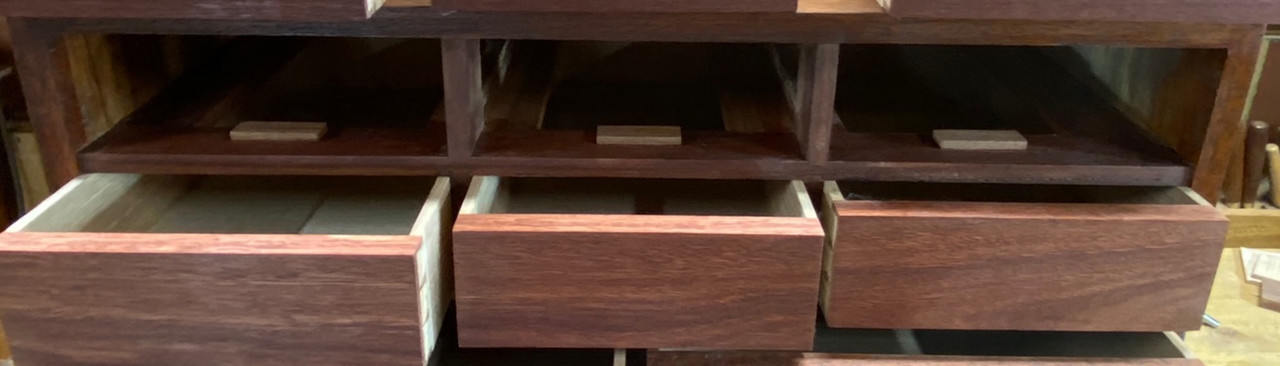
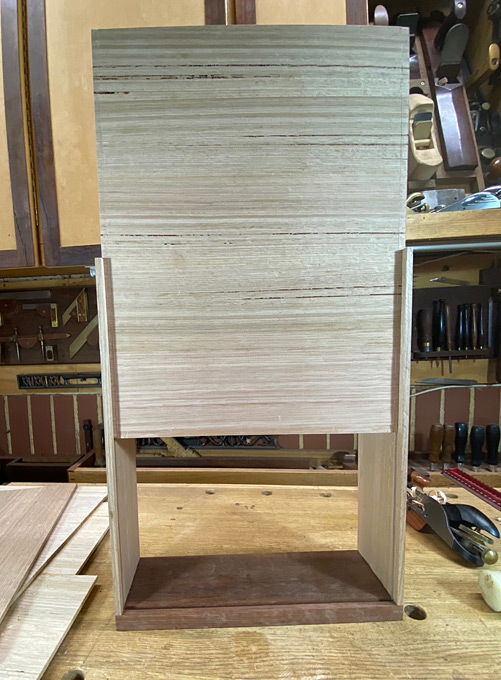
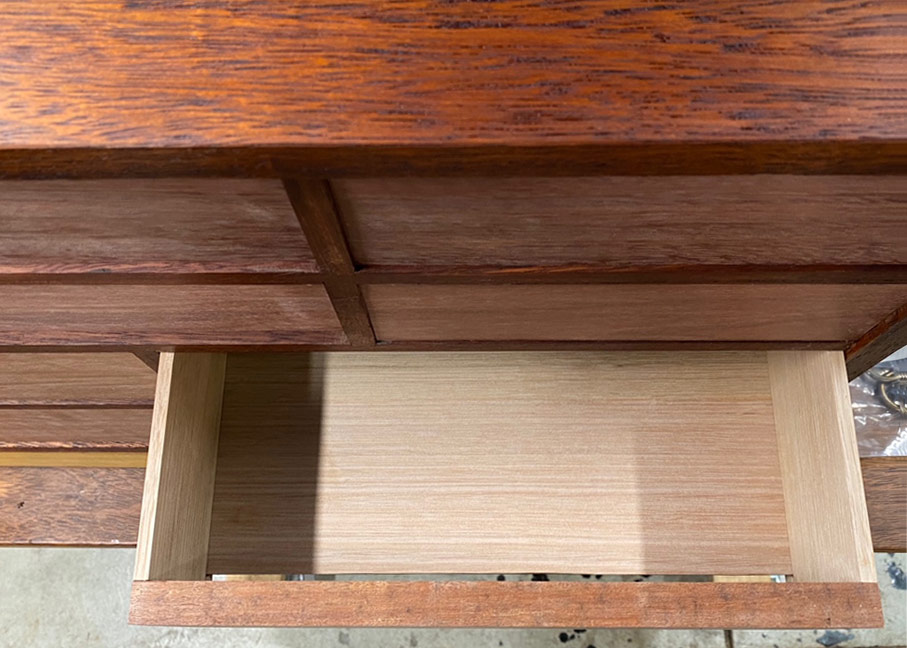
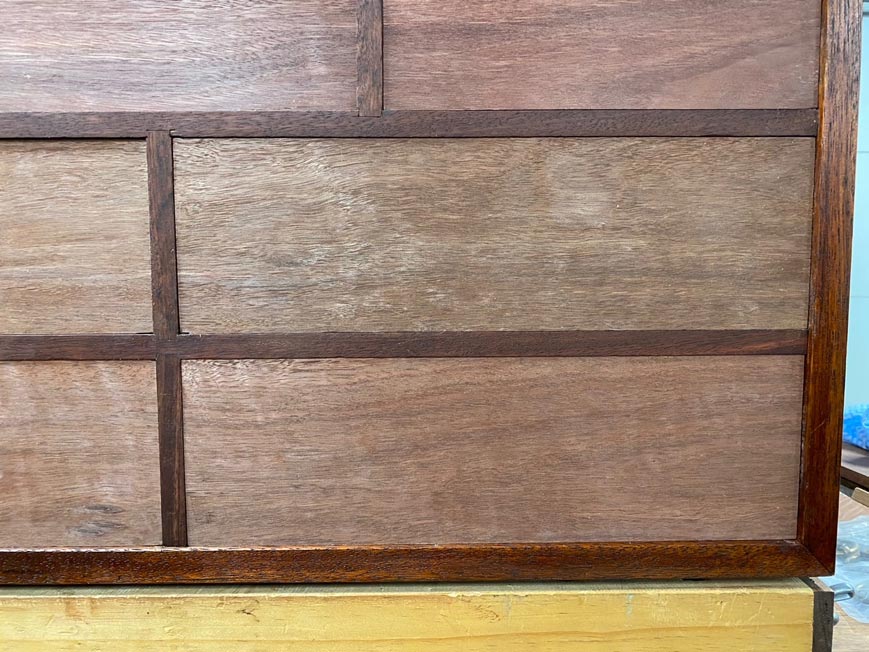
All the drawers fit and move smoothly ...
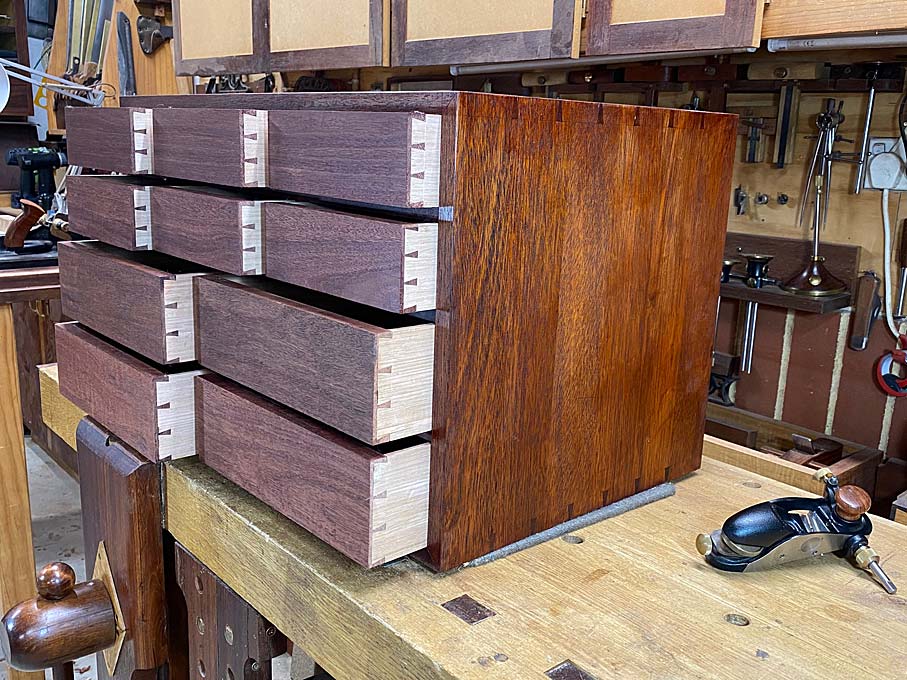
And this is what it looks like at present ...

Of course, there is the case back to make, and the handles to fit .... and then the fun bit begins - fitting out each of the 10 drawers for tools. Lots to do still.
Regards from Perth
Derek
http://www.inthewoodshop.com/Furniture/index.html
This is the conclusion of building the drawers.
One of the least pleasurable areas of drawer making is fitting drawer bottoms. Why? Because there always seems more to do than anticipated - there are more panels to machine to thickness and area, and this feels like it is endless. Mindless.
Before starting on the bottoms, the drawer fronts are planed, chipped dovetails repaired, and fine-tuning of the bottom-less drawer is completed ...
Link to the fixture here: http://www.inthewoodshop.com/ShopMadeTools/DrawerPlaningFixture.html
One of the rules I set for myself at the start of this project was that, being a just for the workshop, I would use as much scrap or cheap wood as I could scrounge up. The Jarrah drawer fronts are the exception. The case is Merbau stained to match the Jarrah drawer fronts.
Over various projects, I save bits which I think may be used ... don't we all
For now, offcuts of Tasmanian Oak, which make great drawer sides and drawer bottoms.Modern machines, such as jointers and thicknesser/planers, enable the redesign of cabinet parts. In this case, drawer bottoms. One can use the minimum thickness, saving weight and wood.
I am very fortunate to own a Hammer A3-31, which turns the scrap into usable boards ...
These boards ended up a smidgeon over 5mm thick. The grooves in the drawer sides are 5mm wide and 3mm deep. The drawer sides are 6-7mm thick.
Joining such thin boards is quite easy - no clamps used. Just blue tape
Butt two boards, and stretch the tape across the join. The blue tape has some flex to it, and the stretch contracts and pulls the joint tight ...
Do this with all the joins, and then lay a strip down the seam (which is to prevent glue squeezing out ...
Flip the boards and insert glue into the seam. Wiggle the boards open-and-closed to spread it evenly.
Lay flat and wipe away the glue (Titebond II) squeeze out with a wet rag. Freshen this for each join.
Yes, I know many warn against this practice, but I have not experienced any problem with finishes. Once clean, tape the side to hold the joins tightly together ...
The machining and glueing takes all day, and finally ...
Of course - Murphy's Law - the next day I discover that I am going to be one drawer short, and more offcuts are found and glued together. Smaller pieces this time ...
Then it is time to unwrap the presents and make a blue tape Christmas tree ...
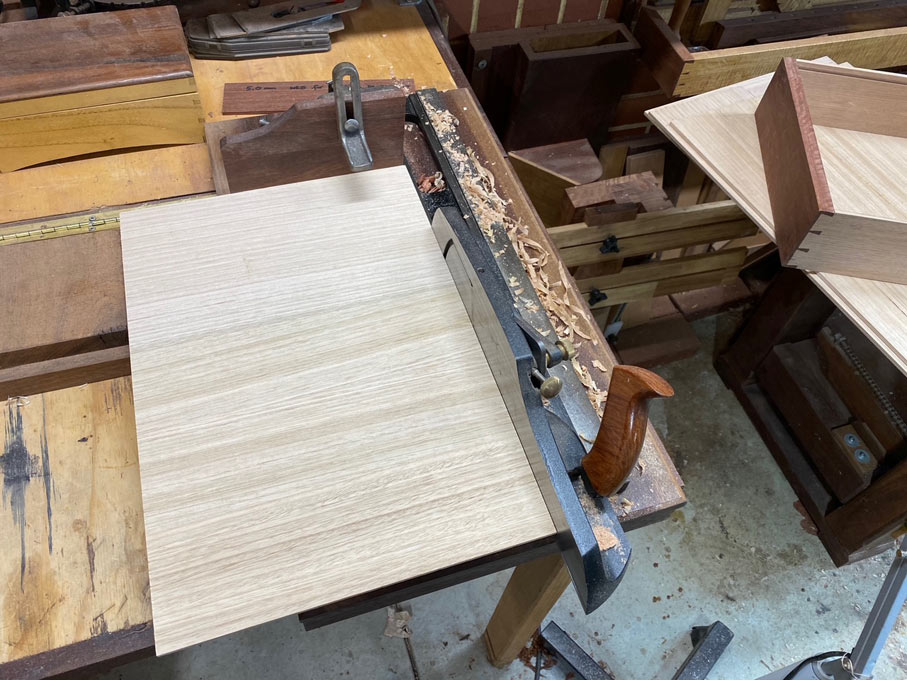
The drawer bottoms are roughly sized, and the top side is sanded to 240 grit (the underside will not be seen, so just leave it be) ...
Why sand? Well, it is just easier. The panels are curvy, not flat, and would be too awkward to hand plane. This is what sanders are for. What I have here is a Mirka Ceros, which uses Abranet mesh. Hooked up to a vacuum cleaner, the result is the closest thing to dustless sanding.
One edge on the underside receives a very shallow rebate. This is to enable the panel to fit the groove. The plane here is a Veritas skew block plane, which has a nicker as it is planing across the grain. It has a fence and a depth stop. Great little plane ..
The width of the panel is measured. Note that the drawer bottom runs across the drawer (expansion then takes place front-to-back) ...
After ripping to size on the table saw, fine tuning takes place with a shooting board ...
Time to fit the drawer bottom.
Of course, if it is too tight, it will not run smoothly. But even if it appears to run smoothly, it can be creating a potential problem.
In the earlier chapters (Dovetailing for Blood), one aim was to make the dovetails an exact depth so that the newly glued drawer could dry in the drawer case. The other aim was to fine tune the drawer (minus the drawer bottom) to move smoothly in the drawer case. Now, if when adding the drawer bottom, the smoothness is lost, then we know that something is wrong.
So, the drawer bottom is dropped part way ...
... and this is presented to the drawer case at this point. Will it run as smoothly as before?
If the drawer appears to have tightened in the case, the problem may be that the sides are slightly bowed. Try tapping the sides to push them flat ...
The drawer bottom is lowered further, and again tested for fit ...
All good, and the bottom is tapped into the groove behind the drawer front. A good fit
Slips are a traditional way of reinforcing thin drawer sides to increase the surface area and reduce wear over time to the runners. Usually when making slips, I would groove the slip rather than, as here, the drawer side.
Here is one of Richard Jones' wonderful illustrations ...
I decided to do something a little different this time. I am not sure whether this can be termed a true slip, but it functions exactly the same way. The drawer sides have a shallow 3mm groove. To support the thin drawer side, as well as support the drawer, a 6mm square Jarrah section was glued to the drawer side directly under the drawer bottom. Care was taken to allow the drawer bottom to remain free to move.
Drawer stops were added ...
All the drawers fit and move smoothly ...
And this is what it looks like at present ...
Of course, there is the case back to make, and the handles to fit .... and then the fun bit begins - fitting out each of the 10 drawers for tools. Lots to do still.
Regards from Perth
Derek