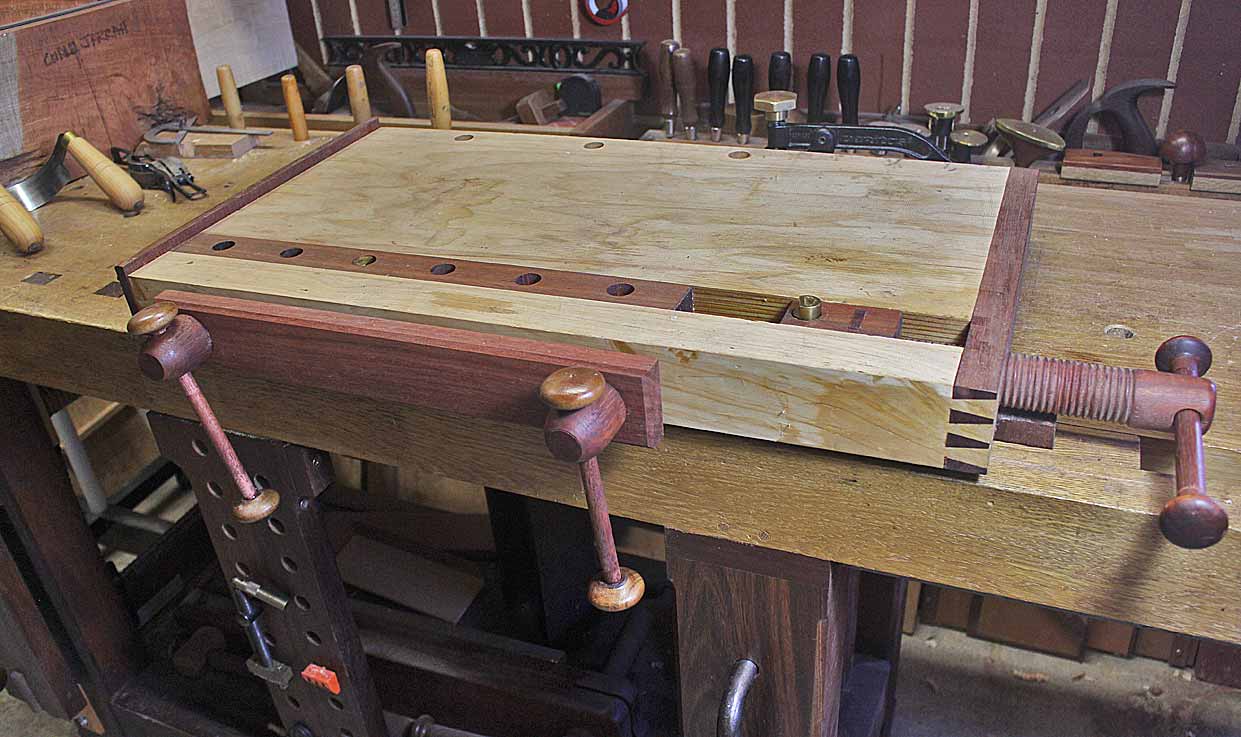
Just gonna chuck some more stuff/options out there, as the biggest obstacle
is finding a compact or functional design that would suit a solid timber top, something like in the photo with the trestles say, (as in laminated planks on edge)
It might be worth noting that a built in vice is not too necessary, so that would help to keep things
as slim or low profile as possible, should you wish to not use it as a table.
Picture pinched from Custard's post, so probably should provide a link aswell...
Workbench / Assembly Table (mostly power tool use, particularly Festool Domino use)
A sure way to get a square edge on something wide which might be a bit intimidating for starters.
Custard has a good article here, should you not wish to watch any youtubes for good habits for planing, or should I say not to pick up bad habits from the rest of youtube
i.e Charlesworth or Cosman for instance you won't go far wrong if wanting good techniques for planing in video format.
https://www.ukworkshop.co.uk/threads/how-to-edge-joint.112936/
Couple those planing skills with some of David W's(Weaver's) advice, on the tube or elsewhere,
should you have any tearout issues, as you'll not find too many folks out there that will you will find actually using any double iron plane like your Bailey to its full potential.
i.e not scraping flat stuff, or any other faffing about with high angles and other hassle.
Here's some more tips should you be keen on not having a vice on the bench.
Mike Simesen has a video on viceless workbenches also.
Aswell as Simon James workholding tips
Just incase one is still eager to use plywood, and use a plane proficiently,
here's a photo demonstrating the tolerances which will make the difference between
having an easy time with planing taking predictable shavings, should you be working on thinner stock, or just not getting the hang of planing thicker stock, but don't know why.
The black crayon represents the high spots which will be the what you might not see otherwise, especially so on a flexing and unstable (as in differential shrinkage) surface like a plywood board.
View attachment 117647
You don't have to scribble a crayon or artists graphite stick on the bench, its just making the point.
You should be able to see the errors with the good lamp that would be easily moved about.
Here's a piccy of a high spot in the center, and also an illustration on why to use stopped shavings from time to time.....i.e Charlesworth's teachings makes this very clear.
View attachment 117648
Now should you wish to do everything on the cheap, then you can make your own straight edge using a pair of
parallel timbers, when they fit with an invisible gap and one can be flipped over and is the same, then you know you have a straight edge.
The two lengths will double the error, so you can get very accurate this way.
Make them as long as your bench I suggest, especially if you're being as frugal as possible with your long stock, i.e jointing timbers for a bench lamination.
View attachment 117649
And lastly another must have tool, if doing some skipdiving, is the metal detector wand.
Keep an eye out for the good stuff, mainly iroko is what you might find, doors and windows most of the time, everything has got a use and if not, laminate it all up.
View attachment 117650
View attachment 117651
All the best
Tom


