DAY 1
Been prevaricating on this one a while. When I found out last week that I'd be waiting ~1 week for my wood order for my garage doors (WIP found here: topic111103.html ) I thought I'd squeeze it in. My sister's bedroom is 2.5m wide. Her new mattress is 1.9m long so there's room head and toe for bookshelves. On top of this, she's always wanted a window seat, and her rabbit to not jump on her bed making all kinds of rabbit mess. The bed was therefore designed to "sit" on a bank of three shelf units that bring her up to near window height, and box in the window so that it comes out over the radiator (which she never uses so no problems there) and becomes a window seat. The idea is to make the bed look fit to an alcove, and the whole thing is framing the window effectively.
The cabinets, bringing out the wall farther and adding some nice crown, chair, and picture frame molding should give the whole entity depth, while a white satin finish should bounce light round the room and hopefully make a relatively small room feel bigger. The "roof" of the bed will be lowered on top of the bookshelves to give the bed occupant an ensconced feeling. My sister has a relatively stressful job (police officer) and spends pretty much all of her time not at work sleeping. It's an important space for her, and maybe even can feel like a safe space from the unsavoury characters she might happen on during the day/night at work.
Starting this was a bit of a last minute decision, and when I phoned Jewson last Friday morning they couldn't deliver till Monday. Not a problem for the MDF but I wanted to start the framing then and there. I picked up maybe 24 2x4s for this project which was a breeze in the Skoda Rapid (a cracking car by the way if anyone's interested, it's only a 1litre - that's only 100cc more than my motorbike - but it's just as quick as my old 1.6 mini I recommend it to everyone!). I did 2 trips to be safe but could have done it in one at a push.

I wheeled out the mitre saw for this one as cutting 8foot lengths down the centre in the workshop can be a bit of a pain at times, and back then it wasn't snowing! The idea for the base is basically a "ribcage" design. 2x4s make boxes which are braced down the centre for left-right torsion with a spine.

I used galvanised frame brackets for creating the ribs. I could have just screwed them into each other tbh or toenailed them but I was interested in trying out these brackets. For what they are, they're expensive, and didn't really provide anything more stable than toenailing. Assembly was made pretty quick though as I set up a little 2x4 fence to show me where to fasten each bracket .
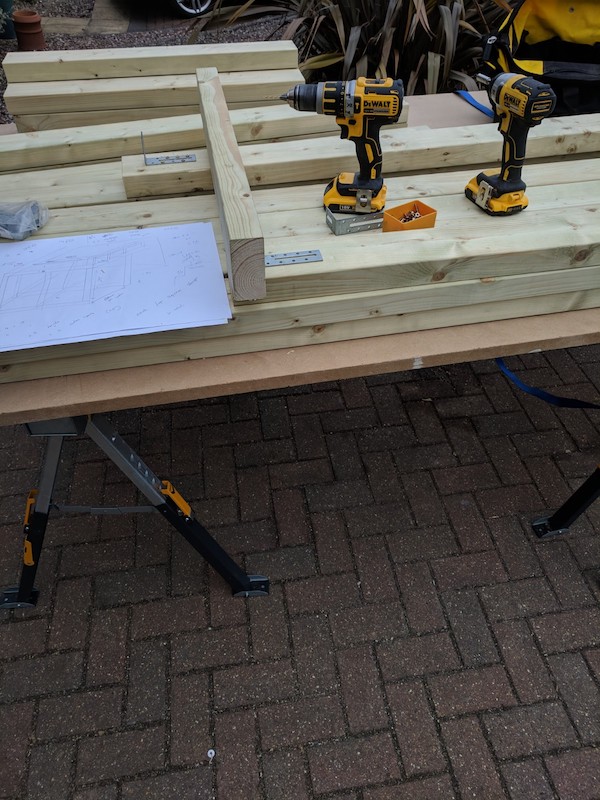
For the ribs, I levelled them in situ by using screws as adjustable feet. Fortunately the floor dropped off pretty much linearly right-left so I knew each box would be slightly lower than its right hand neighbour. Using the RHS as my arbitrary reference, I used a spirit level to drive the screws to the correct height before flipping over for a sanity check. Flipping them over was no issue here as the 100mm or so span of the framing timber isn't enough to make this method inaccurate (i.e. when you flip it left becomes right and right becomes left). I can't think of a good way to phrase this so if it doesn't make sense just ask and I'll do a diagram.

I used a string line across the front to make sure all the boxes lay on the same axis. The two central boxes aren't as deep as they sit in front of the radiator so a string line was required instead of pushing everything against a far wall.

I then added the spines, some more cross pieces along the top to support the ply for the mattress, and some cross bracing on the bottom nearside. This part was the least supported area as the bottom spine for this area is recessed quite a way to accommodate the cabinets.
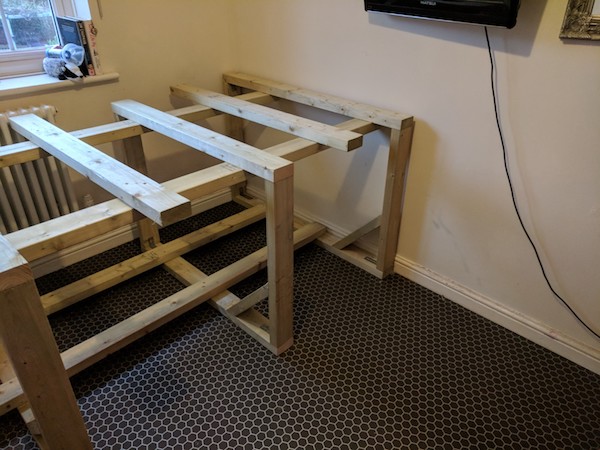
To mitigate any racking whatsoever I also fastened the frame to the walls.
DAY 2
Last Saturday. Set about bringing out the back wall flush with the radiator. Frames were pre-fabricated on the drive then brought upstairs. They could be screwed into the base at the bottom and the top sides were blocked out from the wall which was subsequently hard fastened with more angle brackets.

I added a header to the frame to give more rigidity to the structure, to take a blind, to support the roof and to attach the boxing for the window. That was all I could do on day 2 as I was still waiting on MDF from Jewson.


DAY 3
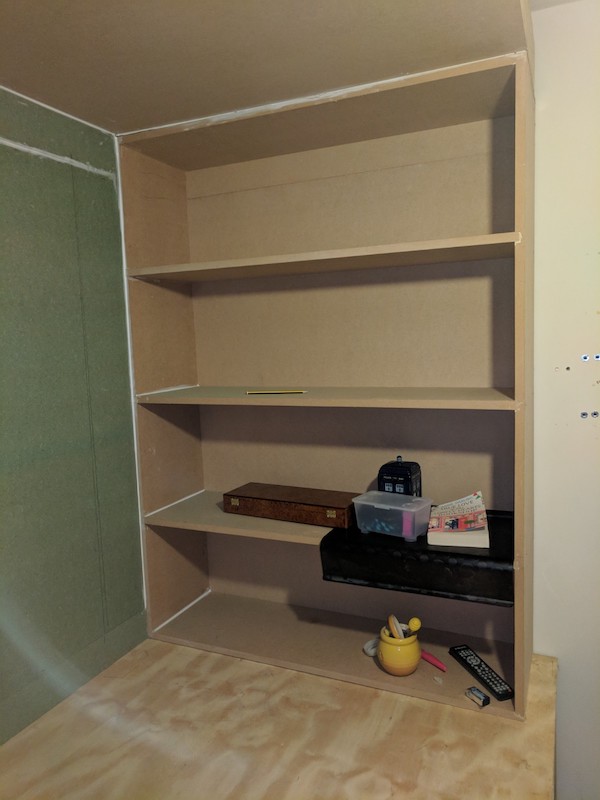
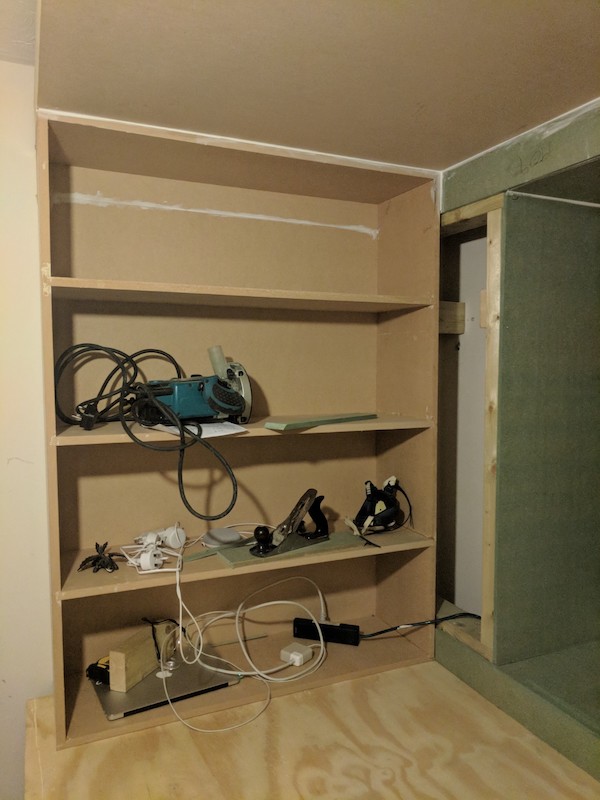
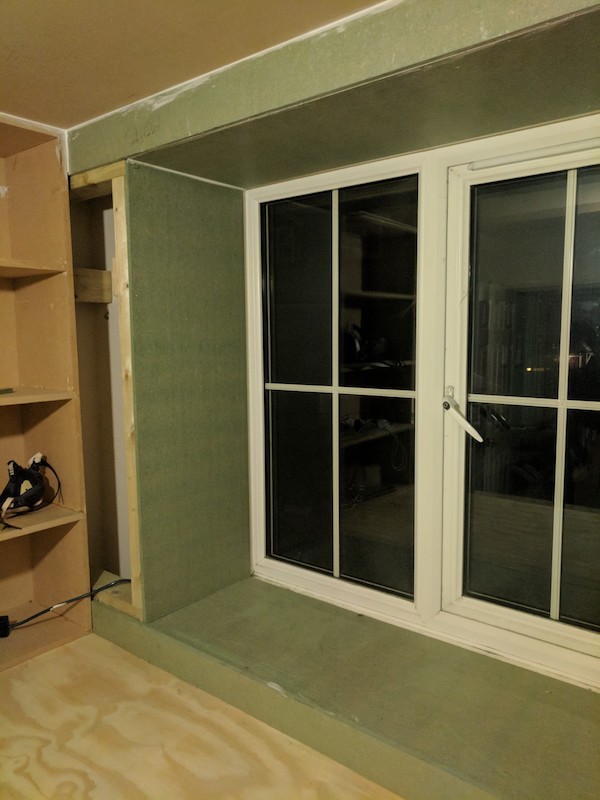
Monday. Jewson turned up pretty late to be honest (gone 1) so I knew I was up against it if I wanted to get the three cabinets cut. Please forgive the dearth of photos for this day. Standard stuff, cutting all components to size. I opted for biscuit joined cabinets on the base. In hindsight I'd have gone with housings as with the top. Sometimes I like to mix it up a bit and these shelves take next to no weight so I knew I'd be fine with biscuits. I'd usually go for an undersized box and then make up for it all with filler panels but the size of the units was constrained to take Ikea storage boxes so I had to come out pretty much bang on with the width of my opening. Obviously I had to fight incredibly hard to get the three units in. I got quite the workout in I have to say.

Been prevaricating on this one a while. When I found out last week that I'd be waiting ~1 week for my wood order for my garage doors (WIP found here: topic111103.html ) I thought I'd squeeze it in. My sister's bedroom is 2.5m wide. Her new mattress is 1.9m long so there's room head and toe for bookshelves. On top of this, she's always wanted a window seat, and her rabbit to not jump on her bed making all kinds of rabbit mess. The bed was therefore designed to "sit" on a bank of three shelf units that bring her up to near window height, and box in the window so that it comes out over the radiator (which she never uses so no problems there) and becomes a window seat. The idea is to make the bed look fit to an alcove, and the whole thing is framing the window effectively.
The cabinets, bringing out the wall farther and adding some nice crown, chair, and picture frame molding should give the whole entity depth, while a white satin finish should bounce light round the room and hopefully make a relatively small room feel bigger. The "roof" of the bed will be lowered on top of the bookshelves to give the bed occupant an ensconced feeling. My sister has a relatively stressful job (police officer) and spends pretty much all of her time not at work sleeping. It's an important space for her, and maybe even can feel like a safe space from the unsavoury characters she might happen on during the day/night at work.
Starting this was a bit of a last minute decision, and when I phoned Jewson last Friday morning they couldn't deliver till Monday. Not a problem for the MDF but I wanted to start the framing then and there. I picked up maybe 24 2x4s for this project which was a breeze in the Skoda Rapid (a cracking car by the way if anyone's interested, it's only a 1litre - that's only 100cc more than my motorbike - but it's just as quick as my old 1.6 mini I recommend it to everyone!). I did 2 trips to be safe but could have done it in one at a push.

I wheeled out the mitre saw for this one as cutting 8foot lengths down the centre in the workshop can be a bit of a pain at times, and back then it wasn't snowing! The idea for the base is basically a "ribcage" design. 2x4s make boxes which are braced down the centre for left-right torsion with a spine.

I used galvanised frame brackets for creating the ribs. I could have just screwed them into each other tbh or toenailed them but I was interested in trying out these brackets. For what they are, they're expensive, and didn't really provide anything more stable than toenailing. Assembly was made pretty quick though as I set up a little 2x4 fence to show me where to fasten each bracket .

For the ribs, I levelled them in situ by using screws as adjustable feet. Fortunately the floor dropped off pretty much linearly right-left so I knew each box would be slightly lower than its right hand neighbour. Using the RHS as my arbitrary reference, I used a spirit level to drive the screws to the correct height before flipping over for a sanity check. Flipping them over was no issue here as the 100mm or so span of the framing timber isn't enough to make this method inaccurate (i.e. when you flip it left becomes right and right becomes left). I can't think of a good way to phrase this so if it doesn't make sense just ask and I'll do a diagram.

I used a string line across the front to make sure all the boxes lay on the same axis. The two central boxes aren't as deep as they sit in front of the radiator so a string line was required instead of pushing everything against a far wall.

I then added the spines, some more cross pieces along the top to support the ply for the mattress, and some cross bracing on the bottom nearside. This part was the least supported area as the bottom spine for this area is recessed quite a way to accommodate the cabinets.

To mitigate any racking whatsoever I also fastened the frame to the walls.
DAY 2
Last Saturday. Set about bringing out the back wall flush with the radiator. Frames were pre-fabricated on the drive then brought upstairs. They could be screwed into the base at the bottom and the top sides were blocked out from the wall which was subsequently hard fastened with more angle brackets.

I added a header to the frame to give more rigidity to the structure, to take a blind, to support the roof and to attach the boxing for the window. That was all I could do on day 2 as I was still waiting on MDF from Jewson.


DAY 3
Monday. Jewson turned up pretty late to be honest (gone 1) so I knew I was up against it if I wanted to get the three cabinets cut. Please forgive the dearth of photos for this day. Standard stuff, cutting all components to size. I opted for biscuit joined cabinets on the base. In hindsight I'd have gone with housings as with the top. Sometimes I like to mix it up a bit and these shelves take next to no weight so I knew I'd be fine with biscuits. I'd usually go for an undersized box and then make up for it all with filler panels but the size of the units was constrained to take Ikea storage boxes so I had to come out pretty much bang on with the width of my opening. Obviously I had to fight incredibly hard to get the three units in. I got quite the workout in I have to say.

Attachments
-
 IMG_20180309_101729.jpg119.2 KB
 -
 IMG_20180309_104754.jpg179.6 KB
 -
 IMG_20180309_122847.jpg146.9 KB
 -
 IMG_20180309_135015.jpg128.5 KB
 -
 IMG_20180309_143848.jpg156.9 KB
 -
 IMG_20180309_164646.jpg81.8 KB
 -
 IMG_20180310_134328.jpg115.6 KB
 -
 IMG_20180310_151344.jpg54.9 KB
 -
 IMG_20180310_160829.jpg66.8 KB
 -
 lower_cabinets.jpg112.9 KB


