Technique question... advice please

UKworkshop.co.uk

Help Support UKworkshop.co.uk:

This site may earn a commission from merchant affiliate links, including eBay, Amazon, and others.

Keithie

Established Member
Joined
30 Nov 2016
Messages
317
Reaction score
0
Location
Somerset
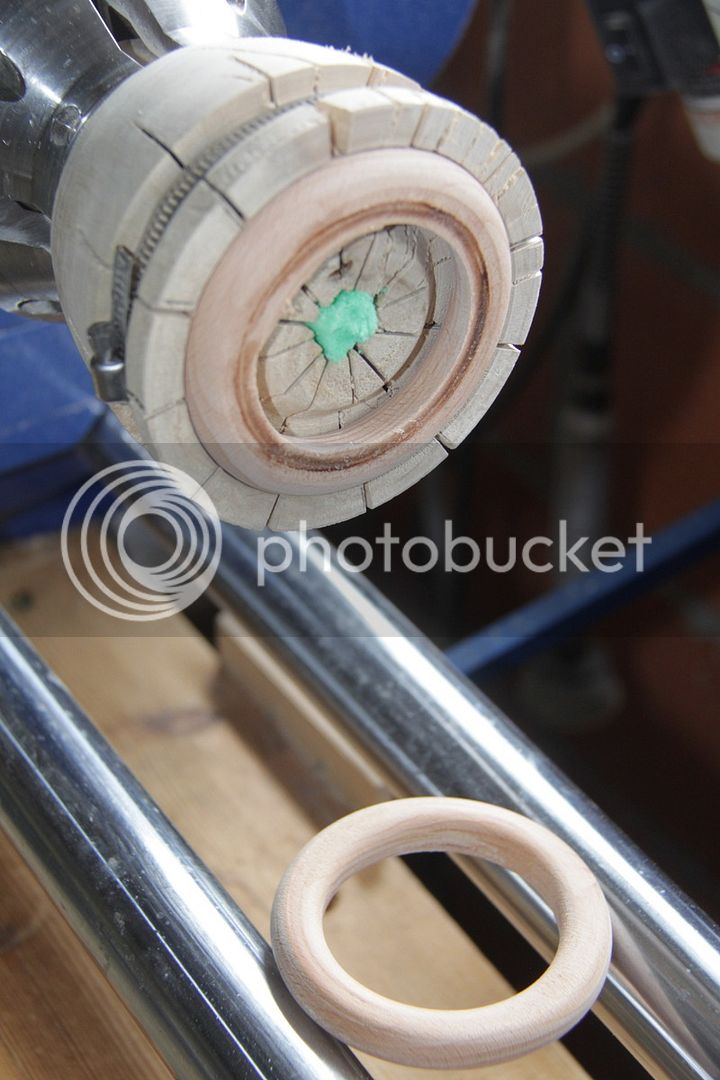
I found it difficult to figure out how to shape the inside of this bangle and have two more to do (smaller and more rounded) ..so advice would be welcome.

(I started out doing the outside with a flat skew chisel which was fine but on the inside I found myself leaning right over the bed and pointing the skew back at the inside of the piece to complete the inside of the curve which felt very awkward and probably dangerous, so I gave up on that and just made some small steps in (parallel to the bed) with a 1/8" parting tool then sanded the steps out)

P1000406.JPG
 
I tend to leave the inside flat and only a slight radius on the edges and then make the outside a nice curve and again making sure there is nice round over on the outside edge. No sharp corners. I find that shape helps give it strength.
If you are going to work on the inside how you have it set up get a small piece of hardboard or ply and place that against the jaws before clamping the bangle into them this will prevent hitting the metal of the jaws and less likley to damage the tool if you go to deep, work from one side then turn the bangle around and then work from the other side. Also with the hardboard or ply in place when you sand you will not hurt your fingers
 
For starters keep a skew away from that sort of project and wood orientation, accident waiting to happen.

Be very aware that using those soft rubber mountings on something without tailstock support is very prone to throwing the piece off the chuck at the slightest loss of tool control or dig in.

For the insides you would be better using a small round nosed scraper until such time as you gain experience using bowl or spindle gouges, even then scraper is my preferred method, just keep it sharp to avoid tearout.
A method I've used in the Past using standard dovetail jaws for such items.
 
Thanks very much both, again. As ever, excellent advice!

- Hardboard between the piece and the jaws ...good plan..will do
- Flat on the inside with rounded edges..for this piece, exactly so ... for the smaller ones I was hoping for circular (as much as practical)
- Avoid scary skew on this sort of work...def agreed .. huge focus needed (at my experience level) with v bad outcome risk if loss of focus
- Shape outside before parting bangle blank from the whole ...blimey ...that is so obvious now...but I somehow failed to think of it! ..ty
- Reverse lathe direction and cut inside at the far side ...much better than cutting back from far side of lathe bed (with a skew!) ..makes much more sense..ty
- Careful with rubber jaws ..def agreed... not sure the dovetail will work so well with convex internal shape tho...I shall think on !

In terms of the internal shaping, I was hoping to make it convex rather than concave on the smaller pieces so that they are approx circular in cross section. I can see how a small round nose scraper (or bowl/spindle gouge) would do concave ...so I guess its small scraper or small parting tool to try and do convex .. doing it little by little ?
 
In terms of the internal shaping, I was hoping to make it convex rather than concave on the smaller pieces so that they are approx circular in cross section. I can see how a small round nose scraper (or bowl/spindle gouge) would do concave ...so I guess its small scraper or small parting tool to try and do convex .. doing it little by little ?[/quote]

Why would you want the internal of the bangle convex?
 
Good question Andy ...it makes things more difficult for sure ...but the short answer is 'why not?'

Longer answer ..two choices ..
1. its just an aesthetic...somemay like it, some not
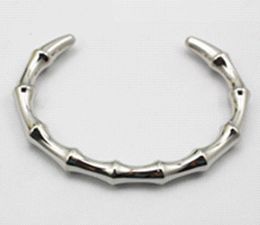
2. In my wifey's case (they are a cheapo valentine gift) its a step towards production of a wooden version of a silver round 'bamboo' bangle ...rationale being even longer and irrelevant (to do with an old company called Smith & Pepper) .. but the silver one was similar to this..
2014-new-fashion-stainless-steel-silver-round.jpg


although that's in steel. So a round cross section bangle isnt too long a carving hop from a 'bamboo' round bangle...subject to me learning to carve ...lol (to be fair tho, I have a foredom pendant motor and handpiece with long cone abrasives, so it may not be so tricky after all)
 
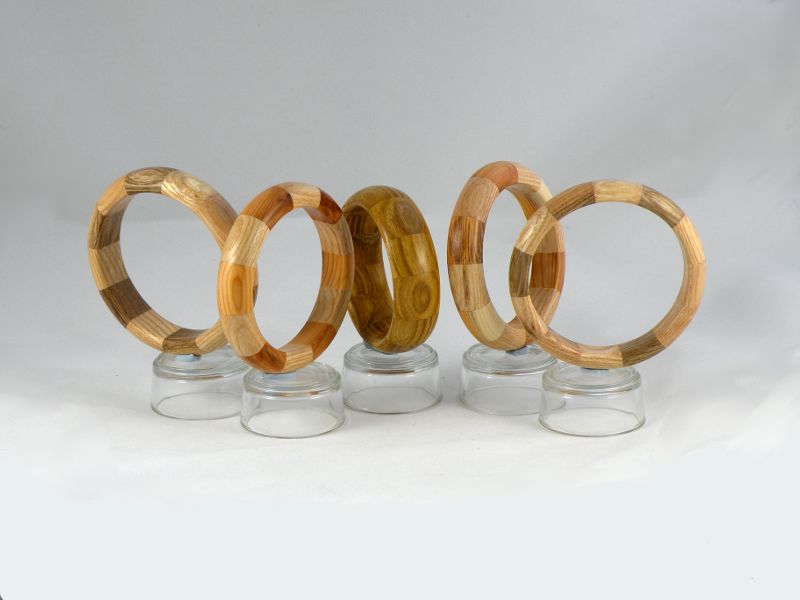
I tend to finish narrow bangle to a D shape rather than a true circle, much easier to form on the lathe.
DSCN0233.jpg


I think you might have problems with your split bangle, they are always prone to splitting across the short grain section even in the round, destroying the 360 deg, support is likely to have it split very easily.
 
CHJ":3d96z7eq said:
I tend to finish narrow bangle to a D shape rather than a true circle, much easier to form on the lathe.
DSCN0233.jpg


I think you might have problems with your split bangle, they are always prone to splitting across the short grain section even in the round, destroying the 360 deg, support is likely to have it split very easily.

Chas,

What adhesive do you use given you've only really got end grain joints and any tips?

S
 
CHJ":u35p073a said:
I tend to finish narrow bangle to a D shape rather than a true circle, much easier to form on the lathe.
DSCN0233.jpg


I think you might have problems with your split bangle, they are always prone to splitting across the short grain section even in the round, destroying the 360 deg, support is likely to have it split very easily.

That was the shape I was trying to discribe but made a right mess up of it :lol: :lol: :lol: Thanks for the better answer Chas
 
They're nice Chas... I like your segmented work...when I get good enough I must have a go at it.

I'd thought about the snapping issue ..in precious metal there can be a bit of flex when putting that type on and deformation isnt a particular disaster ... different in wood of course.

It may be that I'm wrong but I decided to make the 'bowl blank' (from which the bangle blanks were taken) in the 'end grain' rather than the more usual 'side grain' orientation for bowl blanks (in my thread about wood identification thread where I confused /was confused by Bob about bowl blank definition). I'm hoping that with the grain running this way it may be stronger ... but I could easily be completely wrong and it would have been better to cut the bowl blanks perpendicular to how I did.

I guess time will tell .. though the internal diameter is about 6.75cm so it might be better that I keep the 'bamboo' bangle as a circle?
 
SVB":b8jh7wc4 said:
What adhesive do you use given you've only really got end grain joints and any tips?

S
Cascamite Simon, It's become my go to adhesive for segmentation work as when using even low creep PVA I've had joint movement' no problem in normal cabinet work but it become obvious in the surface of turned work.

Tips? none really other than:-
Still need to be careful and mount in compression on small area joint work where possible, if expansion required then anti-slip pressure only.
Leave joining surfaces as cut, or coarse sanded, do not fine sand joints.
On narrow items make longer cylinder and form outer and part off individual rings.


file.php


Note when mounted like this I use a "Boring Bar" approach to inner and outer to provide pressure towards chuck jaws.
 
Not surprisingly, at all, it turns out that practical experience wins over enthusiasm !

Obtaining a true circular cross section on a lathe made bangle is a long way beyond my patience level ...3 hours and still not very close to circular ...
but they are kinda ok enough for a valentines pressie..

P1000453.JPG


I might leave them as they are till Tues then see if one will be returned for an attempt on the bamboo style!
 
Keithie":3b1btkdy said:
Not surprisingly, at all, it turns out that practical experience wins over enthusiasm !

Obtaining a true circular cross section on a lathe made bangle is a long way beyond my patience level ...3 hours and still not very close to circular ...
but they are kinda ok enough for a valentines pressie..

Practice is the answer there is not really an engineering solution as unlike metal wood has its own set of rules.

The still look good don't worry about how long they take I am sure they still will be well received. Speed will come with practice.

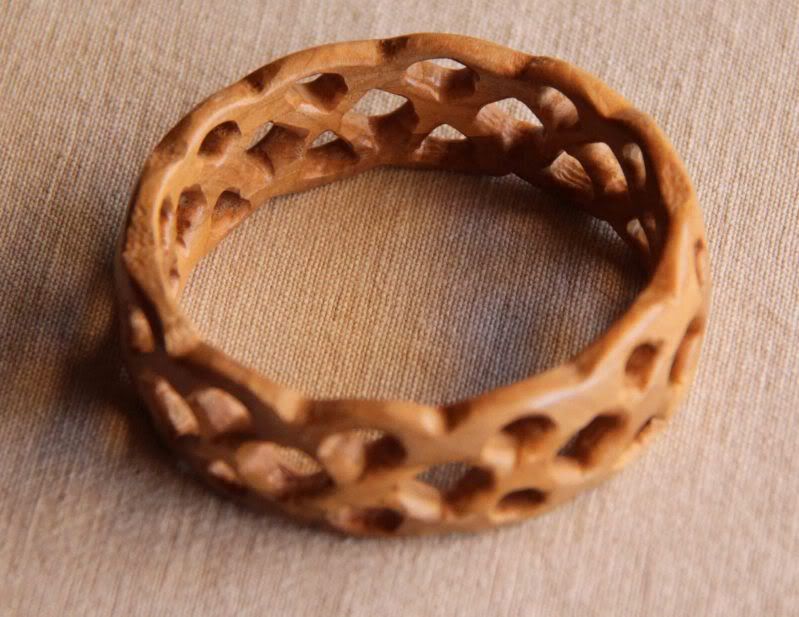
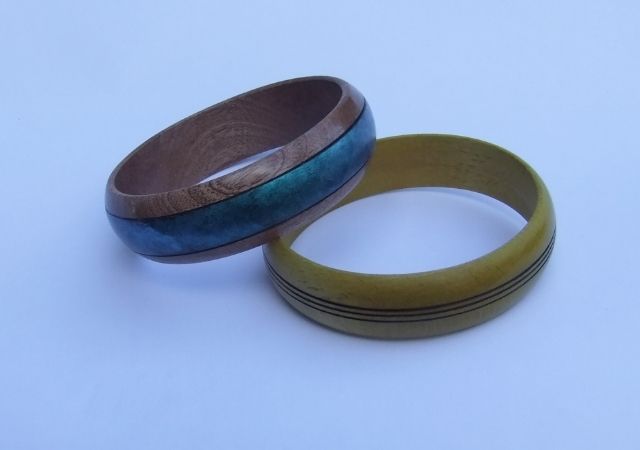
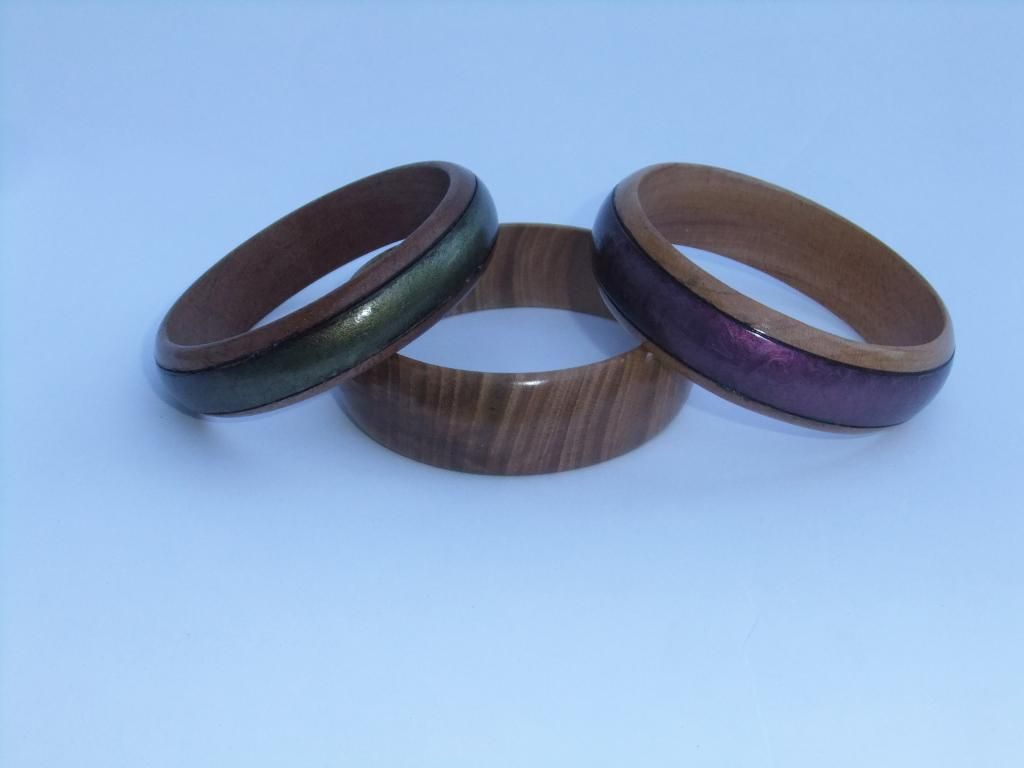
I like to make mine with a wider band as it gives somewhere to add decoration

2014-10-05001009_zps36e93478.jpg

threeofakind_zps33898e52.jpg
 
Thanks Dalboy.. I'm quite pleased with them and, as you say, the time isnt really the issue.

Those inlays of your are really nice (I assume they're resin?). I like your resin work a lot ...the way the swirls and, I guess, flow patterns in them give a textured appearance is very appealing.

I guess you recess the wood first then add the resin and turn the two together...but how do you get the resin to stay in place ...glue or does it bond ? ... do you have an oversize former, place the wood into it and then fill with resin, turning the excess off later ? or a more subtle method?

I'm still reflecting on how to use my starter 'cold enamel' resin kit (from Cookson) to provide a liner for my wooden whisky tumblers and have only really come up with pouring an excess in and turning it out on the lathe later...which cant be the best way!
 
well, they look good ... funny that I'm almost completely unable to tell the diff between resin & wood & paint ...my bad!
 
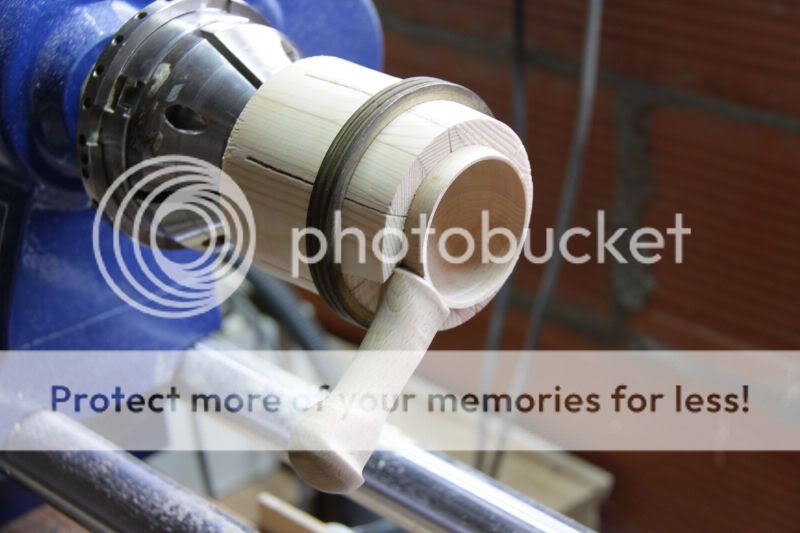
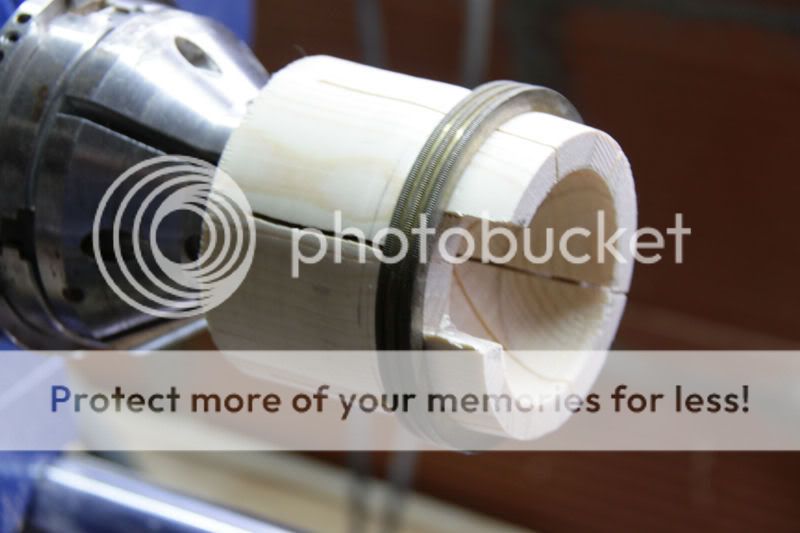
This is what I use when I'm doing anything like bangles or curtain rings. This was for 40 curtain rings at about 2 1/4" internal diameter, but a bit bigger and you have whatever size you need. Easy to make and cheap as chips.


I recessed the slot for the jubilee clip so the screw part is not looking for fingers ! As Chas said, form the outside first and reverse in the chuck when you have done one side.

When I made this one, in herry, I made a 3 ply of the wood to elliminate the cross grain problem and it worked a treat.


I also use the same kind of pinck chuck for turning scoops. This one was a scrap bit of pine. It doesn't have to be anything special as it's all held together by the chuck and the bronze ring. Taht ring is part of a set of box wood pinch chucks that date from over 100 years ago. Given to me by a very good friend.


The hold is really firm and it doesn't mark the wood at all as it's held all the way round.
 
Back
Top