Tallboy - now finished

UKworkshop.co.uk

Help Support UKworkshop.co.uk:

This site may earn a commission from merchant affiliate links, including eBay, Amazon, and others.

gasman

Established Member
Joined
14 Nov 2006
Messages
1,011
Reaction score
337
Location
Near Oxford
This is going to be for us - so I am personally less concerned about 'copying' - but would welcome your views....
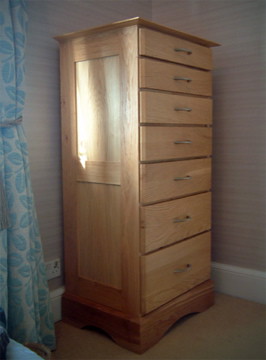
I want to make a tallboy - and have seen with interest the thread from here from the competition in 2007 the tallboy by Slim (really sorry I have never worked out how to put in a hyperlink)
5736765390_b35505e5b3.jpg

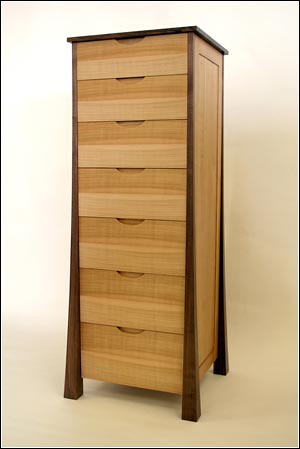
However the one I am more interested in comes from Jonathan Pearce's website jonathanpearcefinefurniture.com and looks like this
5736214611_dbc692ea6a.jpg

I love the geometric drawer spacing, the curves on the supporting legs, and I have made many pieces in the past with contrasting woods, some of which are posted on here etc. I have lots of walnut and will use olive ash for the drawer fronts and sides
So do you think it is acceptable to make 'copies' like this for one's own personal use?
Anyway I may change it significantly by making the drawer fronts curved, the handles will be different etc etc
I hope to start this weekend
Mark
 
Hi Mark

I don't see why not. I'm sure the item you have shown is less than likely to be "original" and many copies of known furniture designs have been made over the centuries, so go for it!

Steve
 
OK thanks I agree with both of you
Next problem is the walnut
I have some 1" and 2" English walnut boards but they have both the dark heart wood and the sapwood - and I definitely do not have enough dark wood lengths to make the 4 corner pieces - which are 40mm square at the base rising to 25mm at the top. However I do have plenty if I have the lengths dark and light. So, has anyone used van dyck crystals or similar to stain the pale sapwood to the same colour as the heart wood?
I will rout around on the internet and see what I can find but if anyone has done it I'd love to hear about it
Otherwise I will have to buy a 2" walnut board from Eynsham sawmills which I think is about £90 a cube
Thanks
Mark
 
Went to the sawmills today which only has 1" walnut which is also a mix of heartwood and sapwood. Not sure what to do will have a think today
 
maybe worth phoning around some local joiners to see if they have any that they will sell you
 
I'm sure there are members here who've successfully used van **** crystals to stain the walnut sapwood to match the heartwood. I imagine that a few scraps for samples may be required to ensure you get the right mix? I've never done it myself but, I think I read in one of the American magazines that you should only apply the stain to the sapwood...? Otherwise, you might further darken the heartwood and you'll still have a similar problem with consistency...

A quick forum search bought up three threads that may be of interest - one,two and three. :)

Looking forward to seeing progress on the tallboy. For what it's worth, you've already stated that this piece will be for your own personal use (non commercial) so, I don't see a problem with it. I'm sure I've seen other items of furniture with very similar design aspects on other people's website so, as has already been said; nothing is new or unique. :)
 
Some progress made over the weekend although I was on call and kept getting interrupted
So I cut the 4 legs up, planed 2 sides perpendicular then used a template and bearing guided straight router bit to shape the 2 curved sides. They are 22mm at the top increasing to 45mm square at the base
5751785410_9080998307.jpg

Unfortunately by the time I read the reply from Olly saying don't stain the heartwood, I had stained the whole lot. But... it actually looks quite good.
So I mixed up some dark crystals
5751781654_cff741f7e1.jpg
[/url]
Then stained the 4 legs as instructed - thick amount all over then wiped off and dried overnight and it turned out quite well
5751783118_888e7cf76a.jpg
[/url]
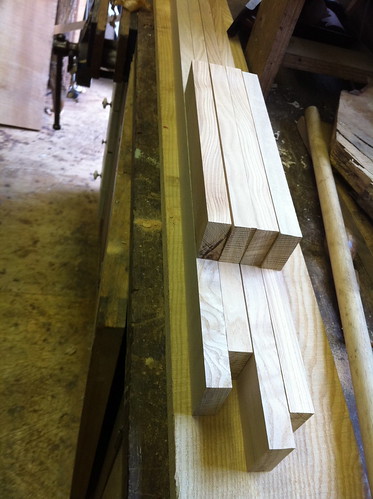
Then I cut up and thicknessed some ash for the sides - which will be 400x1300 and each will be a frame consisting of 22x50x1300 rails and 22x50x300 stiles and a 6mm ash ply panel for simplicity - here's the wood for all the sides except the ash ply which I have ordered and will arrive on wednesday
5751780058_60362ed1b1.jpg
[/url]
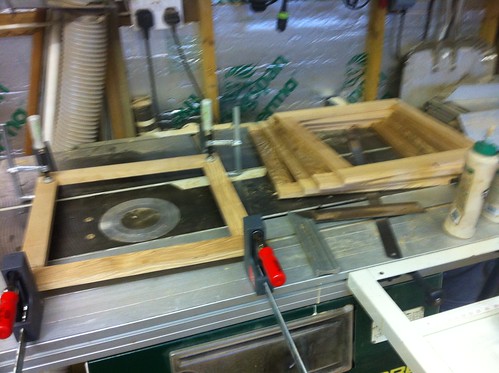
Finally this weekend I thicknessed some more ash to 15mm (used up a lot of offcuts from other projects) and constructed 8 squares like these
5751232441_f4f0014cab.jpg
[/url]
which will be horizontal divides between the drawers. I have decided the drawer fronts will cover the entire front of the tallboy to make it simple like the Jonathan Pearce example I am basing this on
Thanks for looking. Comments always welcome
Mark
 
Progress has been slow due to work, my wife going for a promotion necessitating me cooking every night last week, and to be honest, I don't love this project yet. Until that happens things tend to go quite slowly...
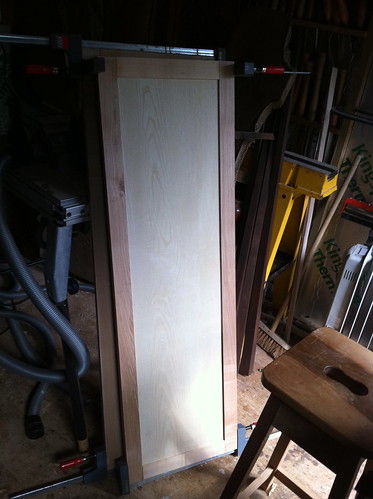
So, first I picked up some ash-faced 6mm ply last thursday and made the 2 side frames: simple 50x22mm ash with a 6mm groove routed in all round and the ply within. The ply looks very pale compared to the frame but I think it will be fine once it is all finished
5772524965_1d80655463.jpg

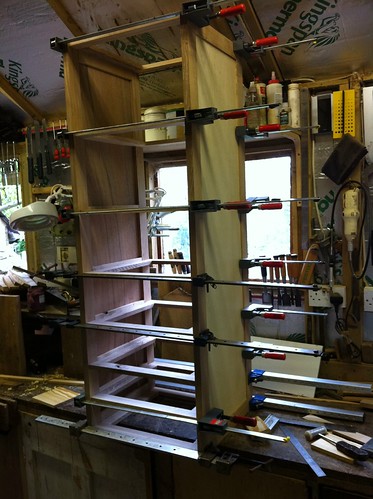
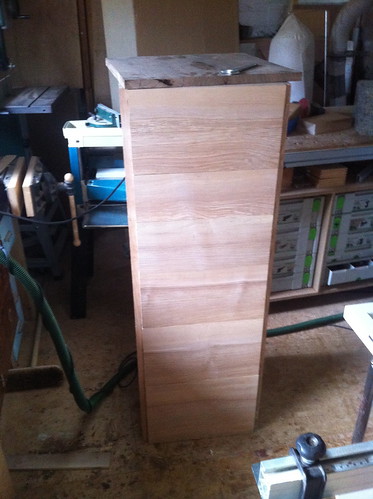
I have not got a photo of this - but on the inside of each side I glued in pieces of ash 11x20mm so that it was flush with the frame at every place the horizontal pieces would be. Then I glued up the cabinet. The construction was done with 5mm dominos, 4 per side at every level. I used TB3 but glued it up in 2 halves - ie did one half and clamped it up with the other side dry, then when that was dry glued up the other side
5773061018_576ba8b471.jpg

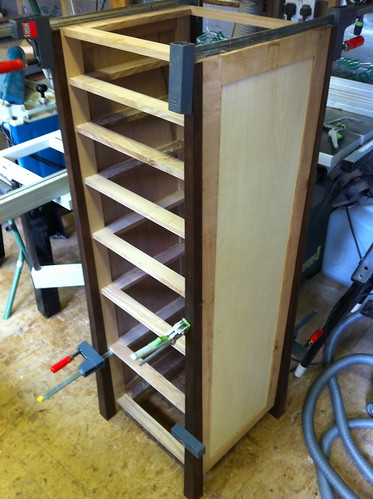
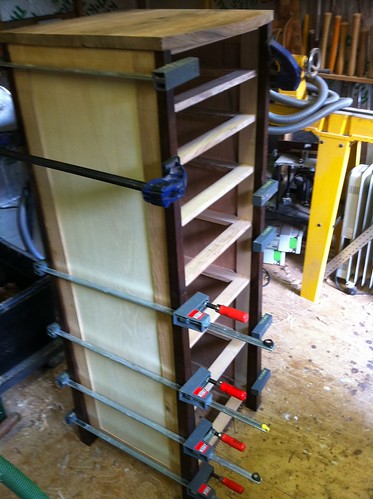
Finally this weekend I clamped it up with the stained walnut corner pieces to see what it is going to look like. I think it will be fine but want to get a finish on the corner pieces before making a final decision whether it is acceptable
5773065880_3924549e5f.jpg

I will start making the drawers next, and get the top walnut cut
Thanks for looking and comments or criticisms welcome as always
Mark
 
Progress remains slow
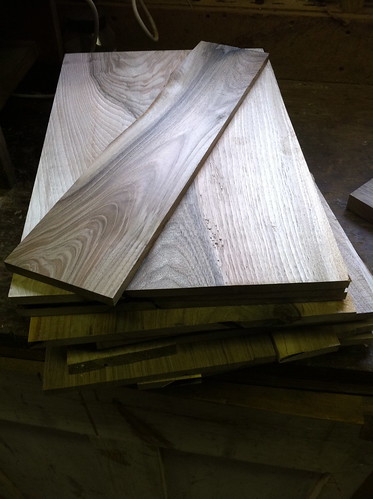
However I have decided to make the drawer fronts out of ash with the drawer sides and back made out of walnut to save on wood (I know that sounds funny but I have lots of walnut boards rough sawn from an old tree so they will be a mixture of sap and heart wood, cut 10mm thick)
So here's the piece of ash for the drawer fronts - should be fine for all of them
5797459100_e75b7ba873.jpg

Then here are the walnut side and back pieces, thicknessed to 10mm roughly but not sized accurately yet
5796903449_e1aeac5c4b.jpg

Now they are cut to size, sanded to 120G and being kept flat overnight under a 12 inch cube of granite
5797460838_f7940145a0.jpg

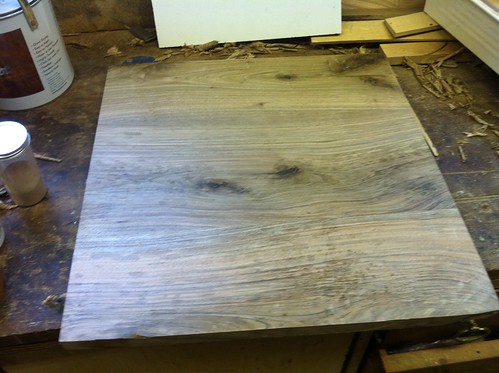
Finally for today here is the 22mm thick walnut top composed of 3 pieces of heart wood glued together and sanded so far just to 120G
5796914405_066201938f.jpg

More hopefully tomorrow
Thanks for looking
Mark
 
Yep, it's looking very good indeed. That top looks interesting and you've done a good job of matching the grain for it. It will be interesting to see how the drawer sides work, given that they'll be darker than the fronts. But, with all the sapwood you have [don't tell Rob!! ;-)], it might work out okay.
 
very nice indeed - love the contrasting woods

not usually a big fan of the 'flared' look but that works well done

cheers
 
gasman":2deqhw3q said:
So do you think it is acceptable to make 'copies' like this for one's own personal use?
Anyway I may change it significantly by making the drawer fronts curved, the handles will be different etc etc
I hope to start this weekend
Mark
As far as I'm concerned, there's nothing wrong with making a copy, or adapting other's ideas. How does the saying go...'imitation is the sincerest form of flattery?' There's nothing new (or very little) in this game as most of it's been repeated and re-hashed over the centuries.

Walnut I like, sappy walnut is another story, but we won't go there! :lol: - Rob
 
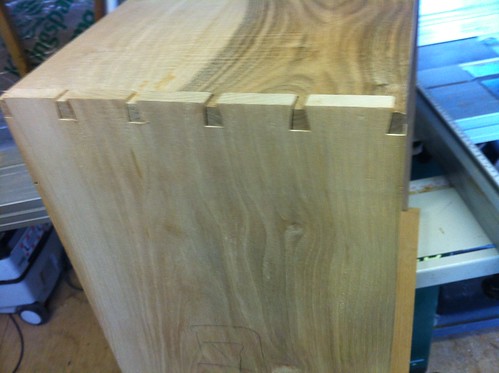
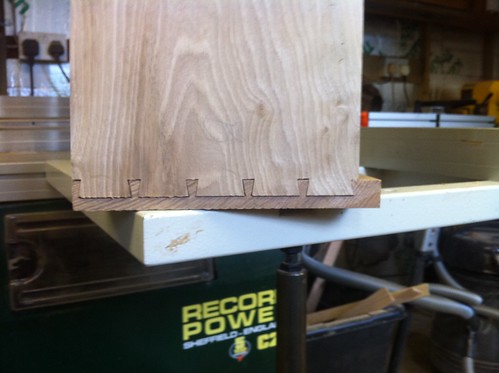
Made some progress this week - with the drawers, although purists out there will turn away in disgust as I have made the full through dovetails of the rear of the drawers on an 18" Leigh Superjig - here is one dry fitted for size - it does go together correctly when clamped - I know it looks as if the pins are too short in the photo. I did spend a bit of time playing around with dovetail bits - and went 'off manual' a bit by using a small 1/4", 8 degree bit to make the pins as narrow as possible and then using a larger 3/8" straight bit to cut the pinboard.
5816037402_4bea3f9a00.jpg

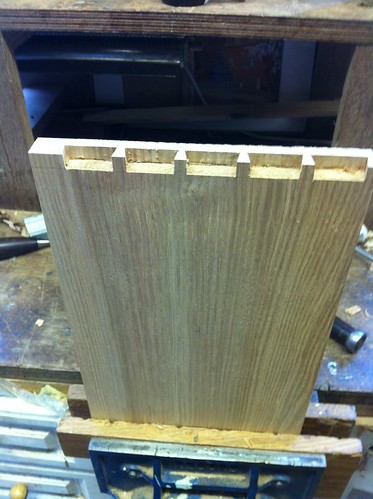
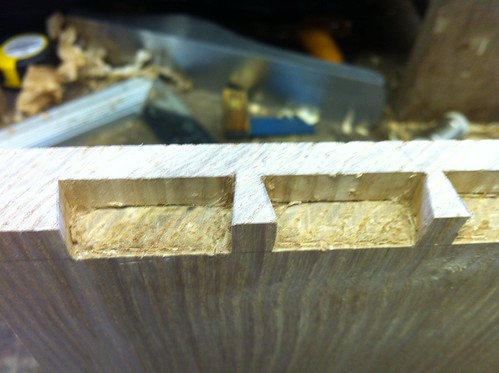
Then for the fronts of the drawers (which are all ash with a section of sapwood above heartwood) there are half-blind dovetails which were marked out very carefully from the tailboards of the sides (cut on the superjig as for the rear dovetails), then roughly routed out using a dovetail bit mounted in a router table
5815470605_99b172a37f.jpg

before being finished off by hand mounted in the vice with chisels
5816035842_609082744c.jpg

5816036602_e6b48f956e.jpg

Very happy with progress - I should get the drawer bases sorted and the drawers glued up this weekend and will then think about the handles / inlays for the drawer fronts next week
Thanks for comments
Mark
Here is one of the drawers loose fitted together (no groove cut yet for the base or bases cut)
5816038128_597559203b.jpg

Finally last night I dry-assembled all the drawers and put them into the carcass to see they all fitted
5815471383_9e59353288.jpg

5816041136_2538cac68f.jpg
 
More good progress today after an early work finish
Yesterday I had glued up the last of the drawers
5829233859_5185b4b287.jpg

So today I spent a good couple of hours tidying all the drawers up - removing surplus glue, sanding to 120G all over, making them fit really well until I had a stack of 7 drawers all looking clean which fitted really well
5829792104_7a8e9e52dd.jpg

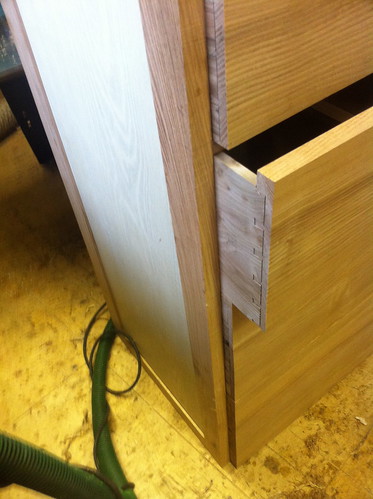
Then I domino'ed the 4 walnut curved corner pieces into place with 5mm dominos every 6 inches or so. This was a little bit fiddly as I had to reference the domino off the straight inner face of the walnut corner pieces but then use the outer face rather than the inner face of the cabinet as the spaces between the upper, smaller drawers was not big enough for the domino - so had to do a bit of trial and error with very small adjustments of the domino depth until the inner faces of the 4 corners and the cabinet were exactly in line
5829780494_a19030cfe3.jpg

Then I spent a bit more time on the top - in fact replaced a corner of it which was 'faulty' and scarfed in a new piece which thankfully after cleaning up looked fine
5829791112_34eee3a1c0.jpg

After removing all the clamps and trial fitting all the drawers it is starting to get near the finished look (the top drawer is still too wide to get in easily)
5829844782_6ea169e222.jpg

At the moment I am thinking of spherical turned walnut knobs in the same proportions as the size progression of the drawers but this could easily change!
Thanks for looking - all comments good or bad welcomed
Mark
 
Back
Top