Crooked Tree
Established Member
Finally finished these, to which I have alluded in a couple of previous replies.
The original idea was to make a nest of tables with tops in yew and contrasting legs. The yew in the shop looked a little challenging for me, particularly as I did not want voids in the top, so I went for an elm top and beech frame instead. Back at the workshop there was obviously too little contrast between the elm and beech such that it would look like a mismatch rather than a contrast, so the whole table was made from elm instead.
The design is deliberately simple and rectilinear, with only a small scratch bead to relieve the lines. The original intention was for a bevel on the underside of the top, but this was omitted to keep it simple. In a departure from the usual nest, there are 2 smaller tables of the same size and 1 large table, because I find that in practice the smaller tables are used as cup stands and the large table as a stand for the tray, but the smallest table is usually too low and the middle table too large in area. The 2 small tables are square and designed to slide under the large table from the ends.
Not many "in progress" shots alas. Timber preparation was by bandsaw then hand planed. The legs were laminated to the required section (the boards were ~1" thick). Joints are mortice and tenon for the frames, with reinforcing corner blocks added after they were found to be too weak on their own. The tops are jointed using 4mm thick loose tenons for alignment, with the mortices cut using a router and straight cutter. The bead was cut using my homemade scratchstock and cutter.
The top of the large table ready for glueing:

Glue-up with too few clamps (the wagon vice is acting as a sash clamp). A central board with "interesting" grain was chosen, with the pieces either side sawn either side of the centre of a single board to obtain matching across the width:

Had to flatten the plane sole a bit in order to be able to flatten the top adequately on some of the more challenging areas. Not perfectly flat, but good enough for the job. The top seemed to lose something of the clarity of the grain when scraped or sanded, so it was refinished using the plane set very finely with a freshly sharpened (and resharpened and resharpened) blade. Next time I will try Benchwaze's suggestion and try a back bevel on one of my blades. On this occasion i just kept sharpening and skewed the plane.

Miss a few and... the completed tables. "Family" photo:
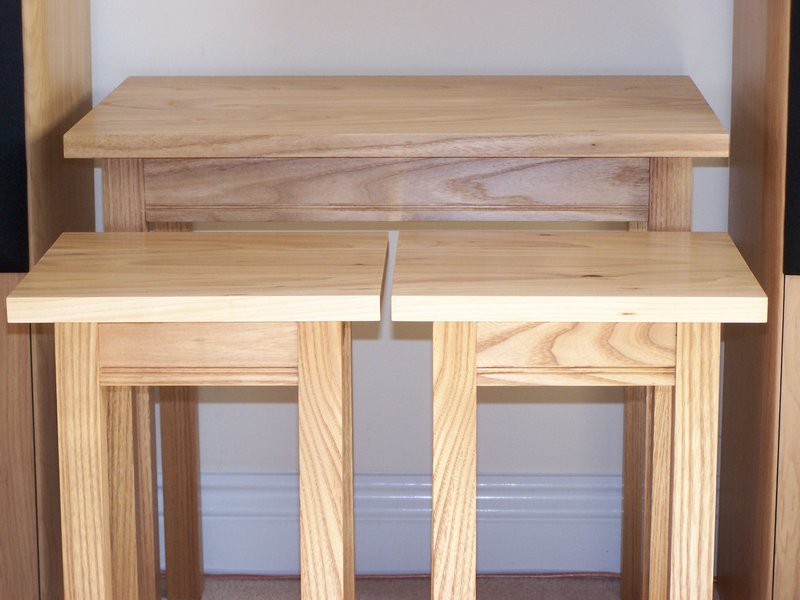
Tops of the small tables. They are not so yellow as in this shot - finish, by the way, is Osmo hard wax oil, 2 coats on the frames and 3 on the tops, flattened with 240 grit before the final coat:

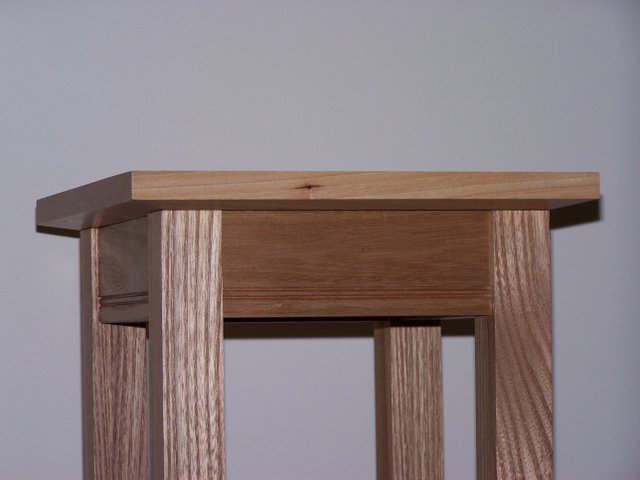
A small table:

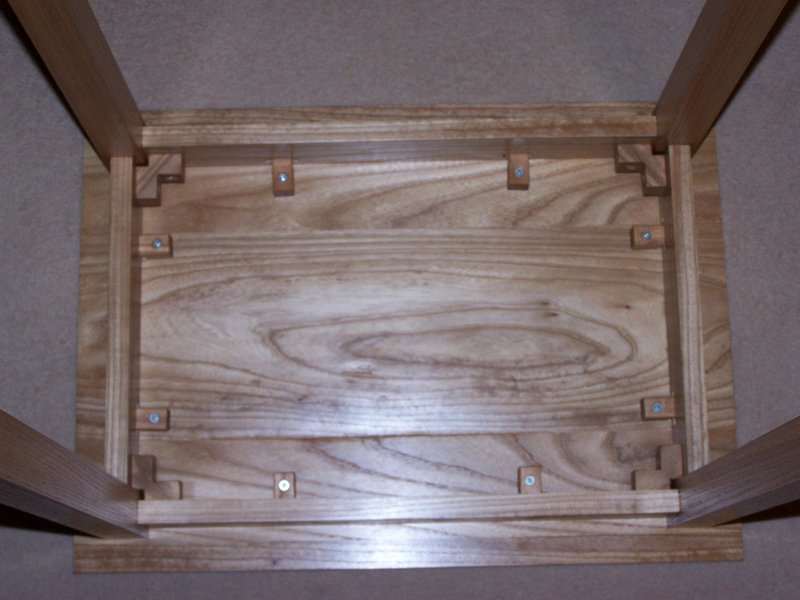
Constructional view of the underside of the large table:
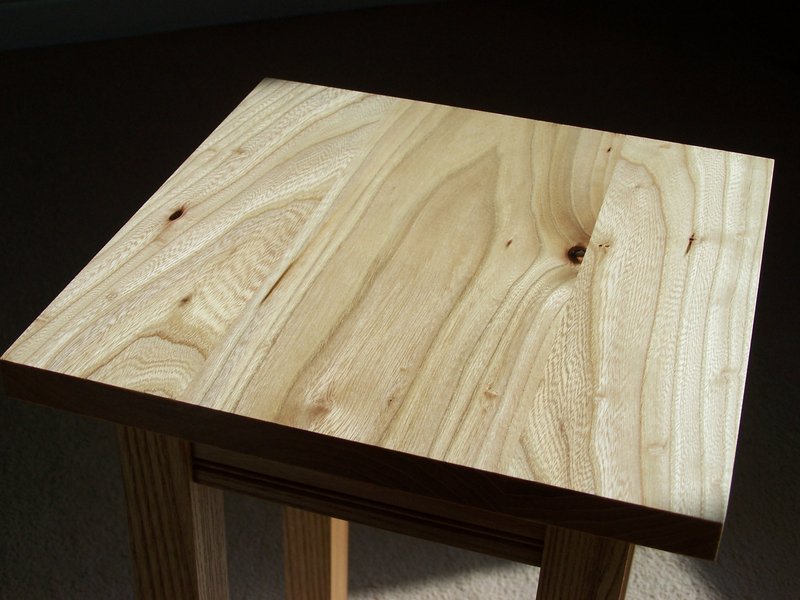
And finally, a shot to show the grain pattern in one of the small tables in a favorable light. The knot was filled with superglue then smoothed:
The tables have turned out a bit more plain than I had originally intended. The bead could perhaps have been bolder or perhaps reeding to make it stand out more, and I am still contemplating a bevel on the underside of the tops. The tops of the small tables have to come off for a little, ahem, rework anyway, because it transpires that allowance that I left for planing the edges was a little generous... they do not quite slide under the big table from the ends! Rushing to finish the project.
The original idea was to make a nest of tables with tops in yew and contrasting legs. The yew in the shop looked a little challenging for me, particularly as I did not want voids in the top, so I went for an elm top and beech frame instead. Back at the workshop there was obviously too little contrast between the elm and beech such that it would look like a mismatch rather than a contrast, so the whole table was made from elm instead.
The design is deliberately simple and rectilinear, with only a small scratch bead to relieve the lines. The original intention was for a bevel on the underside of the top, but this was omitted to keep it simple. In a departure from the usual nest, there are 2 smaller tables of the same size and 1 large table, because I find that in practice the smaller tables are used as cup stands and the large table as a stand for the tray, but the smallest table is usually too low and the middle table too large in area. The 2 small tables are square and designed to slide under the large table from the ends.
Not many "in progress" shots alas. Timber preparation was by bandsaw then hand planed. The legs were laminated to the required section (the boards were ~1" thick). Joints are mortice and tenon for the frames, with reinforcing corner blocks added after they were found to be too weak on their own. The tops are jointed using 4mm thick loose tenons for alignment, with the mortices cut using a router and straight cutter. The bead was cut using my homemade scratchstock and cutter.
The top of the large table ready for glueing:

Glue-up with too few clamps (the wagon vice is acting as a sash clamp). A central board with "interesting" grain was chosen, with the pieces either side sawn either side of the centre of a single board to obtain matching across the width:

Had to flatten the plane sole a bit in order to be able to flatten the top adequately on some of the more challenging areas. Not perfectly flat, but good enough for the job. The top seemed to lose something of the clarity of the grain when scraped or sanded, so it was refinished using the plane set very finely with a freshly sharpened (and resharpened and resharpened) blade. Next time I will try Benchwaze's suggestion and try a back bevel on one of my blades. On this occasion i just kept sharpening and skewed the plane.

Miss a few and... the completed tables. "Family" photo:

Tops of the small tables. They are not so yellow as in this shot - finish, by the way, is Osmo hard wax oil, 2 coats on the frames and 3 on the tops, flattened with 240 grit before the final coat:

A small table:

Constructional view of the underside of the large table:

And finally, a shot to show the grain pattern in one of the small tables in a favorable light. The knot was filled with superglue then smoothed:

The tables have turned out a bit more plain than I had originally intended. The bead could perhaps have been bolder or perhaps reeding to make it stand out more, and I am still contemplating a bevel on the underside of the tops. The tops of the small tables have to come off for a little, ahem, rework anyway, because it transpires that allowance that I left for planing the edges was a little generous... they do not quite slide under the big table from the ends!


