Table saw dust extraction

UKworkshop.co.uk

Help Support UKworkshop.co.uk:

This site may earn a commission from merchant affiliate links, including eBay, Amazon, and others.
Karl,

In the end I blocked all gaps round the underside of the table, the arc shaped hole on the back of the cabinet and the louvres on the motor cover. The area of the remaining gaps came to about 60 sq cm and the dust port is 78 sqcm so fairly well matched.
The dust extraction is very much improved now.

Bob
 
James - that's what I thought! At £18 I thought it was worth a punt.

Bob - I saw your mods over on TWH. I think one of the main problems is a lack of suck at the extraction end. I'm going to invest in a bigger extractor. I think this will solve the majority of the problems. If it doesn't then it is back to plan A of the under blade extraction.

Cheers

Karl
 
Sounds good guys. One issue I'm not too sure about on top guards is that in the US Shark (whose product gets good reviews http://www.leestyron.com/default.php ) go for a very wide top guard, and also a large 4in duct connection with a commensurate 400 cfm approx high airflow.

Felder on the other hand go for a relatively narrow one, at least on my K3 saw anyway http://www.felder-tooling.co.uk/8-420-7 ... 1-1-0.html - it looks quite similar to the De Walt item in your picture Karl, and is maybe another source of guard for retro fitting.

I can't see why a wide guard adds very much when almost all of the chips the top guard is required to collect tend to shoot off at tangents to the saw teeth - in the plane of the blade. I haven't got the Hammer running yet, but this was what my prior Robland seemed to do.

My thinking is that if enough air is moved through the guard then it'll pull any loose dust etc in from the sides anyway - it's in the end not the width of the guard that matters, but the size of the low pressure area created around the blade. Also of course that the profile of the top surface should be such that it hooks back a bit to capture chips.

One change I'm for this reason planning to make to the Felder guard is to glue on a 4in dia stub for a 4in duct, this because much like the De Walt the stock stub is small and restrictive - possibly 2 1/2in? This can probably be accommodated on a narrow guard by making the stub from a length of acrylic plastic tube (presuming the guard is acrylic) and flattening one end (after heating) to form an elongated oval. The cross section of the oval will be similar to the 4in duct, but narrow enough to mate nicely with a lengthened slot in the top of the guard. Bostik Tensol 70 (a two part adhesive used by plastic fabricators) is excellent for bonds like this on acrylics..

Does anybody have any views on the usefulness or otherwise of a very wide guard like the Shark item?
 
The advantage of a wide guard is the ability to guard satisfactorily at a 45 deg tilt. If the guard is narrow, a 45 deg tilt becomes difficult at any depth.
I agree the Shark looks good.
S
 
Thanks Steve. Does a narrow guard make sense when mounted on a riving knife (like on the Hammer saws) do you think?
 
I'm not sure if this is much help but, in a Fine Woodworking article, the writer used what appeared to be fridge magnets (rectangular pieces the size of playing cards) to block the slot in the side of the saw where the angle adjustment moved. They were just moved along by hand when changing the angle. Maybe one cut to fit around the adjusting wheel would give a really sound seal.

I hope I'm not too late with this.

Regards

Eoin
 
ondablade":2m9rmkm0 said:
Thanks Steve. Does a narrow guard make sense when mounted on a riving knife (like on the Hammer saws) do you think?
Well I suppose the bigger the guard the more likely it is to foul the fence if the workpiece is narrow. I don't really know if it makes any other difference. I'll give it some thought.
S
 
I don't know about your saw's, but when I rip/edge say a couple of mm's off, the dust seems to come on to the table at about 45degree to the blade. Paul-Marcel has done a few mods to deal with this at 3.26 in.
 
I know this is an old thread, but I finally got the problem fixed.

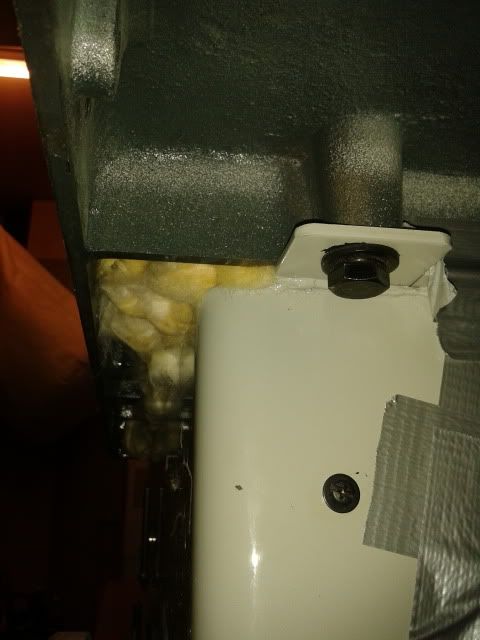
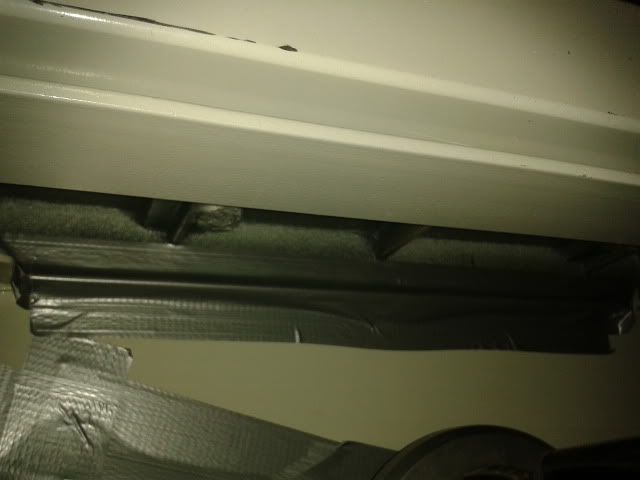
I ended up taking the easy way out and going for more suction rather than complicated mounting of extraction parts. So I bunged up all the holes around the top of the table saw with a mixture of loft insulation and duck tape.

2011-10-26141819.jpg


2011-10-26141813.jpg


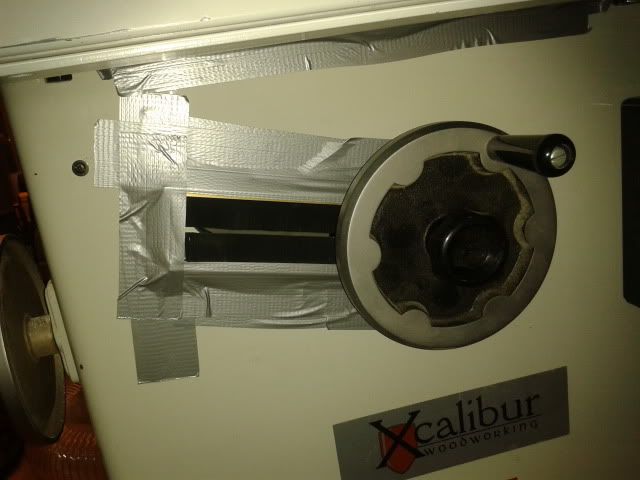
I also used Bob's trick of draught excluder for the handle to move through when tilting the blade through 45 degrees - note the extensive use of duck tape!

2011-10-26141801.jpg


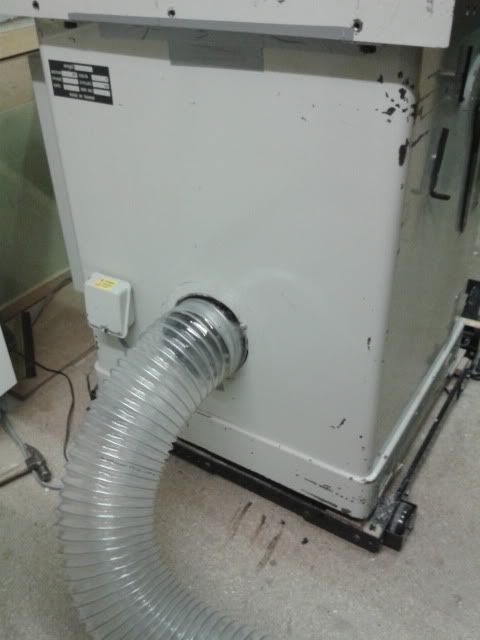
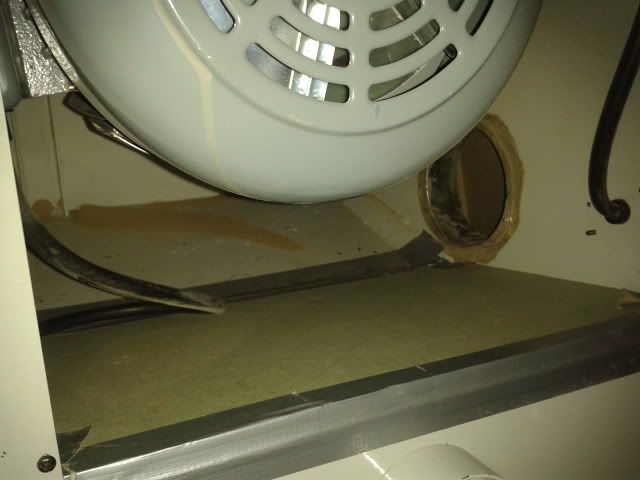
Finally, I cut a new hole for extraction. I've upgraded my ducting to 6", and the original port was 4" (actually less - the internal section was blocked off by part of the cabinet construction; I reckon it was only about 3"). I also mounted this on the rear of the t/s as this is more convenient for use with my extraction set-up.

2011-10-26141831.jpg


Results? Highly impressive - you can hear the suction whistling through the holes around the blade on t/s top. Test cuts on a few pieces of MDF this morning showed much improved extraction, and that was without the crown guard extraction running.

Cheers

Karl
 
Karl,

What did you use to cut the round hole in the rear of the cabinet. I will shortly be tackling my dust collection and need to move the dust outlet port to the back of the saw. Any tips would be appreciated.

David
 
The pictures are not showing up for me on this one thread.
Any ideas at all folks.
All I get is a reference to photobucket.com and thats it.

regards
Al
 
Bluekingfisher":27d44bgl said:
Karl,

What did you use to cut the round hole in the rear of the cabinet. I will shortly be tackling my dust collection and need to move the dust outlet port to the back of the saw. Any tips would be appreciated.

David

Hi David

I just used a metal cutting blade in a jigsaw. Slow the speed right down. If you're using smaller extraction pipe (mine is 6") you might need to make relief cuts before going for the final cut as the radius may be too tight for the thickness of the blade.

Cheers

Karl
 
Thanks Karl, I can already feel my pulse racing at the thought of cutting into the cabinet of my saw. I'll make sure I buy some quality blades and some mini grinding disks for my die grinder.

One other point....my current outlet is on the left side of the saw (looking from the front) Like you having it emerging from the back will save a lot od space and duct work. The only thing is, there is an internal sloping right to left shelf to assist the dust towards the dust port. Is this similar with your saw and if so did you alter it towards the back to suit your new outlet??
 
Excatly the same situation with my saw David. I just cut a piece of 12mm mdf to fit inside the t/s which sits on the floor and creates a "valley" - the new d/x port sits at the bottom of this valley.

2011-10-31153106.jpg


Nothing fancy - just seal it up with caulk and duck tape. Be careful to make sure that there is enough clearance for the motor to still swing past into 45degrees.

Cheers

Karl
 
Thanks for getting back Karl, if memory serves the existing sloping tray in mine is held in place by four small bolts. As I sit here at work I am hoping they have hex nuts rather than pop rivetts, I'll double check tonight when I get home.

Thanks again for the feedback, much appreciated
 
No problem David. When time permits i'll probably make a proper internal chute - tapered on 3 sides towards the d/x port. The mock up i've done for now was out of necessity of getting the t/s back up and running for work purposes.

Cheers

Karl
 
Karl, As a hobbyist I have the luxury of time (it being money) Thanks again for your assistance on this matter.

I like the look of the cutter Noel has identified above, if it's not to pricey I may buy one although I don't know when I would use it again??

David
 

Latest posts

Back
Top