stoat-o-matic router lift

UKworkshop.co.uk

Help Support UKworkshop.co.uk:

This site may earn a commission from merchant affiliate links, including eBay, Amazon, and others.

stoatyboy

Established Member
Joined
9 Feb 2009
Messages
242
Reaction score
0
Location
Sussex
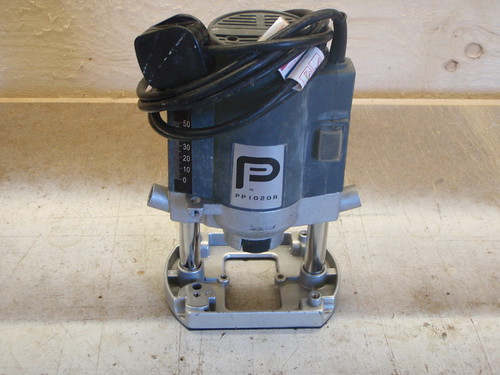
ok so it's not a new idea but i've just done it and it was relatively easy so hope this might help others:

Buy a cheap router from boot sale £5 - can get them new for £25 if it breaks from B&Q
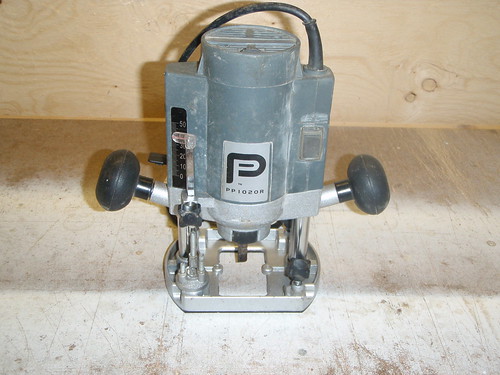
4743005847_333f2a2a9e.jpg


take all the bits off
4743012129_55d81a8043.jpg


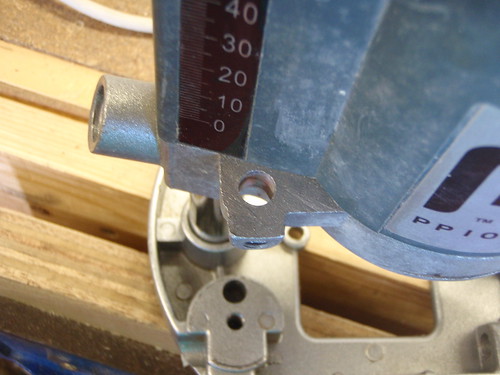
note how depth guage hold and depth stop hole line up
4743635718_5e792456ac.jpg


line up perfectly
4743637616_d696df88b4.jpg


take off legs
4743016205_4d50d30015.jpg


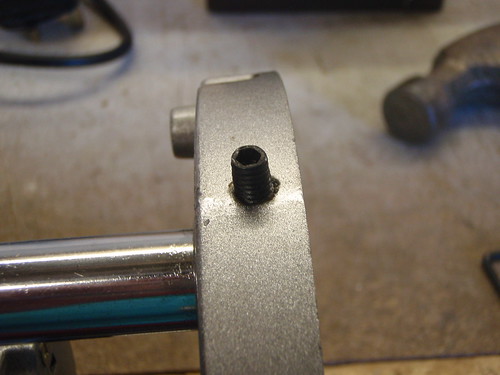
don't forget nasty little grub screw that got stuck requiring purchase of screw extractor kit from screwfix - amazing piece of kit if you've not got one get one - anyway take out grub screw and use drift to knock out legs
4742996877_41cf27bb43.jpg


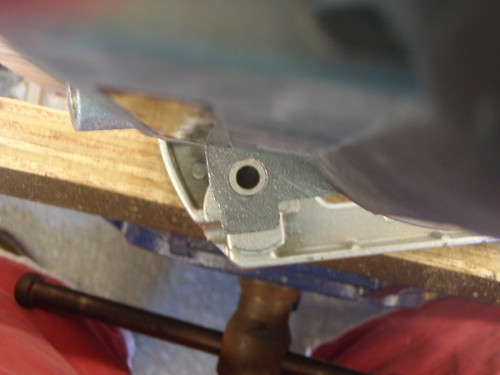
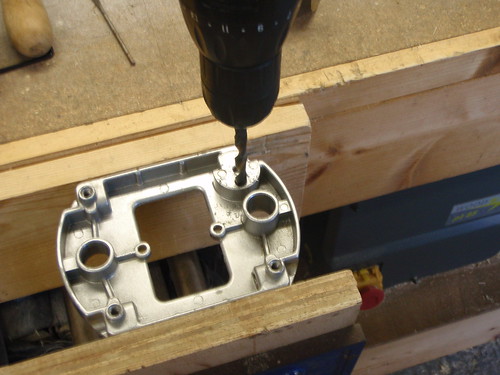
drill hole through base plat using depth stop hole as guide - its exactly the right size - 8mm
4743655444_d333532131.jpg


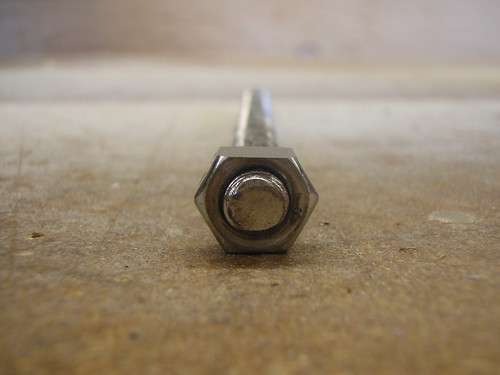
find bit of M8 threaded rod from tin of assorted bits of bolts and stuff flatten one edge of bolt so it sits flush against side of router
4743029049_4c20ba4faa.jpg


drill hole in other end of rod and glue in M4 allen head bolt (tried to thread it but the correct size hole for M4 is 3.3mm drill which I didn't have - and 3mm didn't work as I am cack - there's nothing wrong with Araldite - make sure you put a washer in between the rod and M4 bolt to stop the rod falling out the 8mm hole you drilled earlier
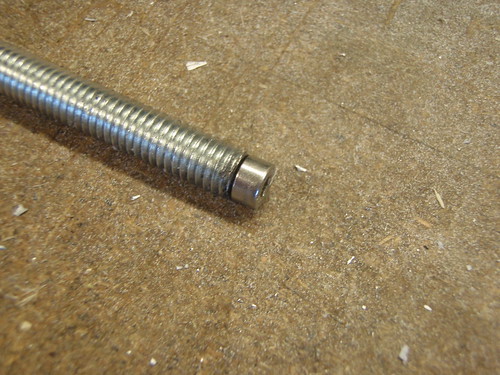
4743041375_55dbe322f5.jpg


here's how it sits in the base (its a little proud but i reckon itll still be below my router plate surface - if not i can sink it a bit more
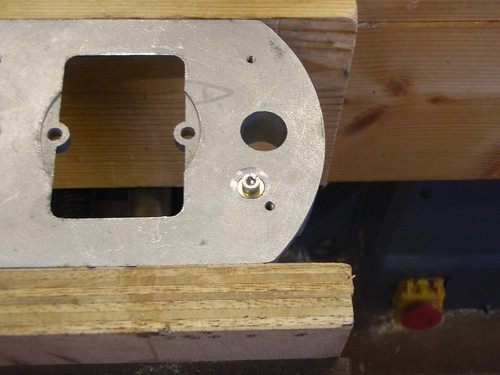
4743022663_f74fa0b9ea.jpg


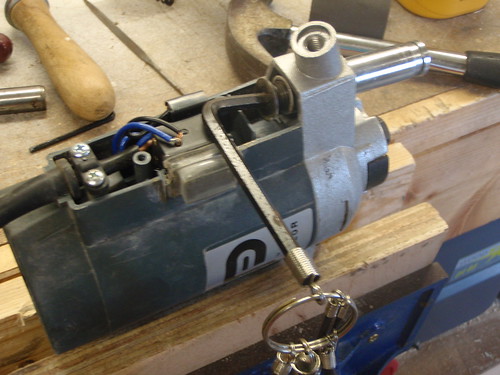
and here it is having just wound the router up - the allen key is sticking out the bottom -I'll have to make some winding handle later. the nut is just visible just below and to the right of the '0' on the depth scale - it's just glued in/on.
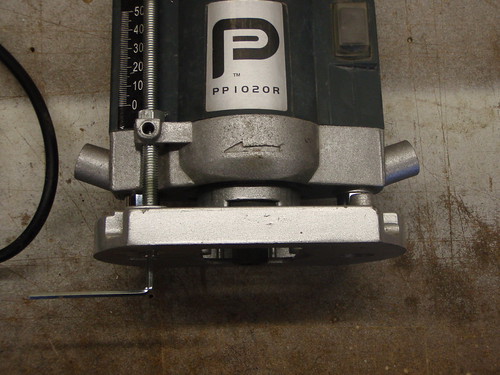
4775369374_73570d0b09.jpg


That's it - thanks to all for the help on the 'holes for tapping' thread just a bit further down than this one
Sorry to mods if too many photo's - I left out half of them
Cost - £5 and a screw extractor set!
now I just need to build a router table to put it in!!!

Thanks for looking

Pete
 
You should see if you can fit it to an old dremel or something now so you have electric wind up and down. :)
 
Thanks Chems - I'll put that on my 'to do' list after

- building the router table
- sorting out some decent sharpening system
- dust proofing the table saw
- fitting castors on the workbench
- finishing the blasted bedside cabinets I started making in January after seeing your design!

or did you mean just put an allen key socket head thing in my electric drill and wind it up with that? - I could manage that!

Cheers
 
stoatyboy":1kne7c71 said:
Thanks Chems - I'll put that on my 'to do' list after

- building the router table
- sorting out some decent sharpening system
- dust proofing the table saw
- fitting castors on the workbench
- finishing the blasted bedside cabinets I started making in January after seeing your design!

or did you mean just put an allen key socket head thing in my electric drill and wind it up with that? - I could manage that!

Cheers

Thats just a mornings work! I meant sort of under the table type arrangement, but a drill/driver with the right end in would probably do to get the bit all the way up and all the way down when needed. If you got an Extreme extension you could also change bits above the table. I have that router in the McKeller format, was my first router I put in a table and changing the bit was a nightmare around the dust shroud.
 
Hi Guys,

I didn't tap any holes - was going to on the one in the depth guide but decided i'd go for the araldite option - much easier for me - and cheaper as i'd have to buy a suitable tap.

the one I drilled in the base plate no - doesn't seem to be a need

As for the under table lift well I heard RR was going to do one - wern't you?

I'll look at the extreme extention when I get it fitted - and Chems you work too fast!!

Pete
 
I wish!

I may have to copy your idea and do it to my little router, looks like fun.
 
stoatyboy":2qc88s06 said:
As for the under table lift well I heard RR was going to do one - wern't you?

Pete

He's already done it. :)

Taken it to phase two in Aluminium,waiting for the Aluminium and even if I had it couldn't show it in operation as I'm waiting for the router plate :roll:

Its motorised,moves up and down at the press of a button,twiddle the pot for speed,throw the switch for upping and lowering the height.

Lovely stuff. :wink:
 
Fitted this to my new (to me) SIP table saw today using old B&D router with no problems took about an hour plus time to make extension table raises simply with 3mm allen bit in cordless drill excellent idea much appreciated
 
HI SB
I'm attempting to do this with a B&Q 1250W router which is presenting greater difficulty in dismantling; on the bais that monkeys put it together then this monkey can take it apart.

One question - did you put the springs back in? Somewhere else I've seen a not dissimilar mod and the springs were removed to reduce the load on the screw thread and the weight of the motor was enough to take the head down anyway.

Rob
 
OldWood":3as49r0c said:
HI SB
I'm attempting to do this with a B&Q 1250W router which is presenting greater difficulty in dismantling; on the bais that monkeys put it together then this monkey can take it apart.

One question - did you put the springs back in? Somewhere else I've seen a not dissimilar mod and the springs were removed to reduce the load on the screw thread and the weight of the motor was enough to take the head down anyway.

Rob

You would need to remove the springs - be bloody hard work otherwise!

Dibs
 
Hi - I wondered who SB was!! doh

I left one spring in - being a sort of sit of the fence kind of guy

I thought that with no springs it might sort of 'flop about' even with the threaded rod fixed

it's definately harder to wind up with springs than without though

I did have to pursuade the legs 'quite hard' to come out of the base. 'quite hard' on my scale is just below 'this is the hardest i've hit anything that I didn't want to break' and just above 'gosh that came out easy'

Cheers
 
Left both springs in on mine bit of grease on the thread and wind up or down with hex key in cordless drill. Doing it this way means you don't have to glue the nut to the router as the spring will push back and converting back to hand held router with depth gauge takes seconds.


Oldwood if you're using the same router as me I couldn't remove the split pin on the one leg. I just locked the height adjustment on the free'd leg and gave it gentle:shock: persuasion with a hammer until the base came of the shaft. I was then able to swing the base plate 90 degrees so I could drill the base hope this helps can take photos if you like
 
Back
Top