Steve's workbench build

UKworkshop.co.uk

Help Support UKworkshop.co.uk:

This site may earn a commission from merchant affiliate links, including eBay, Amazon, and others.
Yesterday I blocked up the legs from 2 pieces of 4x2, but I don't have pics. I'll take some when I work on them. I'm a bit disappointed that one board was very badly stained. I thought it was just the surface and it would plane off, but no, it goes right in. Not just blue, but orange, too. Never seen anything like it. As a single piece it could look quite attractive, but it's not what I want here. I'll put those to the inside of the frame, and if it still bugs me I'll get the paintbrush out.

Unusually for me I'm trying to think ahead. I'm going to re-use my existing QR vice. As it is mounted at the mo, it is proud of the front edge of the bench. This was to allow me to slip auxilliary jaws over them for specific tasks. In particular, my original mortising jig was used like that. These days I have (even) better options, so my rear vice jaw is going to be flush with the front edge of the bench top. So I need to excavate.

This is easier to do now rather than after I have glued up my top. I was not in Noisy Mood today, so I decided to go old-school.

P1060109.JPG


P1060113.JPG


That left me with a deep cavity for the rear (metal) jaw of the vice.

P1060114.JPG


Then the same again, wider but shallower, for the (replaceable) rear vice jaw.

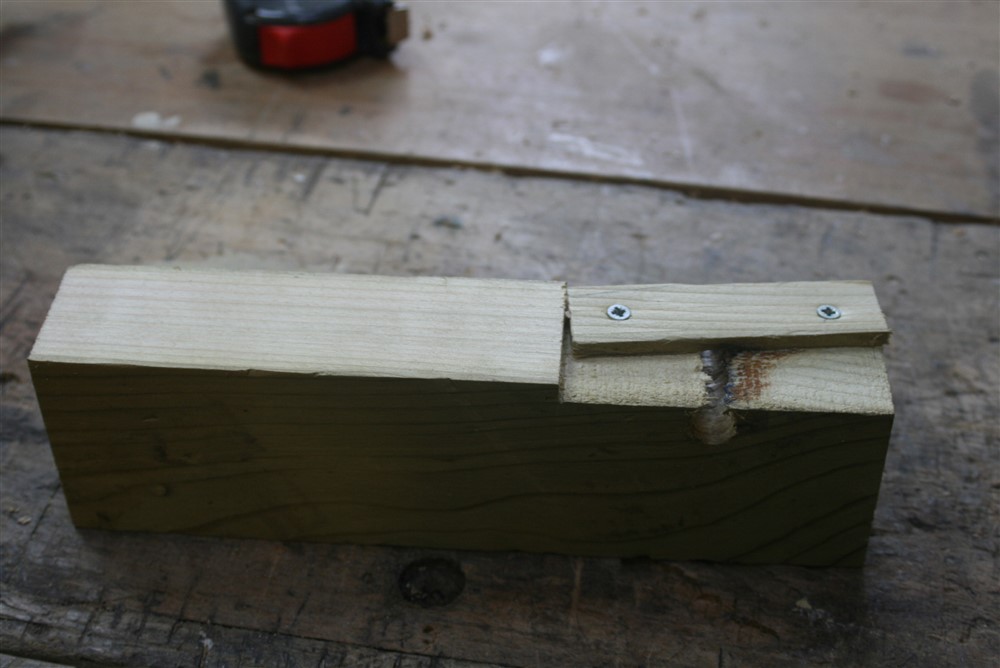
Remember I cut a groove right the way along with my dado stack for the sliding deadman? That was a mistake. Not a huge, project-destroying, mistake, but it meant I had a groove in the vice area which I neither needed nor wanted. So I back filled it in that area. That filler piece went in perfectly straight off the saw, by hand, without a hammer and not being sloppy. I was fairly surprised myself. I thank you.

So this is the end result:

P1060116.JPG


Not sure if I'll get anything done tomorrow, I'm having my eyes counted. I hope it gets to 2, but I fear the verdict will be one-and-a-bit :(
 

Attachments

  • P1060109.JPG
    P1060109.JPG
    236.2 KB
  • P1060113.JPG
    P1060113.JPG
    240 KB
  • P1060114.JPG
    P1060114.JPG
    228.3 KB
  • P1060116.JPG
    P1060116.JPG
    247.9 KB
MikeG.":1r0rjamk said:
Steve Maskery":1r0rjamk said:
........I decided to go old-school.


...........(

Have you been out in the sun without your hat on again Steve? Those are hand tools. HAND TOOLS.

:lol:

All is not right with the world.
Dr. Peter Venkman: This city is headed for a disaster of biblical proportions.
Mayor: What do you mean, "biblical"?
Dr. Raymond Stantz: What he means is Old Testament, Mr. Mayor, real wrath-of-God type stuff. Fire and brimstone coming down from the sky! Rivers and seas boiling!
Dr. Egon Spengler: Forty years of darkness! Earthquakes, volcanoes...
Winston Zeddmore: The dead rising from the grave!
Dr. Peter Venkman: Human sacrifice, dogs and cats living together - MASS HYSTERIA!
 
To keep these top boards aligned I'm using my big Domino because it's quick and easy and what's the point in having it and not using it. I could do the job just as well with a router or on my hollow-chisel mortiser, it would just be slower. The holes go right through, except for the front and back strips.

P1060105.JPG


P1060106.JPG


I made sure that the Domino was free to move inside its mortises by ensuring that I did not get glue inside the holes. I glued up the first four boards, but I had to wait until the end of the day for the temp to reach 10C, the minimum specified by the manufacturer. By doing this in two stages I minimise the amount of heavy lifting I have to do.

P1060124.JPG


While I was waiting I prepped the legs and rails. I blocked up the legs a couple of days ago

P1060118.JPG


They are quite badly stained blue and orange, which I really don't like very much. This may end up getting painted, unless it grows on me.

So today I machined them and finished them by hand. And to prove that I don't just pose for hand-tool pics...

P1060123.JPG


here is the evidence

P1060119.JPG


Wide, gossamer-thin shavings that I can read text through. Wonderful.
 

Attachments

  • P1060105.JPG
    P1060105.JPG
    239.1 KB
  • P1060106.JPG
    P1060106.JPG
    209.8 KB
  • P1060124.JPG
    P1060124.JPG
    243.6 KB
  • P1060118.JPG
    P1060118.JPG
    222 KB
  • P1060123.JPG
    P1060123.JPG
    250.4 KB
  • P1060119.JPG
    P1060119.JPG
    214 KB
The bench top (front section) is now all glued together and is starting to get a bit heavy. But it is pretty good on flat. There is about 0.5mm of crown in it at the moment, so that should not be too difficult to deal with, when the time comes.

P1060129.JPG


I'd blocked the legs up a few days ago, so it's now time to tackle the joinery. There will be two endframes of two legs each, joined together with bolted rails, so here I am building the endframes. I'm using double-tenon M&Ts, because they are very strong and I have a good way to make them.

I always thought that these were Twin Tenons, but someone pointed out that, according to Joyce, they are Double Tenons, two side by side rather than two in the same plane, as you might have with a lock-rail of a door. So I am not going to argue with Joyce, I shall just have to learn to change my terminology.

Double tenons are fantastic, as they double the effective glue area (these have a massive 33 in^2 per joint) and they spread the load further within the leg, whilst also maintaining more integrity of the leg. Win, win, win.

So I am using a 1/2" chisel to cut two mortises with a 1/2" wall between them. That is 38mm in total :), which leaves a shoulder of 4mm each side. The pitch of this arrangement, the distance from the centre of one to the center of the other is 1" or 25mm. Ish.


The legs have finished up at 92mm square, the rails are 46mm thick. 38mm from 92mm is 54mm, which leaves 27mm each side from the mortise to the side of the leg.

P1060131.JPG


I'm cutting as deep as my chisel will allow, 75mm or so, to create the first mortice.

P1060132.JPG


I then install a spacer which is 25mm thick behind the workpiece to bring it forward by 25mm. The settings of the morticer itself remain unchanged.
P1060133.JPG


And this is the finished mortice

P1060130.JPG


I need to adjust the depth to cut the haunches at the top, but essentially the donkey-work is done.
 

Attachments

  • P1060129.JPG
    P1060129.JPG
    245.4 KB
  • P1060131.JPG
    P1060131.JPG
    243.7 KB
  • P1060132.JPG
    P1060132.JPG
    241.3 KB
  • P1060133.JPG
    P1060133.JPG
    244.2 KB
  • P1060130.JPG
    P1060130.JPG
    246.8 KB
You will recall that we ended last time with four mortised legs.

P1060135.JPG


It's now time to cut the matching tenons. I'm using my Ultimate Tablesaw Tenon Jig. It's the Best in the World. I know that sounds arrogant, but it is perfectly possible to be simultaneously arrogant and right. Of course, if you know of a better one, please let me know, I am always eager to learn.

The criteria for "best", in my book, are:

1. Accuracy. It has to produce accurately sized tenons than need minimal clean-up work. Mine fit straight off the saw, First Time Every Time. I know that there are also many other tenon jigs out there that are also accurate.

2. Speed of operation. Many tenon jigs rely on a lead screw for their precision. That is fine, up to a point. But it is a slow operation to wind from one cheek of the tenon to the other, and if you have to re-do a cheek for any reason (it happens) it is very difficult to get back to exactly where you started because of slop in the thread. Mine is a quick slide between two positions and I can go back to exactly the same place any time I like.

3. Speed of setup. The setup time of many jigs is annoyingly long. If you have to set stops for each cheek it can take forever, adjust, test, adjust, test, repeat. And then, just when you have the fit right, you discover that the tenon is not quite in the right place within the thickness of the workpiece (very important if you want flush face-frames), you have to start again from scratch. With mine, the thickness of the tenon is pre-determined and I require just one test cut to ensure it is in exactly the right place before I do my run. If it's not, I can adjust the position easily by as little as 0.1mm, without altering the fit. Even if I have to re-calibrate it for a new blade (the jig accounts for the thickness of the kerf automatically), I am good to go inside 5 minutes.

4. Guarding. Having the workpiece upright over the blade means that normal guarding is not possible. But that doesn't mean we have to use an unguarded blade. Mine has three guards: one at the front for when the jig is pulled back, one at the rear for when I am at the end of the cut, and a stand-alone guard at the side. In practice, it means I cannot possibly come into contact with the blade accidentally.

So. That is why it is the Best in the World, unless you know differently. Somebody, somewhere, has to have the Best in the World and it might as well be me :)

This is the initial setup.
P1060138.JPG


I have a Flat Top Grind blade with deep gullets for this job. There is a lot of sawdust to shift and that is what the gullets are for.

The tall post is a support for the workpiece and is replaced for every job. With the workpiece loaded against the support post and the guards in place it looks like this:

P1060137.JPG


The jig slides between two positions determined by a spacer. If the spacer fits, the tenon will fit exactly the same.

P1060143.JPG


There are 4 cuts to make. The jig runs on the saw's fence, so that is set to give me a 4mm shoulder with the jig closed up. This is cut 1:

P1060139.JPG


Then the spacer is inserted and, because of the automatic kerf-compensation, the second cheek is cut:

P1060140.JPG


That is the first tenon done. But we have a second tenon to worry about, and it needs to be offset from the first by exactly the same amount as my mortices are. So I use the same spacer as I used when mortising to move the jig over. Cut 3.

P1060141.JPG


Finally I use both spacers together to finish the cheeks:

P1060142.JPG


4 cuts, 4 cheeks, 2 tenons, perfect.

P1060146.JPG


Then I change back to my regular combination blade to cut the shoulders, with a crosscut fence. There are two different height settings, 4mm for the shoulders on the wide faces and 7mm for the shoulders on the narrower faces, shown here:

P1060151.JPG


I don't cut the top of the top rails, as they are the haunches. They will be cut separately.
 

Attachments

  • P1060135.JPG
    P1060135.JPG
    236.4 KB
  • P1060138.JPG
    P1060138.JPG
    393.5 KB
  • P1060137.JPG
    P1060137.JPG
    396.4 KB
  • P1060143.JPG
    P1060143.JPG
    344.6 KB
  • P1060139.JPG
    P1060139.JPG
    380.3 KB
  • P1060140.JPG
    P1060140.JPG
    381.9 KB
  • P1060141.JPG
    P1060141.JPG
    392.7 KB
  • P1060142.JPG
    P1060142.JPG
    387.7 KB
  • P1060146.JPG
    P1060146.JPG
    346.9 KB
  • P1060151.JPG
    P1060151.JPG
    235.5 KB
I also have to cut out the waste between the tenons, and this can be done by hand with a chisel, or nibbled out on the TS, but as I still had the mortiser set up...

P1060148.JPG


I can now check the fit. Does it fit perfectly? Course it does!

P1060145.JPG


So all that is left to do is trim the width and that is best done on the bandsaw:

P1060153.JPG


And so we have Goldilocks' Slipper:

P1060152.JPG


I still have the rest of the tenons to trim and the top haunches to cut, but I had had enough in the workshop and my mate Charlie called round. So I'll probably finish all that off tomorrow while you are not looking.

And there are some holes to drill, too, before glue-up. Holes for the lag screws to hold the top down, holes for the stretcher bolts and holes for storage of the holdfasts when not in use. And all the edges need chamfering. All that is easier to do before glue-up rather than afterwards.

But the actual tenoning itself is done.
 

Attachments

  • P1060148.JPG
    P1060148.JPG
    229.8 KB
  • P1060145.JPG
    P1060145.JPG
    327.8 KB
  • P1060153.JPG
    P1060153.JPG
    226.2 KB
  • P1060152.JPG
    P1060152.JPG
    190.6 KB
Are you pegging that Steve? I mean, I know it doesn't need it, but there can't be a better feeling in woodworking than hearing the sound of a peg going tighter and tighter, and watching it pull the shoulders in with just a hint of squeeze-out. I did it 4 times today, and I'm still smiling about it.
 
Mike! You tempter, you!
I did think about it. I've done it before and you are right, it is a very good feeling. But it's more work and I'm trying to do this quickly without it dragging on. I used to have my dad's dowel plate. Imperial, but 5/16" is 8mm as near as makes no difference. But I can't find it, so I assume it was part of the Great Haul. I do have a design in my head for a dowel maker on the RT, and that would make an article/video in its own right, but cleft dowels would be better. But I don't want to shell out £55 for a Lie-Nielsen one, much as I love his stuff.
So now I am looking at stopping this build whilst I make, and film, and write up, a new dowel jig, so I can peg joints that don't need it, before I can get on and finish my new bench before the Squatters arrive for the spring! Grrrr!
Do you want round-headed pegs or square ones?
:)
 
I made a dowel jig in under 10 minutes the other day, Steve. One chisel, two holes, and a drill. It made immaculate pegs first time to within 0.2 of a mm of what I wanted. It shouldn't hold you up at all.........especially as we now know you do in fact own a chisel. :lol:
 
MikeG.":1g1s2z9t said:
.......especially as we now know you do in fact own a chisel. :lol:

Cheeky bugg-er! :)
I wonder if the Pineapple Police will let that through? Let's see, shall we?
Edit 1: No they don't. Let's see if a hyphen fools them.
Edit 2: Ha-ha! beaten them!
 
MikeG.":psbvd0zr said:
I made a dowel jig in under 10 minutes the other day, Steve. One chisel, two holes, and a drill. It made immaculate pegs first time to within 0.2 of a mm of what I wanted.

No you didn't Mike, No you didn't

NP, INH, as they say :)

S
 
Steve Maskery":2puxfq9a said:
MikeG.":2puxfq9a said:
I made a dowel jig in under 10 minutes the other day, Steve. One chisel, two holes, and a drill. It made immaculate pegs first time to within 0.2 of a mm of what I wanted.
No you didn't Mike, No you didn't
NP, INH, as they say :)

Pictures tomorrow Steve, after my stairs are erected today.
 
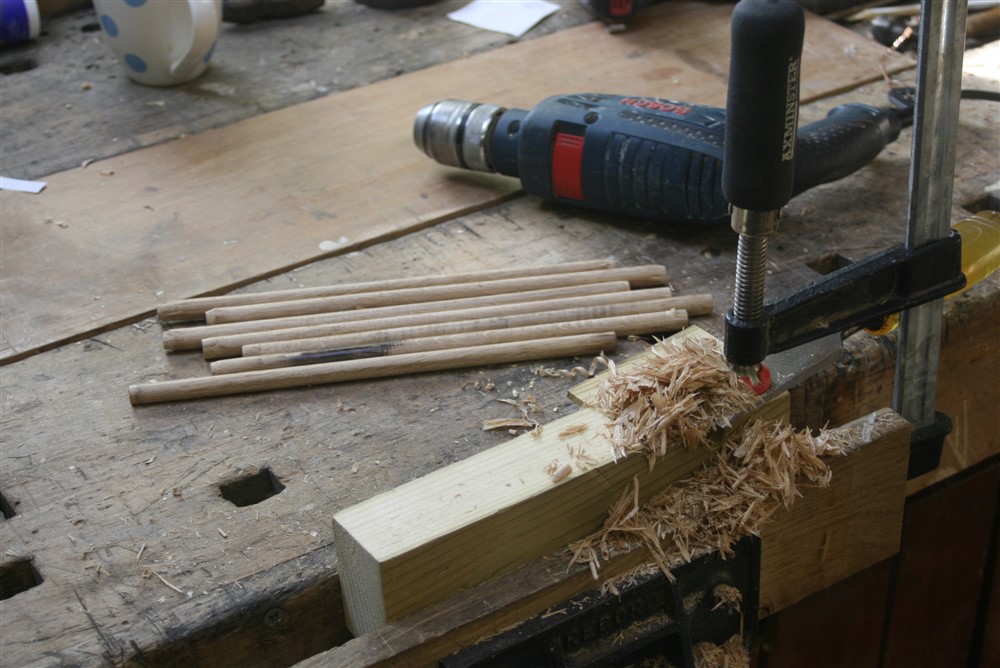
So you have two holes, the smaller one being the dowel size, the big one being the corner size of the original stock. The blocks is cut back to be tangential with the exit hole. The angled bit supports the chisel.
Is that right?
 
That's it in a nutshell, Steve. The platform on which the chisel sits is very slightly below the top of the exit (final dowel size) hole, and adjustment is by moving it further in (smaller dowel) or further out (larger). After the burnt dowel (see previous photo), I just tapped the and of the chisel handle with a pin hammer to take a tad more off. Having a good depth of exit hole helps stability, and the depth of the infeed hole is unimportant. I didn't even make mine on the pillar drill, which is out of action at the moment, and just free-handed it.
 
I'll try it Mike. But I have tried a similar jig years ago and couldn't get it to cut nicely at all. I made a jig for the RT and that worked great, though I don't have it any more. I do have a design in my head for a replacement, but if I can get yours to work, I'll be pleased. I'll keep you posted.
 
If you want a nice cut, then don't withdraw the dowel back through the jig when you've finished the length of it. Disconnect it from the drill and turn it through the jig in the same direction you were going. Withdrawing the dowel puts a helical mark along the length of the dowel, varying with the speed of withdrawal.
 
Back
Top