Step Stool in Brown Oak - Finished

UKworkshop.co.uk

Help Support UKworkshop.co.uk:

This site may earn a commission from merchant affiliate links, including eBay, Amazon, and others.

OPJ

Established Member
Joined
31 Jul 2005
Messages
5,566
Reaction score
1
Location
North Somerset
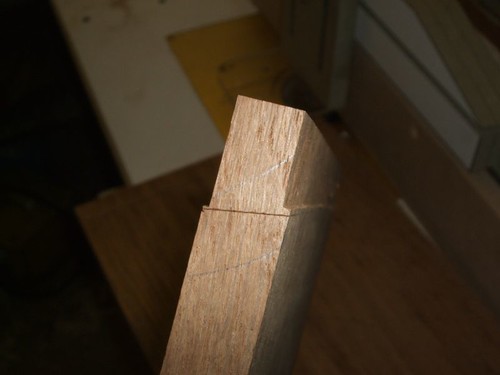
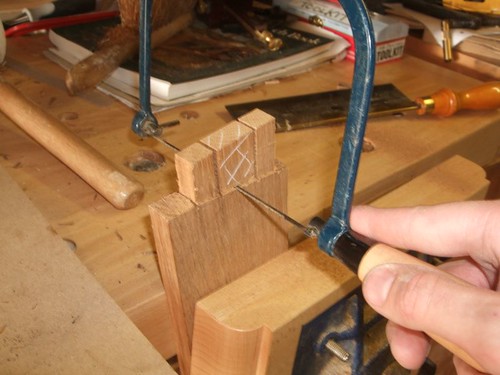
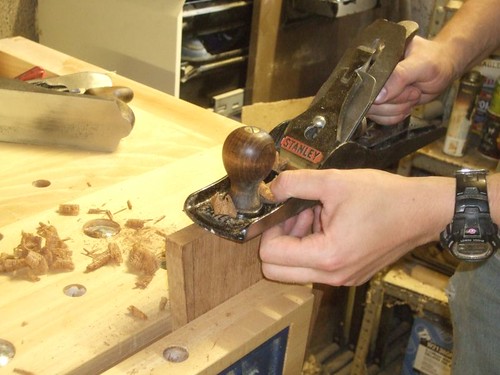
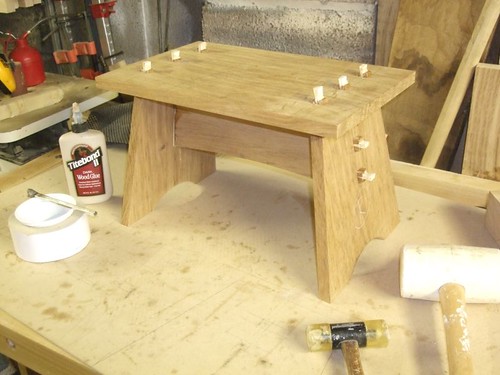
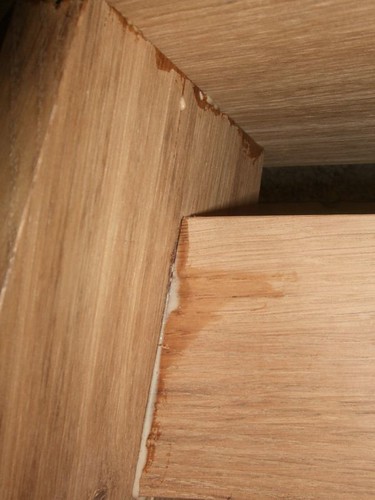
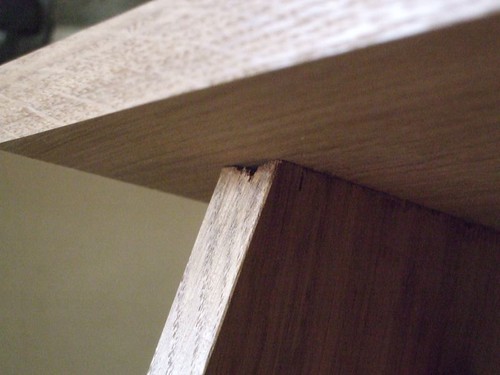
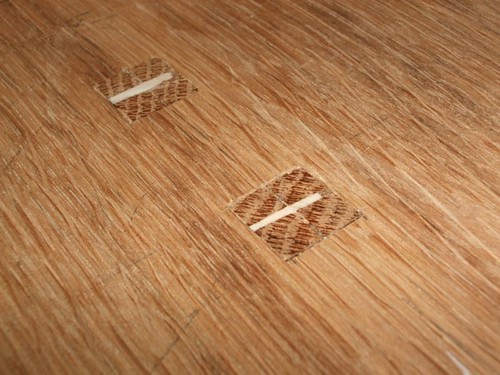
I'm trying to kill some time at college in between my two main projects so, with bits of brown oak left lying around, I've begun working on a small step stool. This won't be appearing in the magazine as it's taken straight from a book titled Building Small Projects so, it's not my design. :( I can't think of many ways to improve it and I'd really like to have a go at some wedged tenons like this. :)

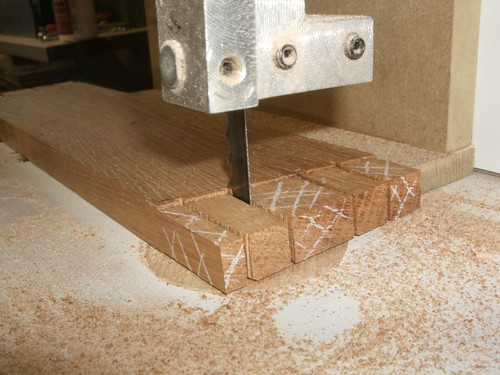
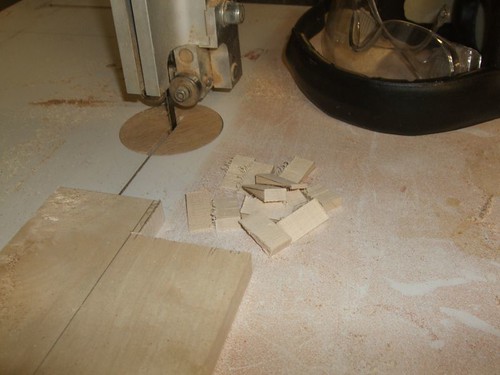
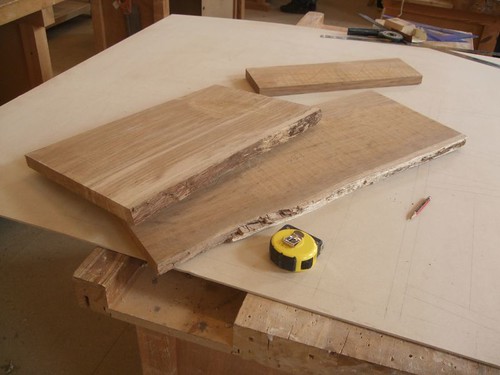
These are the offcuts I've chosen. It would've been nice to have gotten them from one length for grain continuity.

3414214679_eaa0bc1096.jpg


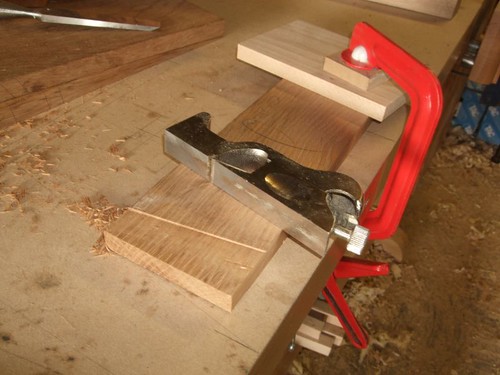
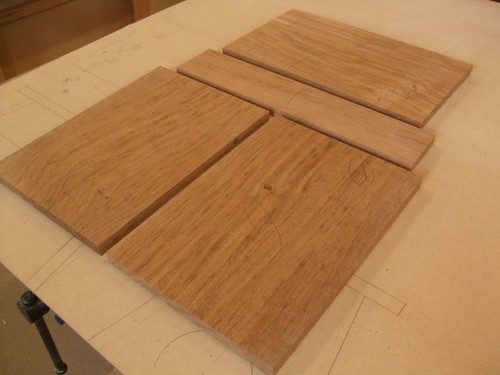
Here are the components after machining. I was aiming for a width of about 10", ending up with boards 240mm wide, which isn't bad, if you ask me. Because some boards weren't flat and had 'hidden dips' in them, I was only able to achieve a maximum finished thickness of 18mm, which is quite disappointing (the original design has a 1" finish; 22mm would've been nice). The boards weren't cupped at all; it's purely down to how they were cut or stacked.

3415021650_58c04ec97a.jpg


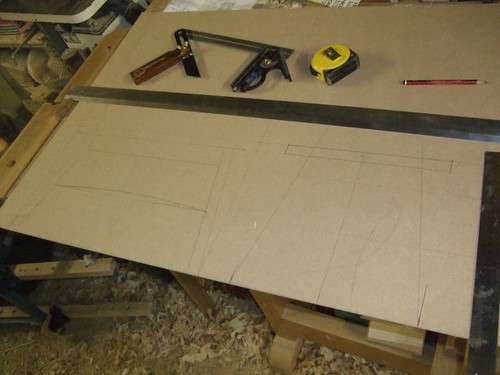
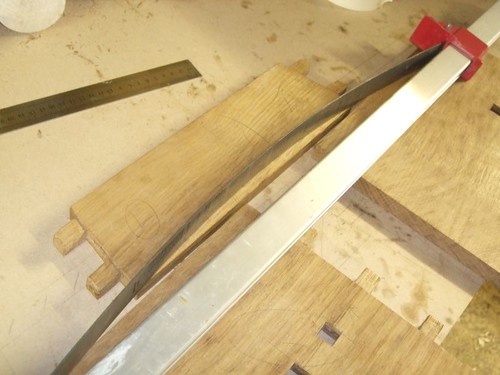
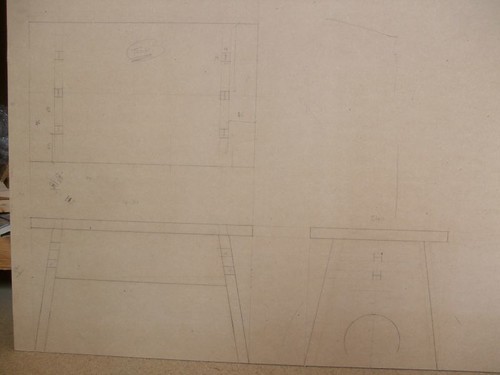
Once I had all the components machined, I drew out a full size rod. I have to admit, this is something I probably wouldn't have done at home...! :oops: :D I'll leave all the curved work until nearer the end so, don't worry about the rail or that badly-drawn curve on the end view! :)

3415021522_89b1002bcf.jpg


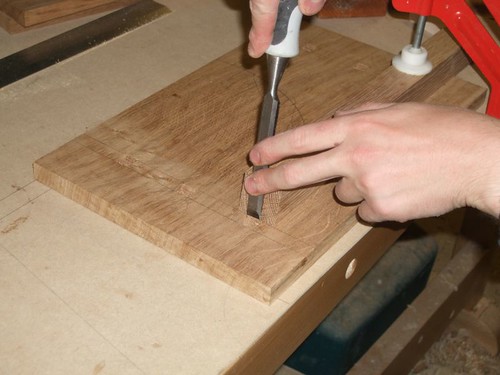
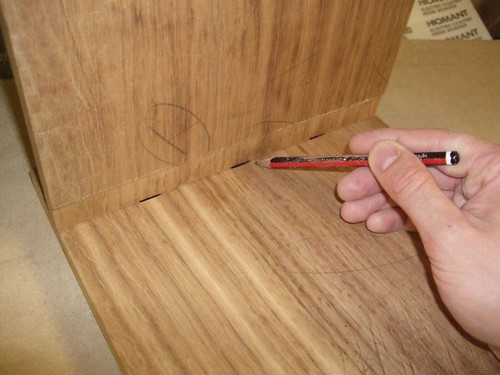
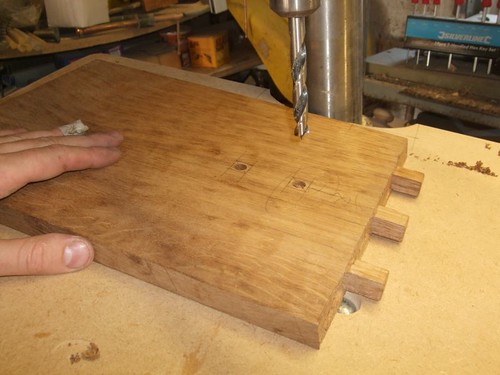
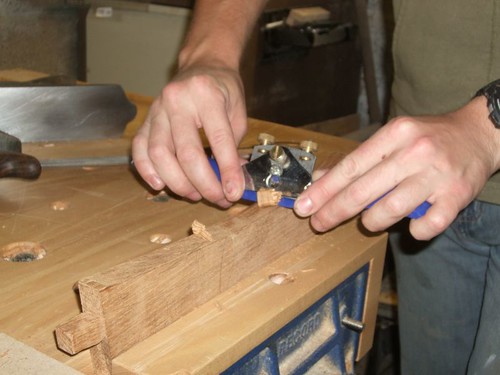
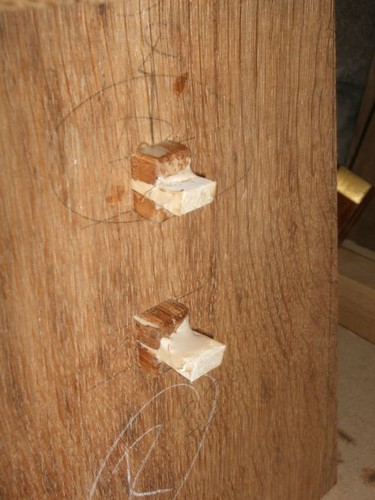
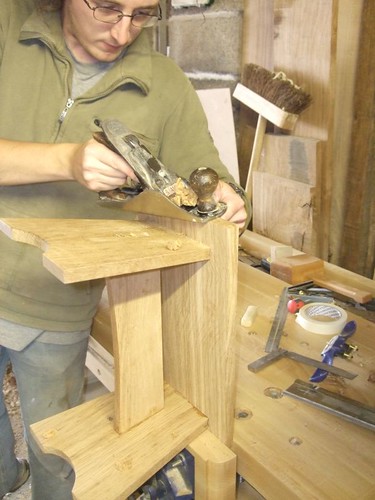
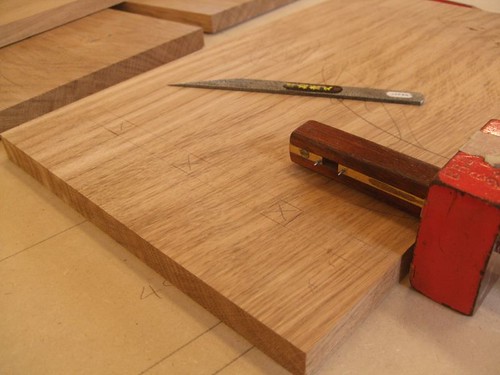
After the top to length on the panel saw, here, I'm setting out the mortises which will receive tenons from the two ends.

3414214761_fe2d46e8c9.jpg


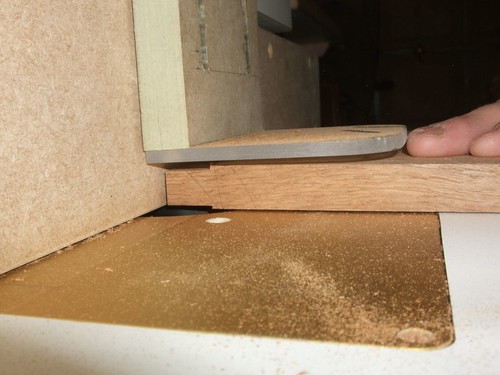
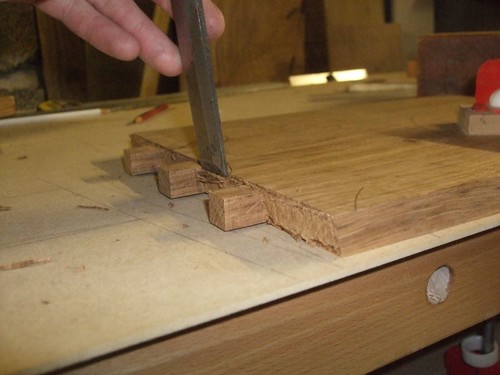
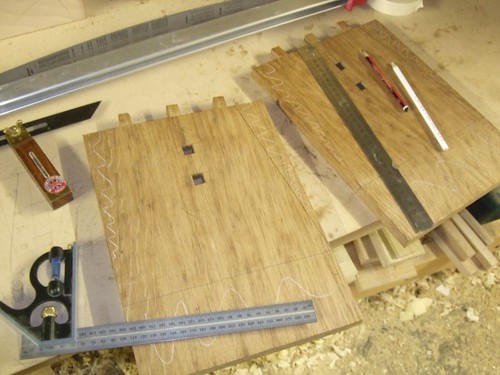
Because the legs are angled at 10°, I need to build a jig to drill the angled mortises accurately. I could just tilt the pillar drill table but, this jig will also come in handy for cutting the tenons. :wink:

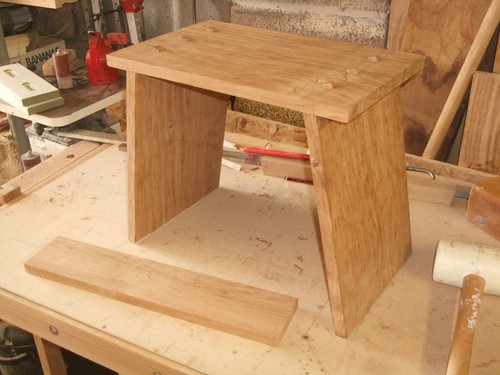
This is where I'm at right now; ready to make the jig. It's Easter for the next two weeks and I'll be picking up with other things straight after. So, while I'm looking to keep you all up-to-date on how things progress, don't expect to see this one completed any time soon! Feel free to add any comments though. :wink:
 
I'll be watching this one, as I desperately need to build a good step-stool, I'm sick of standing on tool boxes, benches, timber, badgers etc.. just to reach up into the ceiling of my workshop.
 
The grain looks fine ti me Olly. Not sure about the sun rise cut out on the sides though. Possibly a little dated. I'm not sure what else you could do though. Even an oval I think would look better.
 
Colin, while I'll be making this one for general use around the home, I'm also thinking up a larger one for use in the workshop! :wink: David Free did a pretty good one on Great British Woodshop a few years ago, with a fold-out step for climbing up. I'm thinking of something along similar lines... Although, I may add some kind of 'tool storage compartment' under the seat for use around the home. That's probably a few months away though... I reckon I'd use cheaper beech for that rather than lovely brown oak, as it's more likely to get knocked about! :D

Dom, when you say "oval", are you thinking of something shallow, which would help the stool to sit comfortably on wonky floors? That's the kind of line I'm thinking along at the moment - keep it simple and let the wood do the talking! :wink:
 
Precisely three months after my previous post :shock:, it's time for a new update on this little project! :D Due to a series of unfortunate mis-haps, I didn't get anything more done in this while at college (which finished at the end of June). I did manage to finish my main project though - you'll have to keep your eyes peeled for a future issue of British Woodworking to see that! :wink:

Out in the workshop yesterday, I re-draw the rod and made a couple of changes. The rail is now 38mm down from the underside of the top and, although I haven't drawn it here, I've going with a shallow curve at the bottom of each end. Don't worry, I did draw all the tenons before proceeding any further! :)

3697830554_164d8c1cbc.jpg


I finished chopping out the 10° mortises using a scrap of oak with a bevel at one end to help guide the chisel.

3702039732_8751a829a0.jpg


Next, I could start cutting some tenons on the router table, using my Wealden Tenon Cutter to remove almost 2mm from each face.

3701231233_4544af9a45.jpg


I left my knife-lines in so that I could chisel the rest away later. :wink:

3701231405_9cafa894a2.jpg


Tenons were marked directly from the underside of the top before cutting the waste with a fine-toothed gents' saw.

3701231343_c1352af61f.jpg


The remaining waste was removed with a coping saw - mind that 10° shoulder! - before chiselling back to the lines.

3702032564_df36f0da29.jpg


These weren't the tidiest joints I've cut with big lumps missing from the middle but, they won't be seen and the joints pull up nicely!

3702032632_6a67d48258.jpg


Chamfering the ends of the tenons helps to prevent them literally breaking-through the face side.

3701224209_c31fd78de9.jpg


This is how it was looking after a dry-assembly, earlier today. Please bear in mind that the legs aren't even cut to the same length here, which is why it looks so lop-sided! :) Time to fit that rail next...

3701224259_dd7977442c.jpg


This is what I should've done with the first set of mortises!! :roll: It certainly made life easier second-time around!

3701224309_3279c7d6ff.jpg


Back to the router table to remove most of the waste [...well, you know what I mean! :D] which left me with a little work to do with my shoulder plane.

3702033030_5e780631cd.jpg


At least I could cut the tenons on the bandsaw this time! :D

3702033084_df23859750.jpg


Again, using the coping saw and my set of bevel-edged chisels made from cheese-like steel... :x

3701231281_b92b384c87.jpg


Tomorrow then, I aim to get all the shaping done and will hopefully have this one assembled and wedged. I'll be adding sycamore wedges for contrast, cut from the waste of last week's quick-project. :wink:

Don't worry, Pete, the pine has been ordered and Chest of Drawers will soon be under way! This one's just a filler project to keep me sane in the mean time! :D

Does anyone have any thoughts on finishing? I usually go with Danish Oil, creating a smooth, glass-like finish - that's hardly ideal for a piece of furniture you're supposed to be standing on! :shock:
 
Looking good, Olly!
Oil is a good choice for Oak - brings out the colour nicely! I finished a pine step stool a few years ago with danish oil and it has stood up well (no pun intended).
Cheers
Philly :D
 
Looks to be an intresting project, don't like the brown oak much thou looks like nasty wood.

Your workbench looks fantastic in those shots. I'm still waiting for a final finish update!
 
Chems":1gwskjk7 said:
Looks to be an intresting project, don't like the brown oak much thou looks like nasty wood.

:shock: :shock: :shock:

You won't be saying that once it's oiled, Chems!!! :twisted:

:wink:

Thanks for reminding me about photographing my 'bench! :roll: Because the lighting in my workshop is so rubbish, I'm playing around with the settings on my camera so that I can use a flash without turning my bench orange! It's also covered in tools and wood at the moment; hopefully I'll be able to clear it for the weekend. :wink: I've also got wooden dogs and vice handles to sort out... Yep, I'm terrible at actually finishing things! :D
 
Not the finish of it doesn't look nice more the stringy nature of the grain? Reminds me of coarse pine.

Yes keep the blog going always an interesting read!
 
Mike,

Brown Oak is ordinary oak that has been exposed to fungus, which causes it to go brown, as distinct from the usual golden colour of English Oak.

Tiger oak is similar, but it has streaks of affected wood with streaks of normal toned wood.

The other oak that's nice to work with is bog oak, which of course has been buried in peat bogs, sometimes for centuries.
I'm sure you knew that last one of course.

regards
John :)
 
Yep, John's got the answer. :wink:

This fungus gets its name because it looks like a beef steak when it appears outside the bark! :D It does stain (most of) the timber brown, which also adds beauty to the grain without weakening the structural properties of the timber (as far as I'm aware).

Just wait until you see some of the stuff I used on my table! 8)
 
A supplier would be nice OPJ.

I can't spend much time at the bench now, so these days I am only making small pieces that don't require lumping around,

Thus, I wouldn't want shed-loads of the stuff.

(I can tell you have discovered the delights of working with Brown Oak and I reckon you'd agree, it's a joy to look at, and it possesses all the great working properties of ordinary oak. It's almost a shame to wax it! )

Cheers
John
:D
 
Hi John,

I bought my brown oak from Vasterns in Wiltshire. They have a branch in Wooton Basset but it was the sawmill in Calne who had the brown oak. Quite a lot of it too; all kiln-dried in 1", 2" and 1½" thickness. Prices are on a par with regular English Oak

That's probably a bit far for you so, I do suggest you get in touch a few local sawmills; particularly ones cutting British hardwoods and lots of oak. That's why Vasterns are able to stock so much of it; they're always cutting oak so, chances are, they're going to run in to a stained log every now and again! :wink:

There were several small mills and yards around the Bristol area with small quantities available, they just didn't have the amounts that I was needing. If you're only after a small quantity then, it really would pay to phone around. :)

Update on the stool to follow this evening! :)
 
Using a 600mm steel rule and a sash cramp, I sprung a tidy-looking curve for the rail.

3705052560_20539188c0.jpg


This was later cleaned up with my cheap Silverline spokeshave... I can get it to work okay but, the finish always needs a lot of sanding. I'm looking to upgrade this at some point and have my eyes on either the Clifton or one of the Veritas 'shaves... They are a bit dear for me at the moment so, I may end up buying an old Record off eBay for now. I've used those at college and can get them to work even better than my cheapo. :)

3704244241_0036282d44.jpg


Both ends required some attention...

3704243195_5c0e868ebd.jpg


Thanks to Karl, I am now the proud owner of a 2" Clifton cap iron - which means my Stanley no.5 can take end-grain shavings like this:

3704243001_4b0c923b5d.jpg


Ah, just look at those shavings! 8)

3704243575_97331fd8bf.jpg


This shallow curve was cleaned up with one of my Auriou rasps. My spokeshave couldn't get in to this radius!

3705052322_b70c974c3d.jpg


These hand-sawn kerfs will make some allowance for the wedges. I got these ones right but, I cut them the wrong way on the rail - and didn't realise it until I was gluing it all together!! :x

3705538340_1cde5364cd.jpg


Wedges cut from a scrap of sycamore left over from last week's build; 13mm thick [remember that measurement! :shock:].

3704731333_0c4afd01e0.jpg


Straight after lunch, with a lot of banging and surprisingly no swearing, I got the stool glued, assembled and wedged. I'm using Titebond's Dark Wood Glue [it's Titebond II, Mike!! :wink:], which only needs thirty minutes in the cramps! Scary stuff! :shock:

3704731467_98f76890a7.jpg


To be fair, it is very tricky to get the angles and shoulder length of this rail spot on. Sadly, I didn't quite make it and ended up with a slight gap. :( I tried sash cramps as well but, even they could barely help.

3705538824_f790a8e67b.jpg


I'm kicking myself about this though - I really should've know better! :x When I was 'cleaning up' the tenon shoulders (ie. deliberately under-cutting them for a tight fit), I didn't give any forward-thought to the fact that these ends would later be tapered in width!! :roll:

3705538484_eee7552077.jpg


I did hear the odd snap, crackle and pop when hammering these wedges home. :oops: No physical damage appears to have been done, from what I've seen so far...

3705538010_bb4a994933.jpg


This is where that 13mm measurement comes in... For some bizarre reason, I decided by mortises should be 14mm². What I should have done though, was to make them the same width of my chisel, which would have left me without this 1mm gap! :oops: It's also part-laziness in wanting to use up the first bit of prepared scrap I could find, instead of planing something to fit.

3705538652_c417a6d387.jpg


A lapse in concentration led to this disaster with a Pax fliush-cutting saw! :shock: It was the first one, as well. In all honesty, I haven't been sleeping well at all lately, hopefully that had something to do with it... :?

3705538736_1917cd3719.jpg


I need to find away to fill some of those gaps on the top surface. I may just cut some tiny slithers of sycamore to fill the remaining wedge-space. Anything underneath, I don't care; it won't be seen. :wink:

I've taken a slight detour away from this now while I try and decide what I'm going to do next. I'm back on the workbench looking at Bench Dogs for the next couple of days (look out for my Blog!). :)
 
It's fascinating watching this project progress, warts and all. It's brave of you to show us those points from which you're gaining experience. They're not mistakes - they're learning points ;) :) ! I'm convinced you'll still end up with a lovely little piece of furniture which would adorn any room.

I've actually had that same book for a while. There are some smashing projects in it, especially some very appealing Shaker boxes. It's great to follow one of the projects as it comes to fruition.

Gill
 
But you'll know it's there Olly!

Find a triangular sliver of oak to match the grain. (Take the corner off a piece of scrap)

Go in with a corner chisel, or a 'vee' gouge, until the damage has 'vanished'.

Glue in the sliver.

Some gaffa tape to clamp it, and when dry, flush back with a wide chisel.
You might still see the repair but it will be neater!

Best of luck Olly. I like that design and overall you did a nice job. The brown oak is a definite plus.
.................................................................

With the damage to the through tenon I would be tempted to rout out about 1/4 inch deep. Square up the corners and then cut a piece of end grain to fit with waste protruding.

put the router on 'ski-blocks' and set the depth of cut to barely touch the surface of the stool. Then rout away the end grain waste when dry. Then let in some of the light wood where it needs to go, finishing off with a sharp block plane.

John :)
 
Thanks, people. :) I'll give myself some time over the weekend to ponder over my next move here. John, I do agree with your thoughts on replacing the damaged through tenon with more end-grain.

One more photo' I forgot to add - and, something they didn't do in the book - adding a 10° to the top edges! 8)

3705537904_a09cc72fe4.jpg


I'm also playing around with my camera; trying to see if I can get a flash that won't turn everything red or orange! :shock: I've had this one for eighteen months now; I suppose it would pay to sit down and read the manual one day...! :D (That's why some of my photos are all different colours.)
 

Latest posts

Back
Top