Shaker Inspired Drinks Cabinet

UKworkshop.co.uk

Help Support UKworkshop.co.uk:

This site may earn a commission from merchant affiliate links, including eBay, Amazon, and others.

Jelly

Established Member
Joined
20 Sep 2012
Messages
1,366
Reaction score
340
Location
Sheffield
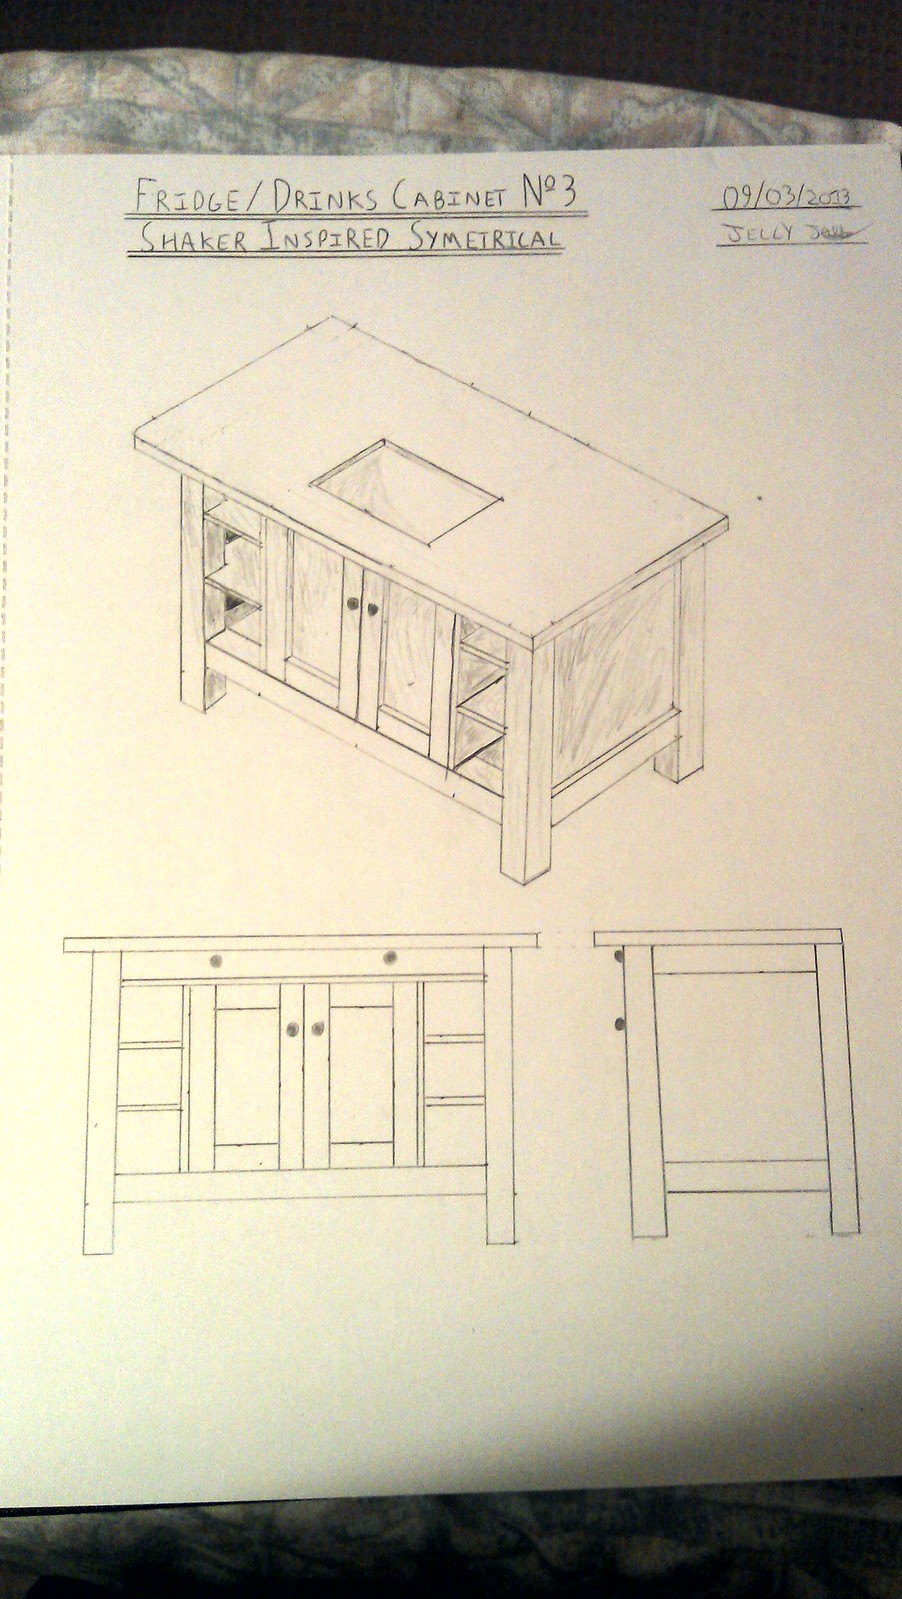
I suppose I should put a post up about this, I have been asked to make a drinks cabinet round an existing small fridge, I presented my friend with a couple of options, and they decided that this design matched their existing furniture best.
8542302261_2fe4abd8af_h.jpg


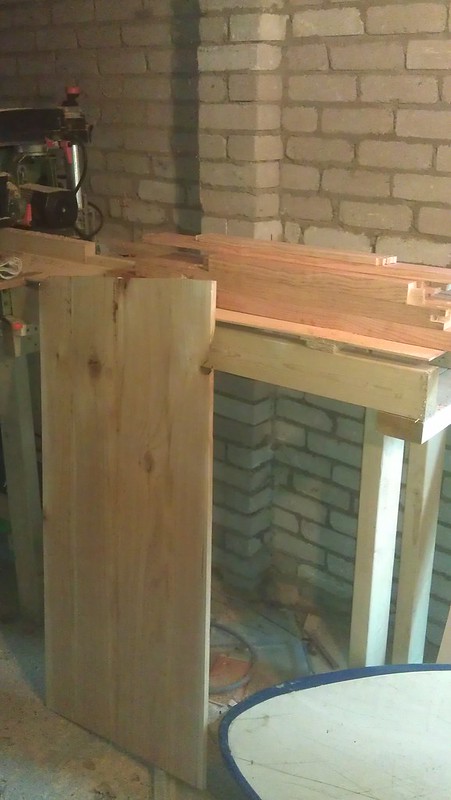
I sourced the timber locally, Douglas Fir for the Top and the paneling and surprisingly (to me at least) Western Red Cedar for the framework. Having aquired it as 4m waney edged boards, I had to get it on the trestles and cut off a sufficient length (8ft) to cut a complete set of components, then take that smaller board and first establish a reference edge, then rip it down into the appropriate widths (1¾"*1¾" for the framework, 1"*11.5" for the table top segments) and cut the individual components to length. This was only achieved once I'd finished modifying the fence of the outfeed table on my RAS, and re-aliging the RAS blade square and true after the saw initially began pinching as it started to cut.

The rough sawn segments are now waiting to go to my friends house to acclimate (my house is much smaller, warmer and drier than his, unfortunately). hopefully after a week or two I'll be able to start planing them up.

I'll try to get some pictures of both the unsawn boards and cut components tomorrow.

I also have to drive over to Blanaeu Ffestiniog to collect a piece of slate riven specifically for the top at some point.
 
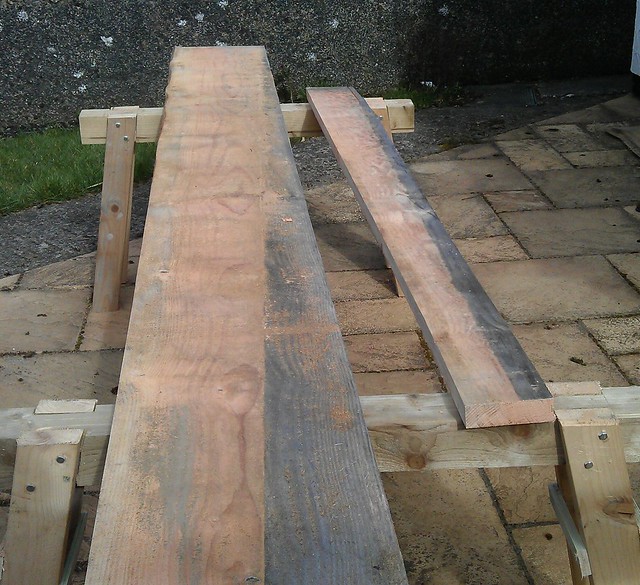
Ok, the unsawn material (or actually, the remainder of the now-sawn board and the unsawn board side by side on a trestle)

8557460984_b7a565b24a_z.jpg


Needless to say handling them on my own was a real sod... I should have recruited an assistant, my back told me as much when I woke up the next morning.


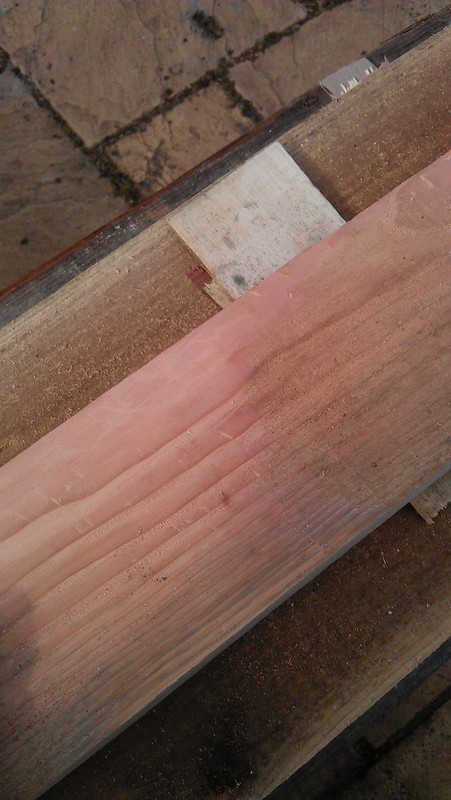
I planed a little bit of the sawn board to get a look at the timber properly (thus discovering that all of my woodies have swollen too much to adjust the iron, so they're currently on cork mats on the dining table, I hope a few days of warmth will shrink the wedges a little.) It looks rather nice, though I'm starting to question my initial identification as Cedar... It may well be a particularly reddish section of Douglas Fir, the grain is somewhat irregular and the spacing of the annular rings varies, showing sections consistent with both varieties of timber; I'll have to plane the end smooth(ish) and take a look with the hand-lens*

8557460050_5e8c622ddc_c.jpg


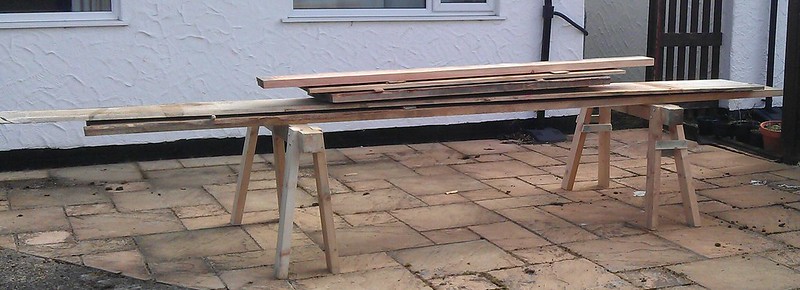
And this is all the remaining timber stickered up on the trestles;

8557460384_75a691aabc_c.jpg


Believe it or not the whole lot was just £20; To get it at that price, I merely had to hand sort through 9 full packs in a clearing in the middle of forest until I had what I wanted and carry it back to the car. Well worth the physical effort for a bargain and a complementary cuppa!

*Identifying timber, other than redwood, whitewood and the more frequently encountered hardwoods, is not my strong-point... and I've rarely handled either of these species before. If it's obvious to you please put me out of my misery! :oops: .
 
That timber looks really good, nice grain pattern on the big piece on the left. I could do with getting a bargain like that. Does the £20 give you enough wood to complete the project? I assume that the piece of slate will fit in the rectangle shown on the top?
 
bobscarle":u7fo0t9e said:
That timber looks really good, nice grain pattern on the big piece on the left. I could do with getting a bargain like that. Does the £20 give you enough wood to complete the project? I assume that the piece of slate will fit in the rectangle shown on the top?

That £20 has given me a little more of the frame material than I'll need, I need to see about having the thinner plank resawn by a local joinery firm for the panels, if they can get 2*11mm out of the 25mm I'm in business, if not, I may need to get a second piece and end up with 8m of 8-9ish mm material spare. I was taken with the timber as it's both good quality and locally grown! My only concern is that it's been seasoned and stored exposed so has a relatively high MC, but with any luck it shouldn't experience too much movement.

The rebate is indeed for the slate cutting surface.

I hope to get some proper WIP pics up as soon as everything has dried out enough to get started in earnest.
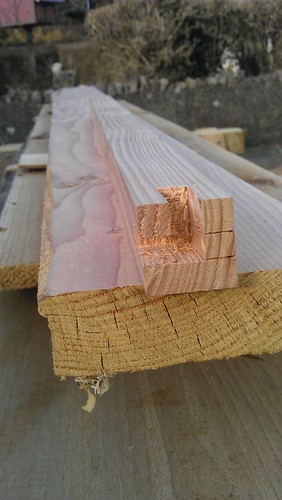
 
Just been to see my friend tonight, the 1"*12" boards for the table top have cupped quite badly, however, the side which was stored open to the elements is still quite damp, I'm rather hoping that once the moisture equalises on both sides of the boards the amount of cupping will decrease somewhat.
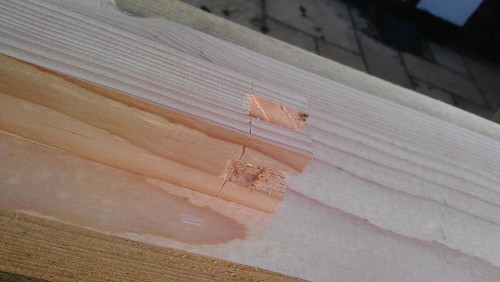
If not I'll rip them in half at a slight bevel, flip one half and glue them back up... it's not an ideal solution but it rather decreases the amount of material lost in bringing the surface of the boards to flat.

The frame material is thankfully drying uniformly and I should be in a position to start in earnest next week!
 
If that is DF with the red tinge it will be hard. I am very concerned that you are expecting 2" stock to season in a few weeks to a point where it can be used for indoor furniture. Unless your friend lives in an unheated barn then you are going to get a lot of movement.

Surely it is going to need a year or two indoors if it is not to be kilned?
 
It's already been seasoned for (the seller reckons) 9 years, but the surface fibers (especially on one of the two sides) were saturated from being stored in the elements, when I initially cut it, you could see a layer of moist fibres a couple of mm deep above otherwise dry material, this is what I believe is causing it to cup...

I'm thinking that the boards for the top will need to wait at least another 3 weeks before I start on them, but the frame material was from the middle of a pack, and wasn't wet, so pending an oven test (I deliberately left a little extra material on the end of a couple of pieces so I could take a sample to do a loss in mass determination of MC) should be good to go soon.
 
I rearranged the ventilation for the boards to gve the wet faces the greatest airflow, and it has reduced the severity of the cupping from ⅜" to a little over a sixteenth, hopefully with another week they'll come back almost flat.
 
Right, I've started in earnest, but no photo's today.

Planed all the framework to 38mm and the Top to 18mm; The mortice and tenon joints for the framework are marked up and the top is on a flat piece of MDF in clamps gluing up.

Once I've got the top glued I'll take a couple of light passes with the coffin smoother to remove a few spots with marks from the P/T (the slow feed speed isn't slow enough to get glass-smooth results on resinous spots in the timber) and that can go to one side in my office/guest bedroom.

I'll chop the mortices in the legs and cut the tenons for the rails and put those to one side too.

Next step (hopefully tomorrow) is to pop over to a local joinery firm and have some of the 50mm material cut on their wide band resaw (ideally I want to get one 2M board cut into two 380*24mm boards and the other 2.4M board cut into five 335*8MM boards). That can then sit in my friends house to acclimate whilst I go home for to see my family just after easter.

Once I know the finished sizes of the boards (given that there's likely to be a ±1mm tolerence resawing) I can cut the grooves for the side paneling with the wide grooving plane and mark out the birdsmouth joints in the legs for the for the shelves & the draw-support and in the front and rear rails for the two panels which form the central cupboard for the fridge, those two panels will be marked with stopped housings for the other side of the shelves.

I'll try to get pics tomorrow once the joints are cut.
 
The small firm couldn't fit me in, but i managed to bend the ear of a bloke at a planing mill 20 mins away, who's progammed me in next week between big jobs.

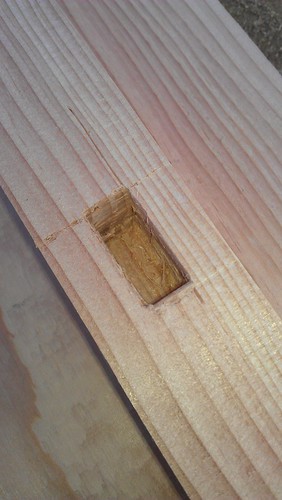
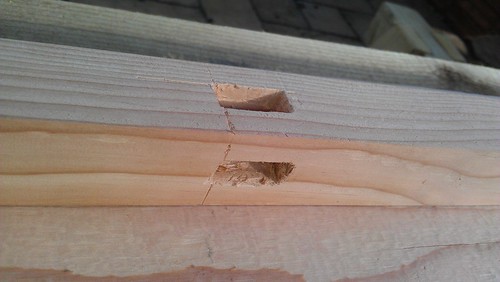
Got all the L-shaped mortices chopped, using my Shanks's pattern solid chisel morticer*

They'll need a little more tidying durig the fitting of the joints, and a pass or two with the plane to take the layout marks off, but considering how concerned I was about splitting, they've turned out marvelously.

8614129438_9d650cdd6e.jpg


8614127126_ff7f8eabab.jpg


8614133684_22a347c26a.jpg


8614131510_0cb3687f6e.jpg


*AKA a big chisel and some elbow grease.
 
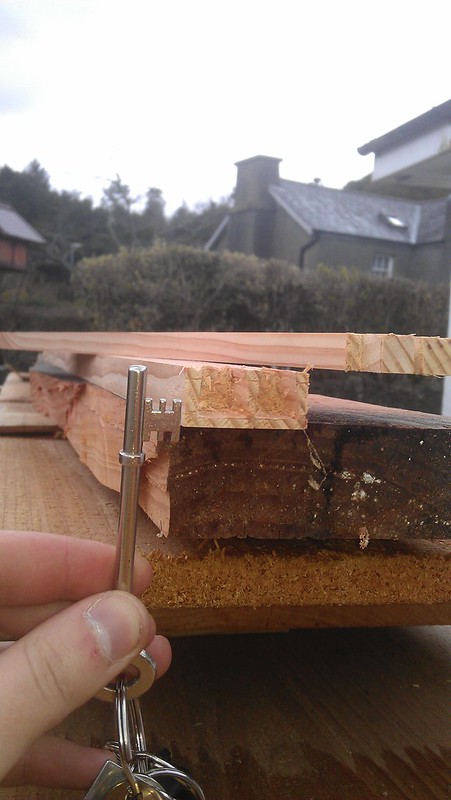
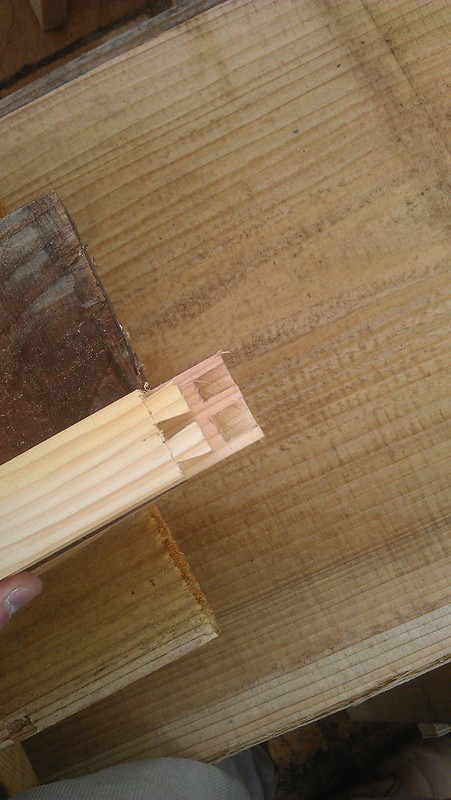
Got the top glued up and the dovetails for the draw cut. Taking the timber in to havethe panels resawn on monday, and if my hangover permits I'll be cutting the shelves and gluing up the cupboard sides out tomorrow.

8645191989_5b0d86e7cd_c.jpg

The key is held there for scale, it was a bit of a fiddly job.

8646293992_392b3ce4e9_c.jpg


8645195861_4ed1020885_z.jpg


8646295280_1e6fceeb29_c.jpg

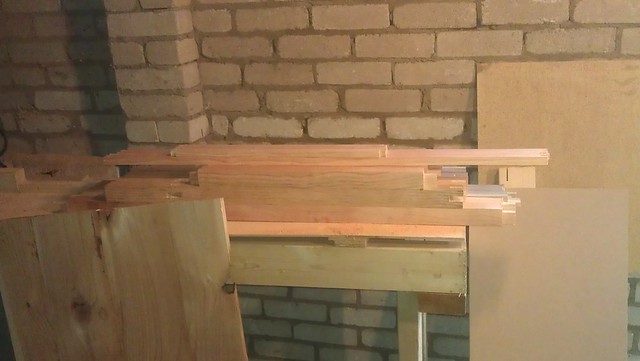
Thats all the major components cut, and ready for dry fitting and final finishing. Just doors, and internal carcase work to prepare.
 
No skills":u3lxp0cf said:
Good progress so far, I like the way you say 'just' doors and carcase to go :)


Ps is you signature quote from kelly's heros? (oddball)

Trying not to hijack, but where the feek is little poland in essex????
 
No skills":10f7psjf said:
Good progress so far, I like the way you say 'just' doors and carcase to go

Hahahaha, the real issue is finding time to go get the thin paneling material sawn!

I would hope to be able to have both the doors done in two or three of hours of hard work...
The carcass is a bit more awkward as it's going to require an awful lot of glueing to turn 10" wide boards into 24" wide panels, I'm thinking it might be an idea to break out my router and cut matched rebates into each set of boards for alignment; I could probably use the RAS in rip configuration to cut tongues to suit one of my grooving planes... But it would be a lot fiddlier for the same result (must get some tonguing planes that match the grooving planes!).

Well that and finishing, I've been experimenting with a traditional varnish based on linseed oil and rosin... I've been testing it on an offcut, and trying a variety of complex metal salts and some oil-soluble urethane resin as adjuvants to the traditional mix; the results are actually pretty promising so far, but it's still 2-3 days to dry each coat*...

*I want to have a play with some of initiators used for commercial bio-polymers which proceed along similar reaction pathways as the linseed drying reaction, but I no longer share an office/lab space with that research group to ask if I can just have a little vial.

Oh, and yes, that is from Oddball... It's a catch all piece of advice for dealing with the stresses and strains of using the internet; much like "Don't Panic" can be lifted from the Trilogy of Five as an important day-to-day maxim.
 
I do belive those blessed with large good quality bandsaws are lucky folk, re-saw by hand is a game for the young and enthusiastic. Good luck with getting the panels cut, and yes you lost me with the finishing..


riclepp

Little Poland seems to exist in the thurrock/west thurrock/grays area. Cant comment much beyond that as I dont get much further on an average day.
 
No skills":od3kwd37 said:
I do belive those blessed with large good quality bandsaws are lucky folk, re-saw by hand is a game for the young and enthusiastic. Good luck with getting the panels cut, and yes you lost me with the finishing..

Too Right! I'm young and enthusiastic, but I'm not resawing 10" timbers for 16 linear meters... that's a job for two men and a framesaw (something I'm in the process of building and most likely will be for some time to come).

I have located a company who will re-saw it for me (though they charge £60 p/h, so I'm hoping that they don't mess about and it only takes the 10-15 mins or so I'd expect it to take on a band re-saw.) I just haven't had the time to saw it to a uniform width and sensible lengths (10mm * 250mm * 4.4m boards would not travel well by roofrack) and take it in to them.

I chose the finishing technique mainly because it's simple, cheap and resistant to the effects of spilled high-proof alcohol... I didn't really think about the convenience having someone else make the varnish though.
 
Got the components for the interior carcass cut to size and planed... Next step is cutting the housings and then cutting matching notches in the framework them with notches. I'm tempted to do the housings on the RAS with a series of stops on the fence, so it's repeatable and quick, but It's probably easier to cut them with a carcass saw, chisel and router plane, by the time I've faffed about getting the saw set up and working out how far I can bring the blade across when cutting a stopped housing.

I'm not 100% sure, but I think I may have made an error when transferring marks to the shelves, leaving them just a little shorter than ideal. I'm going to check tomorrow, but if I have, then I'll have to put blocks or battens underneath where they meet the outside of the cabinet for increased security.

Final "structural" pieces need doing now, which is the bearers which form the bottom of the cupboard to provide adequate support for the fridge, whilst leaving it as open as possible for ventilation.

I've realized that I'm going to have to do nearly all of the glue up in one go, which is going to be fun! The only plus side is that once its all seated, I can simply tension some straps round it to pull the joints together, obviating the need to use dozens of clamps.
 

Latest posts

Back
Top