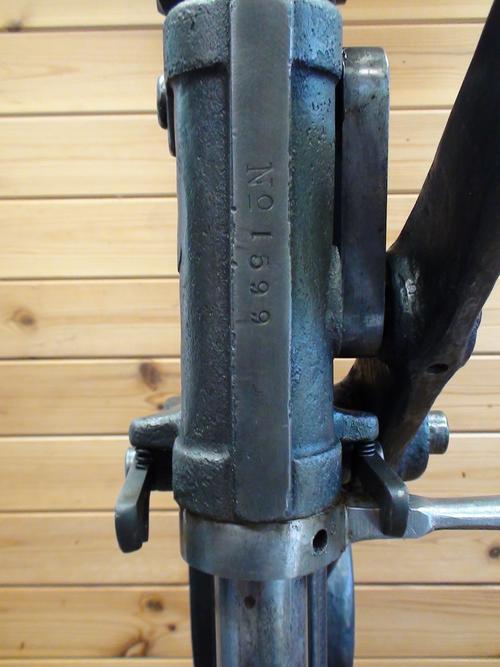
Reynolds Hand Morticing Machine restored (finally).

UKworkshop.co.uk

Help Support UKworkshop.co.uk:

This site may earn a commission from merchant affiliate links, including eBay, Amazon, and others.
Hi Chris (and Andy, yes, same number, same old habits :)

Thank you very much for the message and very kind words. I don't recall that vice but yes, you should have taken it as it's probably still in the storage box from the move !

Really good to see the Reynolds and know it has been taken care of. Lovely restoration, and a proper dry safe home for what is a very fine old piece of England.
I did get very lucky with the chisels for it as I believe that in those days tapers were not standardised so finding the Reynolds fit would be rather hard. The man I got it from gave me a number of someone who had a set... and it all came together.
I've been so busy sorting this house out I hardly have time to make anything. Got a new small hand-tool shop done and the machines in one end of a big garage... but no time.
I do get along to Richard Arnold's Charity Auction day every year so see Andy (TnT) there, along with Ollie Sparks, Richard Hughes, Pete Maddex and everyone else who deserves a mention.

I will try and make something soon (I did a door recently but it doesn't really count. All proper it was, but a door is just a door.
Anyway, top work Chris, really delighted to see the Reynolds being cared for so well - it deserved a good home and I'm sure it has a century or two of good work in it.
Best wishes to all the old gang here. If you have my number it's not changed.
all the best, Douglas

edit p.s. - love the 'arty shot'
 
Brilliant. I'm a happy man now. Thanks Douglas. I will make it come hell or high water next year to Mr Arnold's Big Day Out. I'm going to book the time off work next year. So I would buy you a beer but more likely a cup of tea and a cake seems likely. :D Thanks ever so much for replying. Made my day.
 
Great work Chris.
Excuse my ignorance but how is the mortice cut? Hole first or similar to cutting one by hand? Which would, I assume, mean rotating the stock/chisel? (I think you mentioned something about rotation).
Lastly, there's a chisel with no edge, is that for finishing or something else (or perhaps it hasn't been given an edge yet?).

TIA.
 
Thanks Noel.
I'm not exactly sure I did my test cuts the 'right way' tbh. I started in the middle of the mortice. Like my old hand powered drill it's a bit of a rub the belly, pat the head scenario. With the drill you were spinning the arm and the feed at separate speeds. Not difficult in itself but a rhythm to become accustomed to.
As I say, started in the middle of the mortice and just pull down trying to get a feel for the resistance of the machine and the wood. I've never used a powered morticer but I'd guess this is a far far closer experience to cutting one by hand in that respect. Being a big lever it is fairly powerful but you are also looking out for the wood. You're also spinning the bed in small steps to move the wood along the cut. If you have ever seen people cut peat, its a bit like that. A tiny bit. So you have one arm above your head going up and down and your other hand spinning wheel in localised motions. Hence rub the belly pat the head description.
In the test cuts in cheap soft pine I did, I found you could exert some fair pressure but the pine, being soft cheap pine would tear easily. As I neared the end of half of the mortice I switched the lever round to reverse the chisel and cut the other half out. It was only then that I'd approach each end of the mortice and creep up on it. Very accurate and dead square. You do have to take care to have the chisel at 90 degrees to the bed (this is why we do tests! :oops: ).

vcZGor8.jpg


See the identical parts either side of the shaft with the springs under compression? They are the holding clips. The handle you can see bottom right, swings the entire shaft (and hence the chisel bit) through 180 degrees.
If you look at the bottom 'holding clips' carefully (no idea of the proper name sorry) you can see the inside face of each is swept. That means you don't have to lift it when swing the arm round to secure it, only to release it.
Like I say, when you first look at this you think it could be a rough old workhorse and cobbled together. Far from it. It's extremely clever and precision made. Fair play to Mr Reynolds.

As for the flat tapered bit. I was rather hoping someone clever would tell me what that was for. I have no clue tbh. Sorry! Could be it's never been ground as you suggest. I'd never though of that so thanks . There is another example in the rack that might look like pitted rust but I think It has just never been used. There is no more than the idea of rust on these bit's despite the photos. Maybe they were supplied rough in an age the buyer would be expected to know their A*** from their E**** and be able to sort them out and grind to their own preference? :wink:
 
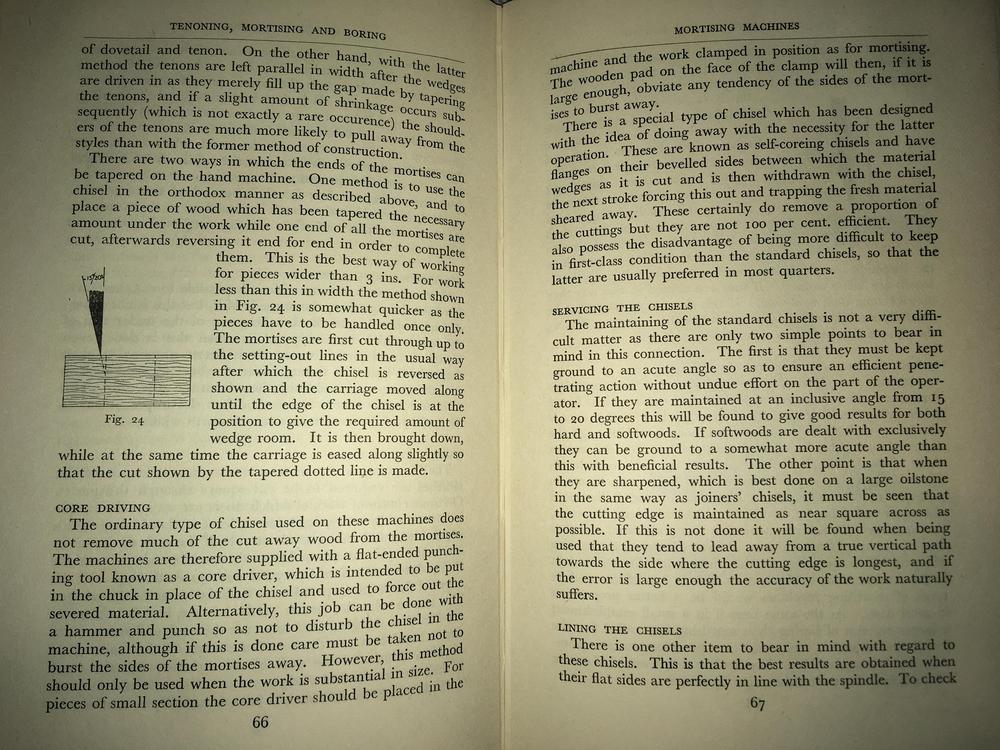
Turning to the question about the flat tapered bit... I reckon it's a core driver, used for forcing the chips out of a mortice.

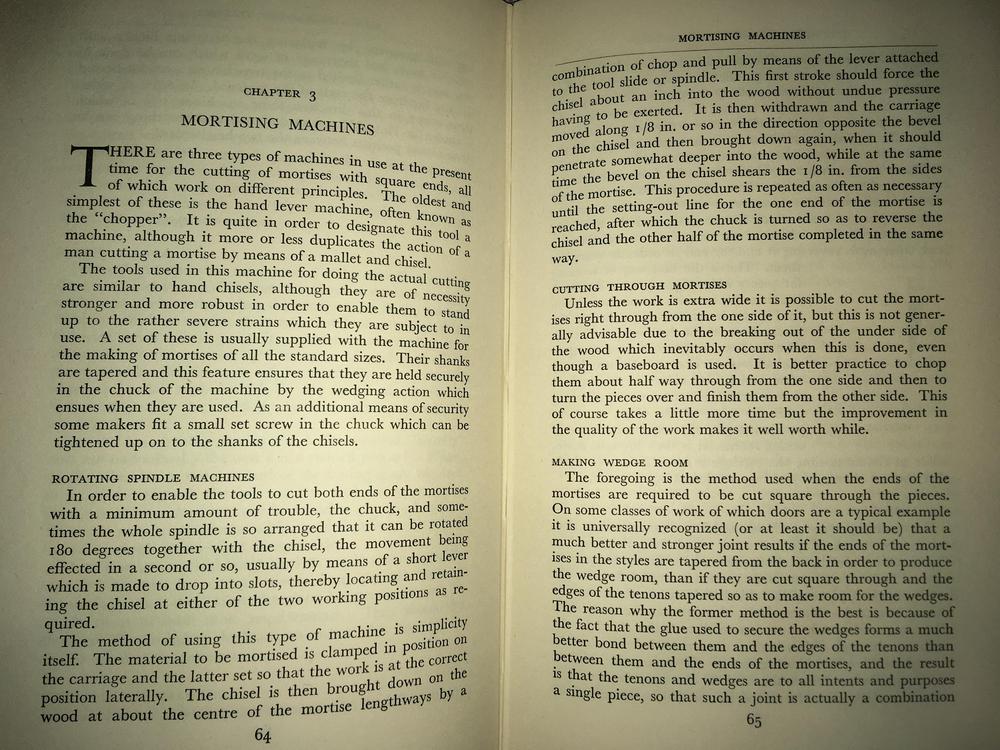
There's a detailed description of using a hand mortising machine in Ellis's Modern Practical Joinery.

I thought it was also interesting as it describes how to make sloping cuts on the outside of the mortice (for glueing wedges in) by reversing the chisel - not something I would have thought of, but essential for a lot of joinery work. (He also says a core driver is needed for hand-cut mortices.)

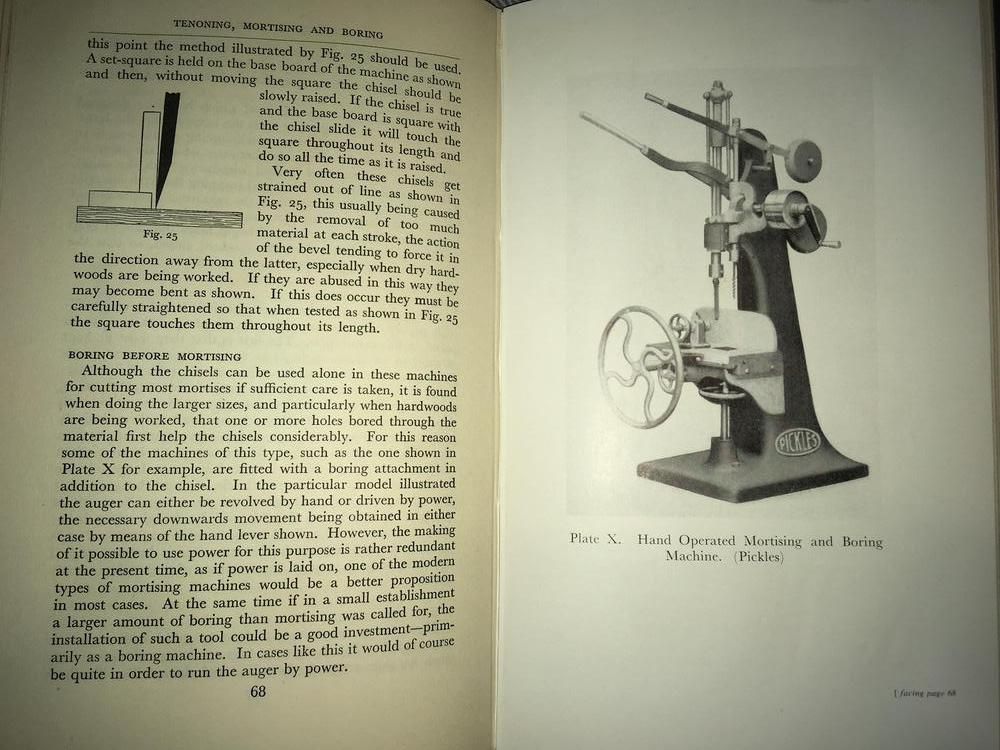
For completeness, here's the whole thing:

mortising1.jpg

mortising2.jpg

mortising3.jpg
 
Crikey Andy. You truly are the Professor! =D> =D> =D>
Many thanks. That's amazing information!

1875! I was born in 1975 which by my maths makes this almost exactly 121 years old! Incredible!!! :eek:
I owe you a pint. Another pint!
I hope you are not writing them all down mate tbh I have a mortgage to pay. Kids to feed!. :shock:
Sincere thanks Prof. As always.
Really.
Cheers,
Chris.
 
Happy to help when I can!
Don't forget that these stayed in production for 40 or 50 years or so, until small electric motors came along, so yours could be under-reporting its age :)
 
Bm101":3242ff4j said:
Thanks Noel.
I'm not exactly sure I did my test cuts the 'right way' tbh. I started in the middle of the mortice. Like my old hand powered drill it's a bit of a rub the belly, pat the head scenario. With the drill you were spinning the arm and the feed at separate speeds. Not difficult in itself but a rhythm to become accustomed to.
As I say, started in the middle of the mortice and just pull down trying to get a feel for the resistance of the machine and the wood. I've never used a powered morticer but I'd guess this is a far far closer experience to cutting one by hand in that respect. Being a big lever it is fairly powerful but you are also looking out for the wood. You're also spinning the bed in small steps to move the wood along the cut. If you have ever seen people cut peat, its a bit like that. A tiny bit. So you have one arm above your head going up and down and your other hand spinning wheel in localised motions. Hence rub the belly pat the head description.
In the test cuts in cheap soft pine I did, I found you could exert some fair pressure but the pine, being soft cheap pine would tear easily. As I neared the end of half of the mortice I switched the lever round to reverse the chisel and cut the other half out. It was only then that I'd approach each end of the mortice and creep up on it. Very accurate and dead square. You do have to take care to have the chisel at 90 degrees to the bed (this is why we do tests! :oops: ).

vcZGor8.jpg


See the identical parts either side of the shaft with the springs under compression? They are the holding clips. The handle you can see bottom right, swings the entire shaft (and hence the chisel bit) through 180 degrees.
If you look at the bottom 'holding clips' carefully (no idea of the proper name sorry) you can see the inside face of each is swept. That means you don't have to lift it when swing the arm round to secure it, only to release it.
Like I say, when you first look at this you think it could be a rough old workhorse and cobbled together. Far from it. It's extremely clever and precision made. Fair play to Mr Reynolds.

As for the flat tapered bit. I was rather hoping someone clever would tell me what that was for. I have no clue tbh. Sorry! Could be it's never been ground as you suggest. I'd never though of that so thanks . There is another example in the rack that might look like pitted rust but I think It has just never been used. There is no more than the idea of rust on these bit's despite the photos. Maybe they were supplied rough in an age the buyer would be expected to know their A*** from their E**** and be able to sort them out and grind to their own preference? :wink:

Thanks Chris for the detailed explanation and also to Andy for the additional information, especially on the square chisel/core driver. I see there is a boring attachment on the Melhuish listing/Centre Motion Machine (quaint description) example Andy posted.
Very interesting.
 
Spotted this whilst glancing through my books :)

jhFBbP3.jpg


99mHF4V.jpg


xRitQm3.jpg


Pjj4UWu.jpg


JqH8Dxd.jpg


dj6vSUA.jpg


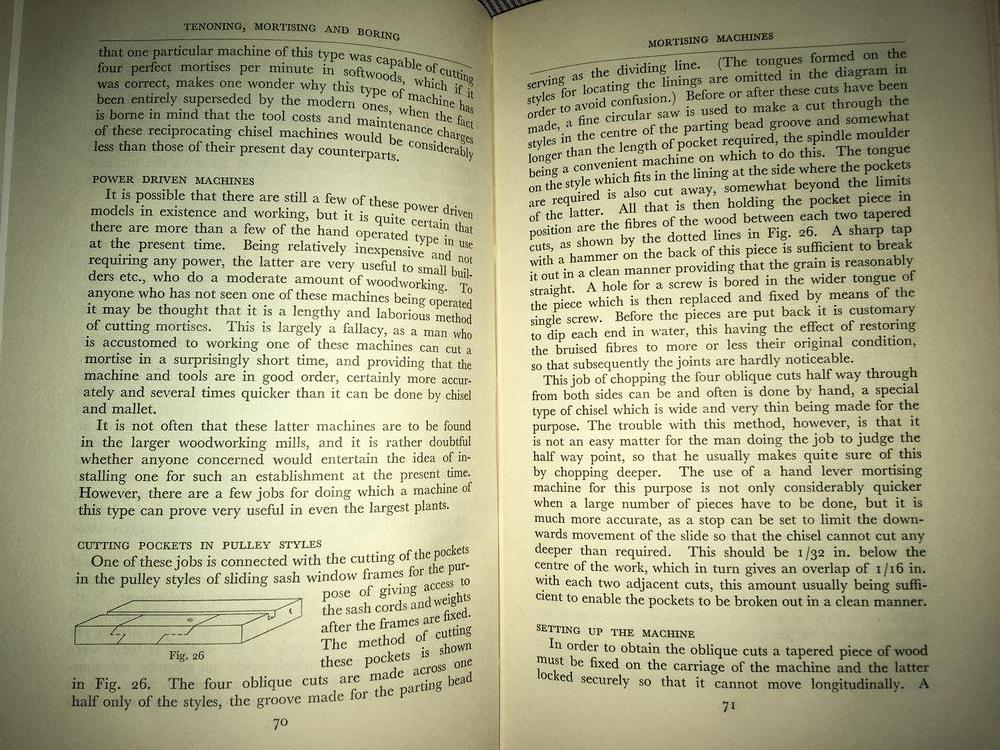
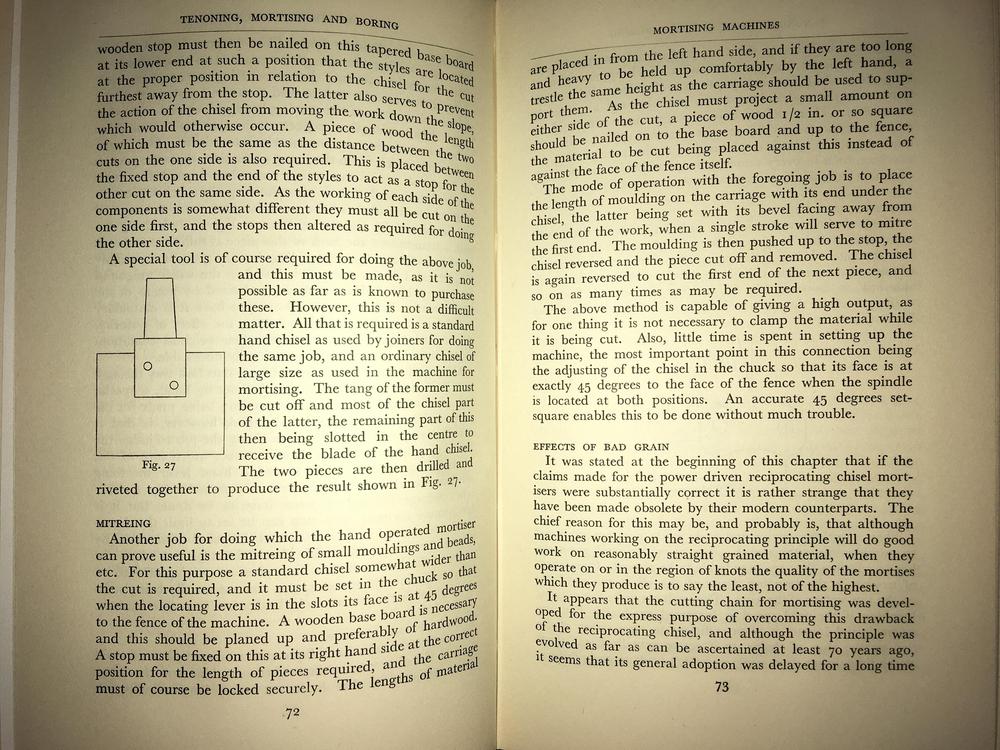
Small segment from Tenoning, Morticing and Boring by A.H.Haycock 1949
 
Now that's the sort of detail not available anywhere else. I knew your books would be useful!
 
Thank you so much for sharing Trevanion. This is fantastic information. It even goes so far as to explain that the flat bit is a core driver! And now I heard the term it's self explanatory.... Isn't it funny how something completely baffling can be blindingly obvious when its been explained clearly from a position of knowledge.
Wonderful. I am in both yours and Mr Haycocks debt my friend.
=D>
Best regards
Chris
 
That's why I like old books, there really isn't anyone alive with practical knowledge of these kinds of things anymore and it's very easy for information to slip into the abyss and be lost forever. One of my favourite quotes is:

"I liken it to train going down the track. As the train goes down the track, the train of society, it's scooping up information, scooping up, scooping up, scoping up as it goes down the track. For some reason, the train can only hold so much information, I don't know why, and the guy on the caboose, he's throwing the information off as fast as he can to make room for the new information coming on the front. And the problem with that is the information we're throwing off is the information it took us 25,000 years to glean." - Eric Hollenbeck

[youtube]otgjdSa6ceA[/youtube]

I must've watched the video a dozen times over the years. Good stuff.
 
I have just discovered this thread. A great restoration and lots of interesting information. I saw this machine on a visit to condeesteso a few years ago and was very impressed with it.
 
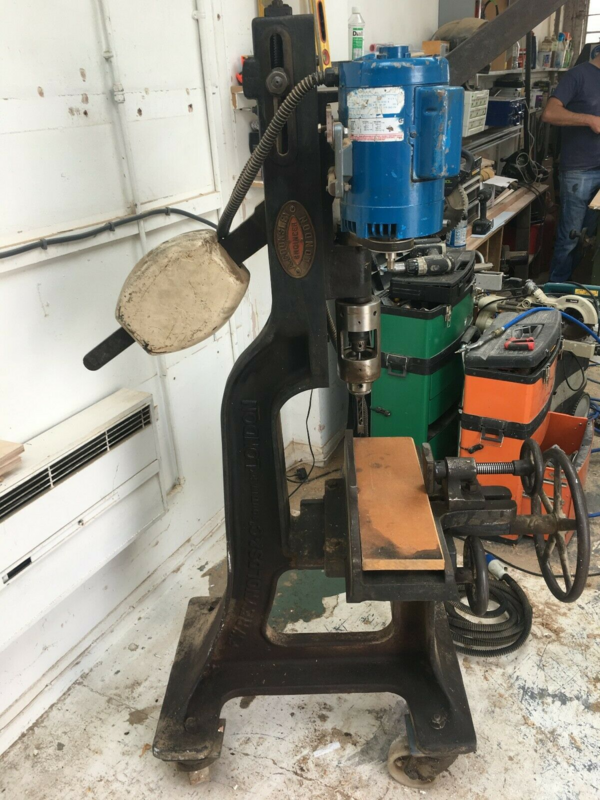
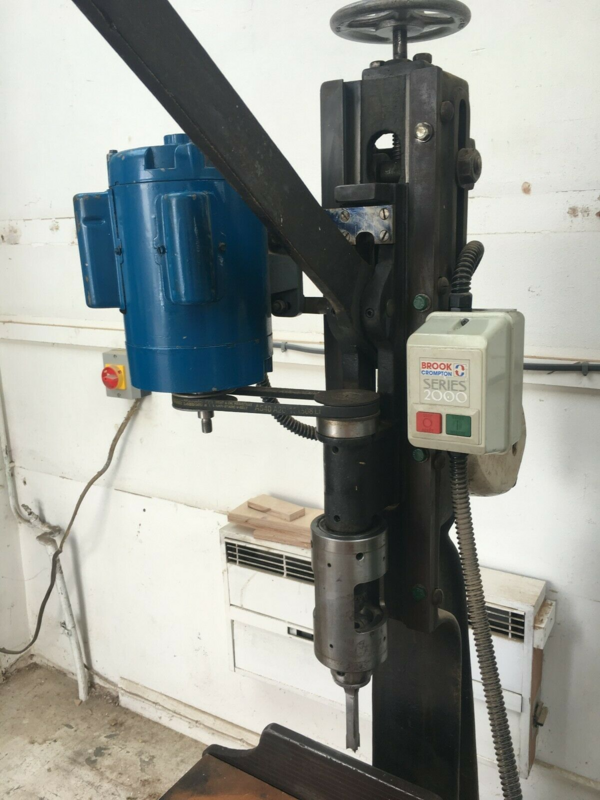
Spotted this Reynold's morticer on eBay and it reminded me of this thread once again, Somebody's taken quite a bit of time, effort and thinking to turn it into a more modern machine with a hollow chisel and auger: https://www.ebay.co.uk/itm/mortising-machine-by-F-W-Reynolds-and-co

ZQK1W4z.png


6JcUC9B.png


Some very clever engineering going on there! Also nice it's making use of something that might've otherwise ended up as scrap or sat outside in the rain until it rotted away, I think the majority of the older non-powered morticers ended up like that, but there's the odd exception like yourself where they're being used and loved.
 
I'm with you Trevanion, these machines, lovely as they are have been superseded for all but the curious few. Even then the sheer size is a limiting factor for most of those interested. If any regular members are interested and local, feel free to invite yourself round for a go. En10. Pm me. Bring your own timber lol.
That looks like a eminently practical use for what is just cast iron in the end. Better to be used than go to scrap every time. Or be a turned into a lamp. :wink:
 
Apologies for the Necropost, but I'm looking for information on my Reynolds 'Blackfriar' mortise machine.

I bought a set of Reynolds branded chisels for it, but they don't fit. Their taper is too large and they have indexing points which are not present in the machine.

I can't find information on whether they are chisels produced for another company's machine or if Reynolds changed at some point... or if the fitting was never standardised.

I can make a new fitting for it, but if anyone else has chisels that are too small we could swap and save some machining!
 

Latest posts

Back
Top