Record DX4000 Silence Cabinet

UKworkshop.co.uk

Help Support UKworkshop.co.uk:

This site may earn a commission from merchant affiliate links, including eBay, Amazon, and others.

RichardG

If at first you don’t succeed have a cup of tea.
Joined
29 Mar 2018
Messages
782
Reaction score
446
Location
South Norfolk
The record DX4000 does a fair job as a workshop dust extractor but it's very very loud. I finally had enough and made a silence cabinet which works very well but it's hard to communicate how much difference it makes. I did take some dBA readings during the build but I'm not sure how useful they are?

Bare Vacuum - 84dBA
In Cabinet no sound proofing - 77dBA
Cabinet with sound proofing - 69dBA

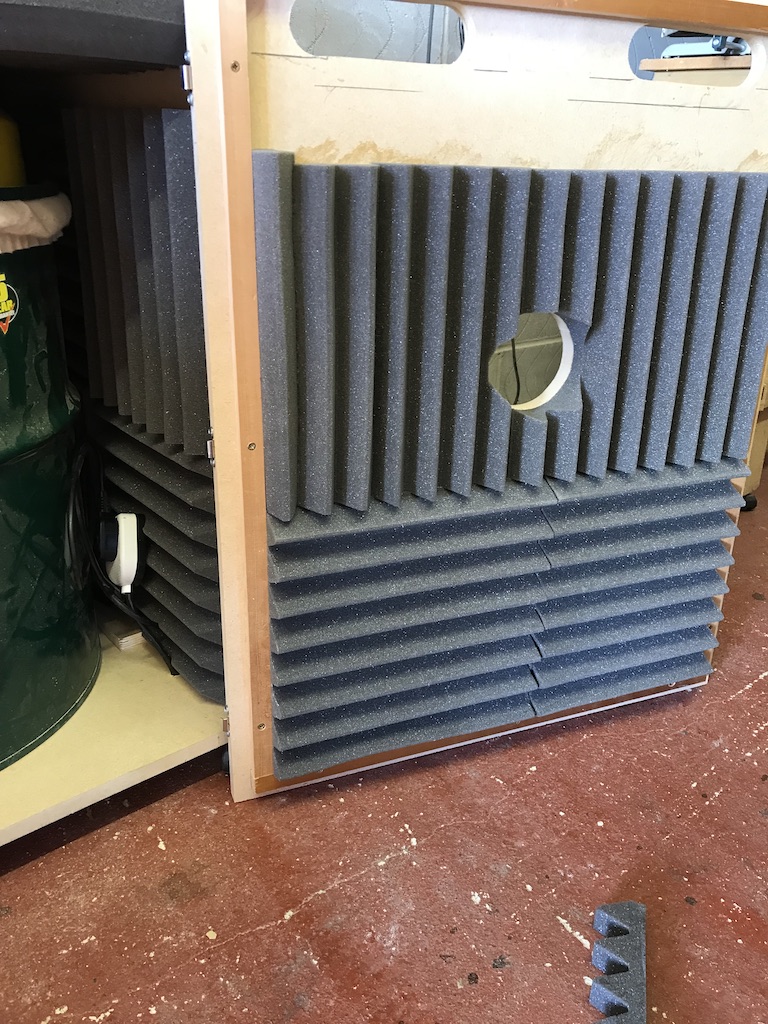
It's a simple box with shelf that has a gap at the back for the air to pass through and then through 180 degrees to be vented at the front. I hope the pictures explain.

The cabinet and door.
main.jpg

door.jpg


and the finished cabinet
finished.jpg


It was all made out of a single sheet of 18mm MDF which I had cut up at our local B&Q. The shelf was an additional piece. Here's a cutting list.

cutting.jpg


The sound insulation is acoustic tiles sourced from eBay.

I'm currently working on a remote control which I'll upload when I've completed it.


Richard
 

Attachments

  • main.jpg
    main.jpg
    223.1 KB
  • door.jpg
    door.jpg
    316 KB
  • finished.jpg
    finished.jpg
    228.2 KB
  • cutting.jpg
    cutting.jpg
    126.4 KB
You can get it even quieter by putting a series of baffles in top outlet duct, made of the foam. then a final soft open material flap over the outside vents.
If you can slow the air speed down the noise drops dramatically.
 
I was a bit concerned about over heating which is why I left the outlet path as smooth as possible. However, I'll try some options to see how well they work...
 
Provided you dont restrict too much, overheating is not a problem because the fans are cooled by the air dragged through the pipework.
If you make a set of staggered baffles to make the air turn left right left, and cover those surfaces with foam or loose blanket, the air speed drops and so does the sound level.
 
Added some baffles which has taken another 2dBA off the total. I don’t think I could make it much quieter without making the cabinet thicker but it’s a huge improvement on the bare unit.

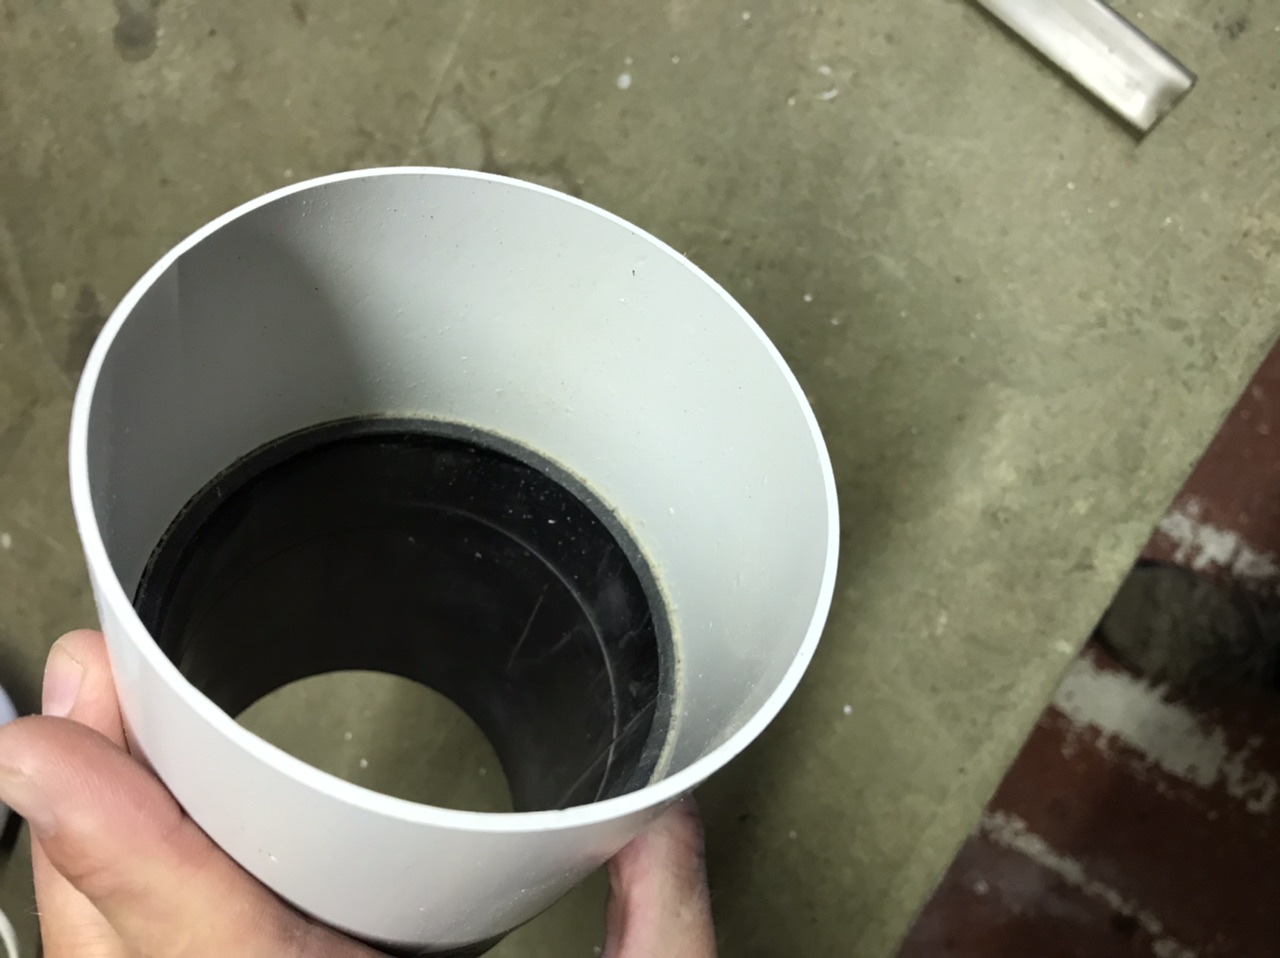
The only issue I have left is extending the 100mm port out the front. I bought a hose coupler from Axminster which I though would be right size but it’s too big. The outlet on the record is 98mm with a taper so a cuff slides on easily, the Axminster hose coupler is 101mm which doesn’t sound like much difference but it’s enough to stop the cuff sliding on easily. Any suggestions?
 
sunnybob":10paba3a said:
You can get it even quieter by putting a series of baffles in top outlet duct, made of the foam. then a final soft open material flap over the outside vents.
If you can slow the air speed down the noise drops dramatically.

bah beat me to it - but I would make the actual baffle from MDF (denser), but not too thin or you'll get a small vibration effect as the sound waves hit it (creating more sound), and glue the foam to it, so you get two forms of sound reduction not just one.

If you do that, make sure you line the sides top and bottom of the outlet channel in old carpet as well or sound bouncing off the hard surfaces of the ply will add to the reverberation instead of reducing it.

Richard, baffles in the outlet path won't increase the heat buildup inside the cabinet to any noticeable degree, and despite there is the added consequence of loss of pressure (speed & heat) over distance, contrary to what sunnybob said, the air itself will not be moving much slower because air moves faster when it's warmer; however the sound reduction will be much better - the more baffles you can add to increase the distance the better - doubling the distance halves the dB output.

Edit - you said you've got a 3dB reduction - add more baffles and that will be 6dB - don't worry that the channels will be thinner, that's pretty irrelevant.

Despite popular belief, fast air on it's own doesn't create sound - it just aids propagation from a source.

It's all pretty complicated stuff :)

Put the vaccum on a sheet of foam too - it's conducting sound via the box itself through direct contact.

There's a golden rule to remember about sound reduction: 10% "gap" without any sound reduction methods will allow 50% of the sound to be transmitted.
 
My theory might be shaky, but my practical gives the required results =D> =D> :roll: 8)
 
Hose couplers are from the twilight zone, they will never match anything else regardless of where you buy them from.
Sounds like the record is designed to go inside a 100 mm and the axminster is designed to go over the top of a 100 mm

Silicone sealant and duct tape are your friends here. :roll: :roll:
 
sunnybob":jxlks52w said:
My theory might be shaky, but my practical gives the required results =D> =D> :roll: 8)

Oh sure it does :) = but it could be improved with little effort - I've edited my post to reflect that.
 
sunnybob":aw5to98z said:
Hose couplers are from the twilight zone, they will never match anything else regardless of where you buy them from.
Sounds like the record is designed to go inside a 100 mm and the axminster is designed to go over the top of a 100 mm

Silicone sealant and duct tape are your friends here. :roll: :roll:

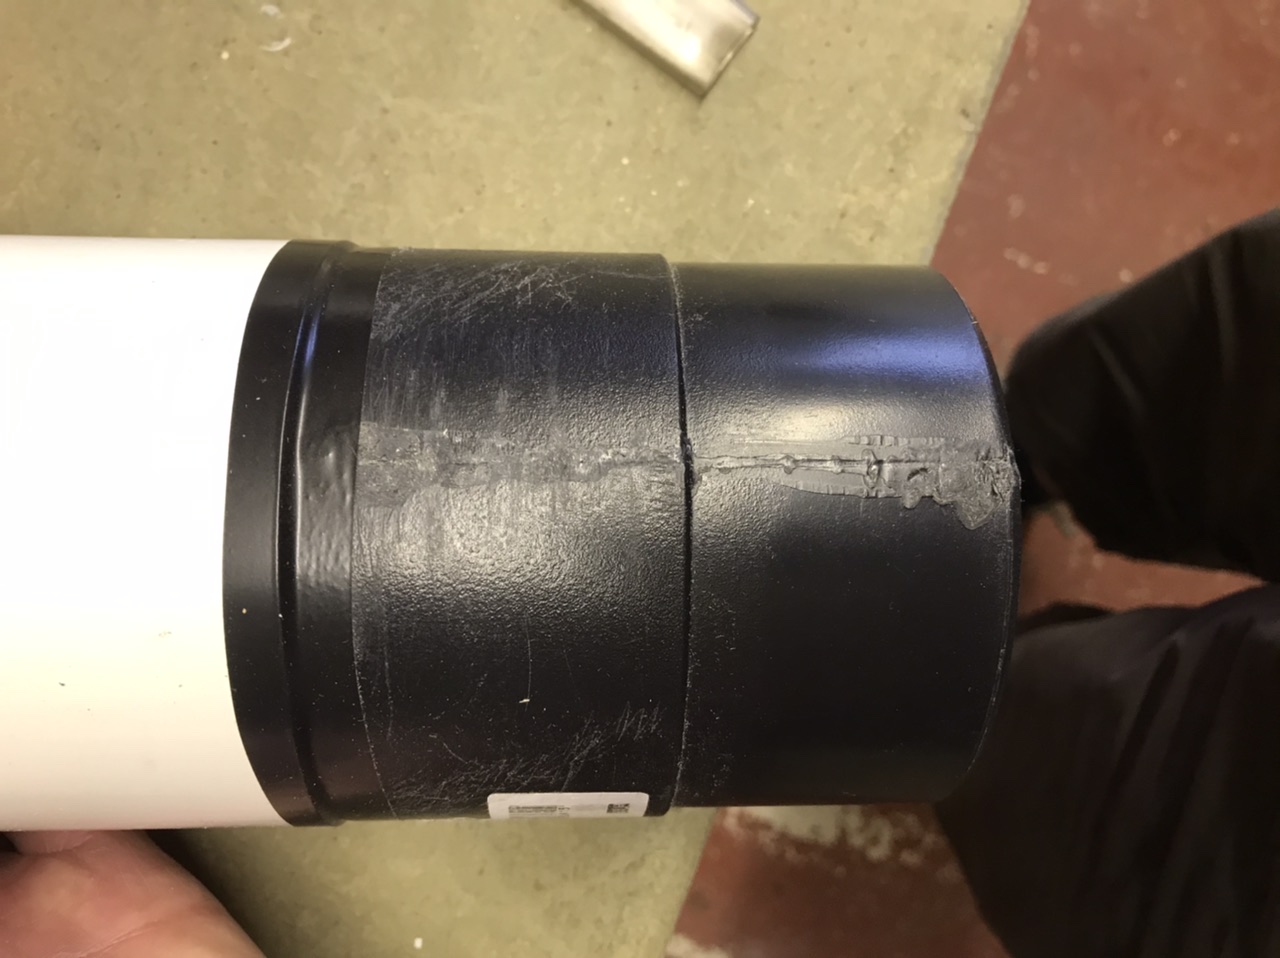
I ended up making my own adaptor (as I've got one of these too), taking a larger sized one and cutting it one side, then solvent welding it back.
 
I have a DX1000 and am following this thread with interest. The tubing that came with it didn't have a cuff so I bought one cuff from Record assuming it would be suitable for their size of ducting - it's a bit too loose for their adapter to a smaller size which I also bought to allow it to be used with my table saw. I just assumed they would make compatible products. The fit on their bandsaw is also a bit too loose. RP told me that the different sizes are a known problem but the tooling to make an adapter is quite expensive so the production runs required need to be very long whereas the cuff is made with a dipping technique e.g. like making a wellington boot - so quite easy to change. So perhaps in 20+ years they will get round to it. Of course they have to allow for all the differing 100mm standards (the trouble is everyone has their own) so can't be too restricting.

The adapter was exchanged for another but the cuff was replaced with another that appeared a "slightly" better fit and I got to keep the "old" one. I've found that they are really about the same after a few uses. I did think about putting a hose clip on the outside but I did find that wrapping a few turns of insulating tape - tightly around the outside is the difference between being too loose and about right. If that hadn't work I would have added a sleeve of bicycle inner tube to build up the thickness rather than adding tape between them. My next "target" appliance is my P/T and of course this has yet another size to match up. The adapter I'm using has, of course, the same outside diameter as the table saw (DW745) so my "bodge" with some tape to couple them together may not last indefinitely.

I was a bit concerned about building a box around the extractor, but I realise that the exhaust air will quickly leave the structure so the buildup of heat will be minimal. Less space e.g. a smaller box will provide faster airflow too. As an experiment I put the cardboard carton that the extractor came in over the top of the extractor and found that something so simple knocks off the high frequencies significantly. The camvac units (that I don't have) have a removable top plug and a silencer that seems to be a length of constant diameter tubing. That also has an effect but I'm struggling to know how it works unless it's a "tuned" baffle.

I have a gizmo that Peter Millard recommended for switching extractors on/off. It has worked with other machines e.g. my table saw and the primary device, switches two secondary devices on/off. For £6 off eBay, it works for "other" machines very well, but on my bandsaw it doesn't work so well as the extractor only switches on intermittently. On a table saw the switching is 100% - one is a universal motor and the other is an induction motor. Perhaps if I added a resistive load e.g. a light to the bandsaw then it would switch correctly? The reason I mention it on this thread, is an extractor that can be switched on/off automatically e.g. with a run on of 15 seconds is a lot less intrusive e.g. make a "cut" wait a while and make the next "cut" so the extractor need not be on for too long but is a PIA to manually switch on/off. however, perhaps this will affect the life of the extractor (brushed) motor in DX1000 (or maybe the life of the brushes is related to power on hours e.g. carbon build up)?
 
Thanks everyone for all the information.

My baffles were MDF but I'll see if I can add some more and cover the surfaces with carpet where I can. The shelf slides in so I can't add anything to the top if that makes sense which I realise is not ideal.

There's no foam on the bottom as I need to be able to slide the vacuum in and out for emptying, perhaps a bit of carpet may not add too much friction. I'll do a trial.

As the DX4000 has 2 motors you can't use an external switch as you couldn't swap between motors or turn one or both on. I'll add my solution shortly....
 
The next problem to solve was being able to switch the motors individually when the vacuum is inside the cabinet. My solution involves mains wiring so please do not attempt this unless you know what you are doing. (hammer)

My solution was to buy a pair of remote switches from Wickes for £10.
masterplug.jpg

I opened the two switch units, removed the electronics and then installed into a transparent plastic box.
inbox.jpg

I arranged the wires so they exit the box at the same spacing as the 2 on/off switches on the vacuum. The switches are connected using spade terminals so I soldered on spades and used heat shrink sleeving. I then removed the two switches and swapped the wires over.
wiring.jpg

I then stuck this over the 2 holes using doubled sided tape. This means I can revert the vacuum back to original form very easily.

The remote control has buttons for 4 switches but also has an all on/off button as well which is perfect. I can now turn on either motor or turn both on/off with one button press.

I just need to be careful I don't lose the remote control #-o
 

Attachments

  • masterplug.jpg
    masterplug.jpg
    242.1 KB
  • inbox.jpg
    inbox.jpg
    182.3 KB
  • wiring.jpg
    wiring.jpg
    196.3 KB
It’s a standard Hammond polycarbonate enclosure, various sizes available. I removed the electronics from the 2 Masterplug socket switches (they had 3 point security screws but then so do I). Cut the wires from where they attached to the 3 pin sockets. I then placed the 2 electronic switch boards inside the case and marked where the mounting holes were, drilled and then using nylon screws and spacers mounted them. Worked out where the wires needed to come out and drilled the holes. Pulled the wires through the hole and then soldered on spade terminals, you could crimp but I’m not a fan. Job done.

If I was doing it again I would use a larger enclosure as the size I used was only just big enough which made it a bit fiddly.

The other option I considered was using the Sonoff DIY wireless modules. They link with Alexa/Google or an app on your phone. I have a Google Home Mini in the workshop for the radio and I thought I could say “hey google turn on the vacuum”. I prototyped this and it worked but the vacuum was so noisy I couldn’t turn it off :lol:
 
Just to finish this off, I solved extending the port out the front by using advice given and sliced the hose coupler down the side, removed about 4mm and then solvent welded back together. I found a bit of 100mm ducting that you can buy from screwfix/tool station that mated the reduced hose adaptor to the front of the vacuum together with a bit of tape to secure. Job done.

FB411C8E-3ABB-46DF-AC6C-CD5426866838.jpeg
45FB3BDE-9238-41E3-A0B7-7124DB084372.jpeg
 

Attachments

  • 45FB3BDE-9238-41E3-A0B7-7124DB084372.jpeg
    45FB3BDE-9238-41E3-A0B7-7124DB084372.jpeg
    220.9 KB
  • FB411C8E-3ABB-46DF-AC6C-CD5426866838.jpeg
    FB411C8E-3ABB-46DF-AC6C-CD5426866838.jpeg
    191.2 KB
Did you get any loss of power by baffling the exhaust?
I'd too thought about doing this for the noise (and to vent outside) but thought it may reduce the power. Considering we're told to use 2 45's rather than a 90 for the power smooth tubing rather than ribbed etc etc
 
Nothing noticeable, I don’t believe it’s so critical on a HPLV extractor.
 
Did you get any loss of power by baffling the exhaust?
I'd too thought about doing this for the noise (and to vent outside) but thought it may reduce the power. Considering we're told to use 2 45's rather than a 90 for the power smooth tubing rather than ribbed etc etc
As long as the area of the baffle is larger than the area of the outlet from the vac (and it likely would be much larger, it would be fine. My old dx4000 (they may have changed it since mine was made) has a few maybe 50mm holes to vent from filled with a 3mm holey mesh.

A 100mm inlet is only 78cm2 so even if your baffle was only 5x20cm in size, it's larger than the inlet.

The thing can still suck a football through a straw. I just use a cheap remote switch like the ones posted recently from lidl/aldi.
 

Latest posts

Back
Top