oddsocks
Established Member
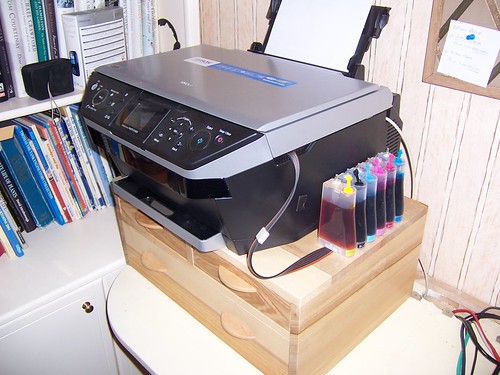
Apologies to all apprentices out there! I originally intended to make a printer stand with drawers out of MDF, but then it occurred to me that this would be a good project to practice the skills needed for a full sized chest of drawers without using too much wood (in fact most of this was recycled).....
No WIP photos - I started this in May but then my daughter's wedding took precedence so it only finally got completed last week. I deliberately tried to use a number of different techniques -
Most of the wood is ash with the handles in maple. The finish is chestnut spray sanding sealer followed by chestnut spray satin acrylic and a coat of wax.
Hopefully the photos make it clear....... One day I'll upgrade the painted MDF desk to ash as well!
(PS the printer in an epson RX685 fitted with an external 'continuous' ink system bought some time ago on ebay)
 [/img]
No WIP photos - I started this in May but then my daughter's wedding took precedence so it only finally got completed last week. I deliberately tried to use a number of different techniques -
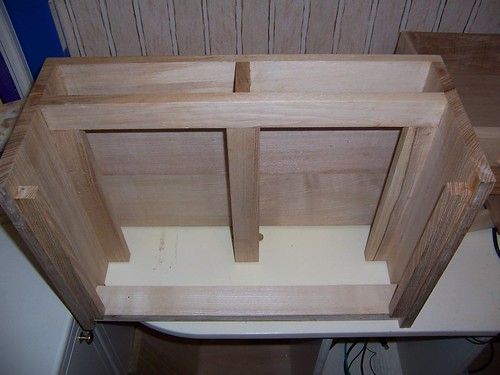
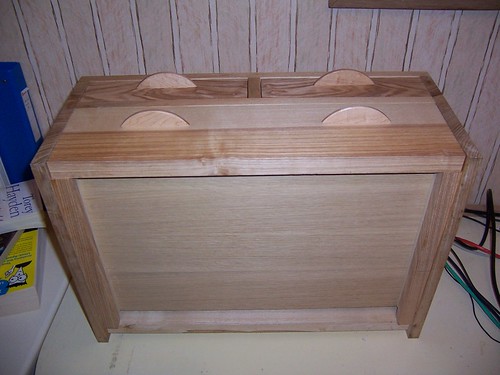
- biscuit jointing of top and sides
traditional (ish) top drawer frame runners with central divide (the sides are router grooved in)
pocket screws for the back rail
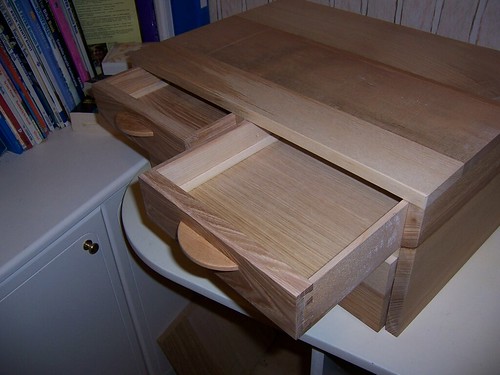
dovetails on the drawer fronts
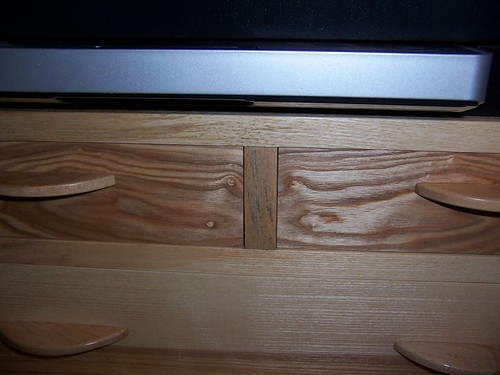
book matched top drawers
drawer bottoms held in front groove and then sandwiched between lower bearers and upper curved retainers (I fitted the base in position then glued the bearer followed by retainer)
handles turned from maple - 2 discs, each yielded 2 handles complete with tenons that fitted a routed slot
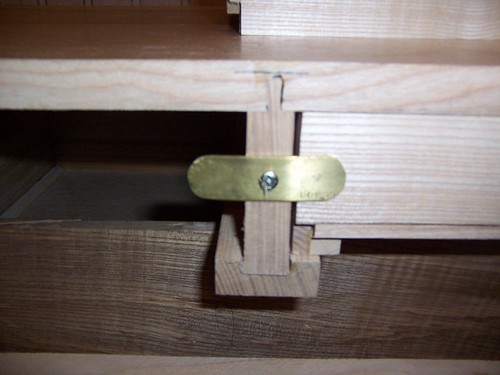
top drawers sit slightly recessed to give a shadow line -a brass plate at the rear adjusted with gentle hammer blows set the depths
Most of the wood is ash with the handles in maple. The finish is chestnut spray sanding sealer followed by chestnut spray satin acrylic and a coat of wax.
Hopefully the photos make it clear....... One day I'll upgrade the painted MDF desk to ash as well!
(PS the printer in an epson RX685 fitted with an external 'continuous' ink system bought some time ago on ebay)


