Post a photo of the last thing you made

UKworkshop.co.uk

Help Support UKworkshop.co.uk:

This site may earn a commission from merchant affiliate links, including eBay, Amazon, and others.
MikeG.":3fozq6dk said:
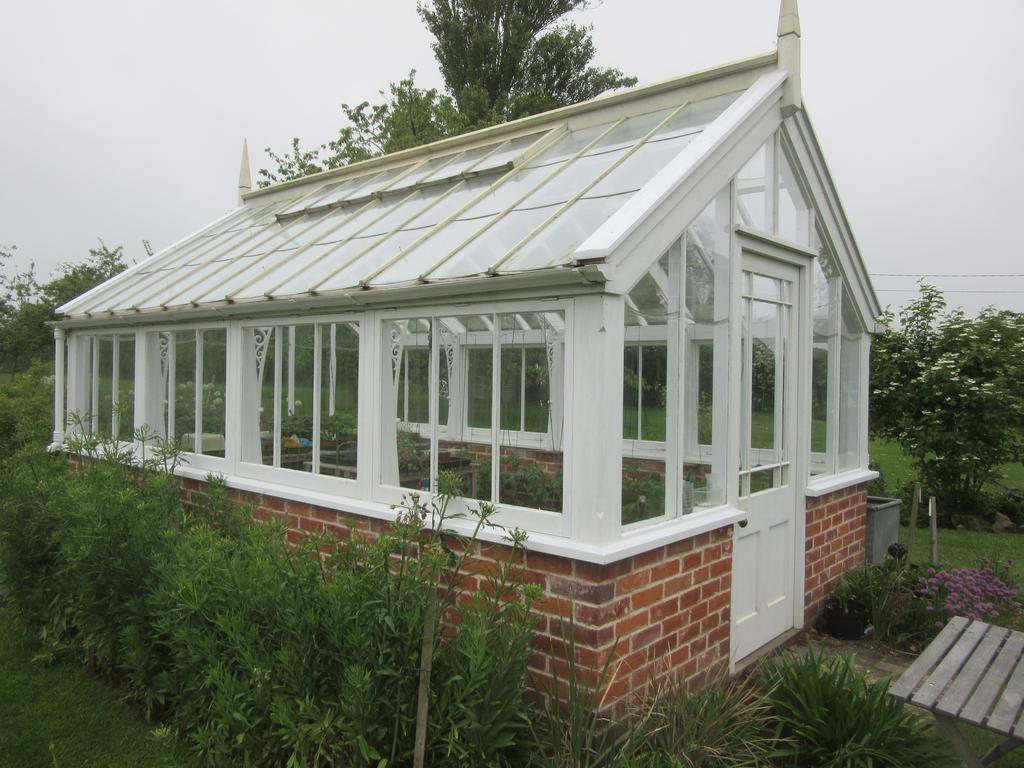
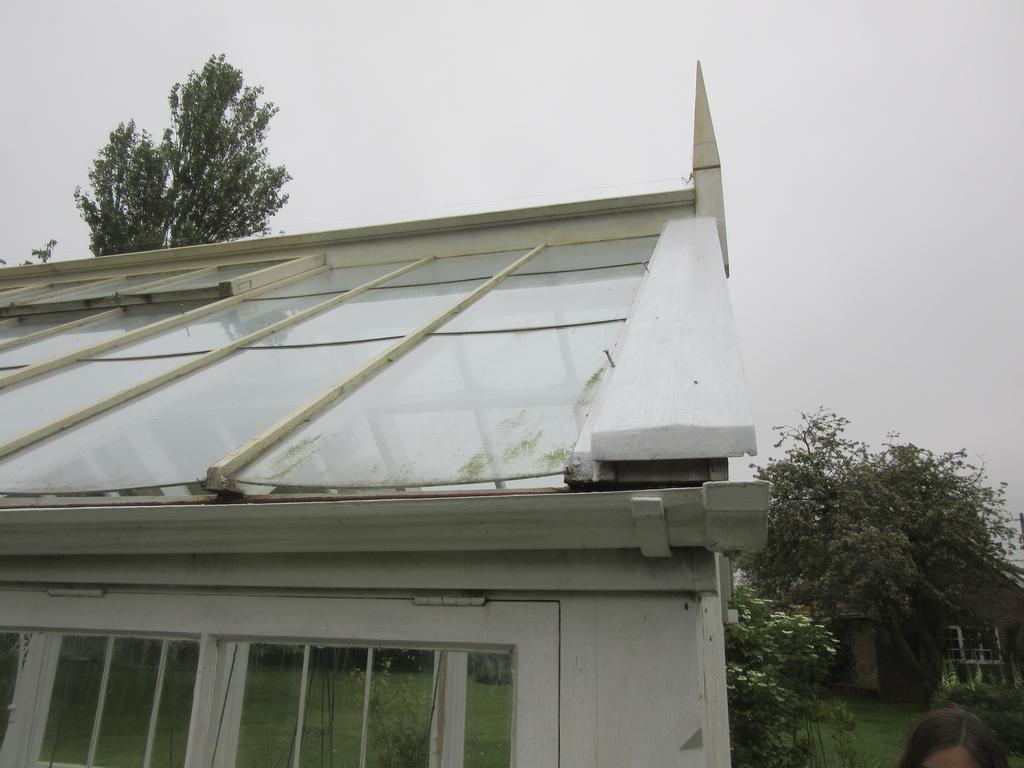
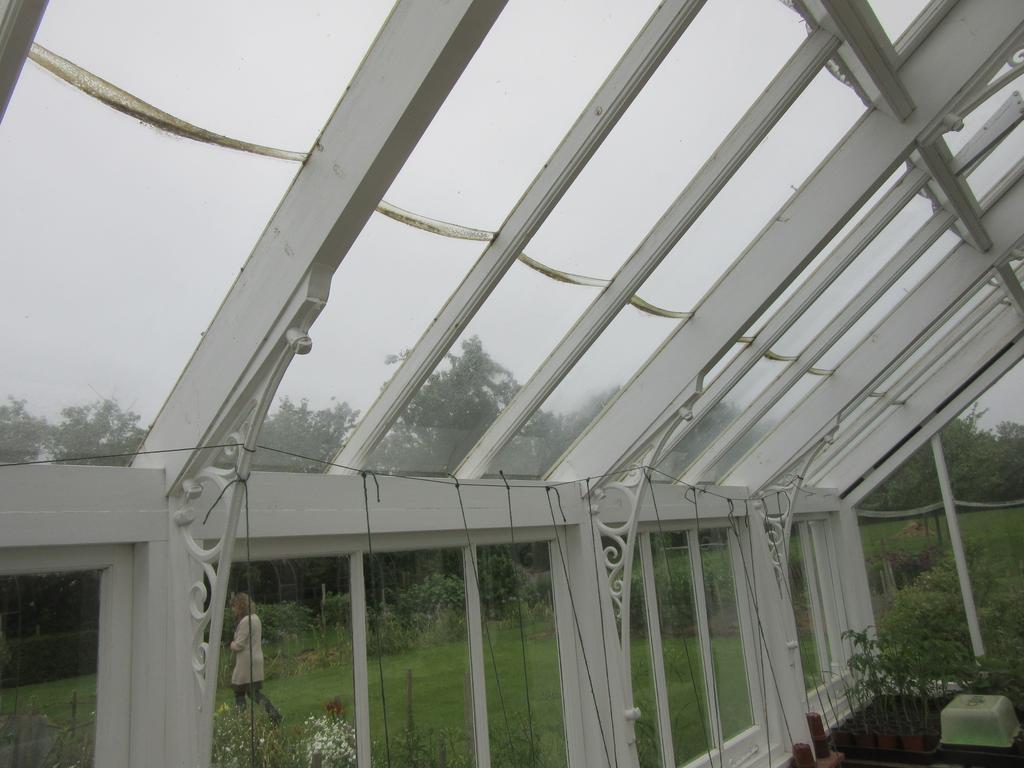
It was the Victorians and the Edwardians who did the smaller over-lapping panes detail. They just couldn't get big enough sheets of glass to do an entire run down one side of a a roof in a single sheet. Here's the one I have modeled mine on:
tPd0h2W.jpg


MZGiJPd.jpg


cqGpSFP.jpg


There's no extra timberwork, just lapped panes of glass. I'll be starting ours sometime in the last 2 years. I promised.

I wonder - were the curved bottoms of the sheets because they were spun? IIRC that's how they made glass sheets, spinning a flat disk and the bullseye (much sort after now ironically) was the unwanted waste - the doors that had bullseyes in them were the poor and the cheapskates.
 
MikeG.":7i0iy1d3 said:
Nice, Richard. Did someone steal all the personal pronouns from your text? :lol:
I was in engraver mode where every superfluous word was removed...
 
rafezetter":344xu4gm said:
..........were the curved bottoms of the sheets because they were spun?

No, it's just to concentrate the water that runs down the roof into the middle, keeping it away from the timber and putty.

IIRC that's how they made glass sheets, spinning a flat disk.......

Well, sort of. They used to blow it, then cut open the resulting big bulb and open it out whilst it was still warm. The bullseye was where the glass connected to the tube.
 
MikeG.":4wgqdzlz said:
rafezetter":4wgqdzlz said:
..........were the curved bottoms of the sheets because they were spun?

No, it's just to concentrate the water that runs down the roof into the middle, keeping it away from the timber and putty.

IIRC that's how they made glass sheets, spinning a flat disk.......

Well, sort of. They used to blow it, then cut open the resulting big bulb and open it out whilst it was still warm. The bullseye was where the glass connected to the tube.

glass making process https://www.youtube.com/watch?v=QO75WvW ... gs=pl%2Cwn

not sure on the bullseye. it makes sense but all of the videos I have seen cut it off and didn't make a bullseye piece.
 
The other end of the plant warming spectrum!

83841A1C-9150-4411-B597-04AB8500D60A.jpeg


E38FED8D-D591-48FB-A499-4C79D1268E19.jpeg


Hoping to grow something more exotic with the extra heat.

Construction is 20mm pvc overflow pipes onto a 4x2 wooden frame. All in its about £50. So well worth a punt.

Fitz.
 

Attachments

  • E38FED8D-D591-48FB-A499-4C79D1268E19.jpeg
    E38FED8D-D591-48FB-A499-4C79D1268E19.jpeg
    510.2 KB
  • 83841A1C-9150-4411-B597-04AB8500D60A.jpeg
    83841A1C-9150-4411-B597-04AB8500D60A.jpeg
    532.5 KB
Fitzroy":2n6cpc1v said:
The other end of the plant warming spectrum!

View attachment 83841


Hoping to grow something more exotic with the extra heat.

Construction is 20mm pvc overflow pipes onto a 4x2 wooden frame. All in its about £50. So well worth a punt.

Fitz.

More my kind of gardening! Good work.
 
Coppiced hazel stem is abundant and free if you are responsible for making bowed canvas type supports. Just a thought for temporary cold frames.
 
A couple of things i recently finished making.

Made some new doors for the end of the hall cupboard. Faux “shaker style”, as ordered by SWMBO, made from MDF. I am mot a big fan of working with MDF, and hopefully that’s the last painted project for a very long time! But for someone colourblind, i’m pleased with the colour i chose. Also replaced the original bowed chipboard shelves with birch ply.

4A3C14FF-08F9-43BF-B6C2-C61100C396ED.jpeg


8A38A5B6-ECC4-44E2-B676-B550F5CAFE33.jpeg


Also a mirror frame i finished making a few weeks ago for an old beveled mirror which my Gran once owned. Rippled ash with walnut splines. The mirror and frame together are surprisingly heavy!

FDFAF437-827B-4741-BB66-CA34EABCC8AA.jpeg


9B223F35-6F74-4EEA-9AFD-FD9BB57EC6D9.jpeg
 

Attachments

  • 4A3C14FF-08F9-43BF-B6C2-C61100C396ED.jpeg
    4A3C14FF-08F9-43BF-B6C2-C61100C396ED.jpeg
    1.6 MB
  • 8A38A5B6-ECC4-44E2-B676-B550F5CAFE33.jpeg
    8A38A5B6-ECC4-44E2-B676-B550F5CAFE33.jpeg
    1.7 MB
  • FDFAF437-827B-4741-BB66-CA34EABCC8AA.jpeg
    FDFAF437-827B-4741-BB66-CA34EABCC8AA.jpeg
    372.1 KB
  • 9B223F35-6F74-4EEA-9AFD-FD9BB57EC6D9.jpeg
    9B223F35-6F74-4EEA-9AFD-FD9BB57EC6D9.jpeg
    1.8 MB
marcros":1wq8wu0s said:
MikeG.":1wq8wu0s said:
rafezetter":1wq8wu0s said:
..........were the curved bottoms of the sheets because they were spun?

No, it's just to concentrate the water that runs down the roof into the middle, keeping it away from the timber and putty.

IIRC that's how they made glass sheets, spinning a flat disk.......

Well, sort of. They used to blow it, then cut open the resulting big bulb and open it out whilst it was still warm. The bullseye was where the glass connected to the tube.

glass making process https://www.youtube.com/watch?v=QO75WvW ... gs=pl%2Cwn

not sure on the bullseye. it makes sense but all of the videos I have seen cut it off and didn't make a bullseye piece.

I'm certain I've seen a video where the molten glass was just spun and spun into a disk, if that method above was used (and not sure how 200 years ago) it doesnt explain how bullseye glass comes about.

A hand spun disk of glass however, does explain how a glass bullseye with a section of FLAT glass around it can be formed.


aha - found something similar to what I've seen - it's called a "crown" of glass.

https://www.youtube.com/watch?v=kzBXU2ovfGo

and another one - sorry about the awful music - https://www.youtube.com/watch?v=aw43nRwZrTw.

flat glass - round edge, bullseye middle - no fancy machines.
 
Next doors 7 year old asked if I could make a car for him. ''Go and draw one and I'll have a go'' says I.
I am leaving it for him to put together and paint. (the wheels aren't on properly in the pics)

IMG_2676.JPG


IMG_2677.JPG


IMG_2678.JPG


IMG_2679.JPG
 

Attachments

  • IMG_2679.JPG
    IMG_2679.JPG
    515.2 KB
  • IMG_2678.JPG
    IMG_2678.JPG
    478.1 KB
  • IMG_2677.JPG
    IMG_2677.JPG
    479.1 KB
  • IMG_2676.JPG
    IMG_2676.JPG
    605.1 KB
A linen chest in Euro Oak with Bog Oak accent details:

IMG_4566.jpg


IMG_4564.jpg


IMG_4562.jpg


IMG_4560.jpg


IMG_4561.jpg


IMG_4555.jpg


Finished with a couple of coats of Osmo PolyX and burnished with 0000grade wire wool dipped in decent wax polish - Rob
 

Attachments

  • IMG_4566.jpg
    IMG_4566.jpg
    242.1 KB
  • IMG_4564.jpg
    IMG_4564.jpg
    225.7 KB
  • IMG_4562.jpg
    IMG_4562.jpg
    231.5 KB
  • IMG_4560.jpg
    IMG_4560.jpg
    233.2 KB
  • IMG_4561.jpg
    IMG_4561.jpg
    232.1 KB
  • IMG_4555.jpg
    IMG_4555.jpg
    231.1 KB
MikeG.":34wu84ie said:
=D> =D> =D> Very nice Rob. Rift sawn "legs" (corner frames)........ I like that. A modern take on a classic look.
Thanks Mike; corners are mitred with a long 6mm thick ply spline for reinforcement. Should be more than strong enough - Rob
 
MikeG.":1oy32iqt said:
What's that frame gadget in the last photo? Is it to hold the lid whilst you mark out the hinges?
Yep, the lid is extremely heavy and almost impossible to hold steady in position for marking out the hinges. Using the screws and that frame contraption, the lid can be raised steadily until it's in exactly the right position for marking out. Works a treat :D - Rob
 
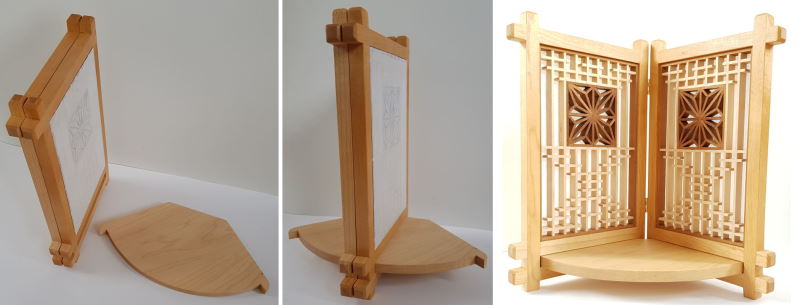
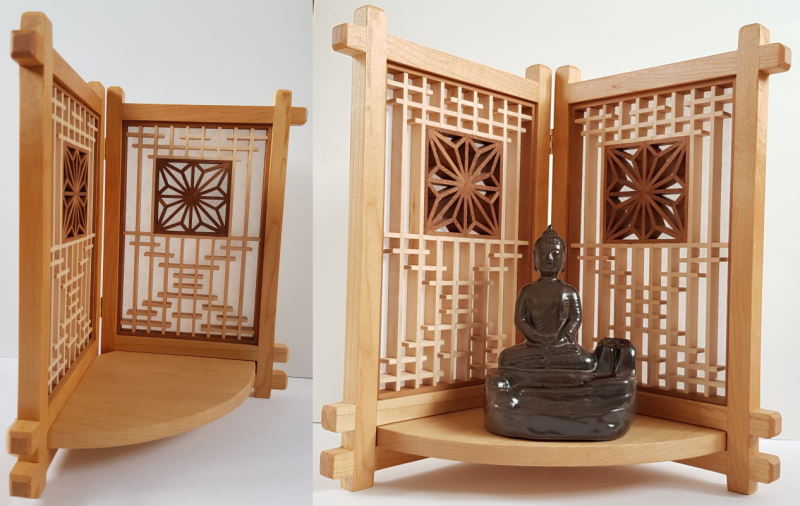
Carrying on with another idea inspired by Desmond King and taken from his website gallery, here is a table-top display stand comprising two hinged screens and a floating shelf. It stands 300mm tall and works best against a natural light source.

Kumiko%20Display%20Stand%20101.jpg


Kumiko%20Display%20Stand%20102.jpg


Stay safe, Trevor
 
Not to everyone's high standards, But , Hey I was enjoying myself in the garage on lock down. There are two of these, and yes, I know my camera is no good.
 

Attachments

  • WIN_20200510_10_29_51_Pro (3).jpg
    WIN_20200510_10_29_51_Pro (3).jpg
    30.3 KB
Here are some photos of the "art desk" I've made.

DSC_2471.jpeg


DSC_2472.jpeg


DSC_2477.jpeg


DSC_2480.jpeg


DSC_2486.jpeg


DSC_2483.jpeg
 

Attachments

  • DSC_2471.jpeg
    DSC_2471.jpeg
    202.4 KB
  • DSC_2472.jpeg
    DSC_2472.jpeg
    203.4 KB
  • DSC_2477.jpeg
    DSC_2477.jpeg
    192.4 KB
  • DSC_2480.jpeg
    DSC_2480.jpeg
    177.2 KB
  • DSC_2486.jpeg
    DSC_2486.jpeg
    228.1 KB
  • DSC_2483.jpeg
    DSC_2483.jpeg
    145.7 KB

Latest posts

Back
Top