Post a photo of the last thing you made

UKworkshop.co.uk

Help Support UKworkshop.co.uk:

This site may earn a commission from merchant affiliate links, including eBay, Amazon, and others.
El Barto":1nr4k84m said:
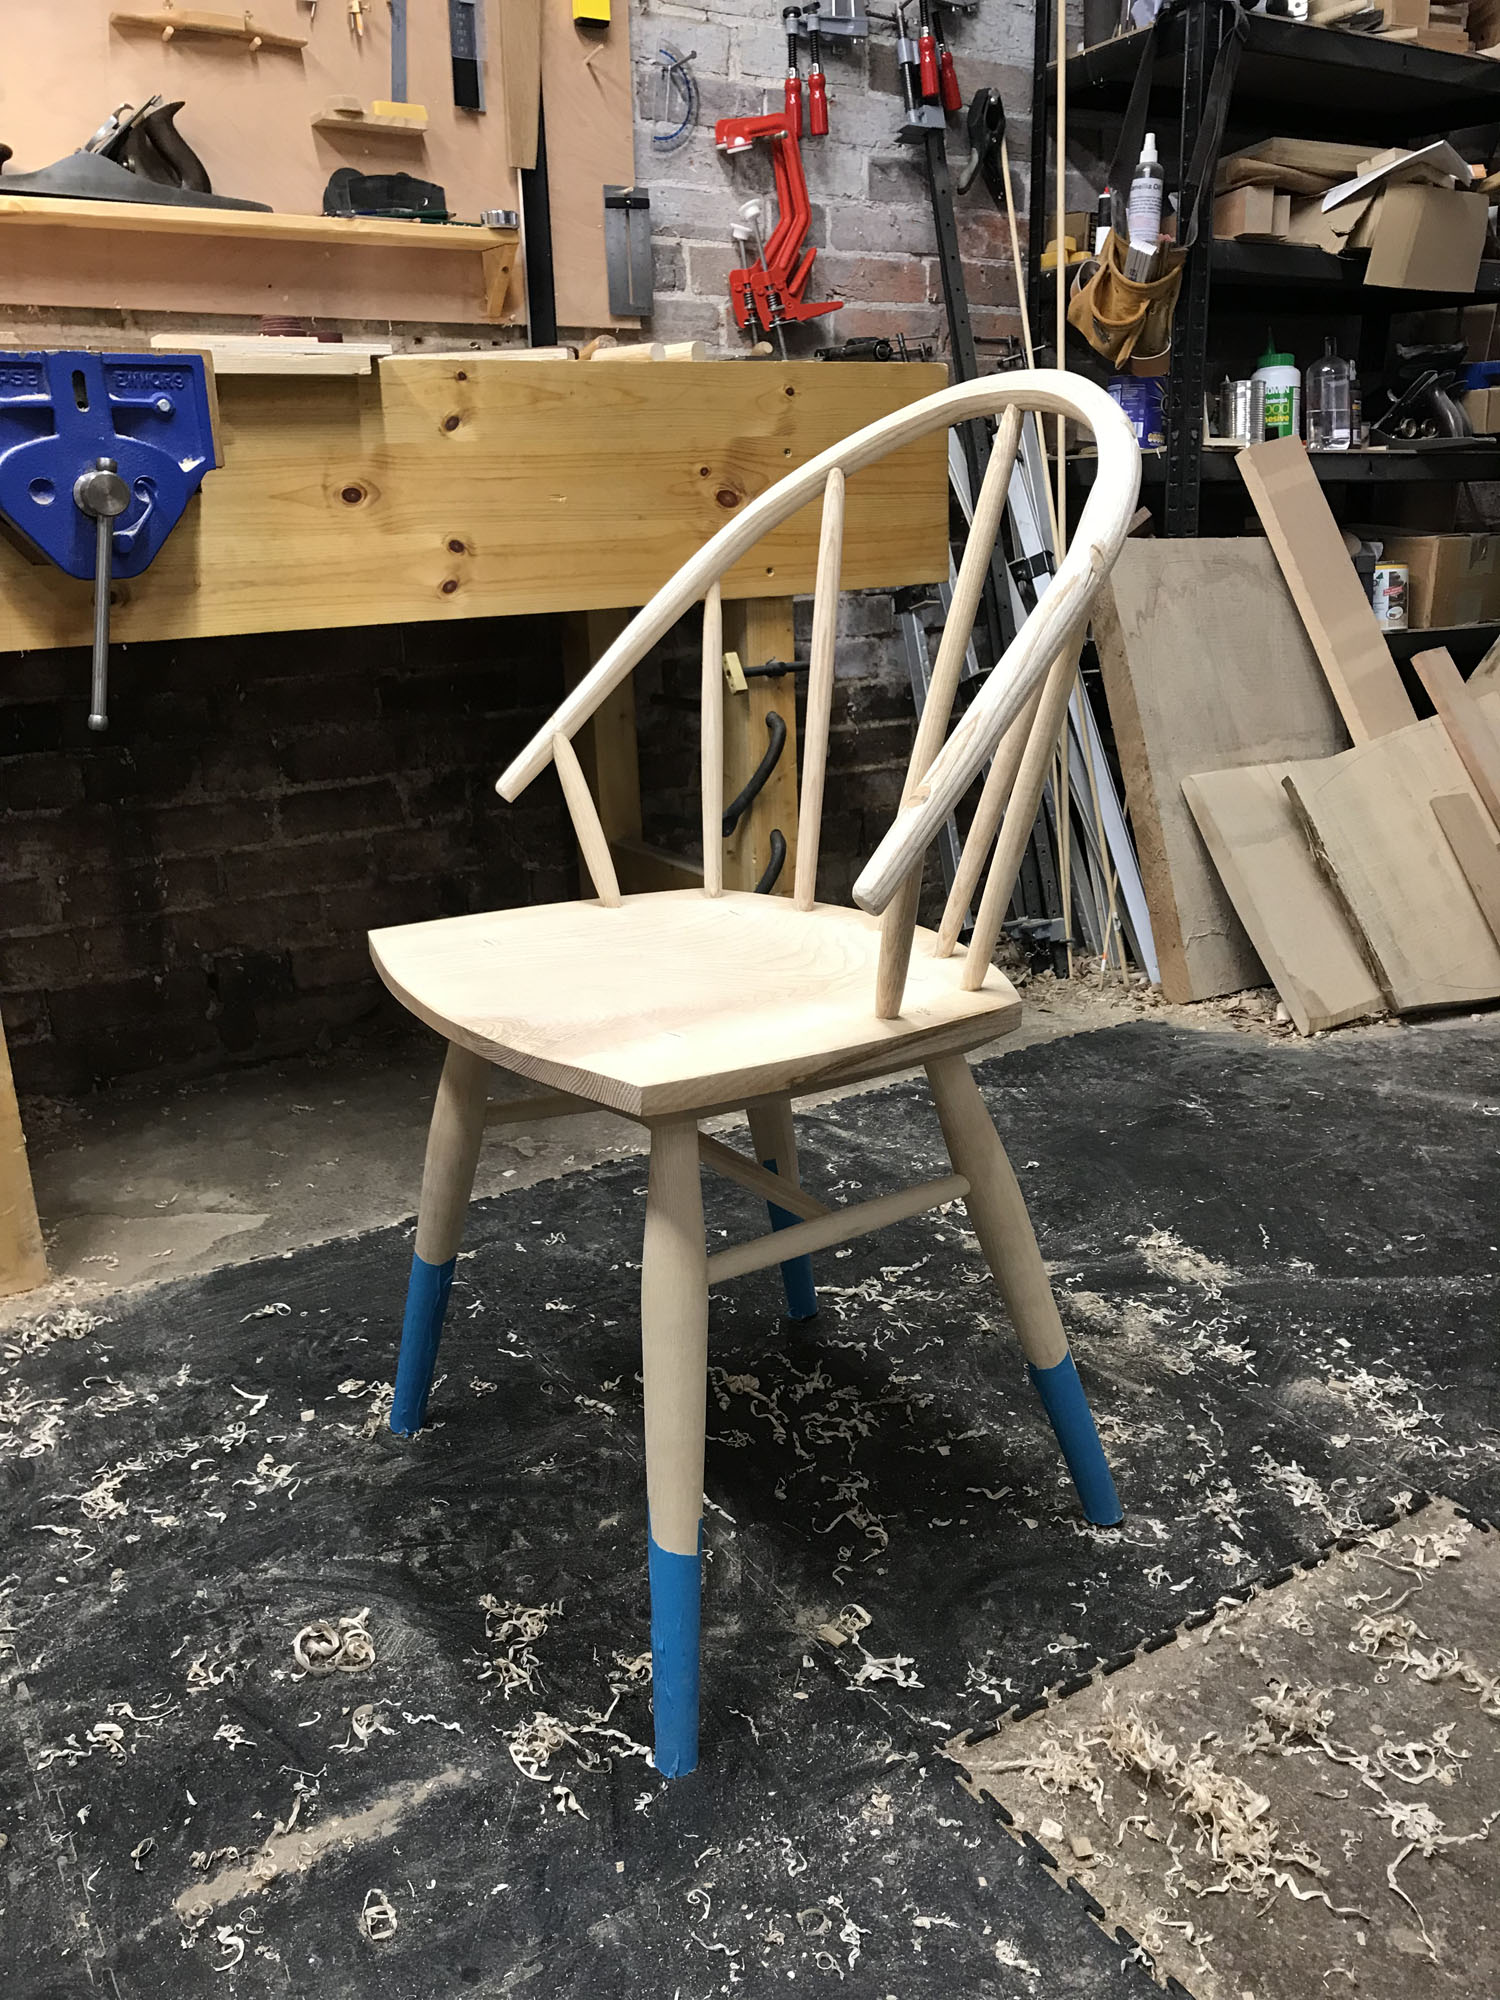
An all but finished chair. It'll receive a couple of coats of Osmo and some more tidying up on the arm/back. For instance, you can see where the second spindle joins the arm that there's been some nasty spelching/tearout. This was a combination of a difficult drilling angle, too much haste and general inexperience, although in some cases it just happened. Ideally I'd spokeshave thing like this away but I also run the risk of making the arm too thin.

I was pretty much making this up as I went along; the other 3 should be much easier and quicker now I've figured out the process.
g9xs4oB.jpg

That's a cracking chair. Can I ask how you jigged the arm for the drilling, and how on earth did you get the angles right?

xy
 
Thanks! Here’s a photo of the jig. The mortises are laid out on the seat already, I then drill from above, lining up the arm mortises with where I think the seat mortises are. There is a bit of guesswork involved but luckily the spindles are quite forgiving and allow for a pretty wide margin of error.

Apologies that that photo uploaded sideways... :(
 

Attachments

  • 61E4ED4E-7582-4B3F-8855-E5542CBC8E95.jpeg
    61E4ED4E-7582-4B3F-8855-E5542CBC8E95.jpeg
    4.1 MB
I'll bet that's nerve racking, to start at least! Well done, the thought of that gives me the heeby geebys just thinking of it. Basically fear of losing the work I had done already. Still fortune favours the brave and all that, and you seem to have sorted the task. Well done again.

xy
 
xy mosian":2xonxsl3 said:
I'll bet that's nerve racking, to start at least! Well done, the thought of that gives me the heeby geebys just thinking of it. Basically fear of losing the work I had done already. Still fortune favours the brave and all that, and you seem to have sorted the task. Well done again.

xy

It’s definitely not without risks, the steep angle of the back especially makes drilling and eyeballing the angles harder. I ruined two backs before finally getting it right.
 
Could you make a two angle jig Bart? Just a basic guide like setting a square to get 90 deg while drilling. Something basic to sit on the seat to aid accuracy except it has 2 angles. To the rear of the seat and the side. You'd need to make 3 but just rough mdf guides. Half hour at most if you have a glue gun. Probably a daft solution.
Cheers
Chris
 
been making some very wide shelves, if it doesn't work out they'll double up as a fin for my car to make it go faster, made the brass hanging plates as well
 

Attachments

  • IMG_0744.JPG
    IMG_0744.JPG
    1.9 MB
  • IMG_0748.JPG
    IMG_0748.JPG
    1.5 MB
  • IMG_0750.JPG
    IMG_0750.JPG
    1.7 MB
The "end plates" are very "aerodynamic"! And I do like the brass work, looks very neat. How did you get it so shiny & scratch-free?
 
do you mean the brass AES? I sanded it through the grits up to 600 grit then autosol then waxed it with alphie shine, then repeated that on the screws. It wasn't easy handling an almost 2 metre long piece without dents, I should be hanging it over the next few days, going to get some help for that.
 
Yes, I did mean the brass. Like that finish.

I'm currently doing much the same with some thin ali channel for a project - down thru the grits with W&D, then solvol autosol.

BUT I though I'd be a bit "clever" and added some liquid Brasso to the polishing mop for a 2nd go (mop is just a simple cotton mop on a mandrel in an electric drill set in a bench fixture). But I "forgot" and turned the drill on fast and got Brasso all over the place, including me! Mrs AES was NOT impressed when I appeared for dinner last night and said I stank (stunk?) like the town drain - made me change my clothes instead of just washing my hands as I "usually" (well, "often" anyway) do before din dins!

But the ali IS coming up nicely. Any idea how long it will keep that nice high gloss - ali is a known so-and-so for oxidizing in just normal air?

Anyway, thread drift, sorry, but that brass does look good. Well done.
 
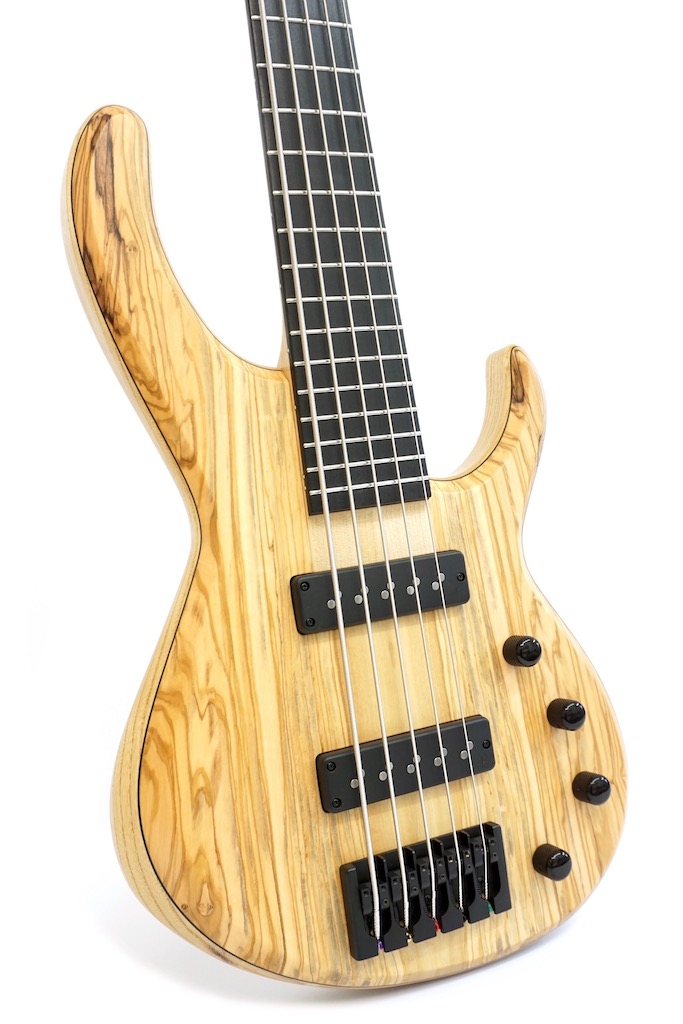
A photo of my latest build.. Swamp Ash body with bookmatched Italian Olive top, Maple neck, Rocklite fretboard. Finished with Osmo PolyX.

bzBfBf.jpeg
 
Simo":1knavmbn said:
A photo of my latest build.. Swamp Ash body with bookmatched Italian Olive top, Maple neck, Rocklite fretboard. Finished with Osmo PolyX.

bzBfBf.jpeg

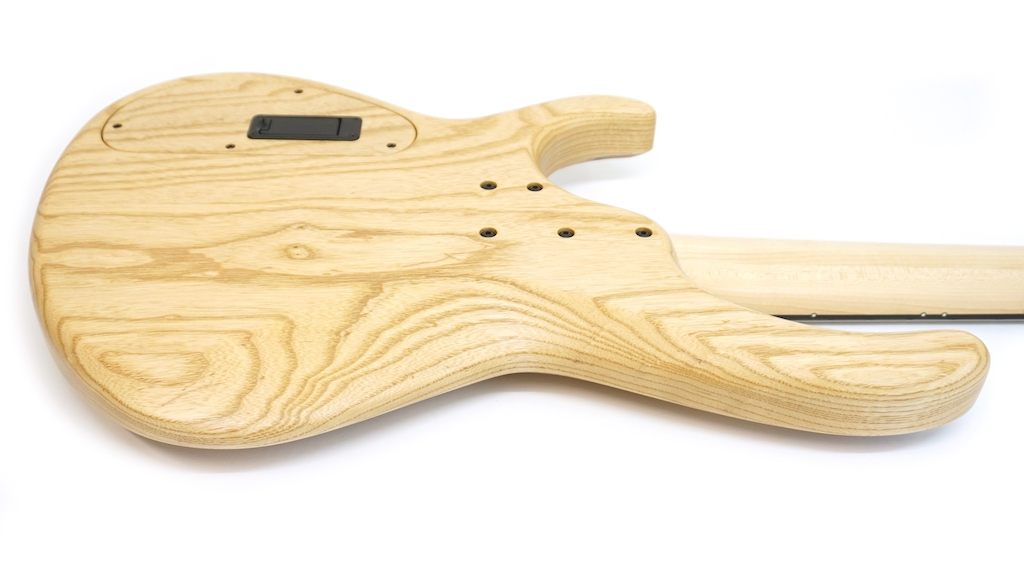
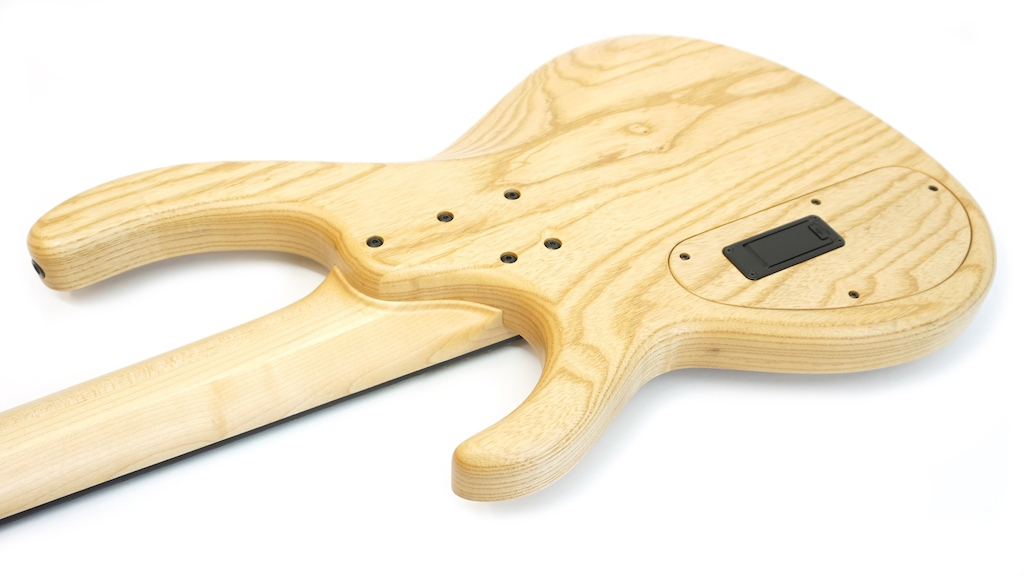
Got a photo of the other side? I want to see what swamp ash looks like.
 
MikeG.":fl9j9rqk said:
Got a photo of the other side? I want to see what swamp ash looks like.

Sure, no problem. It looks as you'd expect Ash to look, it's just much lighter in weight than you're typical English or White Ash (if I remember correctly ''Swamp Ash'' is another term for Green Ash).

Bv2aUx.jpg

qIwpZG.jpg
 
No idea what it's called. Sorry. But Simo the way you have matched the grain pattern to the shaping of the body on the bottom section is masterful. (hammer)
 
Simo":1m2xdsg4 said:
A photo of my latest build.. Swamp Ash body with bookmatched Italian Olive top, Maple neck, Rocklite fretboard. Finished with Osmo PolyX.

bzBfBf.jpeg

Don't let Pete Townsend near it when he's pineappled :lol: far too nice, love it.
 
Oak, Sapele and iroko box for my chess pieces. All unpluged except for the hinge and magnet holes used a drill press for that. Finished with liberon special pale french polish and briwax.
 

Attachments

  • 20190218_100243.jpg
    20190218_100243.jpg
    4.1 MB
  • 20190218_100225.jpg
    20190218_100225.jpg
    4 MB
  • 20190218_100040.jpg
    20190218_100040.jpg
    3.9 MB
  • 20190218_100148.jpg
    20190218_100148.jpg
    3.7 MB
Bm101":sqlcjyc4 said:
Could you make a two angle jig Bart? Just a basic guide like setting a square to get 90 deg while drilling. Something basic to sit on the seat to aid accuracy except it has 2 angles. To the rear of the seat and the side. You'd need to make 3 but just rough mdf guides. Half hour at most if you have a glue gun. Probably a daft solution.
Cheers
Chris

Yes I think there are probably a few ways to make drilling easier that I'll need to try out next time! Will give yours a go too.
 
Back
Top