Pine Chest of Drawers - Finished

UKworkshop.co.uk

Help Support UKworkshop.co.uk:

This site may earn a commission from merchant affiliate links, including eBay, Amazon, and others.
OPJ":2afcb2a8 said:
Chems, at the moment, I'm looking at hand-cut dovetails for all eight drawers! :shock: I am watching a couple of Leigh jigs on eBay, just in case but, I still need to do a bit of research on those before I consider about bidding... I think I'd prefer a WoodRat in the long run anyway.

Box-joints may be okay at the rear... I'd have to check with Pete. Even then, I'd have to build a jig (lots of trial and error, etc.) for that... Come to think of it, I don't have any kind of track on my router table so, I'd have to look at adding at least one of those as well! :(

Good news for you, personally - that 32mm adaptor turned up yesterday inside a box full of other things which had gone missing! :D
Olly - just the merest eight? :lol: ...good for the soul. Don't waste your money on jigs to cut the d/t's, do it by hand, by the time you've finished the last set you'll know exactly how to use a dovetail saw. The fun part is then fitting them :whistle: :wink: - Rob
 
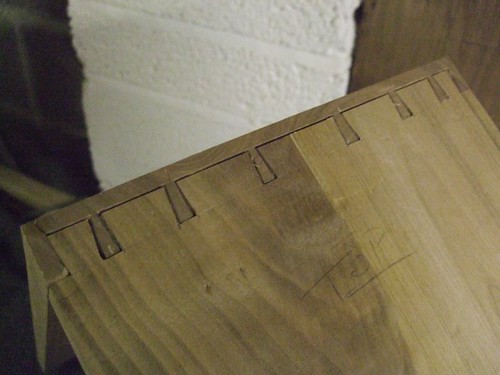
Don't worry, guys, I'm almost certain I'll be cutting those dovetails by hand :wink: - just so long as they don't turn out like this, which I was cutting over the weekend... :shock:

3815440640_5f701d1fab.jpg


Hardly my finest hour on the forums, is it! :oops: :(

I know what I did wrong and I was being very lazy. Instead of shooting the boards to length, I decided I would leave them long and chisel the waste off once the tails were cut... As you can see, this was a very bad idea and I removed far too much! That doesn't account for the split on the left-hand corner or general sloppiness of the pins, of course... :oops:

This is from a job I started (for myself) back in November, when I soon realised the limitations of my old 'bench. I've picked it up again for the weekends when I need a 'break' from the chest of drawers. :)

---

I'll have a proper update for you on this thread tomorrow. I haven't been able to make too much progress today and I'm looking at another half-day for tomorrow as well. Those dreaded drawers are coming up and I could do with some advice, while you're here... :D

My widest fronts are being cut from 8in. and 7in. redwood, with slightly narrower sides to suit. I'm very concerned about these boards cupping (given the general instability of pine) and am not sure how to approach this...

I was thinking of planing a face and edge, carefully running them through the bandsaw to give me two halves and then rejoining them with cascamite, which I'm sure would relieve a lot of the stress.

Unless there's a better solution? Obviously, I would like to keep the grain configuration so they still look 'whole'.
 
OPJ":2jk6m45p said:
My widest fronts are being cut from 8in. and 7in. redwood, with slightly narrower sides to suit. I'm very concerned about these boards cupping (given the general instability of pine) and am not sure how to approach this...


Unless there's a better solution? Obviously, I would like to keep the grain configuration so they still look 'whole'.
Olly, here's a solution that you might want to consider. Take the drawer fronts and plane them flat each side. Then stack laminate them to form a gurt (westo...you know what 'gurt' is :lol: ) pile of pine 200mm+ thick (thicker than your widest drawer) You then slice up the block of pine through 90deg once the glue has set so that each new board produced is in effect quarter sawn pine. You then pass each of the new laminated boards through the p/t to arrive at your chosen thickness, which ought to be about 18mm
The process is convoluted, but does produce true quarter sawn pine boards from 'normal' thru & thru sawn stock - Rob
 
Hi olly

good progress - swimbo most impressed

by the way i'm thinking of buying one of these http://www.axminster.co.uk/product-Axmi ... -21973.htm if I do you'd be welcome to borrow it to do the drawers

though to be honest i wasnt expecting dovetails , I thought you'd go the mitres and biscuits route as the drawers are out of sight anyway, but respect for doing it properly (yet another reason why swimbo is glad we commisioned you not me to do the build)
 
Thanks for the offer, Pete, although I will have to politely decline. My main reason is that jigs (like your one) at the cheaper end of the market produce pins and tails of equal proportion - in short, they look as if they have been made by machine, which I don't personally like. :? With a WoodRat or Leigh jig, there's more flexibility in sizing and layout. I doubt mitres would take much abuse once the drawers are fully loaded. :wink: Actually, if you look back to Monday's efforts, cutting mitres would probably make the job harder!! :D

Rob, indeed I know what "gert" means...! :D If I understand correctly what you are saying about stack-laminating, won't that completely change the appearance of the face of the board?
 
OPJ":2k6cc36d said:
If I understand correctly what you are saying about stack-laminating, won't that completely change the appearance of the face of the board?

Olly, if you can lay your hands on a copy of Robert Ingham's book, "Cutting edge cabinetmaking", he discusses the problems of quarter-sawn boards suitable for drawer making not being readily available, and describes a method similar to the one Rob suggested. Sounds good as you start with crown-cut boards and end up with, in effect, quarter-sawn boards 8)

Cheers :wink:

Paul
 
OPJ":2ktbmsot said:
If I understand correctly what you are saying about stack-laminating, won't that completely change the appearance of the face of the board?

The appearance of the board will change (it will be 'lines' of grain rather than the crown cut figure) but you'll sacrifice the standard figuring for board stability - Rob
 
Having re-read Rob's post, I now think I have a better understanding of this 'stack laminating' technique. However, my bandsaw will only take a maximum of 180mm under the guides and it doesn't like to cut more than 150mm - either way, it's not enough for the lower drawers. :(

I'll stick with my idea of splitting and re-gluing, for now. I won't be starting the drawers until next week.

That Robert Ingham book is on a never-ending Wishlist that also includes Alan Peters' book... Oh well, maybe this Christmas! :wink:
 
OPJ":1p0jou1c said:
I doubt mitres would take much abuse once the drawers are fully loaded. :wink:

left to my own devices i'd probably have cut them square and glued the joints with no nails before screwing through with M6s - but then no one would mistake me for a competent cabinet maker

(though that said i have undertaken to make swimbo a sewing table which will be a "propper" build with joints and everything - hence the dovetail jig , but i'll start a new thread on that in the fullness of time)
 
Don't mean to Hijack, but if you want to make proper joints using a jig don't buy that Axminster one.
 
OPJ":1lol6w8y said:
I'll stick with my idea of splitting and re-gluing, for now. I won't be starting the drawers until next week.

If you're going to go down that route, perhaps you should consider ripping the boards into 3 sections and turning the central section over before re-glueing thus reducing the cupping tendency across the board?

Teaching me Granny perhaps but........ :)
 
Chems":2zw1r1kk said:
Don't mean to Hijack, but if you want to make proper joints using a jig don't buy that Axminster one.

chems - why not ? and what would you recomend instead , given that i cant afford the leigh.

if you could tell me by pm so as not hijck ollys thread that would be excellent.
 
OPJ":3dfyqyf1 said:
Having re-read Rob's post, I now think I have a better understanding of this 'stack laminating' technique. However, my bandsaw will only take a maximum of 180mm under the guides and it doesn't like to cut more than 150mm - either way, it's not enough for the lower drawers. :(

I'll stick with my idea of splitting and re-gluing, for now. I won't be starting the drawers until next week.

That Robert Ingham book is on a never-ending Wishlist that also includes Alan Peters' book... Oh well, maybe this Christmas! :wink:
Olly - you could still do the fronts as I suggested, just do it in two hits. Each drawer front would consist of two narrower pieces edged jointed together and then stuffed through the p/t. That way, you'd only have to resaw say, 100mm as opposed to 200mm. It would also mean that your stack laminate pile would be 100mm instead of being much thicker.

Get both those books! :wink: - Rob
 
As I mentioned briefly yesterday, I haven't been able to be out in the workshop for the last two days as often as I would have liked. :( Yesterday began with a couple of hours on the planer - drawer rails, runners, muntins and centre posts and kickers.

3817734321_4d7b1ef38d.jpg


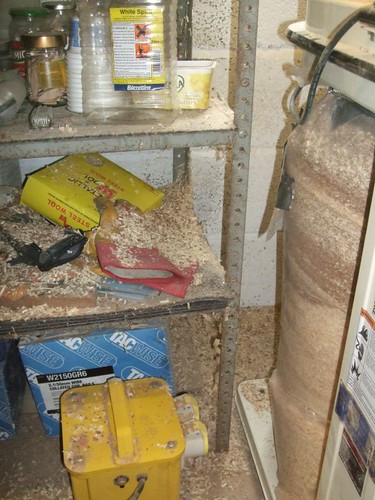
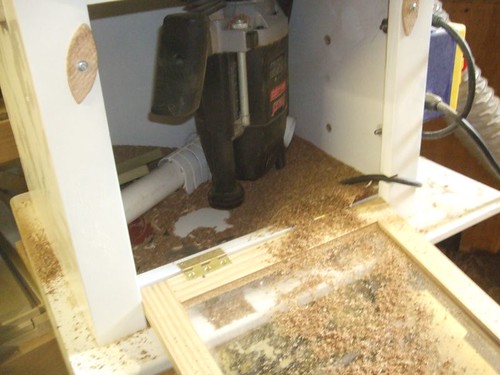
I kept glancing over at my extractor bag, expecting it to fill up any minute but, I couldn't understand why this wasn't happening... Until I noticed the big hole in the side of the bag, leaving a pile of shavings all over this shelf and the floor behind! :D

3817733475_dc86147ccb.jpg


(I'd already patched it up with duct tape by the time I took this shot.)

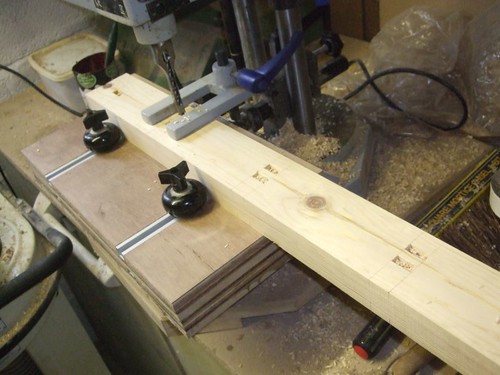
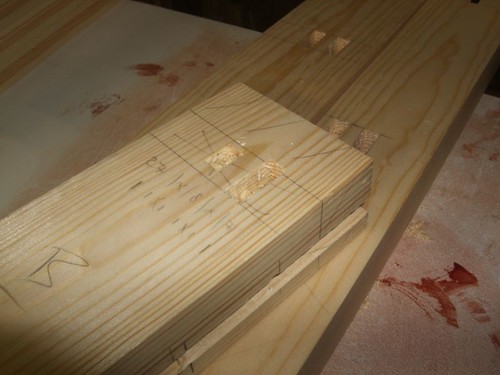
The outer stiles and centre posts needed a series of twin-mortises to receive the drawer rails. I did contemplate doing this after the end frames had been assembled but, then decided this was clearly the sensible option! :)

3818544288_d84193905e.jpg


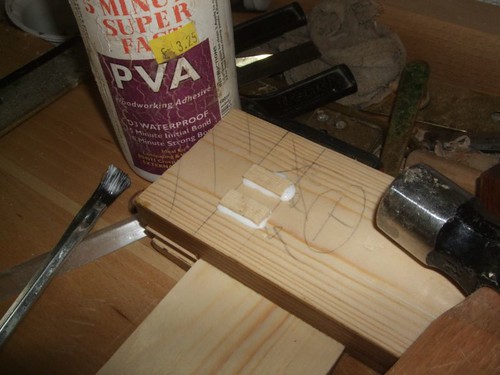
Thanks to several lapses in concentration on the mortiser, I accidentally chopped out this area at the top of each of the four stiles - this was a mistake; the top rail will be dovetailed in to here! :oops: These mortises have since been filled with scraps of pine,

3818543962_735ebeaf6c.jpg


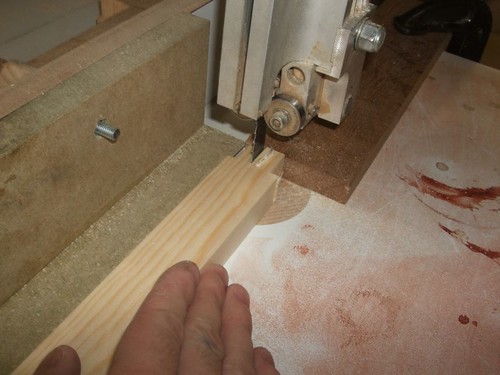
When cutting the twin-tenons, I first used the router table to get a nice, clean cut on the shoulders. Then, created two tenons on the bandsaw, like this, which left me with a little bit to be chopped out with a coping saw and chisel. Had I not made this smaller than 6mm then, yes, I could've done them on the mortiser... :roll:

3817733813_6db2a83d1d.jpg


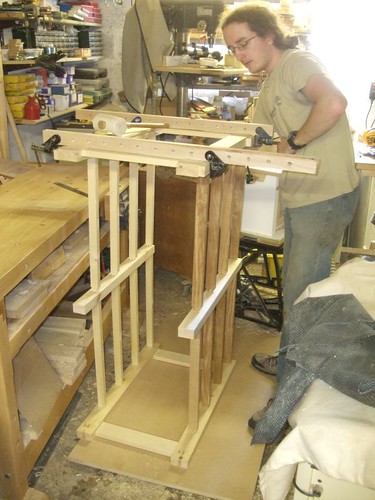
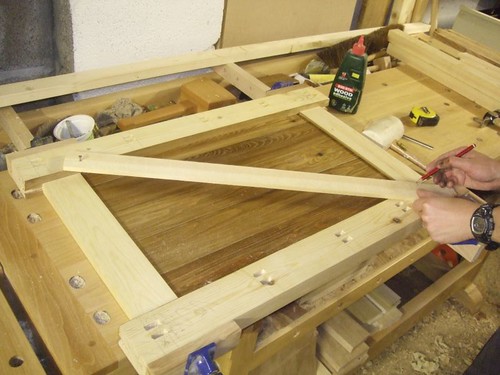
I did have time for a dry-run this afternoon and was able to take some measurements for the shoulder lengths on the runners and kickers. As you can see, this is another build which will press the limitations of space within my four-walled workshop! :D

3818544494_7f9e052289.jpg


It feels surprisingly sturdy, even without the cramps on. It's also fairly light weight, due mainly to the fact this is pine. Once those runners and kickers are glued in, I expect this to be quite solid. :)

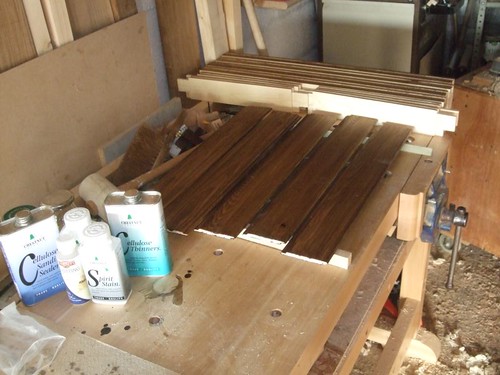
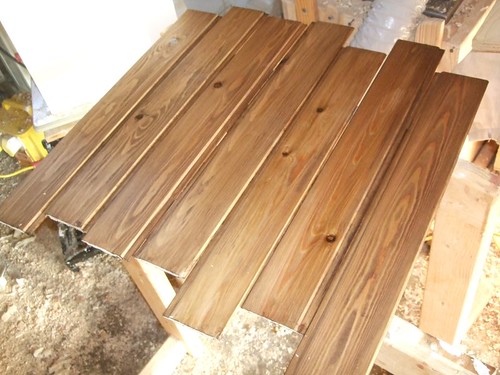
For the last couple of hours since I got back, I've dyeing my fingers brown [no, really!! :D] in preparation to glue the end frames up some time tomorrow (hopefully). Again, Mailee's tip of applying a thin coat of sealer first was used here. After staining, I added knotting solution where required. You'll also note I've done the inside edges of the frame components. Trust me, it's much easier to do them now!! :wink:

3817734215_9775d52906.jpg


I'm not sure why but, these just seem to have come out even better this time... 8)

3818544396_ae5cff4a2a.jpg


Hopefully then, I'll be able to get those end frames glued up tomorrow. Trouble is, I am literally in-and-out all-day. :(

We'll see what happens! :wink:
 
Tony Spear":aycl0yr3 said:
If you're going to go down that route, perhaps you should consider ripping the boards into 3 sections and turning the central section over before re-glueing thus reducing the cupping tendency across the board?

Thanks, Tony. You are quite right in saying three boards would give greater stability over two.

I was going to say that it might look odd but, thinking about it, I doubt it would be worse than a wide drawer with a single centre line! :D

I've still got some serious thinking to do on this one, then... :-k
 
swimbo and i would be happy with three piece drawer fronts if you think it will work better olly - it occurs to me that if you do two the kob or handle or whatever will be on the join which will make for trouble fixing.

also excuse my ignorance but what are "muntins" in my day that was a derogatorary term for the really ugly but over made up girl at the college disco e.g "shes like totally muntin" but i somehow doubt that this is the correct definition in this context ;)
 
Pete, yes, I also had a similar thought with regards to fitting the handles. I doubt it would make the actual fixing difficult but I'm quite certain it would look a bit odd. :?

For your information, muntins, in this situation, are narrow strips of wood fitting to the underside of the drawers - they're mainly used in wide drawers to help the base withstand heavy loads.

3819063020_d5b87e1e46.jpg


They're also common in window and door construction. Oh, and I've also met a few "munters" in my time but, that's totally irrelevant here!! :D
 
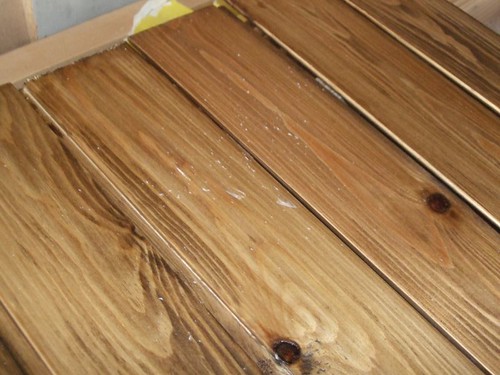
What little time I found to work on the chest this morning (roughly two hours) was largely wasted as I spent most of that time trying to clean out my Earlex HV5000 spray station! :x It's my own fault for not cleaning it after attempting to spray emulsion on the workshop walls, a few weeks ago. With the stain and knotting dry, I decided I'd try and spray on a coat of sanding sealer... Every now and then, there was a 'cough' and a 'splutter' and, well, take a look for yourselves... :oops:

3820476831_ee574574b1.jpg


Fortunately, I did this test-run on the back faces, which will be unseen inside once the drawers are in. So, I picked up another cloth to do the show faces, which worked okay.

I was using a thicker mix of thinners than before. If you add too much thinners at this stage, the action of a cloth or brush stroke will cause the stain to lift - DAMHIKT!! :oops:

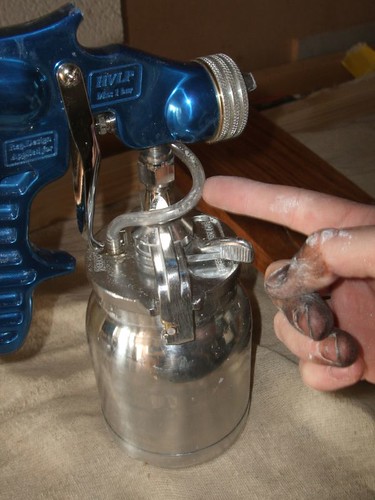
I've taken almost everything apart, used all the supplied cleaning brushes and emptied almost 500ml of thinners through the gun - and yet, it's still spitting out little white bits of emulsion every now and again!!! :evil: I think the problem may be in the pipe as illustrated below. It doesn't appear to be easy to get in there; the supplied brushes will only go about half way. :( I think it's purpose is to filter air from the nozzle in to the container...? I'm hoping Philly might have an answer! :D

3821283110_cc32c00035.jpg


Been driving all afternoon and was pleased to find a couple more hours in the workshop this evening... Until I came to doing a dry-run on the end frames. Well, wouldn't you know it, the boards are too bloody tight after all! :x Now I understand the reason for those 'side rebate' planes Veritas re-introduced to the world last year! (I wish I had one now!) :roll: In the morning, I'll be back on the router table, trying to ease the width of the grooves VERY carefully... :?

Speaking of 'muntins', I've promised two of them I'd give them a lift down to Weston in a minute (well, they are paying me for petrol!)... :D
 
Despite a very late start following a late night, today was a much better day in the workshop! :D I carefully re-cut those grooves and was soon able to glue and cramp up both end frames, not forgetting to check for square (spot on!! 8))

3823405683_fa69538c34.jpg


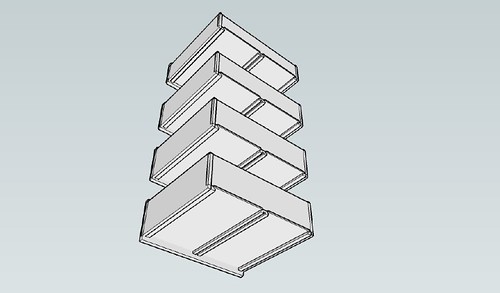
With all rails and runners now tennoned, I could happily move on to grooving the runners and muntins, as per JonnyD's sketch in the Design thread.

3824208536_ac9431f1f8.jpg


Using a 3/8" diameter cutter, I cut a perfectly-centred 12mm wide groove in two passes. There was little point in fitting my extractor hose to the rear of the fence - this next shot tells you why I really should sort out my below-table extraction setup... :roll: :oops:

3824208444_3889a2b4b5.jpg


After a few hours, I took the cramps off and cut some tiny little 8mm thick blocks to fill in those unwanted twin-mortises I cut several days ago. I also spent a good amount of time cleaning up the rails and runners ready for final assembly. All it took was a sharp no.4 with a Clifton blade - beautiful and absolutely no need for anything less than 240g paper! 8) :wink:

3824208350_8b064255db.jpg


So, come Monday morning then, I'll be looking to assemble the whole carcase - to be honest, I haven't quite figured out how I'm going to do it.... Of course, I'll do it in two parts but, even then, I'm not sure I have enough sash cramps...! :roll: :D Tapered cauls may help connect the runners in to the rails, front and back... :-k

Whatever happens, you'll find out next week! :wink:
 

Latest posts

Back
Top