Noobs needs help with hand planing!!

UKworkshop.co.uk

Help Support UKworkshop.co.uk:

This site may earn a commission from merchant affiliate links, including eBay, Amazon, and others.
LuptonM":n3lxh9cc said:
...
Should engaging with the wood with the blade intitally be very hard (I am applying most of the pressure to the front knob)?
No. Try setting the blade right back so it doesn't cut at all - then go through the motions. Does the plane catch as the mouth passes the start of the board?
If yes then you could have the frog screws too tight, which will press the sole down behind the mouth - have a look at the frog and how it is fixed; you will see how it pivots.
But you don't necessarily start a cut at the end of the board - you are trying to flatten it so you should be planing the high points. Have a squint along the board. Is it bowed higher in the middle? If so, set the blade down again and concentrate on taking the top off the high point. Scribble pencil all over the board and you can see what effect you are having as you plane.
And so on - looking and thinking as you go.
 
I think you may have found one of my problems. When I said I think the frog is tight before, the frog was actually so tight I couldn't move the screws (I didn't tighten it - I came like it) so I'll have another go and see if loosening it helps.

When appyling candle wax to the bottom do you simply rub the candle against the sole? - I would have thought candle wax would add friction
 
LuptonM":5z4s99qd said:
When appyling candle wax to the bottom do you simply rub the candle against the sole? - I would have thought candle wax would add friction

Yes - just scribble on the sole with it like you were doing with your marker pen. You'll feel the difference!
 
I think after all the things I've done to my plane I think that lapping the sole has actually helped the most (even though I didn' quite finish it) but I am still not happy with it. I am not really sure what to do, any suggestions?

Is it reasonable to expect to be able to plane thorugh oak end grain or not as my plane can barely touch it?
 
I doubt that lapping has made much difference. It's more the whole process, of fiddling about, adjusting, sharpening and most of all - having a go at using it, which all add up to improved performance.
Of all the things you can do, after sharpening, candle wax on the sole perhaps makes the biggest difference.
 
LuptonM":1zimlc7h said:
A bit deeper it takes a shaving but not at full blade width

It's extraordinarily difficult to get a thin, full width shaving, so don't worry.

If the blade edge (e.g.) had a 1/8" camber it clearly cannot take a full width shaving thinner than 1/8".

Now, if you're aiming for a half-thou shaving (a noble target for a smoother) your blade edge would have to be straight to an accuracy a good deal better than half a thou...

In practice, most people don't GET full width, thin shavings.

Welcome to the (large) club!

BugBear
 
LuptonM":22xqddhp said:
Is it reasonable to expect to be able to plane thorugh oak end grain or not as my plane can barely touch it?

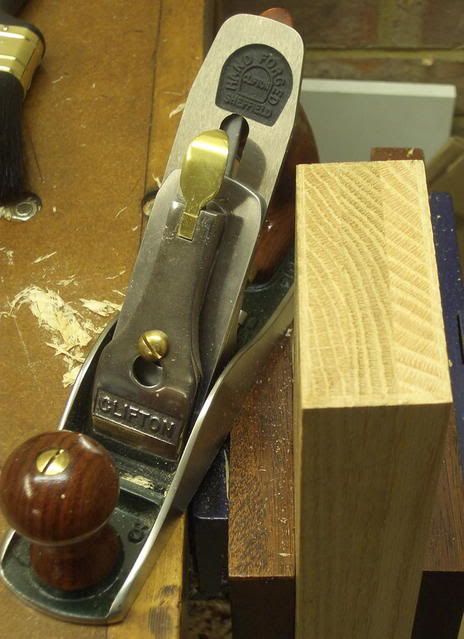
Oak end-grain can be very hard so it will test your plane. If it's, say, an inch or more thick, then it's best to do it freehand in the vice, like this

Endgrain3.jpg


That was three pieces of oak laminated together which I planed with my Clifton #3. You need a very sharp blade, set to take very thin shavings. While it won't make any difference to the shavings, I find it best to close the mouth up as much as you can. Take slow, deliberate shavings. If nothing much is happening, try turning the wood round and plane from the opposite direction. In my experience, for this type of thing, the thicker the blade and heavier the plane, the better. I sometimes use my #7 on end grain.

If the wood is less than an inch thick, you are better off using a shooting board. If you haven't one, there's some great stuff on Alf's site. Make one and you'll find it one of the most useful tools you have http://www.cornishworkshop.co.uk/rocketscience.html

Cheers :wink:

Paul
 
When I tried to plane the end grain my shavings look like yours (more like scrapings).

What difference does adjusting the distance between the blade and the sole (the mouth?) make?

Well thanks for anyone that replied, I guess all that I have to do now is practice
 
LuptonM":8ix3zh9f said:
What difference does adjusting the distance between the blade and the sole (the mouth?) make?

When planing end-grain, it usually involves smallish pieces of wood. Having a large mouth on the plane has a tendency for the wood to get caught in the mouth. Closing up the mouth won't make any difference to the shavings - it will just make the planing easier. A little wax on the sole also helps.

Cheers :wink:

Paul
 
Just another thought - it also sometimes helps to skew the plane slightly, particularly when starting the cut, on end-grain. That will give the blade more of a slicing action.

Cheers :wink:

Paul
 
Hi LuptonM,
Forgive me if you already know this but just check to make sure your blade is installed in the plane the right way up. The blade bevel should be facing the frog in a No.4.

I've put the blade in the wrong way up before now and wondered what was wrong :)

Cheers
Dave
 
davebray":abbhj5mn said:
Hi LuptonM,
Forgive me if you already know this but just check to make sure your blade is installed in the plane the right way up. The blade bevel should be facing the frog in a No.4.

I've put the blade in the wrong way up before now and wondered what was wrong :)

Cheers
Dave

I've done that before when I first bought the plane but my dad nicely (or not) pointed that out and initially had to grind the primary bevel on an medium oilstone- really not much fun. I've also had the chibreaker somehow slip (maybe the screw wasn't tight enough) onto the blade edge while in the plane and was like "this plane's a load of sh*t". It did somehow make some scrapings but mainly gouged the wood to death.

Yep blading facing down- its not a bevel up plane after all


UPDATE


WRT to planing oak end grain I've tried again with better results as last time my blade had become dull and lost its 'scary sharp'. The blade is now resharpened and I've managed to make a decent shaving (roughly 20cm long from a 20cm long piece of wood- so full length end grain shaving) on the end grain which I am quite proud of, enough to take a photo tomorrow and upload it.

By resharpening again I've only really realised how much a difference sanding the back of the blade makes. If you hone it even up to 0.3 micron paper it feels blunt to touch. However if you sand the back edge of the blade, it reveals an edge that you can feel it catch you finger as you pull away from it.

I've also determined the cause of the 'non-full width' shavings. You've probably sat there, cursing 'that noob just won't listen' and your right the cutting edge is not quite straight enough.
How do I know this? Well I was planing some end grain of an oak board 25mm thick (I'd already flattened the end grain side) just for fun and was playing with the lateral adjustment. Anyway I I found that if I planed using the centre of the blade I could get 25mm wide shavings. However if offset the centre to either side of the plane, very thin shavings would only be made on the part of the blade nearest to the centre.
Basically to sum it up, only the middle part of the blade was deep enought to cut whereas a considerable part of the blade at the sides was not deep enough to cut the wood. Thus concluding the blade edge is not sufficiently straight to cut full width shavings.

That brings me on to another question, how do I get my blade edge straight enough? I am contemplating getting a better honing guide (my current one can't hold chisels square anyway and christmas will soon be upon us), and using it in conjunction with coarse sandpaper to grind/hone the blade straight and square.
 
Hi,

Could you clarify the difference in technique between honing and sanding the back of the blade please?

I think we may have found part of the issue here because at most there should only be a degree or two of difference between the two and a honed edge should be infinitely sharper.
 
LuptonM":3op1lima said:
.....I've also determined the cause of the 'non-full width' shavings. You've probably sat there, cursing 'that noob just won't listen' and your right the cutting edge is not quite straight enough.
How do I know this? Well I was planing some end grain of an oak board 25mm thick (I'd already flattened the end grain side) just for fun and was playing with the lateral adjustment. Anyway I I found that if I planed using the centre of the blade I could get 25mm wide shavings. However if offset the centre to either side of the plane, very thin shavings would only be made on the part of the blade nearest to the centre.
Basically to sum it up, only the middle part of the blade was deep enought to cut whereas a considerable part of the blade at the sides was not deep enough to cut the wood. Thus concluding the blade edge is not sufficiently straight to cut full width shavings....
What you describe is exactly how it is supposed to work. Nobody wants or needs full width shavings.
 
LuptonM":1hdwlvmy said:
That brings me on to another question, how do I get my blade edge straight enough? I am contemplating getting a better honing guide (my current one can't hold chisels square anyway and christmas will soon be upon us), and using it in conjunction with coarse sandpaper to grind/hone the blade straight and square.

Apart from the Kell (which has its own issues) I know of no practical guide that will "lock" a blade such that the edge comes out perfectly straight. Even if the guide is that rigid, you now have the problem of getting the blade into the jig at the perfect angle.

Fortunately, it's pretty easy to keep the blade centred by adjusting your hand pressure. IMHO, jigs should only control the bevel angle.

Further, by not doing this "perfectly" you can work a chosen curve (called "camber") into your edge, so that your edge can vary from perfectly straight (used in joint cutting planes e.g. rebate or shoulder planes) to strongly cambered (for scrub planes) and everything in between.

There are several uses for controlled camber.

There are two classic approaches to smoothing plane blades, both aimed at solving the issue of the edges of the strokes in the workpieces - how to you get your smoothing strokes to merge together into a large smoothed surface.

The approach recommended in most pre 1950 texts is to have your blade essentially straight, and to merely round off the corners to avoid an actual, but tiny, vertical slope at the edge of the cut. This approach also requires that your lateral adjustment is pretty near perfect.

The approach which is more used today is to make a very shallow camber on the blade (say 1/64") so that the shaving is NOT full width, and tapers to zero at the edge. These cuts are very easy to match up "edge to edge", since you can overlap them, and even the amount of overlap isn't critical.

BugBear
 
matthewwh":196ohieq said:
Hi,

Could you clarify the difference in technique between honing and sanding the back of the blade please?

I think we may have found part of the issue here because at most there should only be a degree or two of difference between the two and a honed edge should be infinitely sharper.

What I mean by honing is sanding the secondary bevel at a constant angle whereas sanding the back on the finest sandpaper is to the remove the wire edge

Mr G Rimsdale":196ohieq said:
LuptonM":196ohieq said:
.....I've also determined the cause of the 'non-full width' shavings. You've probably sat there, cursing 'that noob just won't listen' and your right the cutting edge is not quite straight enough.
How do I know this? Well I was planing some end grain of an oak board 25mm thick (I'd already flattened the end grain side) just for fun and was playing with the lateral adjustment. Anyway I I found that if I planed using the centre of the blade I could get 25mm wide shavings. However if offset the centre to either side of the plane, very thin shavings would only be made on the part of the blade nearest to the centre.
Basically to sum it up, only the middle part of the blade was deep enought to cut whereas a considerable part of the blade at the sides was not deep enough to cut the wood. Thus concluding the blade edge is not sufficiently straight to cut full width shavings....
What you describe is exactly how it is supposed to work. Nobody wants or needs full width shavings.

I just want to be able to have wider shavings at a low cutting depth

bugbear":196ohieq said:
The approach which is more used today is to make a very shallow camber on the blade (say 1/64") so that the shaving is NOT full width, and tapers to zero at the edge. These cuts are very easy to match up "edge to edge", since you can overlap them, and even the amount of overlap isn't critical.

BugBear

Basically thats what I want to do. I just don't want my blade as cambered as it is now

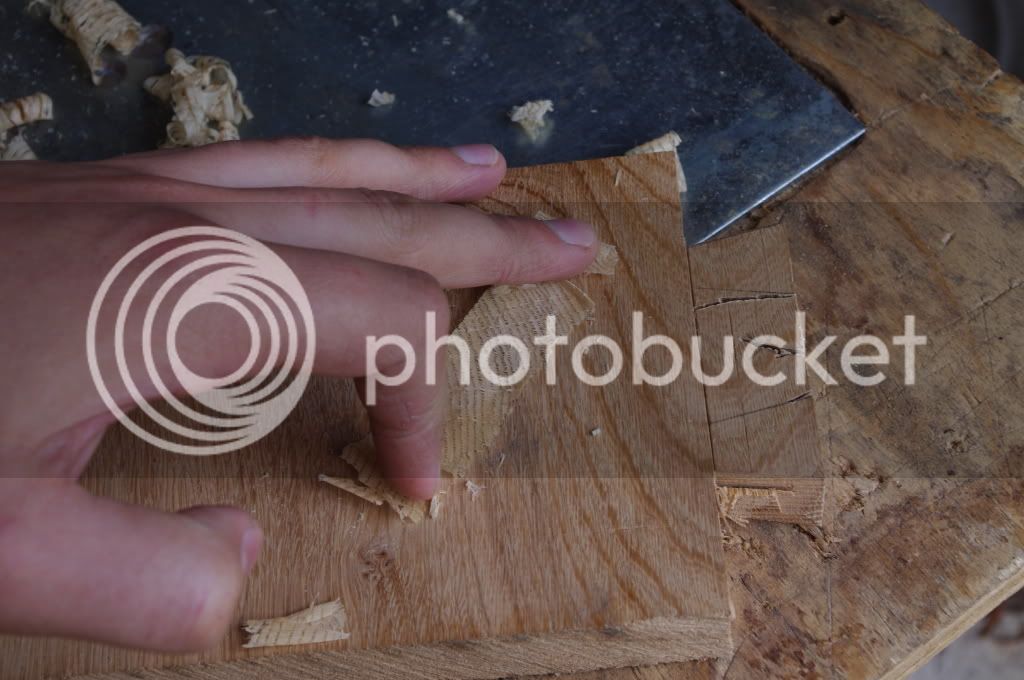
Anyway end grain shaving (maybe not as long as I thought it was)-very fragile mind you

IMGP1555.jpg
 
You could be missing the point. Shavings aren't interesting - it's the surface of the work which is the important thing. Unless you are in to shavings for their own sake.
 
Well I can get good shavings like this guy on you tube ( http://www.youtube.com/watch?v=EKotbPE22lo ) then I know my hand plane is properly tuned and sharpened ready for me to finally start making something (just a hand plane would save alot of time)

Shavings just tell you the condition in which your plane is in and no I don't have a shaving fetish
 
LuptonM":37lp48fl said:
Well I can get good shavings like this guy on you tube ( http://www.youtube.com/watch?v=EKotbPE22lo ) then I know my hand plane is properly tuned and sharpened ready for me to finally start making something (just a hand plane would save alot of time)

Shavings just tell you the condition in which your plane is in and no I don't have a shaving fetish
He earns a living by playing up to shaving fetishists! Best to ignore him and just cast your eye over the surfaces you are planing instead.
 
LuptonM":owzbcxys said:
Anyway end grain shaving (maybe not as long as I thought it was)-very fragile mind you

IMGP1555.jpg

I'd say your plane is cutting pretty well. Nice work!

BugBear
 

Latest posts

Back
Top