My new workbench WIP

UKworkshop.co.uk

Help Support UKworkshop.co.uk:

This site may earn a commission from merchant affiliate links, including eBay, Amazon, and others.
OPJ":1px4oi2a said:
I think you should stick with the board jack/sliding dead man idea rather than trying to get something similar with the legs. I also do think you will need somewhere to tuck your toes under when you're working at the 'bench - even if it means bring that front face forwards a few inches...?

if i do bring the top forward how would I make the deadman flush with the face - id have to face the legs wouldn't I ? = so I could go with my second drawing but add the deadman is that more or less what you mean?

thanks for your input

Mike
 
Boz62":pwlcrj9m said:
More for completeness than specifically for this application, I've finally remembered where I've seen a variation on this beefing up thing. Not on a deadman but on a sliding leg vice by Bill Liebold discussed by Chris Schwarz on his blog a while back. Here a lot more force will be applied than in your deadman, but the upper slot is beefed up with a steel angle. Interestingly the V grove arrangement at the bottom is kept, which seems counter-intuitive to me. Bill makes a comment about the V at the bottom of the page.

I don't think your top slot needs this much work, but I still think a hardwood batten making a slot at the bottom would be simpler and easier to adjust. If it is a bit rattly you can always fit a brush strip behind the slots :)

Boz

Thats a lovely looking setup isnt it :D

I wonder if i put in one or two leg vices mmmhh :shock:
 
mikepooley":ibp5ijr2 said:
if i do bring the top forward how would I make the deadman flush with the face - id have to face the legs wouldn't I ? = so I could go with my second drawing but add the deadman is that more or less what you mean?

While this does sound rather crude, I was thinking of simply screwing another rail on to the face of the lower one, to bring it forward with the top? (Sticking with your first design).
 
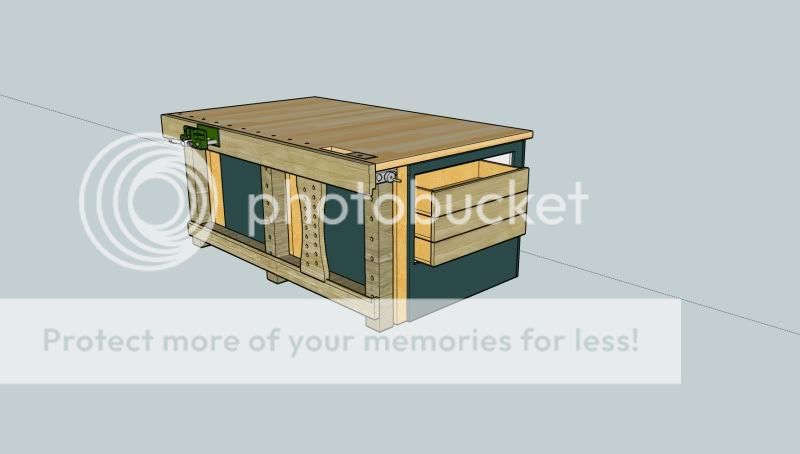
having thought about it I have tried again- I think this one may be best as its a mixture of the two previous designs,

It keeps the deadman - it gives plenty of support to the front of the bench where the wagon vice is and it allows my feet to get under the bench.

what do you think?

workbench3.jpg


oh and forget the holes in the legs I wont need them.

Mike
 
Hi Mike,

It's getting really hard to find criticisms now. In fact I'm down to nit-picking - I think you need a groove in the top rail for the deadman - the above only shows a rebate :)

The other comment is a naive question - do you really need the middle leg? The top is well supported on the main "old" middle bit, with its' own middle leg. So it's only the overhang that you need the support for. You've got a thick deep board along the front edge between the end legs which will give it strength. I'm just wondering if that middle leg will get in the way far more than the benefits it gives. Without it you'll have deeper access behind the deadman for long dogs and clamps, for the full width of the front. I suspect with the leg there you'll be forever cursing hitting it, especially if you want to nudge the deadman along and need to pull out dogs to do it :( I think the overhang will cope without the middle leg, as long as the front board is nice and thick and is well attached [fingers crossed].

Boz
 
Boz62":25ktyswd said:
Hi Mike,

It's getting really hard to find criticisms now. In fact I'm down to nit-picking - I think you need a groove in the top rail for the deadman - the above only shows a rebate :)

The other comment is a naive question - do you really need the middle leg? The top is well supported on the main "old" middle bit, with its' own middle leg. So it's only the overhang that you need the support for. You've got a thick deep board along the front edge between the end legs which will give it strength. I'm just wondering if that middle leg will get in the way far more than the benefits it gives. Without it you'll have deeper access behind the deadman for long dogs and clamps, for the full width of the front. I suspect with the leg there you'll be forever cursing hitting it, especially if you want to nudge the deadman along and need to pull out dogs to do it :( I think the overhang will cope without the middle leg, as long as the front board is nice and thick and is well attached [fingers crossed].

Boz

Thanks Boz :)

Yes it will have a slot I just didnt put it in the drawing.

the middle leg to be honest is there because I have seven 1mtr long 9mm x 8mm kiln dried doug fir left over from another job - if i had a couple of 2mtr lengths I could leave it out :?

I know what you mean tho - and I'll have another sort through my scrap pile to see what I have - I know I've got a huge 3mtr length of 125 x125 mm but i was doing my usual and trying to use up my leftovers :)

I have some other old doug fir i got when i tore a building down so i'll rethink that one lol

I do tend to just grab whats to hand and rush into this type of job for the workshop just using up what I have (tight i suppose) but I am usually a little dissapointed because I also want it to look good
so this time I want to get it right ( but i still dont want to spend too much lol)

thanks again

Mike :roll:
 
That gave me a much needed laugh after a boring morning rubbing down and painting a garage door. Yes, I know what you mean. Real engineering is making the most of the materials available. Can be a real shock if you actually end up needing to buy new timber :shock:

Good luck
Boz
 
BUY NEW TIMBER eeek :shock:

No you are definitely right I have found a nice ( well not too pretty) piece of Doug fir for the top and with two legs it will be more than enough.

with that and the rail at the top and the rail at the bottom of the deadman will be more than enough to tie it together. (both will be oak)

I was definitely over engineering that.

thanks

I might actually have a plan now :)

Mike
 
Well, Mike, I think this is the one! Can't see a lot wrong with it while it appears to offer you everything you are looking for in a workbench. Go for it! 8)
 
Well I had a few hours at it yesterday and of course my first cock up happened on the second cut :?

I had to use up the sheet of 18mm mdf laying on the bench to get it out of the way without having to cart it back to my sheet store so I thought I'd start with the easiest bit - The Back.

so I measured it again ("measure twice cut once") cut it to height and then thought must remember to add 36 mm to it to take account of the sides wrapping round.

wife called me over for coffee and when i got back I (you think I am going to say "forgot about the adjustment arent you?)
No I remembered 8) then I went ahead and subtracted 36mm from the the length eeeeeeeeeeeeeeeeeeeeeeeeeeeeeeeeeeek! :shock:

so its 72mm short :oops:

Luckily I am used to this sort of thing :roll:

so I have "improved" my design by adding nice rounded oak corners to the bench at the back which incedentally will hide my error LOL

OH dear I wonder why I do this sometimes :wink:

I then proceeded to prepare cut and mortice and tennon the two verticals and crosspiece that will support the front of the bench.

after making a reasonable job of this I then realised that I would have to cut right through the middle of the rail to fit my big old record vice :shock:

Back to the drawing board!

I spent some time making accurate measurements of the vice and making a proper model of it in sketchup - and came to the conclusion that it will have to go right at the left hand end now so i can fit it under the overhang there.
The worktop is not long enough so I am going to add "Breaboard" ends in oak as another "improvement" :roll:

this is all par for the course for me so I am not surprised by this at all 8)

LOL
 
Mike, you know the rules... Without the photos, we have no reason to believe anything you say!! :roll:

:D
 
OPJ":3kthtd2l said:
Mike, you know the rules... Without the photos, we have no reason to believe anything you say!! :roll:

:D

OK you asked for it

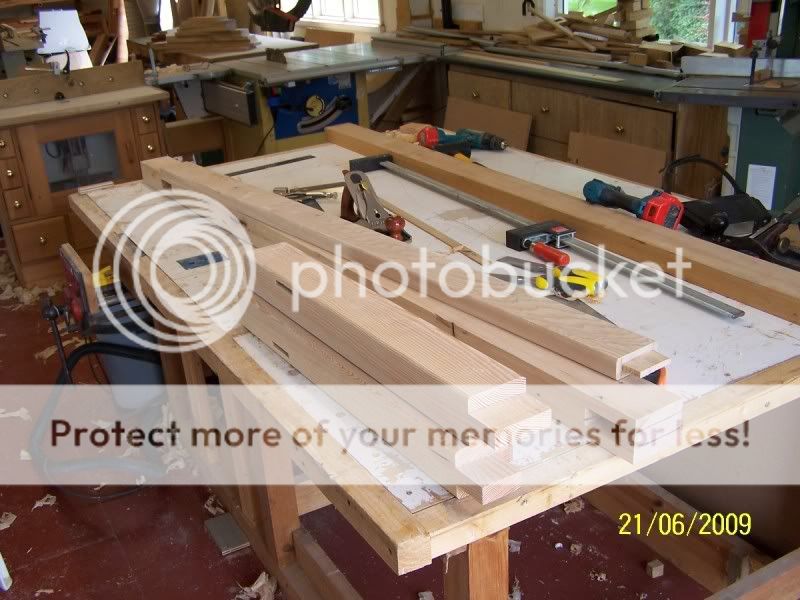
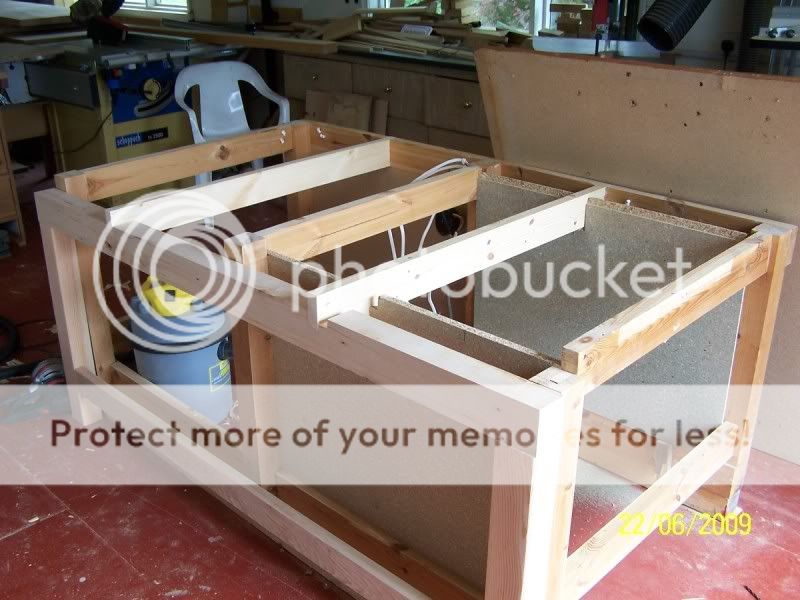
This is the parts for the new front frame
workbench2001.jpg

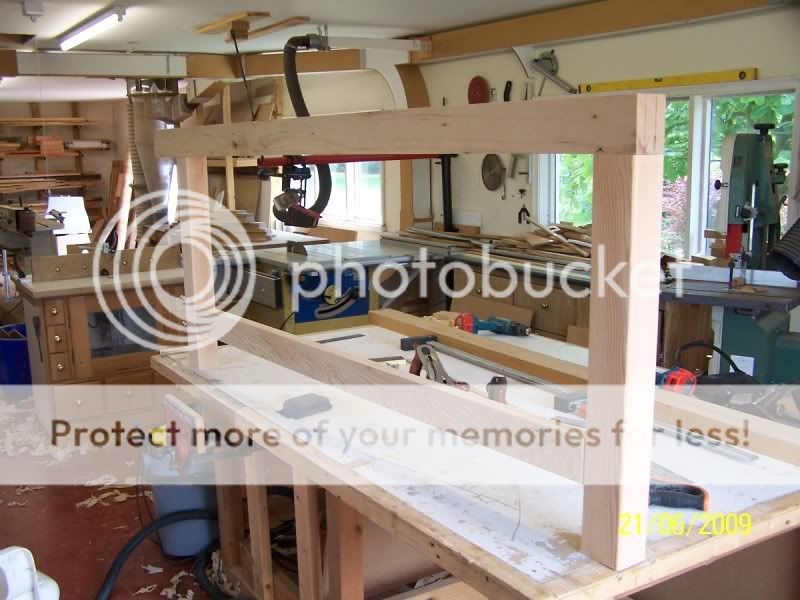
Dry assembly
workbench2002.jpg

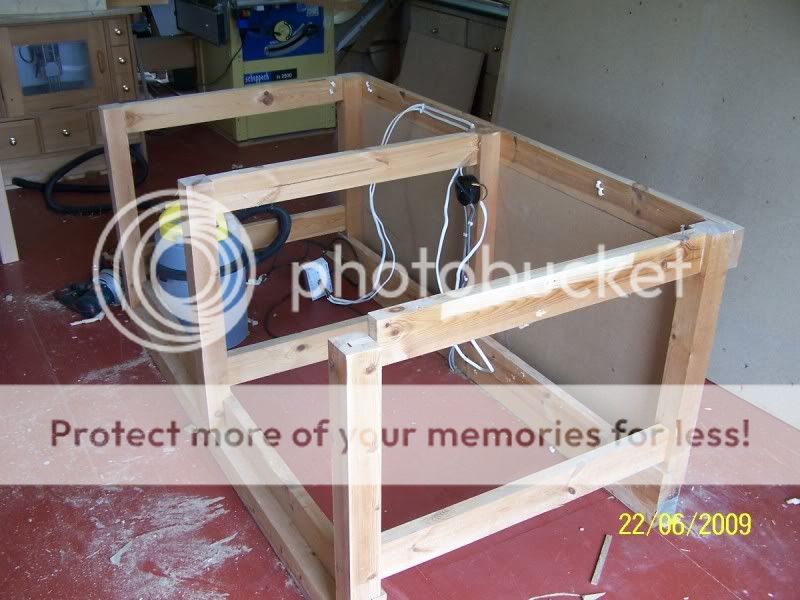
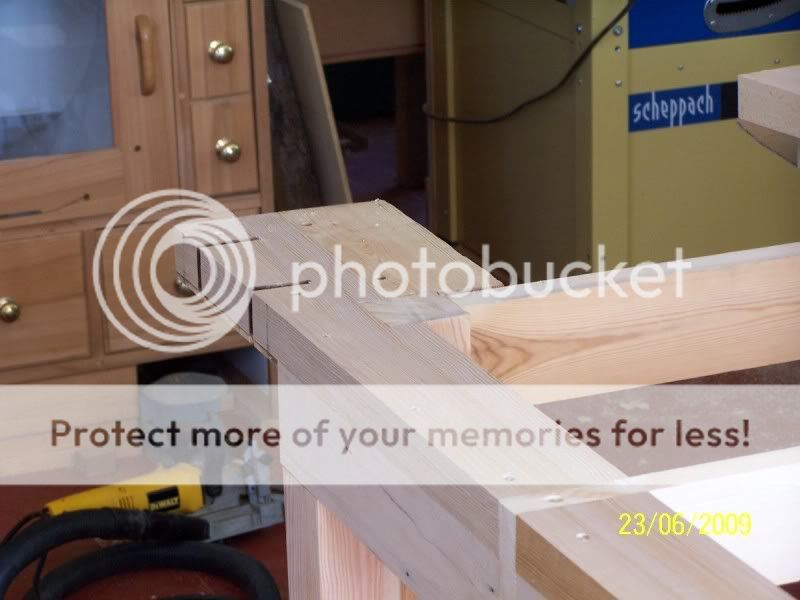
stripped down old bench plus cut top of corner post to allow wagon vice to sit there
workbench2003.jpg

Let in more support rails for top and added carcase sides for drawers
workbench2004.jpg

Glued up and fixed in place then added extra top rail to make front of bench ultra chunky and support the vice at the far end
workbench2005.jpg


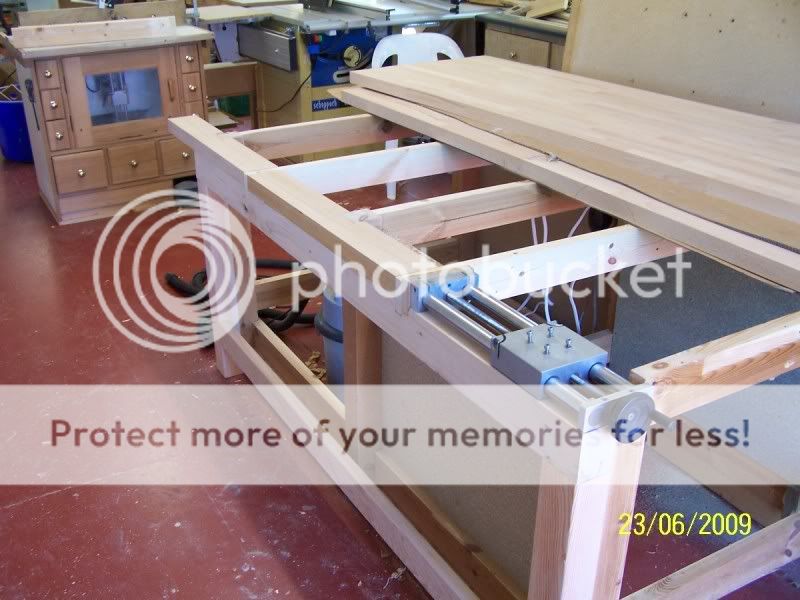
The wagon vice has a piece of oak fixed to the back and this is let into the top to take the pressure - Havnt fixed the front of it yet not sure if i should leave a bit of wiggle room and wedge it later.

Notice old chipboard flooring getting used up in there :)
and the new worktop has arrived and been cut in two :)

got to cut out the slot in the top for the wagon vice soon - not looking forward to that based on my past performance of completely useless measuring :oops:

How would you fix the top on - I want to keep it simple and dont fancy the usual buttons I am also thinking of not gluing the two tops together (just dry biscuit) as it will be so heavy

mike
 
can I ask a basic question :oops:,
Whats a 'deadman' in relation to this!?!?

(unless you build caskets for a living :shock: )

Wayne.
 
A dead man is the vertical board (with holes in) shown in the front of the bench, look back at the pictures of the different designs. Its used to support the end of long timber to stop it sagging as only the end is clamped in the vice.
 
Hi Mike,

Did the worktop purchase /delivery go OK? I think you did use chippyshop.co.uk in the end?

Sorry to digress slightly, but do you think I'll get away with laminating 2 bits for a really chunky worktop?

Ta
Boz
 
Boz62":16aaocln said:
Hi Mike,

Did the worktop purchase /delivery go OK? I think you did use chippyshop.co.uk in the end?

Sorry to digress slightly, but do you think I'll get away with laminating 2 bits for a really chunky worktop?

Ta
Boz

No I used Worktop express from Ebay they were very good and I saved £2.50 with delivery charges :shock:

and yes I think you could easily laminate two ! I did think of it myself but as my bench is quite wide I would have needed 8 mtrs - :shock:

also as any heavy chiselling etc is done on the front of the bench I think 40mm is perfectly acceptable for the rest. Mine is now approx 225mm deep at the front but if your bench is narrower than mine and you can afford it :shock: get 4 mtrs and double it up - it will be luvverly :)
 
Thanks for that Mike.

You've got plenty of support under your front edge, so a single layer should be well adequate. I only have a small workshop so mine will be 1500mm x 600mm (ish), hence a mere 3m chunk of worktop will do nicely :D.

Glad to see you are progressing a lot faster than me :oops:. Thanks for the thoughts and ideas you have given me.

Boz
 
Boz62":3jnnn2qm said:
Thanks for that Mike.

You've got plenty of support under your front edge, so a single layer should be well adequate. I only have a small workshop so mine will be 1500mm x 600mm (ish), hence a mere 3m chunk of worktop will do nicely :D.

Glad to see you are progressing a lot faster than me :oops:. Thanks for the thoughts and ideas you have given me.

Boz

Thanks

here is the preparation for the vice
workbench001.jpg


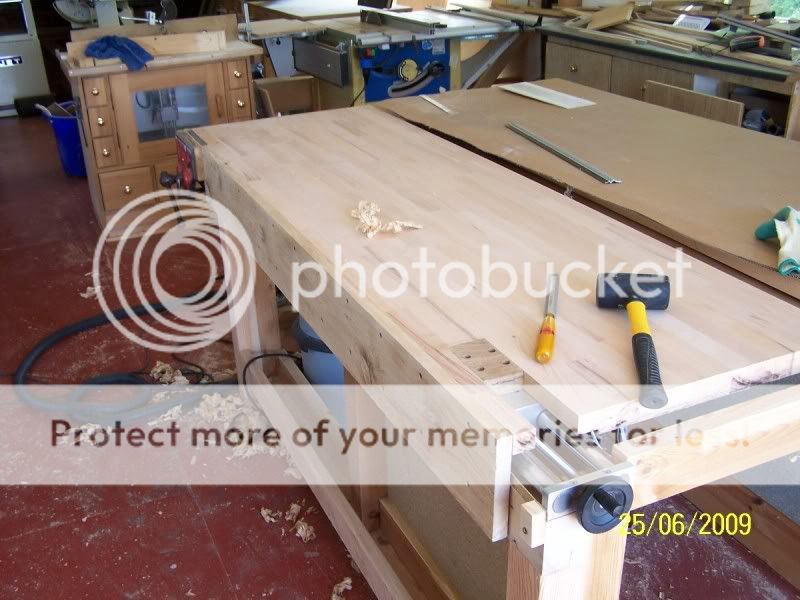
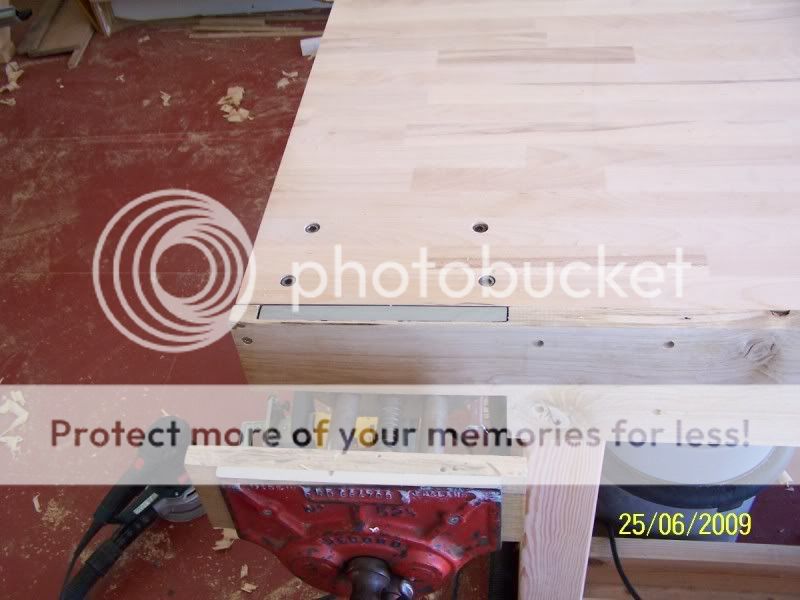
this is as far as i have got at the moment - cut out slot for wagon vice fixed vice in place and temporarily fitted front face
workbench002.jpg


not sure if i did right fitting the face over the vice like this as the oak is very thin there?
workbench003.jpg


where are your pics Boz?
:)
 
mikepooley":3c3exdme said:
not sure if i did right fitting the face over the vice like this as the oak is very thin there?
Right, we're now into realms of "wot I'm intending to do" rather than "wot I have done" :oops:. Personally I think the vice should be dropped a tad so that the steel is 10mm or so below worktop surface level, with the wood jaw also recessed over the moving jaw as well. This makes it less prone to plane blades etc hitting steel jaws. And yes, the oak is a tad thin over the jaw :oops: I suppose the only option is to replace it with a thicker piece, now or later? At least that is simpler than moving the vice further back under the worktop since you've already drilled it's support holes.
mikepooley":3c3exdme said:
where are your pics Boz?
:)
Mmmmmmmmm :oops:
I was afraid someone would say that :shock:

Boz
 

Latest posts

Back
Top