Mortiser - Help Needed, Please

UKworkshop.co.uk

Help Support UKworkshop.co.uk:

This site may earn a commission from merchant affiliate links, including eBay, Amazon, and others.

OPJ

Established Member
Joined
31 Jul 2005
Messages
5,566
Reaction score
1
Location
North Somerset
Hi all,

If you've read the latest/current issue of British Woodworking then, you'll probably know that I bought a new (old!) benchtop mortiser a few weeks ago. It's a 'Smiths Woodworker' with a Brook Crompton motor. Made of cast iron, weighs an absolute ton and I've already de-rusted most of it.

Very soon, I'm looking to give it a first proper run out when I start this belated beech dining table. It's almost ready to go but, there are a couple of areas I'd appreciate some help with (I must admit, I've been avoiding this for several weeks... :oops:)

First of all. Any thoughts on getting this chuck off so I can give the spindle/shaft a proper clean? I've tried removing the grub screws from the collar but it still won't budge... :? Anyone?
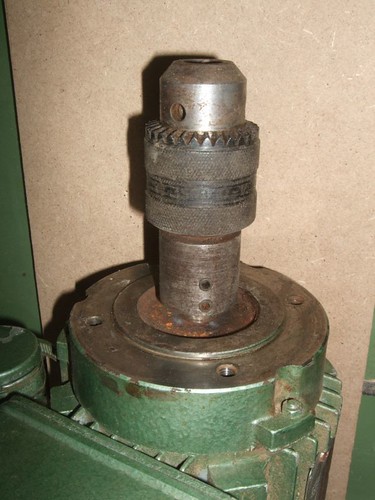
4058917786_b3636dec06.jpg


There's got to be rust in there. The fence was also "glued" to the bed because of all the rust and needed a few sharp taps with a hammer before I could remove it! :shock:

Secondly. The bed has a pair of T-slots machined in to it (measuring 11x4mm at the narrowest and 9.5x21.5mm or thereabouts below).
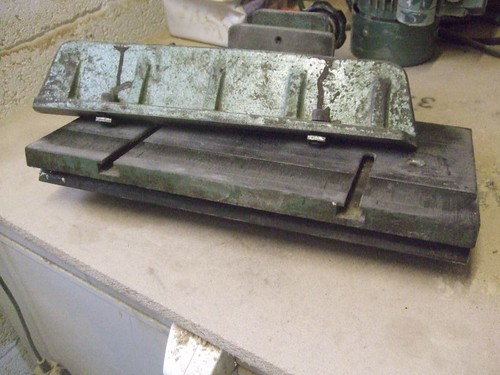
4058917908_d115278883.jpg


I'm thinking about getting a couple short lengths of steel machined to fit. I'm guessing the old ones are missing as the fence came only with two flimsy bits of 20mm square steel, which are barely fit for this purpose.

Do you think this idea would allow the fence to slide back and forth while remaining parallel, if you see what I mean? The bed is scribed with a series of parallel lines to aid this but, it still seems a bit 'hit and miss' to me. Whenever fine adjustment is called for, I can see it moving from being square and parallel to the chisel sides.

Any other ideas, here?

Thanks for looking. I'll probably have some more questions on this machine over the weekend but, I'll leave you to think about these two for now. :)

Olly.
 
I think the benefits of removing the chuck are far out weighed by the risk of incurring damage and getting run out on re-assembly.

Clean up anything visible and leave the rest.

As for the tee slots, yes getting some T nuts made is a good idea to spread the clamping load way from the weak edges of the T slot.

As for the adjustment, it would be possible to devise a screw driven mechanism to micro adjust the fence but I would set it square and as far back as you might ever need it and then make yourself a set of shims 1, 2, 2,5,10,20,20,50 etc to slip between fence and the job.

HTH

Bob
 
Thanks, Bob - just the man I was hoping to hear from :D and I like the shims idea - great advice! :wink:

Possible run-out was one of the reasons I was keen to remove the chuck. I've tried it running with a chisel and auger fitted but, maybe I'm just not used to the sound of a proper motor (my last mortiser was made by Fox! :shock:)... Thinking about it, the machines at college make a bit of a racket (especially that big Wadkin). There doesn't seem to be any heat build-up between the chisel and bit so, it's probably not worth worrying about. :)

When I'm next on my planer/thicknesser, I machine a couple of wooden T-nuts first and wax them, just to see how it goes (I'll embed a nut on the underside or something).
 
Hi Olly,

I can make you some Tee nuts if you want.

Just need you to firm up on the dimensions of the slot, I'll make an allowance for clearance and knock up the nuts. Let me know what thread you want, M8 or M6 perhaps. I have most metric and imperial taps here.


Bob
 
Bob, thank you very much for the offer. 8) Once I've double-checked the dimensions, I'll PM you. I also need to check the thread size but, I think it's M8 (that's no bother anyway, I could do that part myself).

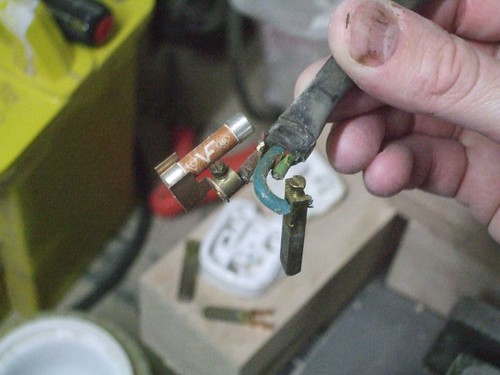
I took the plug off just now (purely because I don't like seeing those cheap, white plastic things on my tools! :x) and found that only the Live and Neutral wires were connected... :shock: But, from previous tests the motor runs fine...

Upon closer inspection, I then realised the Earth wire had been cut right back! :shock: :?

4068419027_3a3fbbc3ab.jpg


(You can just see it in this photo.)

Er... I assume this needs to be connected as well, otherwise all that cast iron could become 'live', leaving an Olly-shaped hole in the garage door??? :?

I'm failing to understand why someone would've done this though. It definitely has not broken off. Any thoughts?
 
Hi Olly,

The cut off earth is a bit of a worry!
First check that it is connected at the other end and if not, connect it.

Then chop off an inch or so of the plug end cable to expose new fresh wires and fit the plug of your choice.

Plug in and test. If you get a blown fuse or your mains breaker pops out, then there is an earth leak which might well explain why it was cut before.

In this case, the answer is not to cut it again but to find the source of the problem.

hth

Bob
 
Olly you need to practice your aim with the hammer mate, looks like you've hit that thumb a couple of times :lol:
 
Actually, Tom, it's the stain from that chest of drawers I finished last week! :D Beeswax is surprisingly good at removing it from your skin but my nails are still a bit dark in places.

Anyway, I'm right-handed!! :wink:
 
Oh dear. :?

I had quick look inside the NVR box earlier and the Earth wire has also been "disconnected" there!! :shock: Worst of all, I have no idea where it is supposed to go!

I'll take a photo and upload it some time tomorrow but, I'm hoping you'll be able to advise! :)
 
The Earth in the nvr is usually just attached to a bolt on the side of the box and often has the electrical earth logo stamped into the metal assuming its a metal box.

cheers

Jon
 
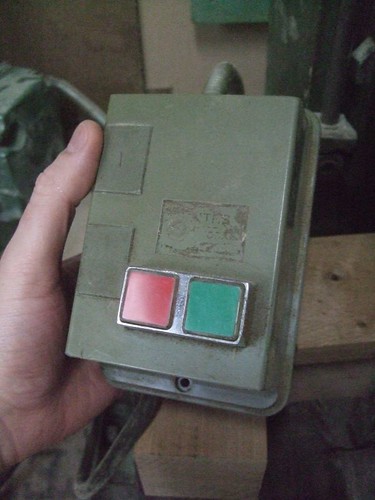
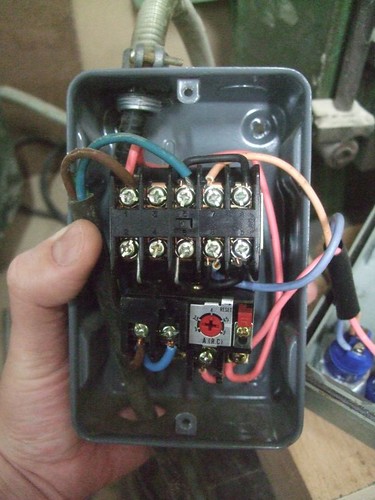
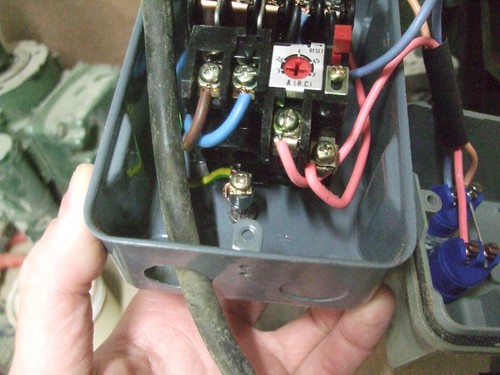
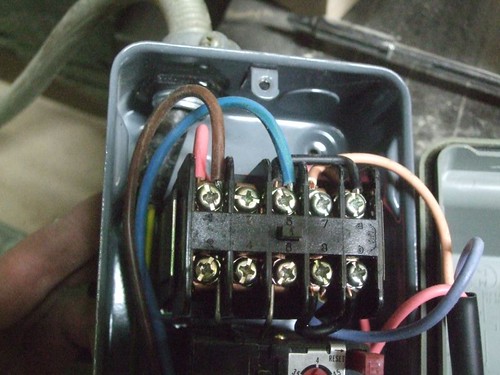
Right. I've got some more photos for you, starting with the NVR box, which is made of some kind of plastic.

4071705982_ac8165d1b9.jpg


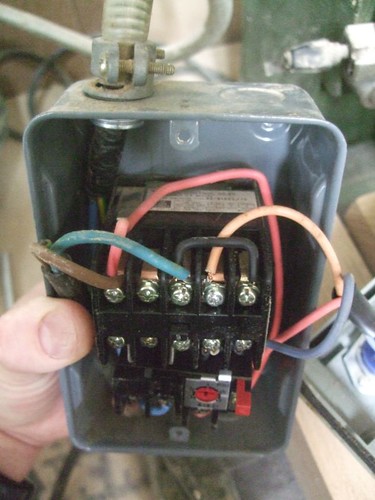
You probably can't see the snipped Earth wire, here. It is just above my them, behind the Blue wire (...neutral, isn't it? :oops: :wink:).

4071706018_835183d6e8.jpg


But, I'm guessing that Earth wire needs to go in the top of here, somewhere? Along with the other two.

4071706076_025699baff.jpg


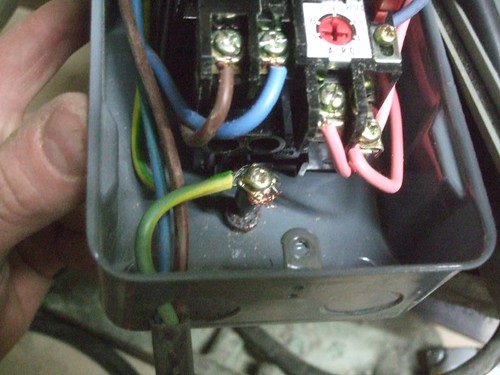
Going back to Jonny's comment, the Earth wire from the motor is attached directly to a bolt. There doesn't appear to be another bolt for the Earth from the mains plug.

4071705940_3ffb87d688.jpg


Hope this all makes sense and that you might also be able to advise. :)
 
Olly,

You need to connect the incoming earth to the same screw as the motor earth goes to inside the NVR box which does appear to be metal.

Whilst you are in check mode, look inside the motor connection box and make sure the earth wire is connected to the body of the motor in there too.

hth

Bob
 
Thanks again, Bob. :)

Does it matter if the two Earth wires are touching, on that bolt?
 
Hi Olly,

Yes it is essential that they do touch.

At all times you need earth continuity from the fat pin on the plug through to all exposed metal work on the machine.
As the earth pin is longest on the plug then the whole machine will be safety earthed before any power is applied when you plug it in.

Bob
 
Right. I've been putting this off all week because I generally hate touching electrical things. :? Saying that, I seem to have a way with the electronic waves... Whenever I walk in the kitchen, my mum's phone lights up! :D And, when I got for an interview or sit at a desk with someone, their PC always starts playing up!! :shock: :wink:

Makes me wonder why I persist in using woodwork machinery, sometimes...! :)

Anyway. No such problems with my mortiser! This evening, after finishing a couple of other odd-jobs today, I re-attached the Earth wires to the new plug and inside the switch housing.

4086890892_bef6c90046.jpg


Everything is back where it is supposed to be and, I've put those two Earth wires on to the same bolt (the box is still plastic, by the way).

4086135645_5e1afb9fb4.jpg


All I can add for the time being is that it seems to be working fine. I've let it run, switched it on and off a few times; it purrs beautifully. :) I suppose the next test, once I get headstock back together again, will be to see how the motor handles under load.
When I came back indoors just now, it looked as though all the lights were off but, it was just a coincidence (my mum was being lazy!). :D

Thanks to Bob for all the advice. I will get back to you with those dimensions :roll: and, if I should need any further advice.
 
Glad you are all safely earthed now Olly and everything runs OK without releasing the magic smoke!

I'd still put money on the back of your NVR box being made of metal but no matter at least you have earth continuity from plug to motor now.

Bob
 
Well, whaddya know, there is one more thing where I could do with some help... :roll:

I just set the machine up to cut some test mortises. No smoke, the motor's running fine. But, as the bit engages with the wood and I try to apply downward pressure, the handle keeps moving but 'disengages' from the headstock.

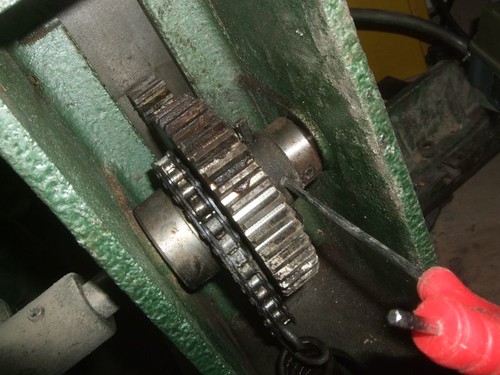
This grub screw, below, secures the collar to the shaft. What happens is that this collar/screw keeps slipping.

4090282196_66a8a70af9.jpg


If you look closely, you'll also see there's a roll pin going through it as well.

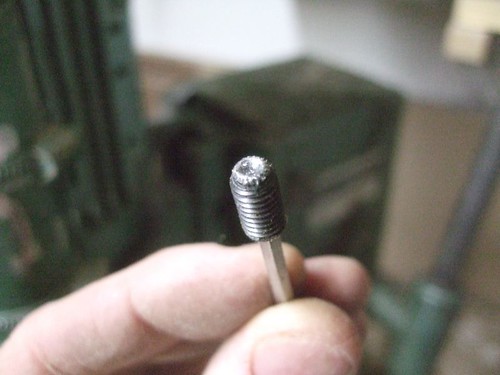
Here, is the grub screw on its own. Apologies for the photos but, does it look a bit worn at the end?

4089519065_7f33bf45a4.jpg


I'm confused as to why there's a roll pin in there as well as a grub screw...?

I should have checked this :roll: but, do you think it's possible the pin had snapped when the machine was last used? Actually, I did have a similar problem with my Fox mortiser and that was what had happened.
 
9fingers":3m34mjyt said:
I'd still put money on the back of your NVR box being made of metal but no matter at least you have earth continuity from plug to motor now.

Bob

my moneys on it being metal too Bob.

One thing i would do Olly is get one of these,

http://www.screwfix.com/prods/17058/Ele ... Pack-of-10

and fit it in where its been knocked out for the flex going to the plug.

My dad having city and guilds in electrical installation can be helpful sometimes. :D

JHB
 
Good eyes, John-Henry - that's something I forgot to ask about!! :wink:

Another thing I'll need is a chuck key. Ideally a spring-loaded one (so I cannot leave it in place when I start the motor... :oops:). Previous searches have drawn up no results - anyone know where you can buy them?
As for the box, it's still plastic! :D But, it is fixed to a removable panel on the back of the machine which is definitely 'metal'...
 
Back
Top