sawdust maker
Established Member
Hi all.
Thought I would share my idea for making a micro adjuster to fit the router I got to use with a Trend Dovetailing jig. The jig I won from Woodworker magazine. It was their annual prize in 2006 for published “top tips”.
The router I used is the Wickes 1200W, made by Draper and cost only £39.99. I chose this router because it takes Trend router guides, for use on my Trend Dovetailing jig.
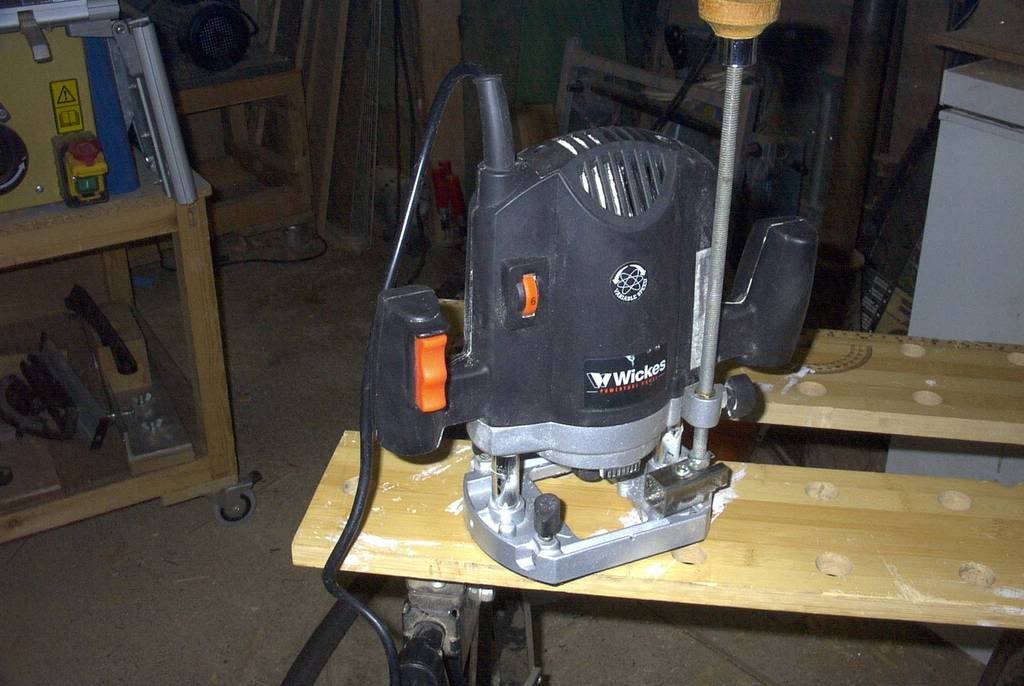
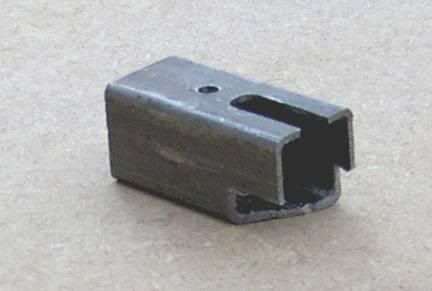
The micro adjuster replaces the turret and depth stop. The method is quite straightforward. Remove the depth stop and the turret. Care needs to be taken in removing the machine screw holding the turret. The screw is secured with glue, so a good fitting screwdriver is needed with plenty of downward pressure. The first new part is constructed from 20mm X 20mm square section steel tube 45mm long. This is secured in place of the turret by a 25mm X 4mm machine screw. About midway through the tube a 4mm hole is drilled through the tube and enlarged to 10mm on the underside, to accommodate the projection, which held the turret. The tube is also shaped on the underside to fit snugly to the router base. A bit of sawing and filling is needed for this.
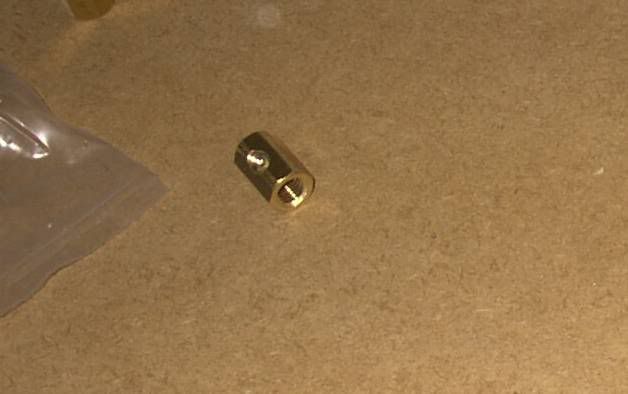
The second part fits where the depth stop was fitted. Into this hole a special nut is placed. The nut is the type used to secure mono-block kitchen taps (Photo 1).
Ideal Nut
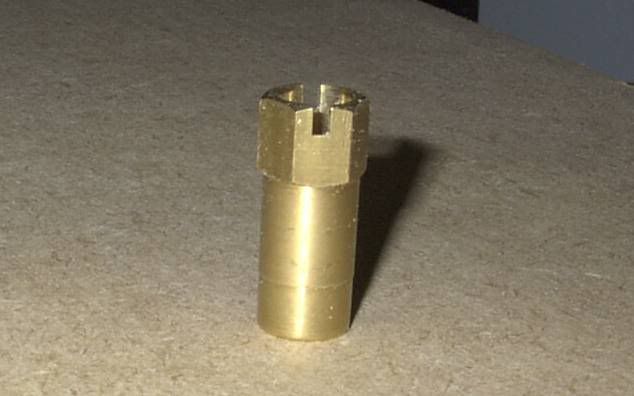
The one I used was one I found in my store of bits & bobs, that had come from an old tap. These nuts are not generally available. I made an extensive search on the Internet in the hope of finding a supplier, but without success. However, a longer than normal brass nut with an 8mm thread can be purchased from Bristan, in a fixing kit part number FX 1264R (tel. 0870 4425556). The cost is only £1.86 plus vat. However, if you order by phone they will only sell a minimum of two kits, so the cost will be just under £5.
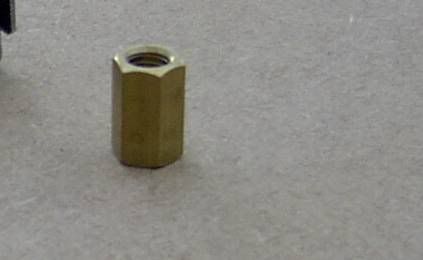
Some work needs to be done on the nut. To enable the nut to slip into the hole, a small amount of metal needs to be filed off the corners of the nut. So the nut can be held in place, half way along its length a hole is drilled, for the thumbscrew to locate into.
A 270mm length of 8mm threaded rod is screwed through the special nut and the point at which this meets the square tube attached to the router base is marked. Remove the tube and drill a 10mm hole at this point through one wall of the tube. This hole is extended to form a slot to the end of the tube.
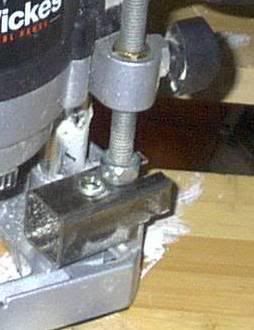
Next remover the threaded rod and screw on 8mm lock nut 25mm along the threaded rod. A washer, small enough to fit inside the square tube, and then normal 8mm nut, follows this. The normal 8mm nut is secure at the very end of the threaded rod by drilling a 2mm hole through both the nut and rod. A nail is hammered through both the nut and rod and cut off close to the nut. The other end of the rod is then passed though the depth adjuster hole, with the special nut removed, and the bottom slipped into the slot in the square tube, with the washer below. The lock nut is then screwed down to just above the top of the square tube, enabling the rod to spin freely. (Note that the lock nut is upside down. This stops it fouling on the machine screw securing the square tube to the base.)
The special nut is then screwed down the rod and secured in the depth adjuster hole with the thumbscrew. The final task is the affix a knob to the top of the threaded rod. Once checks have been made that all is working well the knob can be permanently glued to the rod. You now have a router with a micro adjuster normally found on only the most expensive routers.
The threaded rod and square section steel tube can be purchased from B&Q.
Thought I would share my idea for making a micro adjuster to fit the router I got to use with a Trend Dovetailing jig. The jig I won from Woodworker magazine. It was their annual prize in 2006 for published “top tips”.
The router I used is the Wickes 1200W, made by Draper and cost only £39.99. I chose this router because it takes Trend router guides, for use on my Trend Dovetailing jig.

The micro adjuster replaces the turret and depth stop. The method is quite straightforward. Remove the depth stop and the turret. Care needs to be taken in removing the machine screw holding the turret. The screw is secured with glue, so a good fitting screwdriver is needed with plenty of downward pressure. The first new part is constructed from 20mm X 20mm square section steel tube 45mm long. This is secured in place of the turret by a 25mm X 4mm machine screw. About midway through the tube a 4mm hole is drilled through the tube and enlarged to 10mm on the underside, to accommodate the projection, which held the turret. The tube is also shaped on the underside to fit snugly to the router base. A bit of sawing and filling is needed for this.

The second part fits where the depth stop was fitted. Into this hole a special nut is placed. The nut is the type used to secure mono-block kitchen taps (Photo 1).
Ideal Nut

The one I used was one I found in my store of bits & bobs, that had come from an old tap. These nuts are not generally available. I made an extensive search on the Internet in the hope of finding a supplier, but without success. However, a longer than normal brass nut with an 8mm thread can be purchased from Bristan, in a fixing kit part number FX 1264R (tel. 0870 4425556). The cost is only £1.86 plus vat. However, if you order by phone they will only sell a minimum of two kits, so the cost will be just under £5.

Some work needs to be done on the nut. To enable the nut to slip into the hole, a small amount of metal needs to be filed off the corners of the nut. So the nut can be held in place, half way along its length a hole is drilled, for the thumbscrew to locate into.

A 270mm length of 8mm threaded rod is screwed through the special nut and the point at which this meets the square tube attached to the router base is marked. Remove the tube and drill a 10mm hole at this point through one wall of the tube. This hole is extended to form a slot to the end of the tube.

Next remover the threaded rod and screw on 8mm lock nut 25mm along the threaded rod. A washer, small enough to fit inside the square tube, and then normal 8mm nut, follows this. The normal 8mm nut is secure at the very end of the threaded rod by drilling a 2mm hole through both the nut and rod. A nail is hammered through both the nut and rod and cut off close to the nut. The other end of the rod is then passed though the depth adjuster hole, with the special nut removed, and the bottom slipped into the slot in the square tube, with the washer below. The lock nut is then screwed down to just above the top of the square tube, enabling the rod to spin freely. (Note that the lock nut is upside down. This stops it fouling on the machine screw securing the square tube to the base.)
The special nut is then screwed down the rod and secured in the depth adjuster hole with the thumbscrew. The final task is the affix a knob to the top of the threaded rod. Once checks have been made that all is working well the knob can be permanently glued to the rod. You now have a router with a micro adjuster normally found on only the most expensive routers.
The threaded rod and square section steel tube can be purchased from B&Q.


