Making Sash Window Frame

UKworkshop.co.uk

Help Support UKworkshop.co.uk:

This site may earn a commission from merchant affiliate links, including eBay, Amazon, and others.

nerd8192

New member
Joined
4 Jun 2013
Messages
4
Reaction score
0
Location
London
Hi,

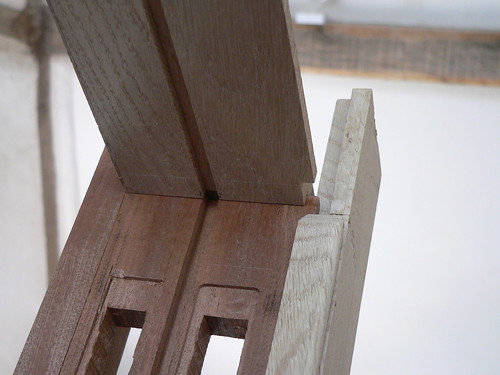
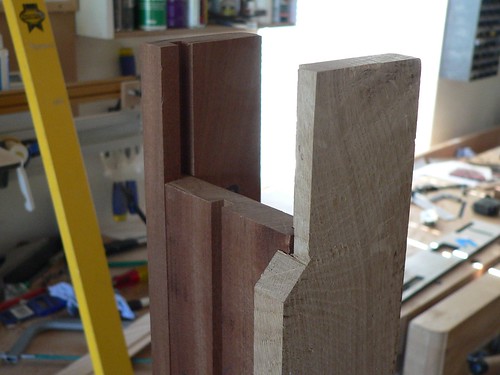
I live in quite an old flat in East London with sashes that have been neglected quite a lot over the years, the upshot of this is that the frame is very rotten, especially at the bottom. Various people have tried to repair it in the past and there is a lot of filler already on it - underneath the 10 coats of paint I have burnt off. So I have decided its time to start from scratch and build a new frame. That way at least I can get both sashes moving (weights and hardware to move the top sash were removed and both cords have been cut). Ironically the sashes themselves are in not too bad condition, but will probably need to be re-glazed.

I am quite new to woodworking - my job is IT, but I am pretty much have a go and see what happens kind of person - have done my own electrics, plumbing, decorating, etc, before. I am quite lucky in that my grandfather who passed last year has quite a few tools in his garage and maybe a table saw.

The issue I have at the moment is trying to match my plans to the sizes of wood available on the market. The window has quite a big recess around it and the original frame did not come all the way to where the wall returns to a double skin, neither did the windowsil. If I am going to make the frame to fit the opening as I think it should be (would certainly stop a lot of cold getting in) then I need the box sides of my frame to be 160x100mm. Looking at what most big DIY stores/timber merchants offer, it tends to stop at about 100mm or so, especially when you are asking for thicknesses of 18 or 22mm. One option would be "pine board" but I am given to understand that this may not be solid or may be made out of lots of sections glued together.

Can anyone who is perhaps in the trade or has done this before give me some tips as to what kind of wood I can use for the frame/where to source it. As I said I am based in East London (E8).

BTW: I have looked at a lot of your previous discussions on sashes and used a lot of this to understand how the frame is constructed and build my design (which is mostly in my head and very rough drawings at present!), so thank you very much :D

Seth
 
Hi and welcome to the forum.

I applaud your enthusiasm but making a box sash does need a few machines to make life possible/interesting. And it's not necessarily an ideal 'first-time' project. There was an excellent article :-" :-" in a back issue of British Woodworking but I can't recall the issue, I'm afraid. Most pros will have at least a spindle moulder to hand. It can be done manually....that was how they were originally made but it will be a long haul.

I think you may have tried to post an image but until you have a few more posts under your belt then the image will be blocked unless a friendly mod comes to your help.

Here's a couple of photos to give you some idea of what is involved


I am sure Jacob (our resident 'sash' expert) will be along soon to tell you how to do it.
 
Assuming it is an old window built before say 1914:
The main thing is to copy exactly what you see there as original. It's very likely that whoever made it knew far more about them and was more highly skilled than you or me. See it as a learning opportunity. If you try to impose your own ideas of how it should be done you will get it all wrong.

trying to match my plans to the sizes of wood available on the market is the first step in getting it wrong! It' the other way around - buy wood to match the original. It'll almost certainly be redwood which is widely available in all sizes.

build my design (which is mostly in my head and very rough drawings at present!) is the second wrong step! You already have the design in your hands - you are unlikely to improve on it.
 
+1 to all the above. I'll just add that digging up a copy of Modern Practical Joinery by George Ellis would be £20-odd well spent, and a good first step towards understanding how sashes are constructed - it's also a gold mine of invaluable other info, especially when working in older properties. Also, I'd forget about using DIY stores - find a local timber yard as they're generally happy to dimension timber for you if you need slightly out of the ordinary sizes.

Good luck!

Pete
 
You have just got very sensible, good advice from Jacob. One good way to learn about sash and case construction is to use an old one as a study and as Jacob says you have it all there. If there are more than one frame make it as a double unit. Heavier but easier to fix into position and stiffer in place. If the old sills have beenj replaced then the origonal sill if in one piece will have been cut out. Best wishes.
 
A method I nearly always use when trying a new and tricky project is to prototype it first. If money allows I'll do a mock up in cheaper or scrap wood...even if its just the more tricky joinery rather than the whole project. Basically you exorcise the mistake demons on stuff that doesn't matter, learn and then tackle the main job.
 
Absolutely agree with what everyone has said above.

My favorite bedtime TV is Roy Underhill's "The Woodwright's Shop" (unless the TT is on, that is). Roy is an American historian of craft skills (and a bit of a ham actor!), and the 25min programmes feature one or two topics each episode. There have been quite a few recent ones on windows and frame building. They're not necessarily sashes but worth looking at nonetheless. Crucially, he usually uses the tools of a century or so ago, giving you a good idea of what's possible by hand, etc.

He really knows his stuff. You'll have to browse through past series to find relevant episodes*, but that in itself can be fun. You may not take to the style, but the knowledge demonstrated is evident from the start. Caution: he has a somewhat quaint view of British history!

On a practical note: obviously, the sashes are balanced against the weights. It's a fine thing, even making allowance for the amount of paint on them (repaint too often and, not only do they stick, they become too heavy!), but significantly, also for the glass. I had complete new sashes made in our last place, using the old ones as patterns. Having decided on laminated glass for the bottom sashes as a security measure, we had problems. It's a lot heavier than the single glass used in the originals and the expert who made them had difficulty balancing them and getting the weights to fit in the weight boxes at the sides. Too-long weights stop the sashes moving properly, and put extra strain on the pulleys (each carries the whole amount of the extra weight of the frame). People like Ironmongery Direct carry modern pulleys, with ball-races that cope better than the original designs - don't use cheap hardware!

If you want double-glazing panels, not only are they heavier, they're also much thicker than single glass. That means the frame rebate needs to be deeper, weakening the sash although it actually needs to be stronger than for single glazing!

The fun bit is the pockets (covers) for the weight boxes. The traditional way to do them is "entertaining," and it'll make you smile if you do it. I think there's a thread on here somewhere where an expert shows how (Jacob?), or on YouTube.

Don't forget, too, that the whole existing window will be set out in Imperial measurements, to use imperial tools, such as plough planes and mortice chisels. Don't take dimensions off it in mm - you won't understand it (mentally deconstruct it) half as well. For example, the sashes probably have 1/2" mortices (handy chisel size). That would lead to a sash thickness of 1.5" (3x the mortice), and a rebate of probably 1/2" (because that brings it to the tenon cheek), and so on. I'm happy to be corrected on the detail, but you can see the idea.

If you've stripped them, you'll see the quality of the wood involved. Redwood, as above, and probably quite close grained and with very few (zero?) knots. This is why construction-grade 'dunnage' from a DIY shed is unsuitable. You need decent stuff. I've used Idigbo (inexpensive, somewhat nasty hardwood) in the past. It's easy to work, but it's denser than redwood I think (upsets the balance) and has a tendency to fracture - not what you want in a sash! Copying the originals, even down to the wood used is a really good idea!

Have fun, anyway.

E.

(I've only made small casements and non-opening windows myself, but I really do enjoy doing them)

*there are more here on the main PBS site, but very compressed - some have dire video quality.
 
petermillard":gnckn95g said:
+1 to all the above. I'll just add that digging up a copy of Modern Practical Joinery by George Ellis would be £20-odd well spent, and a good first step towards understanding how sashes are constructed - it's also a gold mine of invaluable other info, especially when working in older properties. Also, I'd forget about using DIY stores - find a local timber yard as they're generally happy to dimension timber for you if you need slightly out of the ordinary sizes.

Good luck!

Pete

+1 to George Ellis's book.

There are a couple of downsides to copying the original

1) probably covered in layers and layers of paint and so the joinery will be invisible

2) some aspects are going to remain hidden while it is still in situ
 
Just to put this into perspective...

My first proper woodworking project was building a guitar including making the fretboard from scratch. I would imagine that was a far simpler project than making sash windows. Plus, if things didn't work out I could hide it behind the settee...you will have a big hole in the wall of your house!

Not saying don't do it, just don't underestimate it.
 
RogerS":gvxzqk20 said:
......

There are a couple of downsides to copying the original

1) probably covered in layers and layers of paint and so the joinery will be invisible

2) some aspects are going to remain hidden while it is still in situ
1) Remove paint as necessary
2) Prise off inner linings etc as necessary
3) If in doubt remove the whole thing and board up temporarily. This also allows the possibility of giving the original a complete makeover instead of replacing, but it may be no cheaper in the long run.

There's more downsides to not copying. Not least because copying is easier and will produce something actually resembling the original.
 
Collective advice at its best!

+1 to all of the above.

The beauty of the old box sash window design is that it is possible to make them with a few basic hand tools, as they used to be. That would be no good for a business but to repair one or two of your own is a different matter.

If you want to see what is in Ellis have a look at the sticky thread on old books and plans. It's in the WK Fine Tools library IIRC. Also look at Cassell's Joinery edited by Hasluck at the Internet Archive. It's very good on the practical details of how to make boxes and sashes to the required sizes.

Edited to add urls.

For pdf of Ellis, 1903 edition, go to to this page: http://www.wkfinetools.com/mLibrary/mLibrary_index-2.asp

For Cassell's Joinery click on this link to read online:

http://www.archive.org/stream/cassellscarpentr00hasl#page/404/mode/2up

or here to download as a pdf

http://openlibrary.org/books/OL24760370M/Cassells'_carpentry_and_joinery
 
Hi,

Sorry I haven't replied to you - thank you for your helpful comments. I have been quite busy at work lately, but I have managed to take some pictures:

[pictures are on flickr and I can't post a link apparently? Why?!]

There isn't a lot of light, because this is a basement flat and that window is the main source of light!

I am working on a drawing. You will see that on the left hand side of the window there is a big gap between the box and the recess of the window, this was (as per the right side) previously filled in with rubble. There are many things that make me think this window isn't as old as the house or the window wasn't originally made for the house:

- Gap as per pictures
- Construction of box is with lap joints and no tongue/groove or rabbited joints on the frame.
- Sil does not run length of recess and box is not attached to sil.

So with the utmost respect to your suggestions to make an exact copy of what I have, I believe (maybe wrongly) that if I constructed the box with parts that can be fit together and glued/pinned rather than just nails holding it together, it will be a lot stronger.

Seth
 
Seth

As protection against spam bots, new members can't post any links until they have made 3 posts. Tell us some more and try again!
 
If it's not original then all bets are off! Be interesting to see your snaps.
 
OK, so this is just so I can get past the 3 post thing - the other thing, which might be related to the way things are is that there are bars on the outside of the window. I believe the bars are a modern addition, so its possible that something was changed about the window frame itself then...
 
Hi Nerd,

The advice of remove it, board up the opening, copy piece by piece is the best here. At the end of the day even if this example of a box sash is not "by the book" it probably did the job just fine. Looks like you have pockets in the face of the inside linings which is less usually than having them located in the pulley stile.
Should you wish to omit the tongues and grooves used to join pulley stile to linings then do so. On a window this size glue and nails would be adequate. The photos suggest a box frame that was perhaps built with the opening in mind, or perhaps something needed to be "got over" when the window was fitted. Very hard to tell from the images.
I would advise removing the metal bars and refit when the box sash is made. Probably a security measure.
 
I see you have horns (the bits sticking out beyond the sashes). These may or may not be traditional in your area but are necessary in your case. Vertical sliding sashes work best if they are rectangular. In your case it is the other way round....not a problem and often encounterd. They add to the sliding length and can also add strength to the sash... so dont miss them out. The external bars are probably for security so best refitted. I canot see from teh photoes but wondered if you room had shutters at one time. Best wishes.
 

Latest posts

Back
Top