- Joined
- 19 Mar 2007
- Messages
- 5,295
- Reaction score
- 411
A while back someone, I can't remember who, sorry, started a thread about a lazy susan he had made. I saw it and though that it was a good challenge!! It was! I have mentioned that I was making one and that I would see if I could do a WIP? I will try...
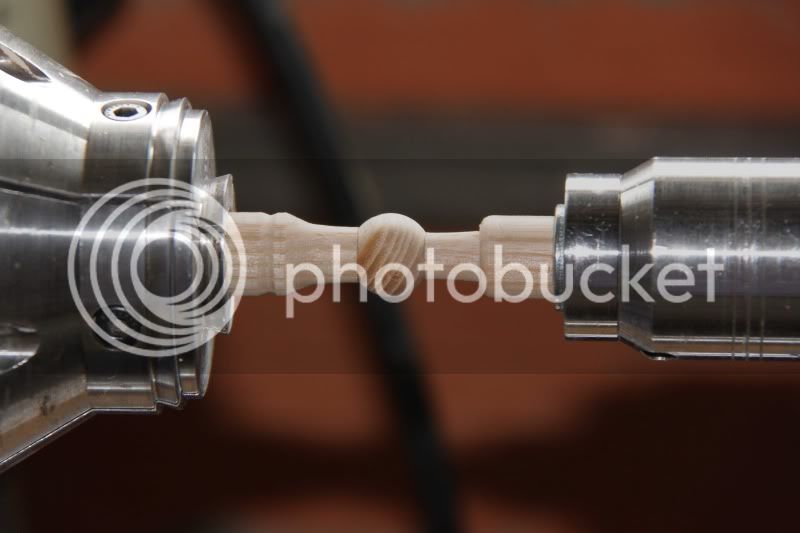
The first thing was to turn a load of proverbial new balls. These were done in ash as they will take a load of the pressure. I started by cutting 8 or so 3/4” by 6” long blanks. These were turned down to 5/8” dowel. That fits well into my small O'Donnel jaws. The balls were turned free hand from them and as long as I didn't reduce the diameter of the dowel I knew it had to be there or there abouts?
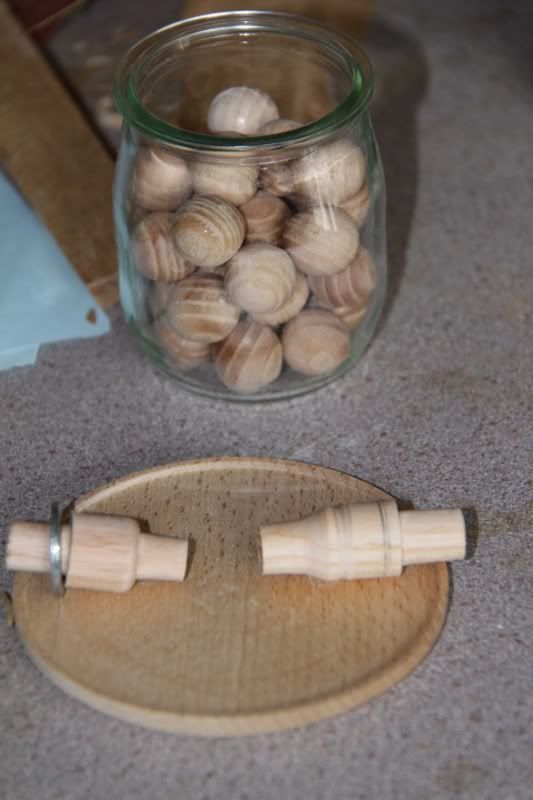
All 37 (!) of them were then put into the little pinch chuck (I think that it's what it would be called?) so that I could remove the knibs from the parted ends.
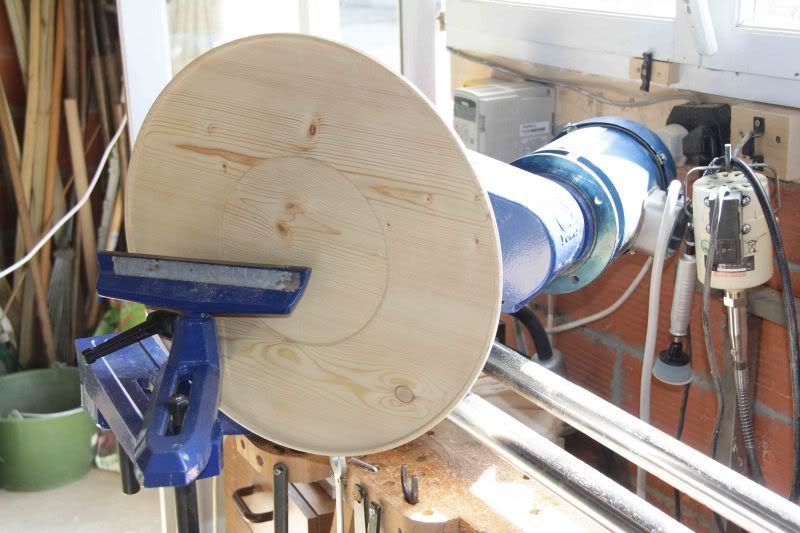
When I had my eyes straight again I found a pine board, I didn't have anything else wide enough, and cut 2 squares about 18” and glued them together to form a 2 ply board, for stability, cut the 'ply' to a round on my bandsaw and mounted it on a 4”face plate with 4 1”screws and onto my lathe. I had fitted the large bowl kit and it looked enor-mouse! And the headstock had to be turned about 45º for the blank to clear the bars. I trued everything up and turned a dovetail mortice in the base for the larger of my O'Donnel jaws.
I had worked out that 36 X 5/8” balls would need a diameter of just over 7” and I turned the race to that diameter and shaped the rest of the underside. I made sure that the balls would sit properly in the race too. Because of the relatively low speed due to the diameter of 17” I found it difficult to get a good finish from my spindle gouge. No problems though and I power sanded it from 80 to 280 grit and hand sanded to 400.
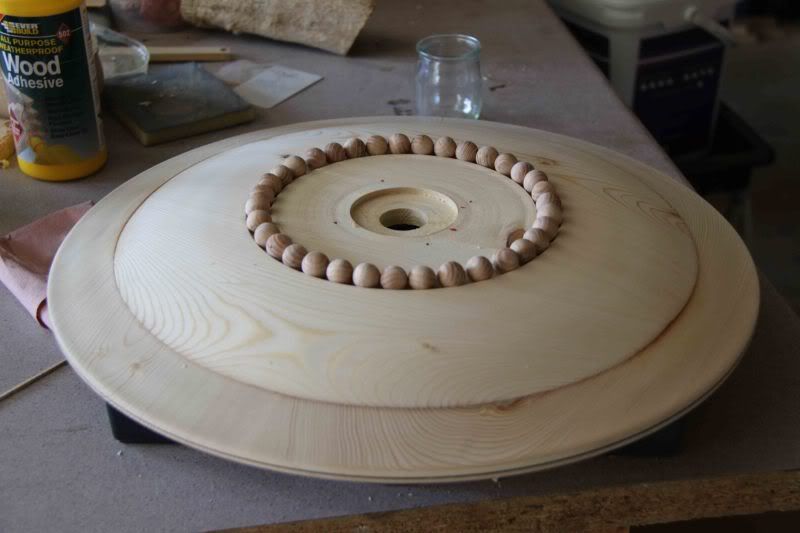
It was then removed from the face plate and mounted on my K8 chuck with the large O'Donnel jaws and the top was trued. I left a ridge on the outer edge and turned the rest flat. I also turned a 1 1/4” hole through the middle for the center spindle with a dovetail mortice for me chuck, just in case I had to reverse it again. The idea was that a blanking plug would be turned to fill it and cover the spindle. It was then I realised that there was a fault in the wood that meant that I had to turn the recess to a 7” diameter instead. No problems me-thinks.
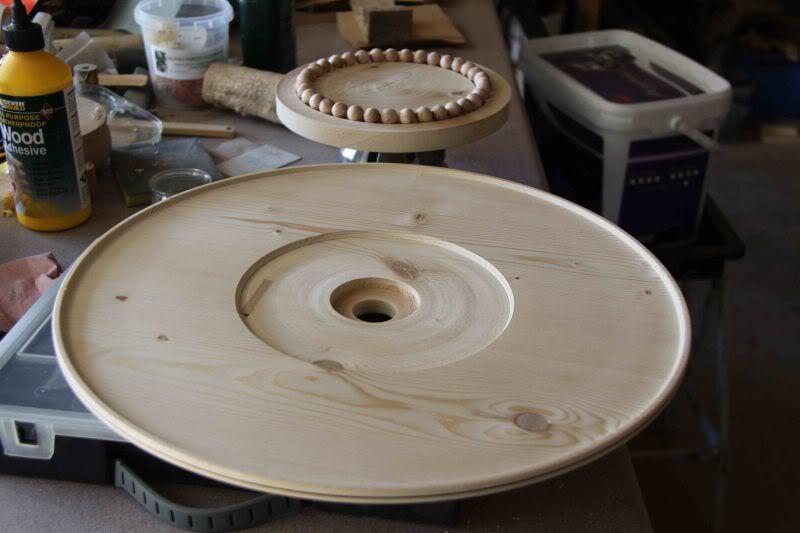
The base was done from another bit of pine and turned to 8” diameter, this time mounted on a hot glue chuck. Base turned true and round and another dovetail turned into it. Removed from the glue chuck with a gentle WHACK from a 2lb watchmakers hammer, reversed, trued, the race turned into it trying to make sure that it was exactly the same diameter-ish? And test fitted to the top with all it little balls in. I kept it on the chuck to do that as I wanted it to stay central! A socket was turned for the spindle.
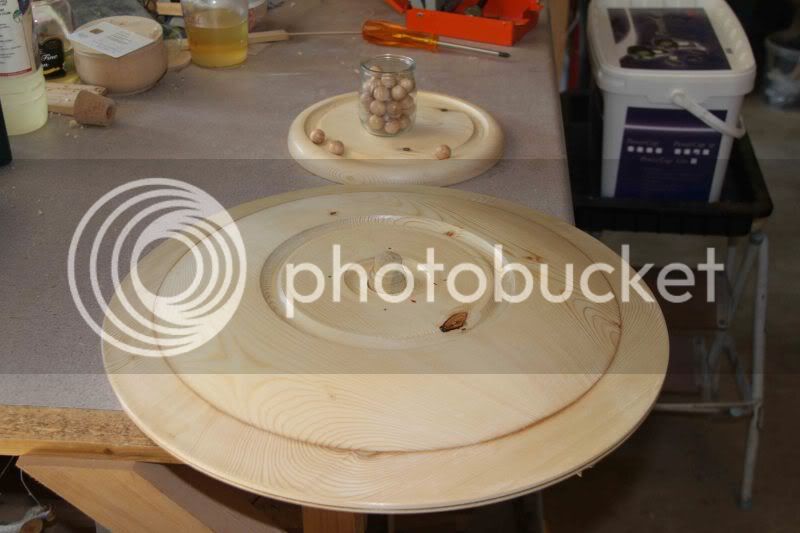
The spindle was turned from box because I wanted it to be as stable as possible, oh, and I had a bit the right size. So now I had all but one bit of the lazy s, the filler for the top. Yet another bit of pine was found, mounted on a glue chuck and turned to fit the recess in the top. Once I had as good a fit as I could get the spindle was fitted trhough the top and the filler piece was glued in place. This was done because I now had to turn the filler down to make a top completely flat. The spindle was no problem because it just flapped around in the empty center of the chuck. When I had the top flat there was a very small gap between the top and the filler so I cut a slot between the 2 with the point of my home made captive ring tool, cut a length of ramin, I think, off of an offcut length of moulding I had, soaked it for a few minutes and purfulled it into the slot. It came out quite well.. Back on the lathe and that was turned flat and power sanded. That is my power sander on the right. An Axminster heavy duty flexy drive. Easy to use and VERY quiet, not like a drill :shock:
Then came the lovely task of sanding sealing and melamine laquering everything! Doing the balls was a slippery job and I had more sanding sealer on my fingers than on the balls I think?. When they were dry an even worse job came to mind! De-knibbing the dammed things! I slept on it and in the morning I remembered seeing a rolling drum sander in a pro turners near Stroud. I set about making one with a 4” inline waste pipe fitting and 2 bits of block board
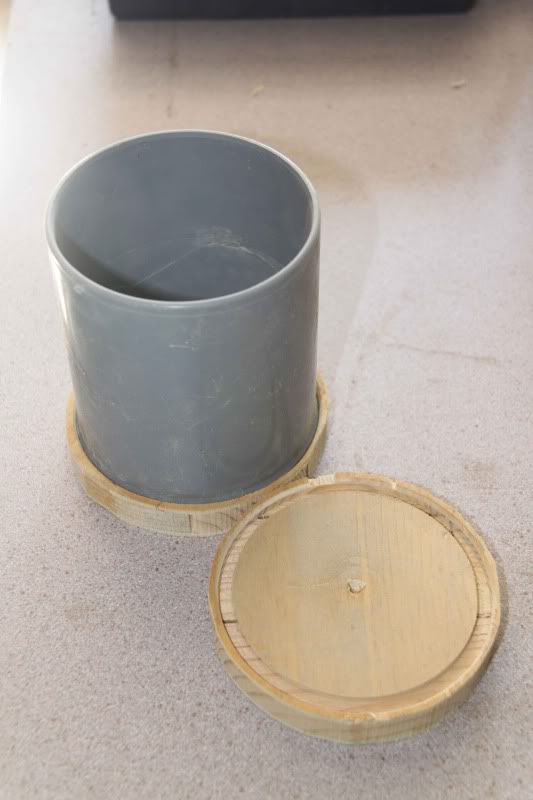
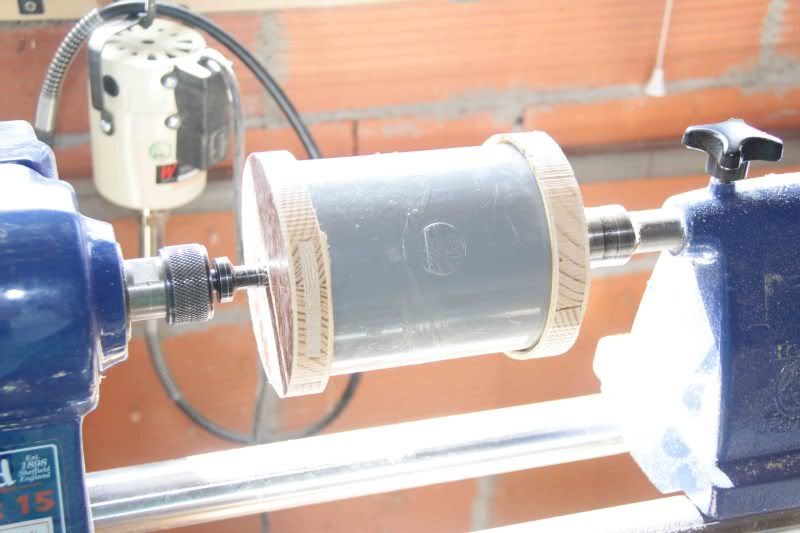
About 1/3rd filled it with sand, chucked the balls in it, put the top on and mounted it between centres on my lathe. Now that I have the 3ø variable speed kit fitted it was a doddle and I turned the speed right down and let it tumble sand the things! Good 'ere init!
I didn't bother de-knibbing the balls after the melamine stuff! The top and bottom were de-knibbed by hand with well worn 400 grit. Not a problem as it is just a very light rub over. The top and bottom were then buffed on my Beal kit.
Everything was now fitted together and I was just about to glue the spindle in when I noticed that the top was, for want of a better expression, wobbly. I have no idea why I hadn't noticed it before but after a while I realised that the 2 races were not identicle diameters and the balls were riding up the outside of the top race!. No real problem, I just put the base back on the chuck and turned the outside edge of the race a little bigger, very slowly and trying it often, until it was a good flat fit!
It's now glued and running really well. A lot of work and thinking, but very satisfying to do and unless someone wants to pay a lot of cash for one it will be a one-off, for now anyway!
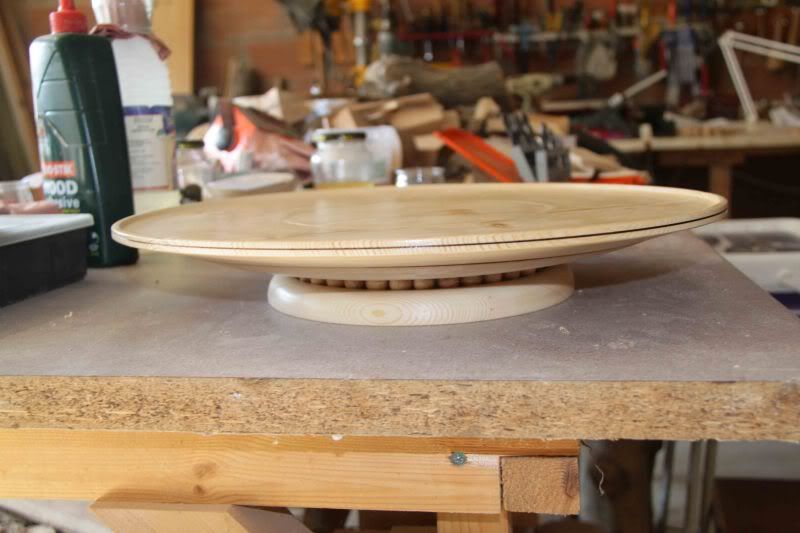
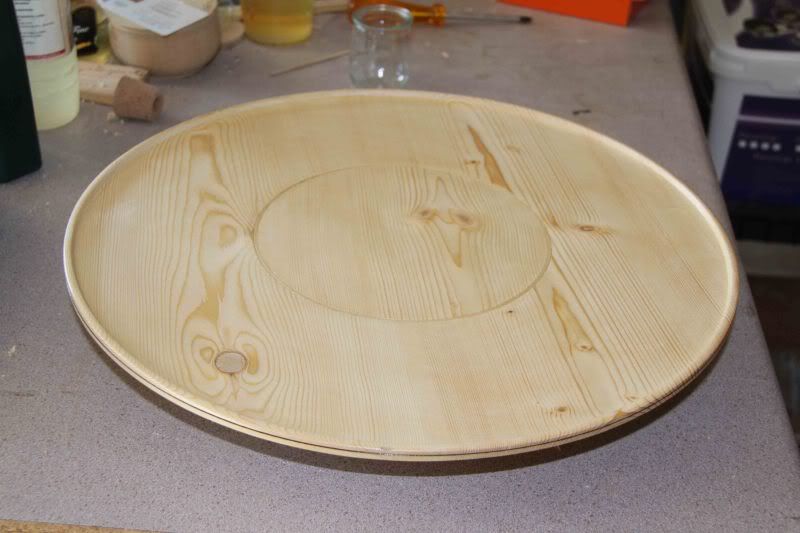
I nearly forgot to mention. The only things on this project that aren't wood are the PVA glue, celulose sanding sealer and the melamine laquer...
The first thing was to turn a load of proverbial new balls. These were done in ash as they will take a load of the pressure. I started by cutting 8 or so 3/4” by 6” long blanks. These were turned down to 5/8” dowel. That fits well into my small O'Donnel jaws. The balls were turned free hand from them and as long as I didn't reduce the diameter of the dowel I knew it had to be there or there abouts?
All 37 (!) of them were then put into the little pinch chuck (I think that it's what it would be called?) so that I could remove the knibs from the parted ends.


When I had my eyes straight again I found a pine board, I didn't have anything else wide enough, and cut 2 squares about 18” and glued them together to form a 2 ply board, for stability, cut the 'ply' to a round on my bandsaw and mounted it on a 4”face plate with 4 1”screws and onto my lathe. I had fitted the large bowl kit and it looked enor-mouse! And the headstock had to be turned about 45º for the blank to clear the bars. I trued everything up and turned a dovetail mortice in the base for the larger of my O'Donnel jaws.
I had worked out that 36 X 5/8” balls would need a diameter of just over 7” and I turned the race to that diameter and shaped the rest of the underside. I made sure that the balls would sit properly in the race too. Because of the relatively low speed due to the diameter of 17” I found it difficult to get a good finish from my spindle gouge. No problems though and I power sanded it from 80 to 280 grit and hand sanded to 400.

It was then removed from the face plate and mounted on my K8 chuck with the large O'Donnel jaws and the top was trued. I left a ridge on the outer edge and turned the rest flat. I also turned a 1 1/4” hole through the middle for the center spindle with a dovetail mortice for me chuck, just in case I had to reverse it again. The idea was that a blanking plug would be turned to fill it and cover the spindle. It was then I realised that there was a fault in the wood that meant that I had to turn the recess to a 7” diameter instead. No problems me-thinks.

The base was done from another bit of pine and turned to 8” diameter, this time mounted on a hot glue chuck. Base turned true and round and another dovetail turned into it. Removed from the glue chuck with a gentle WHACK from a 2lb watchmakers hammer, reversed, trued, the race turned into it trying to make sure that it was exactly the same diameter-ish? And test fitted to the top with all it little balls in. I kept it on the chuck to do that as I wanted it to stay central! A socket was turned for the spindle.

The spindle was turned from box because I wanted it to be as stable as possible, oh, and I had a bit the right size. So now I had all but one bit of the lazy s, the filler for the top. Yet another bit of pine was found, mounted on a glue chuck and turned to fit the recess in the top. Once I had as good a fit as I could get the spindle was fitted trhough the top and the filler piece was glued in place. This was done because I now had to turn the filler down to make a top completely flat. The spindle was no problem because it just flapped around in the empty center of the chuck. When I had the top flat there was a very small gap between the top and the filler so I cut a slot between the 2 with the point of my home made captive ring tool, cut a length of ramin, I think, off of an offcut length of moulding I had, soaked it for a few minutes and purfulled it into the slot. It came out quite well.. Back on the lathe and that was turned flat and power sanded. That is my power sander on the right. An Axminster heavy duty flexy drive. Easy to use and VERY quiet, not like a drill :shock:

Then came the lovely task of sanding sealing and melamine laquering everything! Doing the balls was a slippery job and I had more sanding sealer on my fingers than on the balls I think?. When they were dry an even worse job came to mind! De-knibbing the dammed things! I slept on it and in the morning I remembered seeing a rolling drum sander in a pro turners near Stroud. I set about making one with a 4” inline waste pipe fitting and 2 bits of block board

About 1/3rd filled it with sand, chucked the balls in it, put the top on and mounted it between centres on my lathe. Now that I have the 3ø variable speed kit fitted it was a doddle and I turned the speed right down and let it tumble sand the things! Good 'ere init!

I didn't bother de-knibbing the balls after the melamine stuff! The top and bottom were de-knibbed by hand with well worn 400 grit. Not a problem as it is just a very light rub over. The top and bottom were then buffed on my Beal kit.
Everything was now fitted together and I was just about to glue the spindle in when I noticed that the top was, for want of a better expression, wobbly. I have no idea why I hadn't noticed it before but after a while I realised that the 2 races were not identicle diameters and the balls were riding up the outside of the top race!. No real problem, I just put the base back on the chuck and turned the outside edge of the race a little bigger, very slowly and trying it often, until it was a good flat fit!
It's now glued and running really well. A lot of work and thinking, but very satisfying to do and unless someone wants to pay a lot of cash for one it will be a one-off, for now anyway!


I nearly forgot to mention. The only things on this project that aren't wood are the PVA glue, celulose sanding sealer and the melamine laquer...


