Latest turning....

UKworkshop.co.uk

Help Support UKworkshop.co.uk:

This site may earn a commission from merchant affiliate links, including eBay, Amazon, and others.

NikNak

Established Member
Joined
9 Aug 2008
Messages
792
Reaction score
42
Location
Southampton
Here is my latest effort.....


A small Kapur box with Walnut inlay Celtic knot.


It's been in the making for some months now. Having cut and glued the woods together, i left them in the dining room to fully dry and acclimatise. And much to my surprise the Walnut really shrunk in size compared to the Kapur....


It's going to be a present for one of my sisters for Xmas. She's the one that gives up all the wood (Kapur) for burning on our fire. So i thought a small gift in return, made from what she throws away......
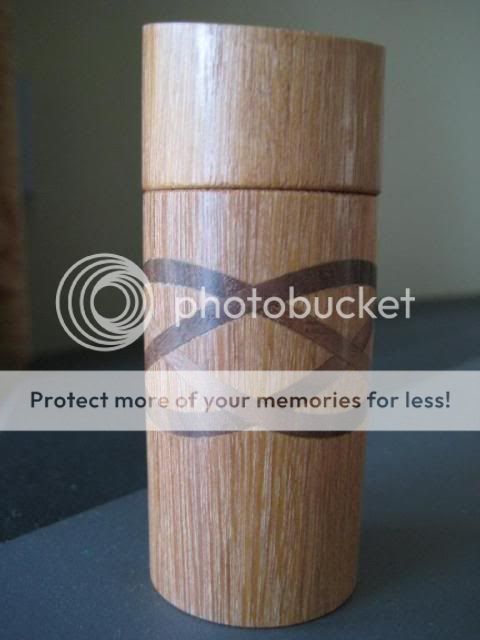
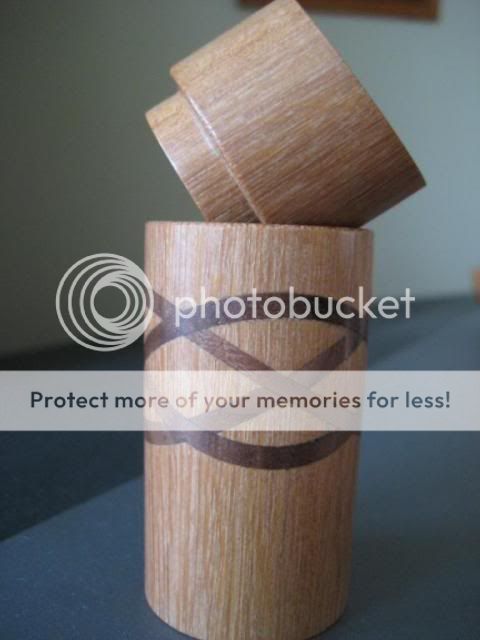

IMG_3014.jpg


IMG_3015.jpg


I made this one with a simple 'plug' type top....
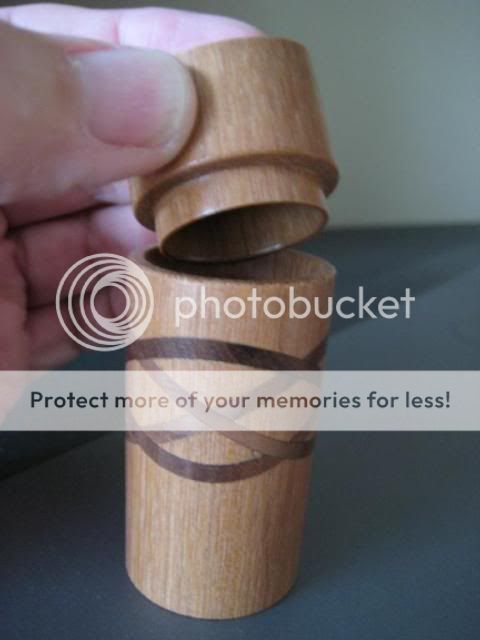

IMG_3017.jpg


It stands about 85mm tall overall and is approx 35mm dia. As she does a lot of needlework i thought she might keep pins in it.


As always..... your comments are welcomed.


Nick
 
Sweet !

Glue lines look perfect. - Is it my eyes though or is the lid a bit skewed ?

Loz
 
Loz....


you're right it does look a bit skewed.... so i went and had a look...!


gave a little gentle pressure to the lid and it 'clicked' shut just that last little bit. Must have missed it before taking pics...


IMG_3021.jpg


here you go......


I must admit also that i didn't bother trying to align grain with this one, as there were no obvious lines to try and align.... so it could also be the miss-aligned grain that can be seen tricking the eye slightly... maybe.. :?


Which/what ever it is.... i won't be doing another of these in a hurry. The Kapur to try and hollow out was a nightmare..!!

I've made a few smallish bowls using this timber, and to be fair going across the grain was not too bad, and i managed to achieve quite a decent finish. But going 'with' the grain.... very brittle, dusty, the slightest little thing (especially around/near the Walnut inlay) and i'd get splinters coming off, which then meant having to turn that little bit thinner etc.


Hey Ho..... it's all a learning curve....


Nick
 
Lovely looking box you have made the inlay looks perfect..bet
the cutting out took some time..I did a bit of rosewood last week, only
a diamond shape but kept getting the cut wrong..after seeing yours
I will have another go....
I am sure she will love it....
Thanks for showing it..
alex
 
Nick, in the first place, burning nice wood in the fireplace is something like a shame. Luckely you didn't.
You created a very nice lidded box with a walnut inlay, which I like to see.
How made you the grooves for the inlay, partingtool ??
Ad
 
loz":m4bc8rul said:
I dont think its inlay Ad, Alex,

Think it is full slices of wood glued into sawn host block,

See - http://www.woodturnersresource.com/cgi-bin/yabb2/YaBB.pl?num=1224581869/

Having re-read the post again
it's been in the making for some months now. Having cut and glued the woods together, i left them in the dining room to fully dry and acclimatise. And much to my surprise the Walnut really shrunk in size compared to the Kapur....
I see now how it is done...It is mind boggling the amount of work
turners do to create a finish..Have bought a few books showing
different techniques.
Thanks for the info & link.
 
`


Hi Guys


I have to apologise.... i think i was giving out mixed messages/signals...!!


It's NOT actually 'inlay'.... that's just my bit of misused terminology... sorry :oops:


It's what the (cowboy) car repairers do..... 'cut-&-shut' :lol:


Yep.... over the course of a week, i cut the (then square) Kapur through at approx 30° and glued in a slice of Walnut. Left it overnight, turned 90° and cut again etc. etc.

After 5 days i had the basic block ready, stuck it in the lathe and rounded it off. Then left it for a few months in the dining room to really dry out, and this is where all the shrinking took place. I suppose if i'd left it in block form THEN rounded it after the wait it would have saved a bit of time, and material due to having to re-skim to size/shape.


Ad.... sorry mate... but i burn LOADS of this stuff in the winter.

IMG_2964b.jpg


I get it from one of my sisters, it's all the off-cuts from their production.


I've got a small pile put by for Pete (Big Soft Moose) who's supposed to be visiting to collect it (cheaper to collect than post), but not heard from him for a few weeks now.... hope he's not succumbed to the dreadful flu..?


Nick
 
Nik your Celtic Knott work is fantastic.
To help simpletons like myself, can i ask you to list the step-by-step instructions of the cuts. I know you have already done this but i am so thick i need it broken down into my simple language :D :oops:
 
Shedhead (Dermot).....


No problem, i can do that for you. It may take me a while.... it's getting cold out there now, and i hate working in the cold... :)


I originally watched a young kid on a 'You Tube' clip making a pen, and i thought if a 12 year old can do it......


There's nothing clever about it (i'm most definitely NOT a wizzy turner, only got just over a years experience now, with only basic tools...), but it does help if you've got a chop-saw to make nice clean cuts with. Oh.... and patience..... LOTS of patience.


When you first cut and glue your wood you will be thinking "oh my god i've done something wrong already.... how on earth is this going to work....." So it will also help if you can think and visualise in three dimensions (easier than it sounds.....).


If you PM me your email addy, i'll keep you posted, and as soon as i've managed to assemble enough pics i'll post them back here. Hows that..?


Nick
 
Super Idea....More lessons for us newbies to get stuck in to.
But as you said it is getting cold and Xmas is almost upon us.
So please take your time...& thanks for offering to do it.
alex
 

Latest posts

Back
Top