Jukebox WIP

UKworkshop.co.uk

Help Support UKworkshop.co.uk:

This site may earn a commission from merchant affiliate links, including eBay, Amazon, and others.

Farmer Giles

The biggest tool in the box
Joined
6 Sep 2011
Messages
997
Reaction score
103
Location
West Yorkshire
The wife was complaining that the media players we have to play our mp3s on the network server are poor. They rarely connect properly, and when they do, selecting tracks is slow and painful and building playlists is out of the question. So I have been playing around with some raspberry pi microcomputers for various home automation tasks when I came across a 7" touchscreen and a 25w amp, both mount on the raspberry pi.

Also, I bought an oak tree a couple of years ago and had it planked to make a dining table, and had a few nice offcuts with lots of burr. So for valentines day I thought I would combine the two and use it as a bit of practice as I've been playing with various mechanical projects for the last couple of years.

First I put the scraps through the bandsaw and thicknesser the bookmatched it and used a couple of big dominoes to join it together.

P1060104.jpg


P1060105.jpg


Glued and clamped

P1060106.jpg


The gubbins that will go in the middle, the touchscreen is face down, then the raspberry pi, then the amp.

P1060109.jpg


To be continued
 

Attachments

  • P1060104.jpg
    P1060104.jpg
    92.1 KB
  • P1060105.jpg
    P1060105.jpg
    83.1 KB
  • P1060106.jpg
    P1060106.jpg
    86 KB
  • P1060109.jpg
    P1060109.jpg
    70.1 KB
Next to cut the hole in the middle for the screen, I used a trend jig and a router.

P1060113.jpg


Here's the hole and recess for the screen in progress with the scrap chipboard underneath showing through.

P1060115.jpg


Routing finished, the back with the recess for the screen

P1060116.jpg


The front, I went around the outside and inside edge with an ovolo bit.

P1060117.jpg


And with the screen installed and polyx oil/wax applied. The black box in front is a USB charger, more of that in a minute.

P1060131.jpg


I'm running an app called Clementine for the media player, it also streams internet radio so can get Radio 6 music etc. as well as play our MP3s. Since I have mounted the file system from our server on the pi, I can also do a slide show of our photos too. Plus it has a browser so the we can pull up recipes as its going in the kitchen

I have added a tiny pair of cambridge audio minx speakers but the speaker cables were a bit annoying, so I am in the process of building a stand for it that hides the cables and allows phones to be charged off the kitchen worktops.

I have that largely built, more photos over the next week or so.

Cheers
Andy
 

Attachments

  • P1060113.jpg
    P1060113.jpg
    90.3 KB
  • P1060115.jpg
    P1060115.jpg
    86.5 KB
  • P1060116.jpg
    P1060116.jpg
    68.9 KB
  • P1060117.jpg
    P1060117.jpg
    72.6 KB
  • P1060131.jpg
    P1060131.jpg
    85.9 KB
Brilliant, tremendous and many another word I cannot think of. What a great project! :)
I'm looking forwards to your next update. I know the Raspbeery Pi runs from 5V, but what about the amp?
Keep at it.
xy
 
Thanks for the support guys:) Once it's finished I can publish my notes on installing the OS and software if you wish, it's relatively easy.

The hifiberry amp has a meaty 12v PSU (I think its 12v, working away today) and feeds the raspberry pi 5v via the headers that join the two boards together. However the internal bus can't carry enough current to feed the screen and the pi so there is a separate 5v supply for the screen.

The Clementine media player has an android remote control app plus you can use VNC from your PC/laptop to control it if you don't want to use the touchscreen. I need to upgrade to the latest Clementine version to use the android app so will do that next. The pi has bluetooth and you can pair your phone but answering calls hands free while the phone is charging is beyond the scope of this project at the moment, I don't get a decent signal in the kitchen so not that bothered but may work on that later. The pi audio in for a microphone may be a limitation, not sure yet.

The speakers were the most expensive bit, however if you have an existing amp/speakers you can replace the hifiberry amp with a hifiberry DAC (Digital to analogue converter) and feed it into your aux input and save cash that way. Both screen and amp are mainstream raspberry pi accessories so plug together easily.

Regards
Andy
 
Farmer Giles":31tlmr74 said:
Thansk for the support guys:) Once it's finished I can publish my notes on installing the OS and software if you wish, it's relatively easy.y

Yes please, this on on my (very long0 to do list and a straightforward set of instructions may well move it up the list

Regards

James
 
One woodworking issue I had. When I joined the two halves of the frame together they initially fitted without a gap, hovever its freezing in the workshop so I finished in the office where its warmer and dryer and a smal gao developed. I filled this with oak sandings mixed to a paste with Bona "mix and fill" which Ihave used with success on oak floor and architrave when water based finishes are used.

It was almost undetectable and blended in nicely when sanded, until I applied the Osmo polyx oil/wax. It highlighted the filler much more than water based. I'm not too bothered on this piece, it was a trial to get me back into the swing of things however for future reference, what is the best filler when using oil/wax finishes?
 
I forgot I had this pic on my phone, this is the base, before being glued and clamped.The back has a 10mm gap behind it to hide power, USB and speaker cables. This will be upright with the screen mounted on the holes via dowels. The cut outs are for holding mobile phones while charging. There is a small hole where the centre popped out of a burr where the USB cables for charging exit. Charging mobiles/ipds on the kitchen worktops is another pet hate this fixes.

There will be more support for the screen once assembled and a place to charge ipads and chunky phones on top/behind the screen. I just need to cut a couple of bits of stock with a recess for the ply back on the tablesaw as my bandsaw is temporarily out of service.

stand.jpg
 

Attachments

  • stand.jpg
    stand.jpg
    41.1 KB
Great project Farmer but you got me lost with the tech, I was lost as soon as soon as you mentioned about fruit pi.
 
Here's a bit of progress. The screen and bezel are now mounted on the stand and there's some more pippy oak around the back to hide the gubbins and provide a means of mounting it on the wall

P1060175.jpg


You can see the cutouts to take the mobile phones while charging, chunky phone and ipads can go on the top. I'm now in the middle of final wiring, there will be 3 cables to the top, one for each type of apple device (sigh!) and a mini-usb. I could get adapters instead of 3 cables but they will charge better individually.

There's a knot hole on the far side of the stand that has been sawn through, this is where the cables for charging the phones on the stand will emerge. All the power adapters and USB charger will be under the worktop and I have a small cradle made out of scrap MDF under clamps to take all this.

The speakers will also hang off this cradle. It is at the end of a worktop where there is a 400m overhang after the last kitchen cabinet. Not perfect acoustically but the daughters bedroom is directly above so didn't want to mount them high. We are rebuilding the whole kitchen soon so it will be integrated into it better then.

The plan is to install it either this coming Saturday or next Monday evening. Saturday is a bit early for valentines but I have more time then.

I have only had a few minutes here and there so some is a bit rushed and the workshop is a tip which made it more difficult. Changes I would have made are :-

1.) I would have bookmatched the frame vertically as well as horizontally. I didn't want to break into too much wood reserved for other projects but it has left a boring grain bit on the right. I may put a stylus for the screen there to break it up.

2.) Add a small drawer to the bottom, this hides where the stand interfaces to the worktop back, however in the new kitchen the screen may be fitted to a panel in a cupboard so maybe superfluous.

3.) Chosen a better bit of timber for the back of the stand, there's a large boring bit below the screen.

Overall pleased so far, its been a while since I've had chance to work with wood and I've enjoyed it.
 

Attachments

  • P1060175.jpg
    P1060175.jpg
    116.4 KB
What a great idea and it looks lovely!
A couple of years ago there was a feature in a computer magazine about a guy making custom wooden radios by replacing the plastic cases off digital radios and fitting them inside some lovely exotic wooden cases he made himself......they were like modern antiques and also worth noting he sold them for ££££££ BUT he wasn't finished there he installed radios and even computers into custom painted motorcycle crash helmets! they looked superb and you just lifted the visor to put a CD in and some even had speakers fitted. They also sold for big money and looked much nicer than a grey metal/plastic box stuck on your desk. There was some videos of them on Youtube and I will try and find them as you will be impressed.
Cheers and look forward to seeing more of this type of work on here

Brian
 
Thanks Brian, I do like stealth technology :)

I've installing it on Saturday while the wife is taking the kids to Judo and dancing, its a few days early for valentines but the kids have helped my a bit and the only other opportunity is too late for the kids.

Cheers
Andy
 
I got it finished this weekend. The kids helped me sand it down and wax it so I had to install it when the kids were going to be about. So I installed it Saturday morning. I made a MDF shelf to fit underneath the worktop that carries the PSU, USB charger and the speakers.

The wife normally goes out for about 2 hours on Saturday morning, unfortunately she came back in under an hour which was just enough to install it without tidying up and testing. However it worked first time and she was well pleased and has made a few play lists already.

Here it is in situ, charging an ipad and a phone plus playing Radio 6 music. I haven't finished off the bottom part as the whole kitchen will be ripped out at the end of the year so I will do that bit then.

P1060204.jpg


Cheers
Andy
 

Attachments

  • P1060204.jpg
    P1060204.jpg
    56 KB
Claymore":188uirbo said:
What a great idea and it looks lovely!
A couple of years ago there was a feature in a computer magazine about a guy making custom wooden radios by replacing the plastic cases off digital radios and fitting them inside some lovely exotic wooden cases he made himself......they were like modern antiques and also worth noting he sold them for ££££££ BUT he wasn't finished there he installed radios and even computers into custom painted motorcycle crash helmets! they looked superb and you just lifted the visor to put a CD in and some even had speakers fitted. They also sold for big money and looked much nicer than a grey metal/plastic box stuck on your desk. There was some videos of them on Youtube and I will try and find them as you will be impressed.
Cheers and look forward to seeing more of this type of work on here

Brian

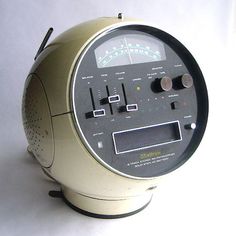
That made me think of an 8 track we had in the 70's

b5c31f029eee2c62c304c4b5117eb7f8.jpg
 

Similar threads

Back
Top