Infill smoothing plane find

UKworkshop.co.uk

Help Support UKworkshop.co.uk:

This site may earn a commission from merchant affiliate links, including eBay, Amazon, and others.

rob1713

Established Member
Joined
10 Feb 2011
Messages
41
Reaction score
0
Location
East Sussex
I was lucky enough to aquire this little infill plane yesterday. To my eyes, It looks to be user made. The infills look to be made from mahogany and it is fitted with a Ward iron. It's in pretty good shape apart from a crack in the front infill.

I know very little about these planes so I would welcome views on its origins and age. I plan to make this into a user so I would also welcome advice on how far to clean it and thoughts on removing the front infill to stabilise the crack.

Cheers
Rob
 

Attachments

  • image.jpeg
    image.jpeg
    135.7 KB
  • image.jpeg
    image.jpeg
    135.1 KB
  • image.jpeg
    image.jpeg
    140.8 KB
  • image.jpeg
    image.jpeg
    152.8 KB
  • image.jpeg
    image.jpeg
    194.3 KB
If you can get the infills out just by removing the screws, that's what I'd do. Generally, you want to do that to clean them, anyway.

You can do whatever you'd like to the metal then. I always go with less is more, but given that it's not an early norris jointer, it doesn't really hurt the value much to clean them properly.

my preference for heavy cleaning on metal is a deburring wheel and then some wet and dry to make for a uniform surface, but there may be enough pitting on that to make you want to do more. A wire wheel is also fine, or if you're looking for toruture, a wire brush.

It has a fabulous very long ward iron but I'd speculate from this distance that the cap iron might not be ward (that doesn't matter if the cap iron is a good shape). The proportions are nice, and the handle angle is very good - it should be an excellent user. If it is a user made plane (perhaps from parts) the woodwork is better than most user made planes.

There's enough of the horn left that I'd probably clean up the top and leave it as is. It's important for some horn to be there for use (so that you don't have to have a tight grip to lift the plane), but I think there's plenty there for that. I wouldn't top it and add another non-matching piece. The crack on the bun is not structural, I'd fill it (burn in shellac if you have it, or filled CA (filled with a matching dust).

Do you intend to also refinish the infills?
 
I wonder if the front infill is possibly a later addition? The rear infill looks like Rosewood but the front infill might not be. Plus the shaping on the front doesn't look as accomplished, there's a flat spot on the top and that little curlicue on the side looks like a bit of amateur whimsy. Just a thought.

Still a cracking find. The turks head screw suggests Edwardian or earlier, and personally I'd rather have that as a user than pay three or four times the price for something with a mangled and misbehaving Norris screw adjuster.
 
Nice looking plane and it represents a lot of work from the maker.I am a little surprised that the metal sides have been made so low near the throat as this would invite a breakage if the plane ever fell off a bench.

If it was mine,I'd just Scotchbrite the metal and sharpen it-then enjoy it.
 
Don't rush to do anything irreversible which you might regret or which might make the plane look worse or perform worse.

There are lots of good threads on here showing different degrees of "restoration" which can range from light dusting to aggressive surface removal.

He's not posting at the moment, but Jim Hendricks has the knack of finding nice old planes hidden under dirt in bootfairs which he restored with lots of photos and helpful detail, eg

scottish-infill-smoother-restoration-t64459.html

and

more-infills-not-landfills-somebody-stop-me-please-o-t46671.html

You'll find more of his work at the WK Fine Tools site, which is also a rich source of approaches and techniques.
You might also find the tool restoration links in this sticky useful:

tool-cleaning-and-restoration-links-t82859.html
 
That would be a shelf queen for me and as a result I wouldn't know how far I'd go with the cleanup. It's nice to take something all the way back to bare metal sometimes but with really old stuff having it fully looking its age can be really nice.
 
Hi. Nice find! If you do get the infills out in a clean-up process, electrolysis of the metal parts works well without scrubbing, sanding etc. Of course, pitting from corrosion is still there but its a gentle way of getting rid of rust and not metal. Best of all it is easy!

Cheers
Richard
 
Very nice find Rob, time, methinks, to move South :wink: =P~
Cracking working to give it that Cupids Bow on the sides.
Just have a peek under the lever cap. Can never be certain but be nice to see the PRESTON trademark and a size.
As for cleaning up, I would wipe it over with your regular oily crappie rag and then a quick tart up on the bottom.
Give it a lick and see what it works like. You might not like it :wink:
Cheers
Andy
 
Thanks for all of your input chaps. I gave the plane a quick try after giving the iron a quick sharpen, it worked ok, but as most of my school reports stated, it 'could do much better'

After wieghing up your advice and considering that I wanted to flatten the sole and clean up the sides a bit, I decided to remove the infills. Hopefully this means I can stabilise the crack in the front bun as well.
3 of the 5 screws came out easily but 2 of them needed to be carefully drilled using my old hand drill press. You may notice that there are 2 screw fixings on its port side rear infill and only 1 on the starboard. Upon removal of the infills I found out why this is. Someone in the past has removed the infill and like me had to resort to drilling the screw out, however unlike me they decided to screw in a very short screw and drill another fixing in the casting for a full length screw,rather than carefully drilling/digging out the screw shank.
However things went ok and I learnt a lot about how these planes are made. For instance I didn't realise that the handle profile is very slightly wedge shaped to keep the rear cheeks tight against the casting.

It seems that infills were bedded on a fine layer of some sort of cement type adhesive / filler, I'm not sure if this is the usual method used or whether the last person who removed them decided on a belt and braces approach to refitting them. It guess it does mean I will need to think about adopting a similar approach when I finish work on the casting.
Again I would appreciate any views on whether this is normal or was it a bit of a bodge.

Andy, I checked under the lever cap and unfortunately the was no hidden EP mark just a 2 1/4 stamp. In the unlikely event that I get bored with it I'll drop it off next time I'm passing as long as you get the last restoration job I sold you finished.
Cheers
Rob
 
rob1713":2bdjvodb said:
Again I would appreciate any views on whether this is normal or was it a bit of a bodge.
Possibly neither. Maybe not usual but with shrinkage of the wood the previous fettler could have felt it was necessary to pack out the underside to provide a solid footing.

You might be best leaving it but if you want to remove it be a little careful, it could be something innocuous like whiting bound with glue or it could be a oil filler containing lead pigment. Lead white isn't hugely toxic but obviously still best not to breathe any in if any dust is generated, and wash hands thoroughly periodically as you're working on it if not wearing gloves (gloves not being essential).

If it is bound in Scotch glue it'll be soluble in warm water. Might still contain lead as old timers would often throw in some lead to fillers and other workshop concoctions because it was a commonplace traditional ingredient, but working wet like this you'll have no worries about dust. It's safe for it to run down the drains.

After removal you'll probably need to re-bed the wood, in which case an epoxy compound might be your best bet.

It's a very pleasing shape, hope the rest of the overhaul goes swimmingly!
 
It's fairly typical to find bedding on an infill, especially an older one.

You want the following (not rocket science)
* a flat sole
* a well bedded iron with a reasonable mouth (filed toward the front as you go to the top of the inside of the casting) and a reasonably tuned cap iron
* good proportions and angles (it looks from afar like you have those)
* infills that are tight and that don't move

The contact with the casting isn't necessary if the cross pieces are tight, just as the cross pieces aren't necessary if the contact is solid and bonded (but that will never stay the case in the long term).

So, the solution is to fit everything as tight as possible and bed the infill into some type of glue, etc.

I use epoxy, but I have gotten to the point that my infills are within about a thousandth of the dovetailed (I'm too incompetent to cast anything) sides and bottom, so it's not necessary. If my planes last long enough, inevitably, the infills may shrink some and someone will have to do the same to them.

By all appearances, you've got a good set of bones there. My suggestion as an amateur maker (and I can't make much, but I can make a good plane) is to do minimal cleaning, get the infills fitted and bedded tightly. Save any bed work to the infills themselves (the bed where the iron contacts) for later unless it absolutely needs to be done, lap the bottom dead flat (File if needed, I can make a video about that if you need it - don't just file away - lapping is safer if the bottom is reasonably close).
 
Thanks for that, I plan to treat the casting using electrolysis then lap the sole flat. The mouth is a bit wide on it, the previous owner had tried to address this by using a card packer beneath the iron to move it forward, I will have to do something similar when I get to putting it back together as the mouth may get wider as I lap the sole to get it flat.
I'm only planning to give the wood a gentle clean and wax as it has a nice patina that I'd like to keep.
 
Well the cap iron trumps mouth size for effectiveness (and convenience but that's not a winning argument in this context) so I wouldn't worry overmuch if the mouth is wider than some fans of infills insist is ideal, i.e. absolutely tiny, a small fraction of a mil.

From the initial photos the gap in front of the iron looks plenty small enough to offer no problems in normal service.
 
rob1713":2k7m6gjo said:
Thanks for that, I plan to treat the casting using electrolysis then lap the sole flat. The mouth is a bit wide on it, the previous owner had tried to address this by using a card packer beneath the iron to move it forward, I will have to do something similar when I get to putting it back together as the mouth may get wider as I lap the sole to get it flat.
I'm only planning to give the wood a gentle clean and wax as it has a nice patina that I'd like to keep.

If the mouth is large enough that it makes it hard to start the plane without leaving marks on the end of a board, it's a problem. If not, I wouldn't worry about it.
 
Well none of these gives much trouble with that:

LaaObjJ.jpg


Top one is my super smoother, 2mm gap. Bottom one is quite a respectable performer, 3mm gap.

I do have a woodie where this is a definite problem but it has a gaping maw for a mouth!
 
Thanks for all of your advice with this .
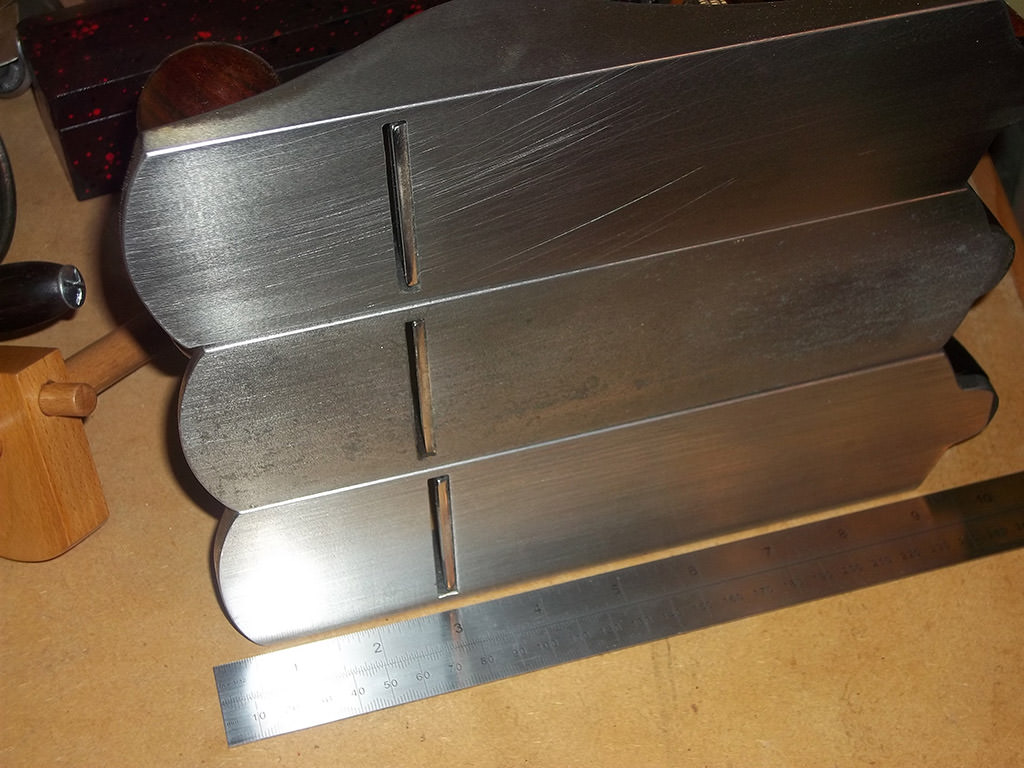
A friend of mine kindly treated the metal parts of my plane to a dip in his electrolysis tank. I'm very pleased with the results, the casting looks to be in very sound condition.
There are still a couple of issues to deal with including a crack in the front bun! getting the cap iron to sit flush on the iron, and upon flattening the rear of the iron I notice it has has a small unintentional back bevel on the flat side of the iron.

After a further session of flattening the sole and a light clean of the wood and lever cap with 0000 grade wire wool it is ready to go back together.

Having looked at previous posts on the subject and read your advice above, there's a couple of issues I'd like to confirm before I proceed with finally putting the plane back together.
1 A couple of you have mentioned bedding the wooden stuffing in the casting using an epoxy compound. Im assuming you mean something like Araldite ?
2. I'm guessing that this means that once I've done this, the infills are in for good, Is there a more 'non permanent' bedding material I can use?
3. To deal with the crack in the front bun, I plan to drill pilot holes deeper than the original 3/4 inch depth screws and fit longer screws, in the hope this will better hold the bun and prevent the crack getting worse?
4. Is there any adhesive or treatment that I could try and inject into this crack to further stabilise it ?
Thanks
Rob
 

Attachments

  • image.jpeg
    image.jpeg
    160 KB
  • image.jpeg
    image.jpeg
    170.1 KB
  • image.jpeg
    image.jpeg
    173.2 KB
  • image.jpeg
    image.jpeg
    146.2 KB
  • image.jpeg
    image.jpeg
    100.4 KB
  • image.jpeg
    image.jpeg
    235.5 KB
  • image.jpeg
    image.jpeg
    182.6 KB
That's looking smashing!

rob1713":rdrsjk99 said:
...upon flattening the rear of the iron I notice it has has a small unintentional back bevel on the flat side of the iron.
Intending to keep this or do you want rid of it?

rob1713":rdrsjk99 said:
1 A couple of you have mentioned bedding the wooden stuffing in the casting using an epoxy compound. Im assuming you mean something like Araldite ?
Many option here including things like Milliput and other epoxy plumbing/sealant compounds if they have a long enough working time. You can also use standard epoxy glues or liquids and thicken them up with a powdered filler (which can be just wood dust if it's all you have) to whatever consistency you want to work with.

rob1713":rdrsjk99 said:
2. I'm guessing that this means that once I've done this, the infills are in for good, Is there a more 'non permanent' bedding material I can use?
You can bed metal and wood together using epoxy without the two materials becoming bonded, but this is usually to bed metal into wood and involves waxing or greasing the metal and having the epoxy remain bound to the wood. In theory you could do the reverse, but I think you'd need to seal the wood off well with lacquer or shellac to get it to work well. You could saturate the wood with wax but this would seriously hamper any future interventions so I think it's probably not advisable.

Epoxy isn't the only option though, in the past fillers made largely of whiting or marble dust and hide glue might be used for this sort of thing and something like that can be done with PVA or Cascamite.

rob1713":rdrsjk99 said:
4. Is there any adhesive or treatment that I could try and inject into this crack to further stabilise it ?
Unless you have some hide glue I think there are only two options for this and that's superglue or epoxy. I'm more partial to epoxy for anything over a hairline crack for a few reasons including it being both stronger initially and lasting better, and it's a much better gap filler.

With superglue you use the runny kind and it just naturally wicks into the crack.

With epoxy the best way to do it is to warm the wood well, then mix your epoxy and apply it whereupon you'll see it immediately becomes liquid and sinks in. Doing this I've gotten penetration in excess of 5 or 6mm, which I doubt you can get with superglue because it sets so fast, although I haven't done a direct comparison.

If you'd like to do a cosmetic repair as well and would like to continue to use epoxy it can be tinted or mixed with wood dust and used for that also.
 
don't worry about epoxy being non-reversible, at least not in this particular application. Standard epoxies quickly soften with heat, so play a hot air gun over the sole and the infills will pop right out
 
Before I read your post Custard, I had convinced myself that I would wax the wood and use Milliput.
I don't mind if it sticks hard to the casting as I could scrape it off if required. But Araldite would be easier to apply and due to its fluidity will provide a better seat for the wood in the casting. I was just worried that it would be impossible to remove the stuffing in the future. I didn't realise that a heat gun would be sufficient to break down the hardened Araldite in the future.
Hmmmm decisions decisions
 
ED65 thanks for your tips I will definitely try Araldite to stabilise the bun, I'm still not sure whether to use Araldite or Milliput as a bedding for the stuffing and yes I do plan to remove the back bevel from the plane Iron as it looks to have been formed by the previous users poor sharpening technique rather than a deliberate action to deal with some tricky timber.
 

Latest posts

Back
Top