How to dry and cut some horse chestnut logs?

UKworkshop.co.uk

Help Support UKworkshop.co.uk:

This site may earn a commission from merchant affiliate links, including eBay, Amazon, and others.
The halves you have will try to bow so the flat side becomes convex. This is the circumference pulling. The thing is this can often pull the half apart as the convex surface splits from the pulling. To alleviate this tendency place the half round trunk flat side down and take an inch or more off the top of the hump to make it flat topped. use anything you can, adze, machete, axe steel wedge anything.
 
woodfarmer":rx7gkto2 said:
The halves you have will try to bow so the flat side becomes convex. This is the circumference pulling. The thing is this can often pull the half apart as the convex surface splits from the pulling. To alleviate this tendency place the half round trunk flat side down and take an inch or more off the top of the hump to make it flat topped. use anything you can, adze, machete, axe steel wedge anything.

1" is going to be a significant "hit" on logs that are only ~5" thick (from the flat side to to the top of the hump). I presume your advice is to get on and do it now based on the fact it'll take me time to plank them?

If I did take the time to quarter the remaining three logs (but not plank them) would I still likely see splitting problems, or would that give me time to fix the bandsaw and change the blade?
 
sploo":16yxv2tu said:
woodfarmer":16yxv2tu said:
The halves you have will try to bow so the flat side becomes convex. This is the circumference pulling. The thing is this can often pull the half apart as the convex surface splits from the pulling. To alleviate this tendency place the half round trunk flat side down and take an inch or more off the top of the hump to make it flat topped. use anything you can, adze, machete, axe steel wedge anything.

1" is going to be a significant "hit" on logs that are only ~5" thick (from the flat side to to the top of the hump). I presume your advice is to get on and do it now based on the fact it'll take me time to plank them?

If I did take the time to quarter the remaining three logs (but not plank them) would I still likely see splitting problems, or would that give me time to fix the bandsaw and change the blade?

Point is if it splits from centre to edge you will lose some of the best wood, this way you lose only the top of the hump, but it will reduce the chances of a split where it matters more. If you do this with a chainsaw you could even recover some of the wood from the removed chord. Just hedging your bets. No guarantees :)
 
woodfarmer":3q0g42uu said:
Point is if it splits from centre to edge you will lose some of the best wood, this way you lose only the top of the hump, but it will reduce the chances of a split where it matters more. If you do this with a chainsaw you could even recover some of the wood from the removed chord. Just hedging your bets. No guarantees :)
If I did it with a chainsaw the most likely result would be that I'd lose my fingers :wink:

I could probably cut the "hump" off using a bow saw (or at least start it, then slip with a wedge I guess). I could rig up a jig for the bandsaw as I'd probably get the relevant section under the height of the saw, but it would need care to prevent it snatching.

Alternatively I guess I should just get my backside in gear, fix the saw, and get a TuffSaws blade!
 
Sploo
You amazed yourself with the wedges and then started farting around with your bandsaw
With at least one bit have a go at rough planking them entirely with wedges with practice you might get good enough planks to stick.
Wet wood and bandsaws do not like each other and then only with one of Ian's special blades
 
Yea, it's a fair point. The problem is that the logs are relatively small and the wedges are relatively large - I'd be hacking some pretty big chunks out of the end to get the "point" of the wedge in, and then unless they split really straight I'd probably get very little usable wood. If there were larger I'd definitely try the wedges.

I've now got one of the Tuffsaws Sabrecut blades (a 5/8") and the difference is night and day. Apart from some wet sawdust sticking to the inside face of the blade (now cleaned off) it wasn't too hard to quarter the remaining three logs.

I did just get time this evening to plank up one of the longer/thinner sections (into 3/4" thicknesses). With hindsight, it's not a bad (finished) thickness for boards that size, so for the other three quarters (from the long log) I'll probably do at least an inch (to hopefully get 3/4" planed boards).

I've stickered the planks I've cut but haven't yet had chance to seal the ends. I probably won't get time to mess about with wax for a few days but I guess I could dig out some PVA glue. BTW Is the sealing just to prevent fungus, or does it help with cracking?

Oh - and should I remove the bark? (I'm assuming yes)

Here's the "story" so far:

20150221_115127.jpg


20150221_115137.jpg


20150221_121017.jpg


20150308_194342.jpg
 
sploo":33gpb6tm said:
Yea, it's a fair point. The problem is that the logs are relatively small and the wedges are relatively large - I'd be hacking some pretty big chunks out of the end to get the "point" of the wedge in, and then unless they split really straight I'd probably get very little usable wood. If there were larger I'd definitely try the wedges.

As an aside, when looking for a 'smaller' splitting wedge, I was struck by the similarity between a 'cold chisel' and splitting wedge. The cold chisel runs out of splitting power faster, but for a small log that's not a problem. Might need to sharpen the edge a little, but I'm sure there's a thread on that somewhere… :wink:

sploo":33gpb6tm said:
Is the sealing just to prevent fungus, or does it help with cracking?

It helps with cracking. The cracking happens because it dries 'too fast' (rather, too unevenly), and the fastest way for water to leave is through the end of the grain (the 'bundle of straws' model of wood is useful here). Once planked, it's less of a problem than when it's in the round, of course, but still helps. Once the ends are sealed, the moisture has to leave through the long grain, which means it leaves much more evenly around the plank. It will make more difference where there is more curve to the rings (C and 4 in your planking) then where it's quarter sawn (A).

On the bark - actually, I don't know. I've always taken the back off _before_ splitting, on the grounds of keeping the potential grit and muck away from cutting tools. I've seen plenty planks with bark still attached, so it probably won't make much difference, but in principle it should dry slightly more evenly with the back removed.
 
A long overdue update (mostly because it's taken until now to get the job done).

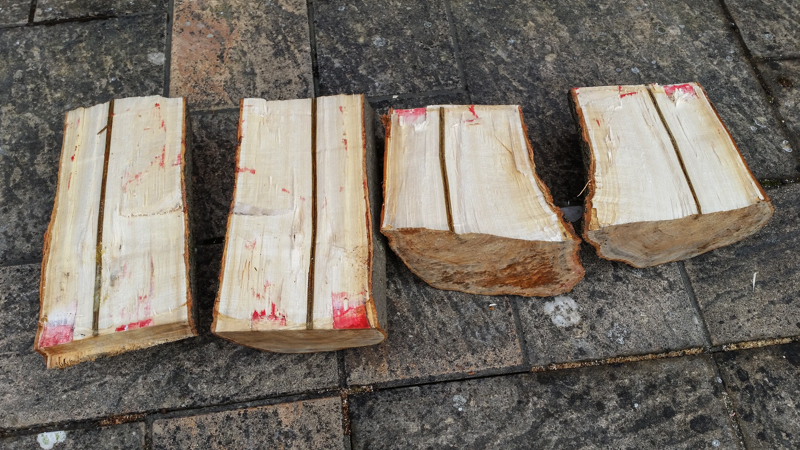
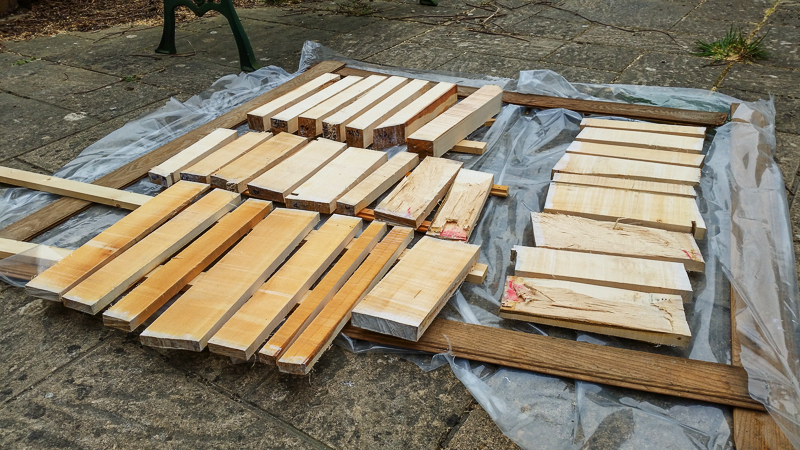
I finished planking the logs, mostly into 3/4" and 1" thicknesses, and a few 2 1/2" square. All had the ends sealed with a generous helping of PVA glue:

20150314_132424.jpg


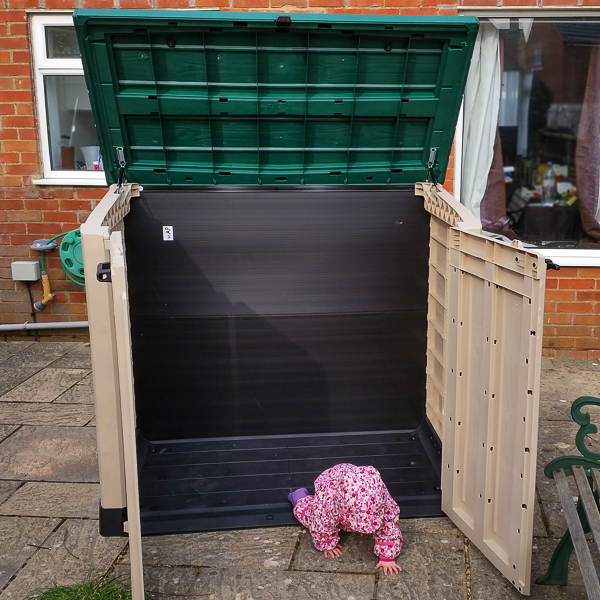
Lacking anywhere suitable to store the planks, I bought one of these garden storage units (by the time I'd finished building it the site foreman had gotten bored, and she'd padded off in search of a bottle):

20150313_145352.jpg


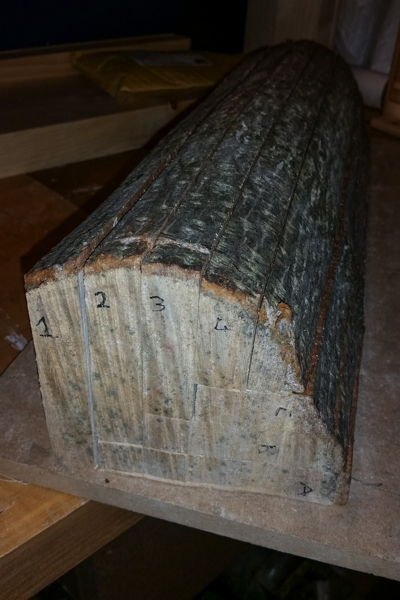
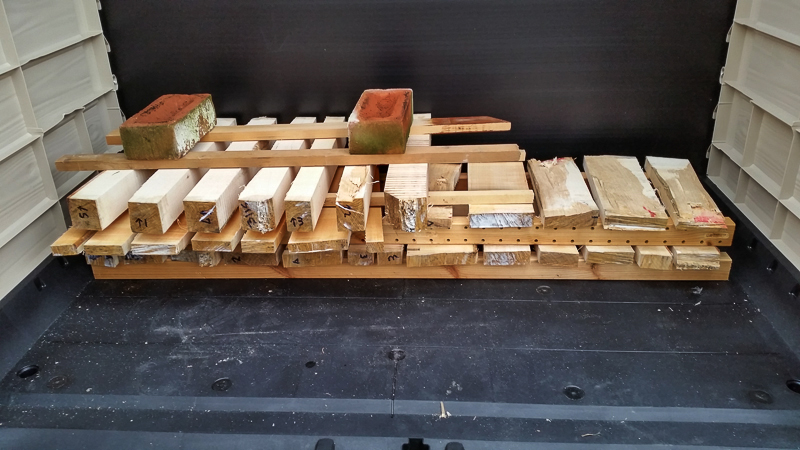
I stickered the planks as best I could:

20150314_135415.jpg


Looking further into drying green timber, it seems there's an argument that air dried wood will never reach a low enough moisture content for use as indoor furniture (i.e. it needs to be kiln dried). A bit of searching yielded this interesting page: http://www.popularwoodworking.com/projects/solar-kiln

In a nutshell, it uses the sun's energy to heat the inside of a cabinet, and a fan to force the warm air through the stack of green wood. At night, the fan shuts down, and the moisture in the air condenses onto the wood; thus stopping the outer surface drying too quickly.

The storage unit I'd built is south facing, so I've decided to go for a (very) poor man's version. I bought a 12v 5w solar panel for £20 from FleaBay, and got a 120mm computer case fan with a very low current requirement.

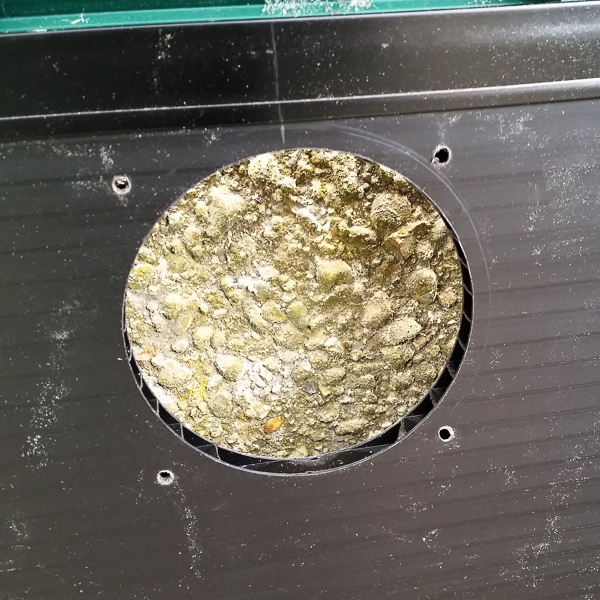
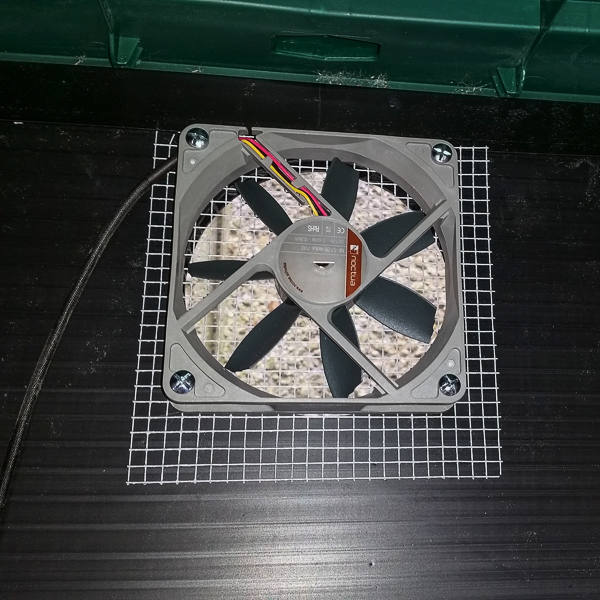
I cut a suitable hole in the top middle of the back board of the storage unit, then added the fan, with some 6mm mesh to keep vermin out:

20150402_171231.jpg


20150403_164532.jpg


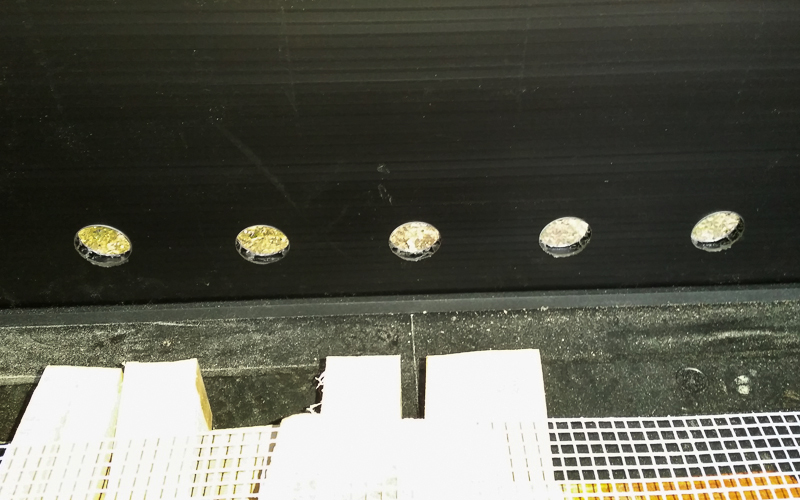
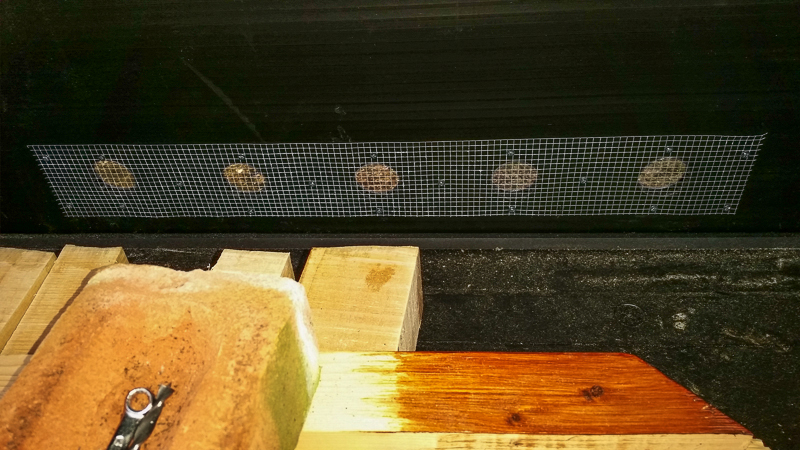
I then cut a series of holes near the bottom of the back board, roughly equating to the area of the 120mm hole, then covered that in mesh too:

20150403_164543.jpg


20150403_165008.jpg


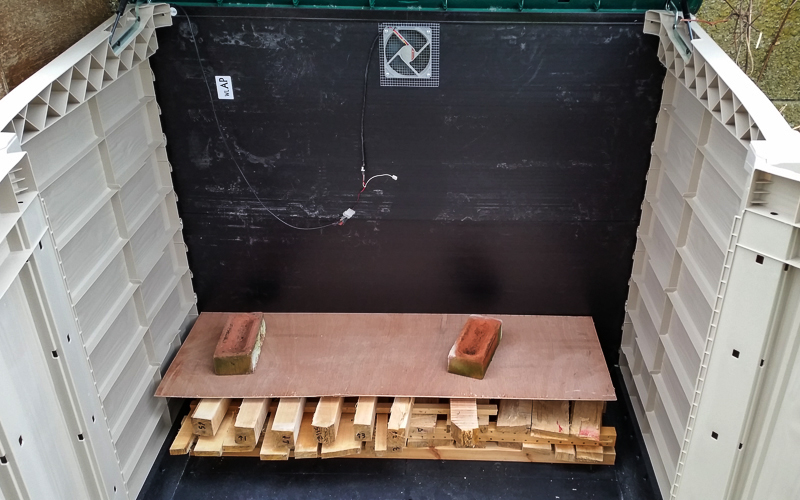
Finally (and I need a larger board) I put a board over the stack, such that air being pulled in by the fan would have to go through the stack to exit the storage unit:

20150404_174521.jpg


The last few days have been quite overcast, but the fan's been whirring away slowly. This morning was pretty cold outside, but the dark green lid of the storage unit was warm to the touch (due to the little bit of sunlight we'd had), and when I lifted the lid the air inside was obviously warmer than outside. I suppose therefore it's possible that this cobbled together project may work.

If I had time (which I don't) and a Raspberry Pi, a bunch of sensors and a moisture meter (none of which I have), I'd be logging the inside & outside temperatures, humidity, and board moisture content. I guess I'll just have to stump up for a moisture meter at some point and see how the boards are doing. Any recommendations?
 

Latest posts

Back
Top