Hand-cut angled dovetails

UKworkshop.co.uk

Help Support UKworkshop.co.uk:

This site may earn a commission from merchant affiliate links, including eBay, Amazon, and others.

Just4Fun

Established Member
Joined
21 Sep 2017
Messages
1,264
Reaction score
569
Location
Finland
Does anyone have any tips for cutting dovetails at compound angles?

I want to make a box with all 4 sides sloping outwards at the top, away from vertical. The tail boards slope will not be the same as the pin boards slope. I tried a test joint yesterday. I had no clue how to lay out the joint and eventually did it freehand. I would prefer a process that I could follow to produce reliable, good-looking joints.

On the plus side my test joint is strong and lies nicely flat on the bench. It isn't too bad and could probably be cleaned up to look almost acceptable. With a bit of practise ...

On the down side the joint is a long way from square and there is no way I could do 4 joints like that to make a box. I don't know where I went wrong.
 
This is something I mean to try too. I have got as far as cutting a test piece, not very well. There are several approaches and some useful YouTube videos.

The approach in older books is to use a full scale drawing to get the angles of the ends. I found this very difficult.

Another way is to use an online butt joint compound angle calculator and plane your ends to those angles. This nearly worked but unless you have a power mitre saw you need to make some angle blocks for a shooting board so you can get the ends right.

I recommend you look on YouTube for Trebangham and watch his tool tote build. (Good hand tool channel all round.)
 
Trebangham 's channel is interesting. Thanks for the pointer, although it didn't help me in this case. He used an online calculator to work the angles required. That won't work for me. I don't even know the angles at which my box sides are sloped; I set those using the time-honoured "that looks about right" method. So to use an online calculator I would somehow need to accurately measure the angles I have selected, feed them into the calculator, then have some way to mark those angles on my stock. I really don't think I can measure or mark angles on boards that are (I'm guessing here) about 12mm thick. I can duplicate an angle easily enough, but to mark it or create it as 9.5 degrees or something is not going to happen.

I created a second test joint yesterday and in doing so I really questioned every step of the process. This came out better in that it is square. The biggest change was that, until I looked at some youtube videos, I had not understood that the ends of the boards were also not square across the narrow edge. They need to be almost square. The off-square angle is small, but large enough that using square boards when marking out put my whole joint out of square. (I found that my first joint was perfectly square with the heel of the square flat against one of the boards so I had cut the wrong thing very well :lol: ).

I am still making this up as I go along with no real process. I did get a usable joint this time, but I am not happy working that way. I am still laying everything out freehand. There has to be a better way.
 
Mat Estlea does this on his channel.

Sent from my Nexus 5X using Tapatalk
 
A Chinese made stainless steel protractor, with a long stem, can cost under £4 on eBay. I think you ought to get one, it will help on this and other projects.
 
Haven't tried this...
Make up a former to clamp the work pieces to, in the correct final angles.
Cut ends of work pieces, to correct angles.
One piece, mark out and cut dovetails as normal.
Use former, to align work pieces, mark 2nd piece from first.
Cut as normal.

Because the joint is held in the correct orientation, and marked from one to the other, it should(might) work.
Good luck

Bod
 
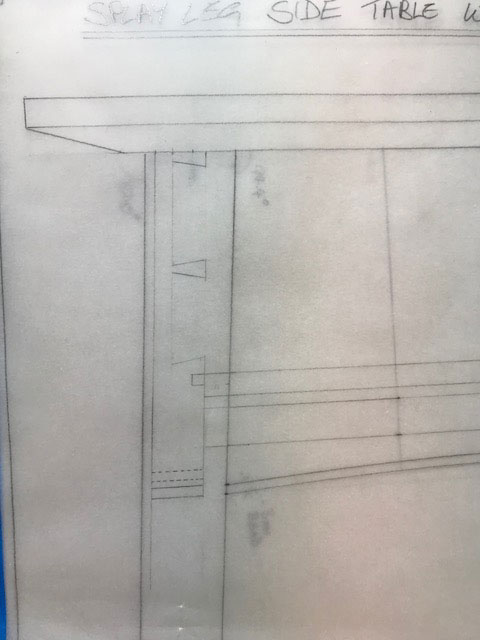
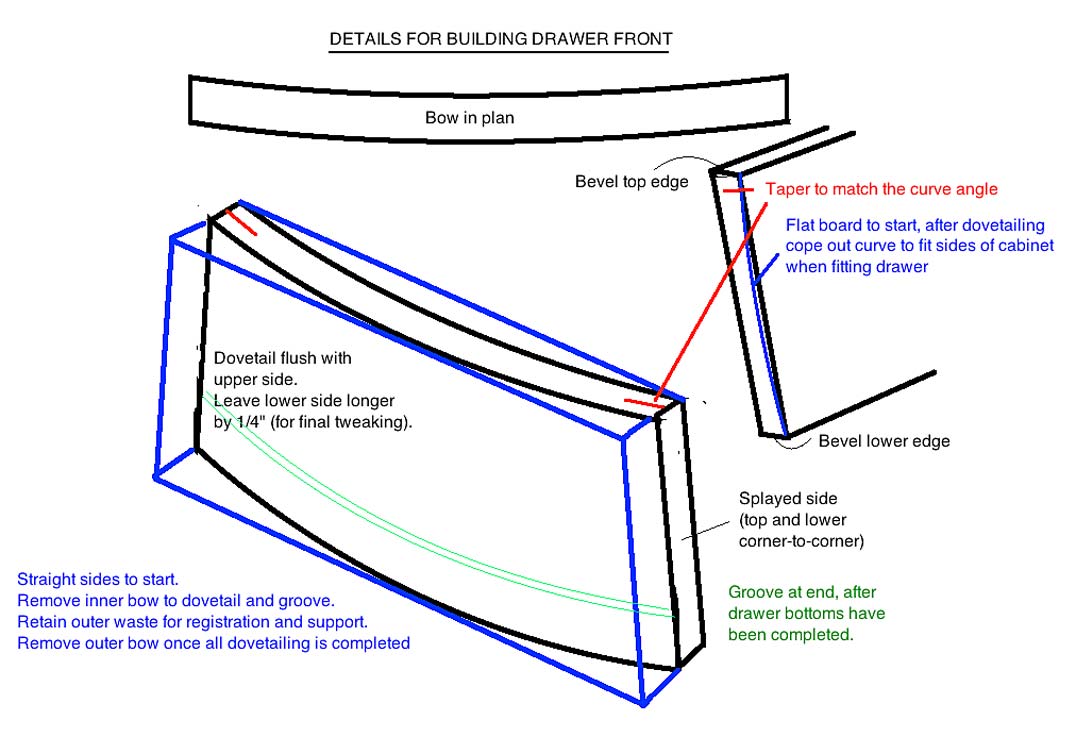
I do this fairly regularly on a single splay for the dovetails on an angled drawer. I don't have a photo of the finished piece but here are the plans I work from,

Side-Table-Plans.jpg


You can probably see from these plans that the key to laying this out is to plot the horizontal centre line for the tails and then to work the appropriate angles either side of this. In practise it's not particularly difficult, in fact some other details on an angled drawer front, like the groove in the drawer front for the bottom, or cutting angled slips and muntins, are quite a bit trickier than the angled dovetails themselves.

But that's for just one angle. Cutting dovetails on a compound angle is something I've only done once, for some flower containers. Again it wasn't particularly difficult, but the layout took a lot of time and you had to be very alert while sawing to make sure all the cuts were in the correct direction. If I was doing it again I might consider making up one of those little jigs with a couple of rare earth magnets, that would guarantee accuracy, minimise the risk of a cock-up, and speed up the process.

Good luck, sounds like a smashing project!
 

Attachments

  • Side-Table-Plans.jpg
    Side-Table-Plans.jpg
    37.8 KB
It's a standard old text book sort of exercise involving conventional drawing layout techniques. Mind bending when you first have a go but then you suddenly twig what it's about. Don't give up on it too soon - it's easier than you think!
PS I wrote this having done just one as an exercise, but splay sided trays with DTs were common, which shows it was easy, once you had the knack.
 
custard":1ojncseg said:
You can probably see from these plans that the key to laying this out is to plot the horizontal centre line for the tails and then to work the appropriate angles either side of this. In practise it's not particularly difficult, in fact some other details on an angled drawer front, like the groove in the drawer front for the bottom, or cutting angled slips and muntins, are quite a bit trickier than the angled dovetails themselves.
Thanks Custard. I had gravitated toward the same approach of basing everything off some horizontal datum lines so it is encouraging to see you do the same. I agree that cutting the joint is not difficult - no more so than a standard dovetail really - but laying out the joint has proved a real challenge for me.

I see what you mean about things like the drawer bottom being more complex than normal. I will face the same issue cutting a groove for the bottom of my box. On the pin boards where the groove will be full length I could cut the groove sides with a tilted saw but won't be able to do that on the tail boards as I will need a stopped groove. I haven't tackled that yet but my plan is just to cut the groove with a chisel, possibly using an angled block as a guide. In other words tackle it like a mortise, just angled.

Jacob":1ojncseg said:
It's a standard old text book sort of exercise involving conventional drawing layout techniques. Mind bending when you first have a go but then you suddenly twig what it's about. Don't give up on it too soon - it's easier than you think!
Thanks for the encouragement. It has certainly been bending my mind, but I don't give up too easily. Maybe I need to (literally) go back to the drawing board to really understand what is going on.
 
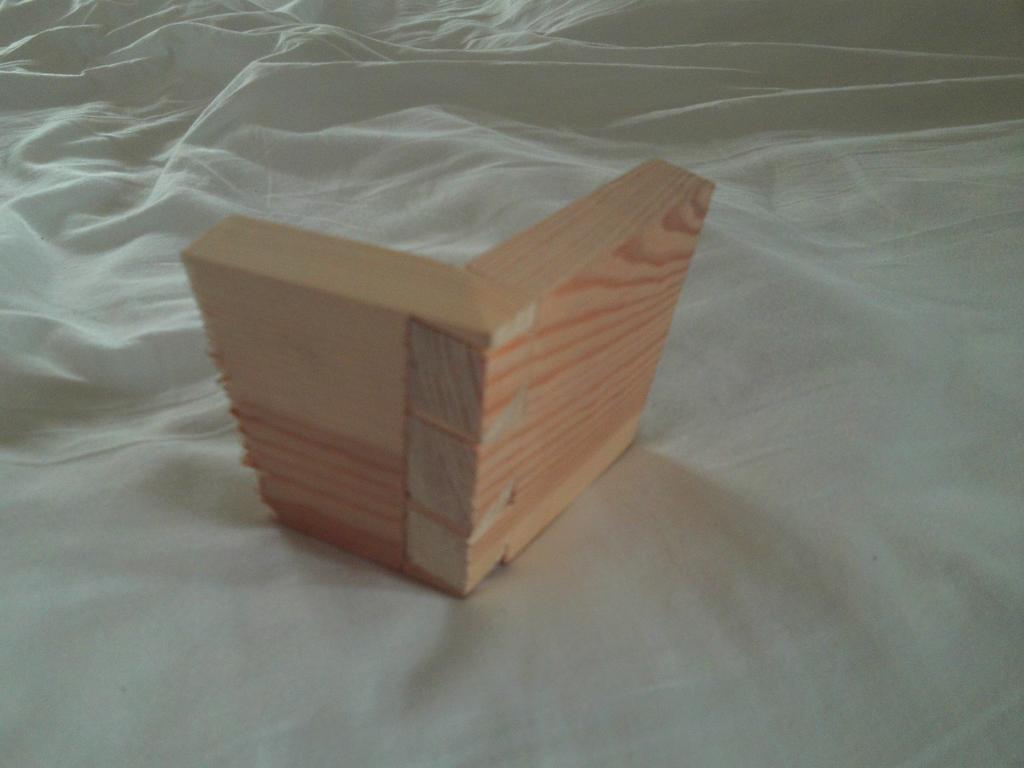
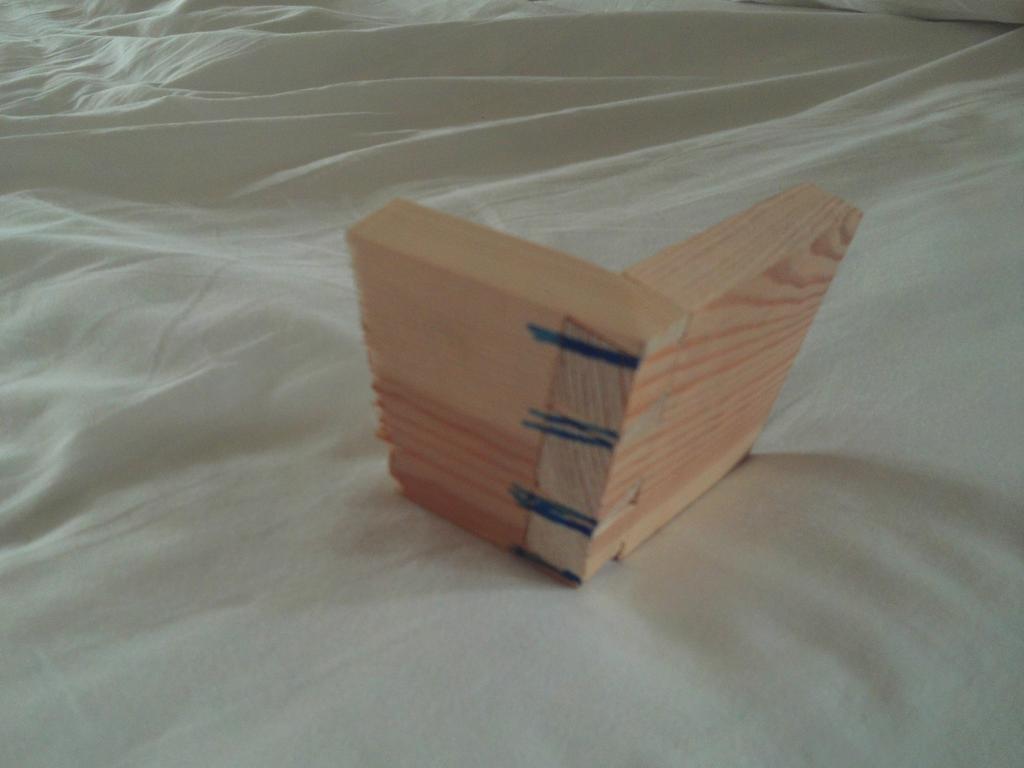
In my vast experience of this (ie the last 10 minutes), there are two ways to do these dovetails. The first is to just cut the tailboard absolutely normally, with the cuts at right angles to the faces of the board in the normal way. This makes for an easy pin board (indeed, a very easy joint), and results in a joint looking like this:

OvlETIZ.jpg


However, if you want the ends of the tails showing as parallel to the board on the pin board, like this:

QNO0VYT.jpg


.....then you might just be better off cutting the pins first (because you will have automatically generated an angle from the end of the board which can be transferred to the tail board by mitre gauge).

Either way, the biggest issue isn't the joint itself, or even the setting out per se, but lining up the top and bottom edges of the boards when you don't have a reference.
 
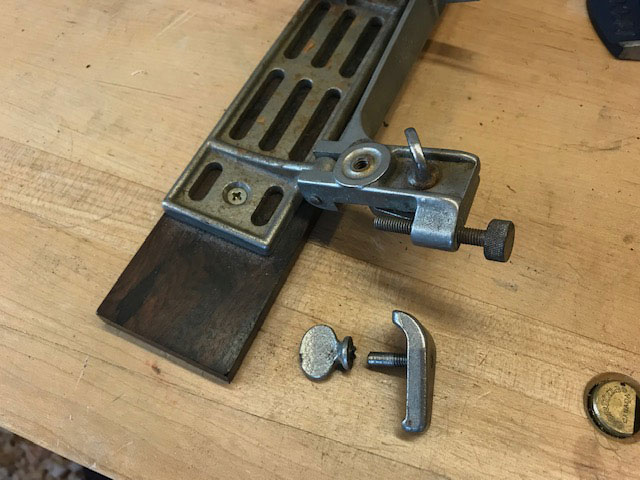
Personally I'd plane the correct angle on to the top and bottom edges of all four components before dovetailing. I'd use my trusty Stanley 386,
Stanley-386.jpg


Or rather I would if I hadn't just sheared off one of the locking wing bolts
Stanley-386-Wingbolt.jpg


:(
 

Attachments

  • Stanley-386.jpg
    Stanley-386.jpg
    82.5 KB
  • Stanley-386-Wingbolt.jpg
    Stanley-386-Wingbolt.jpg
    73.2 KB
Just4Fun":2rbkr6hs said:
Does anyone have any tips for cutting dovetails at compound angles?

I want to make a box with all 4 sides sloping outwards at the top, away from vertical. The tail boards slope will not be the same as the pin boards slope. I tried a test joint yesterday. I had no clue how to lay out the joint and eventually did it freehand. I would prefer a process that I could follow to produce reliable, good-looking joints.

On the plus side my test joint is strong and lies nicely flat on the bench. It isn't too bad and could probably be cleaned up to look almost acceptable. With a bit of practise ...

On the down side the joint is a long way from square and there is no way I could do 4 joints like that to make a box. I don't know where I went wrong.

I would suggest that you join two sides made from cardboard, and then draw the dovetails at the angle that pleases you most. This will become the template for the sides you build. No math involved.

I've built many drawers with compound angles, and it always involved experimentation. This is from a tapered, bow front chest ...

DesigningTheDrawers_html_61fb2f0.jpg


Regards from Perth

Derek
 
sammy.se":djg3tlmt said:
Mat Estlea does this on his channel.
Do you have a link? I couldn't find it. I did find a video of his where just one of the boards was angled, but not with both boards angled, and the interaction of the 2 sloped boards adds complications that are where I have struggled.
 
Honestly, Just4fun, cut a couple of bits of scrap and just have a go. You'll learn more in 10 minutes doing that than you will in 10 days watching Youtube clips.
 
MikeG.":oab60cnz said:
Honestly, Just4fun, cut a couple of bits of scrap and just have a go. You'll learn more in 10 minutes doing that than you will in 10 days watching Youtube clips.

I agree, but please follow this first ...

I would suggest that you join two sides made from cardboard, and then draw the dovetails at the angle that pleases you most. This will become the template for the sides you build. No math involved.

Regards from Perth

Derek
 
MikeG.":2xvamx81 said:
Honestly, Just4fun, cut a couple of bits of scrap and just have a go. You'll learn more in 10 minutes doing that than you will in 10 days watching Youtube clips.
Mike, I have done that. As I wrote in my first post in this topic:
On the plus side my test joint is strong and lies nicely flat on the bench. It isn't too bad and could probably be cleaned up to look almost acceptable. With a bit of practise ...

On the down side the joint is a long way from square and there is no way I could do 4 joints like that to make a box. I don't know where I went wrong.
So I have had a go. Actually I have made several test joints, experienced problems, and then asked for help.

TBH I don't understand how you can have read any of my posts in this topic and reached the conclusion that I did not try this before posting, but hey ho, I can try to be more clear in the future.
 
Apologies. I'd forgotten that. I did read it initially. However, I can't see how there is anything left to work out if you have had a go already. I've made precisely one in my life (photos previous page), and with that experience could now set out confidently to make, say, a tray, a fruit bowl, or a planter with angled sides. All your answers should be in front of you in the test pieces you've made. How about posting photos which illustrate the issue?
 

Latest posts

Back
Top