Galoot Smoother II

UKworkshop.co.uk

Help Support UKworkshop.co.uk:

This site may earn a commission from merchant affiliate links, including eBay, Amazon, and others.

Derek Cohen (Perth Oz)

Established Member
Joined
2 Mar 2005
Messages
3,405
Reaction score
1,946
Location
Perth, Australia
Some of you may recall that a few years ago I built a BU infill smoother out of a Stanley #3. With all the various smoothers at my disposal, including some rather special and expensive planes, I often find myself returning time and again to this little smoother. It is simply wonderful and utterly reliable ...

Original article: http://www.inthewoodshop.com/ShopMadeTools/A_Galoots_infill_smoother.html

I managed to grab a couple of hours today for the workshop as Lynndy's rellies decided to spend the day shopping (with Lynndy in tow).

I started work on the drawer for the armoire, and was smoothing down the front board ...
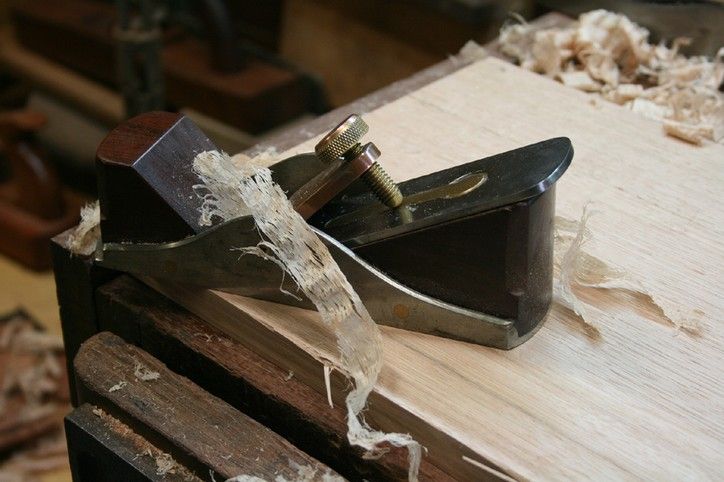
GSII-1A.jpg


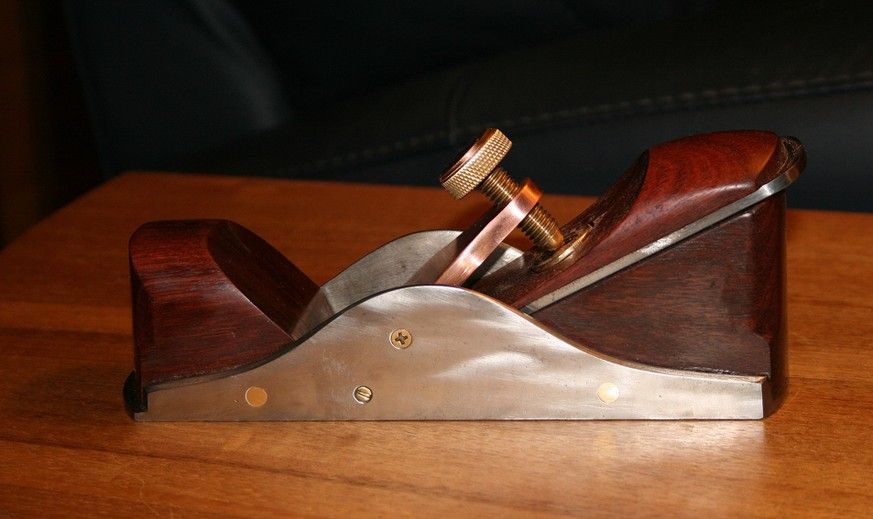
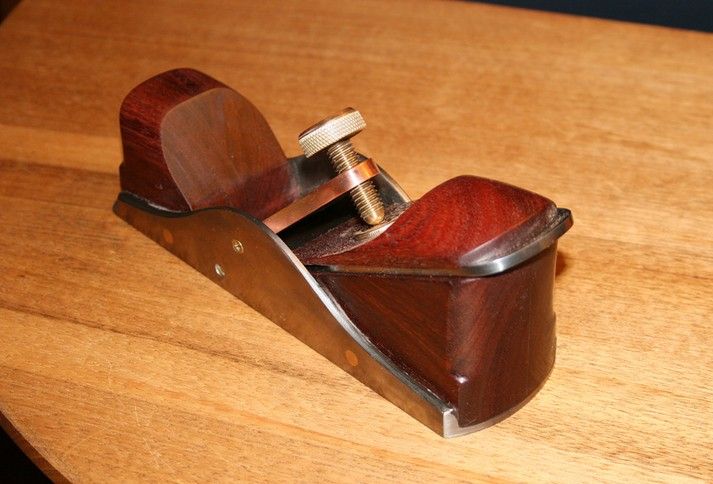
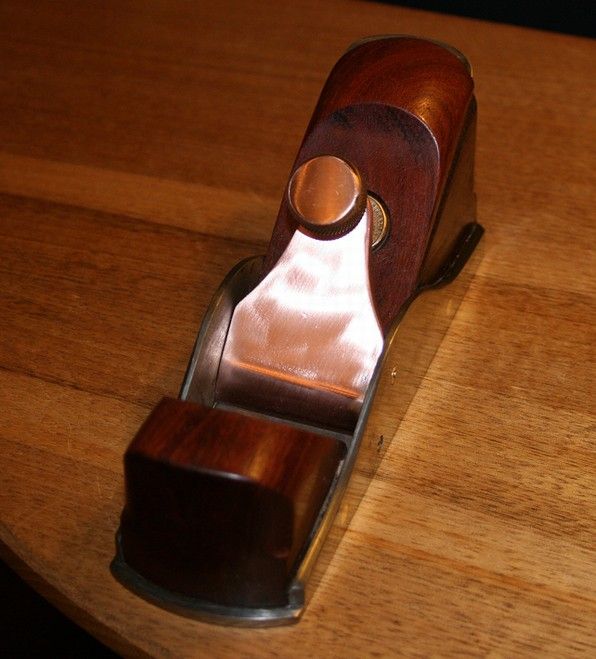
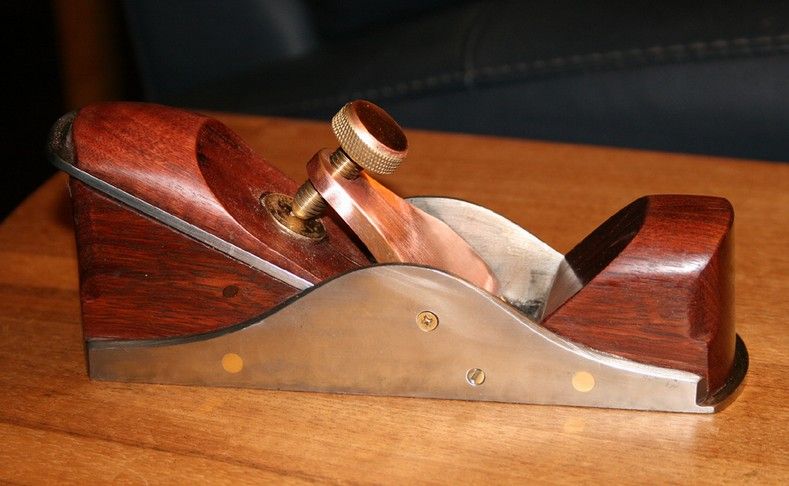
.. when I decided that it was time to make the modifications I had been thinking about for a couple of years.

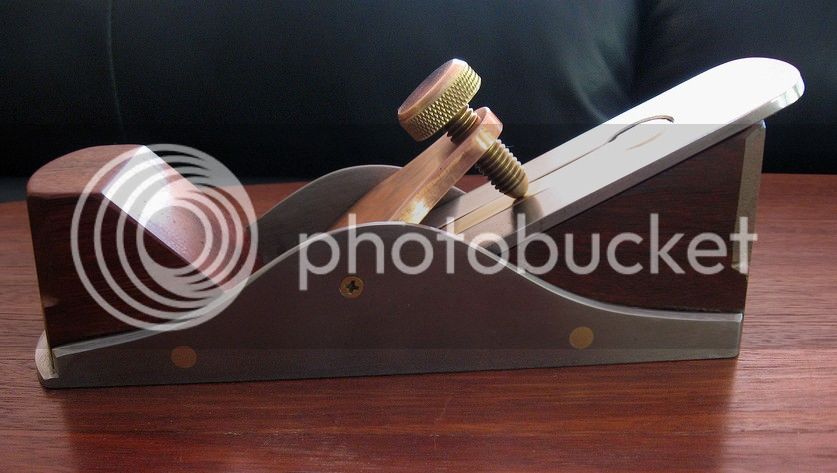
I never liked the looks of the plane - too boxy.
A_Galoots_infill_smoother_html_2912.jpg


And the 5/32” (about 4mm) thick blade, although 1 ¾” wide like the original #3, lacked the support of the #3's frog and so was a sloppy fit. And lastly, it was OK to hold, but not great.

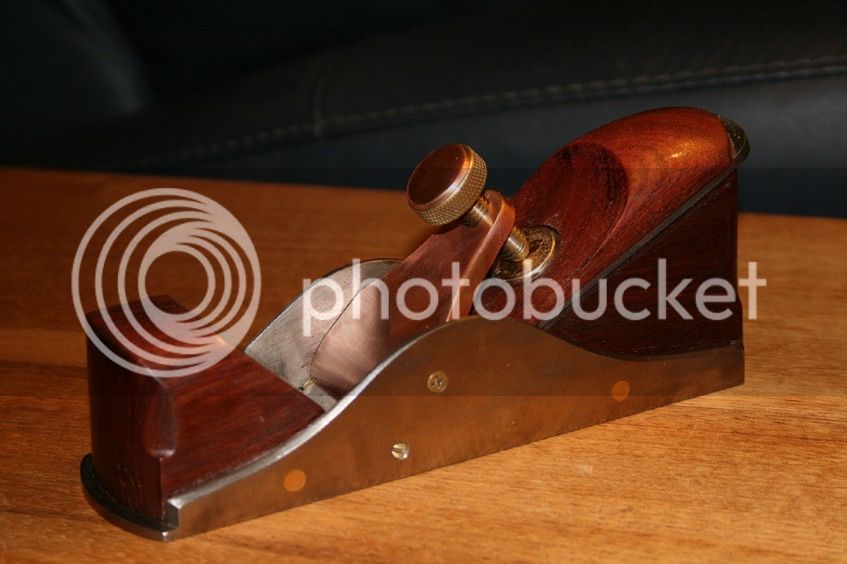
I wanted a rounded profile, side set screws for the blade, and a more comfortable grip.

I finished it up just as I was called in for dinner. Tomorrow I will replace the screws in the lever cap (so don't give me a hard time about those!).

This is what I came up with.
GSII-1.jpg


GSII-2.jpg


GSII-3.jpg


GSII-4.jpg


GSII-5.jpg


Thanks for sharing this with me.

Regards from Perth

Derek
 
It's a beaut, as your contrymen would say. Looking forward to seeing it without those ghastly cross head screws, what where you thinking, have you no taste, etc, etc ;) :lol:
 
Very interesting!

Now I know what I ought to do with one of those spare No 4s that was not quite good enough to use but too good to throw away!

Any special points to watch when drilling holes in the sides? Is it safe to use a centre punch on cast iron?
 
hi derek

hmm , I have never used the older infill planes but I am pondering making some in the future , I like the idea of what you have done to an old stanley that appeal to me very much , the design for the wooden hand holds you show to your plane I was wondering just how you actually hold them when planing ,any chance of a pic when your actually planing timber.

My reasoning for this is the end of the blade protruding past the back of the rear hand hold I'm getting a picture in the mind of it being trust into the palm of the hand as you push forwards , doesn't that after a while especial if use for a longish period of time make you hands sore . hc

ps did you do a wip when you first altered the plane originally thanks .
 
Hi Derek

This is really ingenious!

You have inspired me too...I have a small crappy block plane body where the body is perfectly fine but the rest is cheap pressed tin.

I have some block brass and I think I can see another project coming on here!

This might be just the cheap and satisfying solution I was looking for. I too would like to see WIP pictures if you have any.

Jim
 
Hi Derek.....

Thanks mate!!

THIS is bleedin' magic!!!

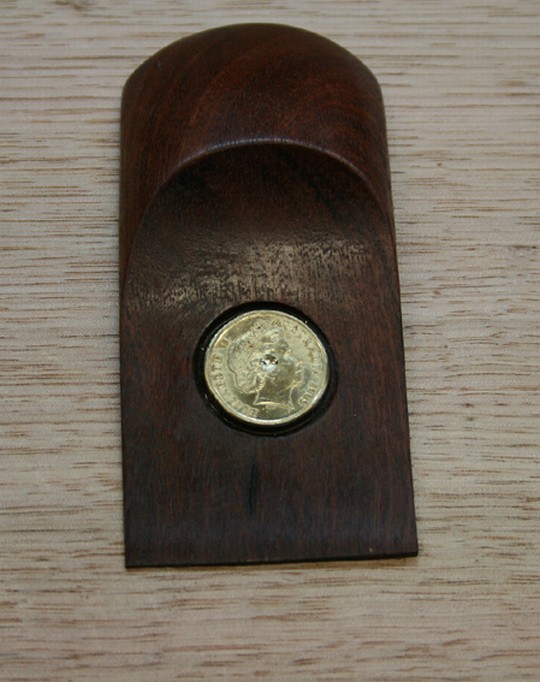
GalootSmootherII_html_5097ce1d.jpg


How very clever! You are the sort of guy they had in Huston the day they had problems with Apollo 13 aren't you....you see uses for other things that mere mortals would just use to buy a newspaper!

This is some brilliant stuff....indeed!

Jim

PS Her Majesty will be sending the summons to the Tower later this week!

:D :D :D
 
hi derek

nice thanks for the reply , before you fitted both the hand held blocks did you do any milling to the cast body like removing the existing frog bed and the strengthening bar across in front of the mouth or did you cut the blocks to suite existing plane bed shape. hc
 
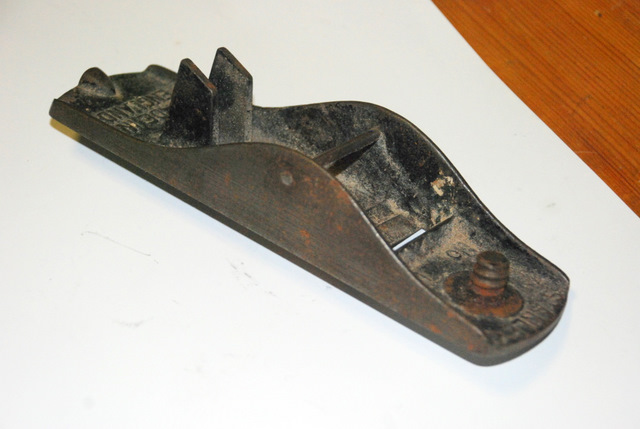
I was so inspired by this HC that being only six feet from my workshop I went in search of the donor sole - not a Turkish fish dish but this:

DSC_0001.JPG


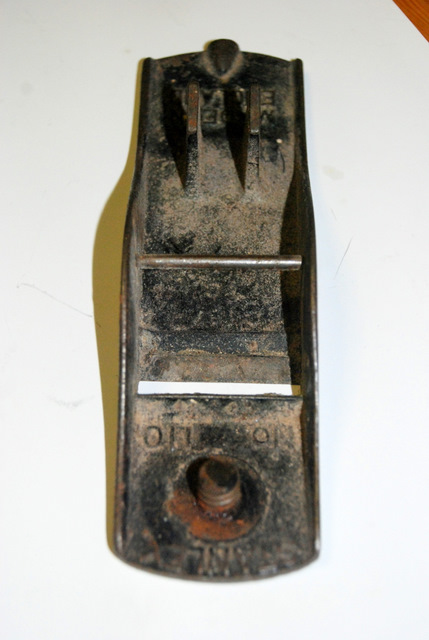
This is an oldish Stanley 110 which has a broken tightener....and a crappy blade anyway....I was going to bin it but it looks like it could be a fine and easy candidate having very little real estate inside the infill area:

DSC_0002.JPG


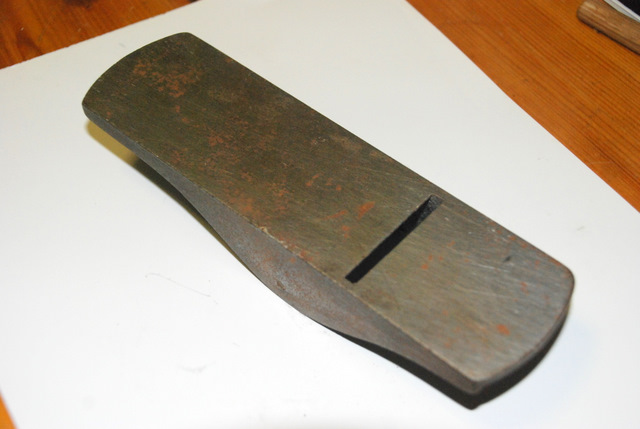
I mean it ain't perfect but the sole should fettle up nicely and give me a chance to flatten and square it if it would work.

DSC_0003.JPG


The mouth is a tad big (to say the least) but that shouldn't matter.

If it weren't for the fact that it is cold enough to freeze the balls off...out there I would set to work...still I could fettle this in the lounge! :shock:

What do you think Derek...is this a good candidate?

If so what would be the bed angle of the frog for various permuations of use....

Guys?

Hey...I could combine this with making a blade with a PhilyForge init? :D


Jim
 
Excellent Jim.

I am going to do one that as well.

Will yours be done sometime today for us to see? :)

Regards from Perth

Derek

HA! Yep...give me twenty minutes! :wink:

Seriously...if I had the heat of Perth I would be RIGHT out there now mate...not in here trying to defrost my toes following 20 minutes in the Arctic we call England now!

So...since you are the pioneer here...what would YOU do with this base?

Obviously I need to knock out the original blade bar.

I was thinking that I would leave the other bits...the two back spikes and the knob thread and just cut the infill wood to fit these. That would even make them MORE stable inside the infill wouldn't it?

Come daybreak tomorrow I will get the sole ground down and the sides...I think I will grind a tiny chamfer out the front as you have done...I like that..it looks older design then. Also chamfer the ridge.

Now just to decide what angle to put on the wooden frog...what wood to use...the replacement blade....

I have the stock for the brass cap plate...I will have to think about the Norris type tightener....

All great stuff...I am looking forward to this little project and will keep WIP pictures just in case it does work out. Hell...it ain't cost nothing!

Thanks for the inspiration again...I look forward to your views on the points above.

Jim
 
Hi Jim

Don't be too hasty in removing the cross bar as you may be able to use it - either with a wooden wedge, or with a brass wedge/lever cap screw.

Certainly remove the other obstructions.

Regards from Perth

Derek (now away for the weekend)
 

Latest posts

Back
Top