End grain table top problem

UKworkshop.co.uk

Help Support UKworkshop.co.uk:

This site may earn a commission from merchant affiliate links, including eBay, Amazon, and others.

DRey

New member
Joined
18 Aug 2018
Messages
1
Reaction score
0
Hi,

Any help with this problem would be appreciated. I'm building a table with an end grain table top. All the pieces are cut from the same type of wood. I'm trying to do a pattern by staining certain pieces, sort of like a chess board. The problem is that no matter how flat I try and get them, after gluing they need to be planned and sanded. This removes the top layer of stain and makes them all the same colour again. I know I could do this with different colours of wood but there's reasons why I can't. Anyone have any ideas how I can fix this?
 
I think that fits the description of a fundamental design flaw. I've gone through the same thing myself on a much smaller scale, and couldn't find a way around it. Sorry, but I think your idea has hit the buffers.......
 
Could you try masking off and staining after? Not sure how much the stain would bleed under though. Can get that green tape (frog tape) that is supposed to seal when wet.
 
You could try and submerge your wood in the dye and then into a vacuum chamber and draw all the air out. When the air bubbles stop you release the vacuum and atmospheric pressure forces the dye deep into the wood. The process and equipment is the same as stabilizing wood with Cactus Juice, a wood stabilizer.

Pete
 
I had a recommendation from a chap at Yandles years ago, when I was looking for suitable wood to make an end-grain chopping board: to hold the blocks together with dowels. Obviously only the ones around the edge need blind holes - you can through-drill the rest in stacks, and if you want to, use uncut dowel rod, almost like a child's set of blocks from years ago. If there is enough thickness, you could have longways and widthways dowels crossing each other over-under, but I'm not sure if that's a good idea!

But dowels would let you drill, dry-assemble, sand, then stain (possibly even finish) before final glue-up.

But to be honest, I'm rather with MikeG: I think you are asking for things to misbehave, either in finishing or after you've completed the piece. That would be very frustrating after putting a lot of work into it...

E.

PS: you could always cheat completely, for example by using a ground of MRMDF (very stable and flat), and tile your tabletop onto that. If you want the blocks to extend out to the edge, you could do one row of "full-height" blocks as a lipping, and cut a groove or a rebate to take the edge of your MDF.

For that application, I think I would at least try that - obviously it's no good for a chopping board, but the usage is rather different!

Two final thoughts:

(1) It would be much more practical with a long-grain lipping all round. This is because your blocks invite damage and splinters to form in use, and taking off the arrises won't look particularly attractive because of how the colour of the stain will change.

(2) The stain, or rather the finish, could look rather odd, depending on how you do it, because of the amount of colour and finish the end-grain soaks up. At least consider a sanding sealer of some sort with a dyed first coat of finish, instead of staining. You can still do this before final assembly, but it should let you control the colour a lot better.
 
I too wouldn't start from here! But if had no choice ...

This might work (to some level of adequacy).

1. Make your blocks so the tops are a perfect 90 degrees to the side and apply a couple of coats of finish to the tops only.

2. Find a board of something very flat and stable - MDF probably, and glue a layer of white paper to it using very dilute hide glue. Liquid hide glue should work well for this.

3. Glue each block in place to the paper with your dilute hide glue, glueing each to its neighbouring blocks at the same time. You won't be able to clamp those block-to-block glue joints so they have to be an excellent fit.

4. Once all the glue is nicely set, plane the underside of your assembled table top flat. I'd give it a plywood substrate at this point, because those block-to-block glue joints won't be particularly strong.

5. Separate the assembled top from the MDF board by splitting along the paper - you'll want a thin and flexible blade, maybe a sharpened kitchen spatula. Do this without gouging the top (can this be achieved on something the size of a table top? Maybe ... I'd introduce a little moisture to persuade the hide glue to release).

6. Remove paper and glue residue from the top with a warm, damp cloth.

7. Apply more finish to the top. Probably quite a lot to finish levelling it, but it should be close to level if this is all done very carefully.

I've never tried this in practice, but in theory it should work. How well, I really can't say though.
 
If my experience of making an end grain chopping board is anything to go by, I'd rethink. The end grain soaks up any moisture, the wet bit swells, and opens cracks at the edges. And if the same side is always up, it cups too. I guess a butcher's block must be quite substantial, and heavily loaded with oil to prevent this ?
 
Properly made commercial butcher's blocks are often bolted together, one set of threaded bar running in one direction and another an inch or two above in the opposite direction - as it then swells in use the small voids close up.
 
If you have to do this, I would look at using m8 threaded rod, near the top and near the bottom to hold everything together, but I would use an M10 hole to give you clearance to adjust the set of each block. Get the blocks to the same height exactly with a thicknesser, undo the rods, separate the blocks, stain them, then glue them using the rods to hold it all together and a board on top to keep everything level.

You recess the nuts into the outer blocks and then add a long-grain edge to cover.

If you can get some stain penetration then you'll have a bit of leeway to sand if required.
 
Then you're back to the same problem as with the dowels - if you have clearance to assemble, the blocks probably will not go back flat on reassembly. You are also assuming depth enough in the table top to take the two sets of rods - butcher's blocks are much deeper.
 
Going back to the OP's question of "how can I fix the staining problem" there is a technique used in handpainting designs onto cloth with dyes which obviously suffers from the same bleed through effect, and that is to use a "blocker" - it's a liquid that inhibits the bleed through and used as a very thin border.

In your case I would suggest a similar approach, assuming you are OK with the natural colour of the wood for one half of the checkerboard effect you could use a dilute varnish CAREFULLY applied, on 50% of the blocks.

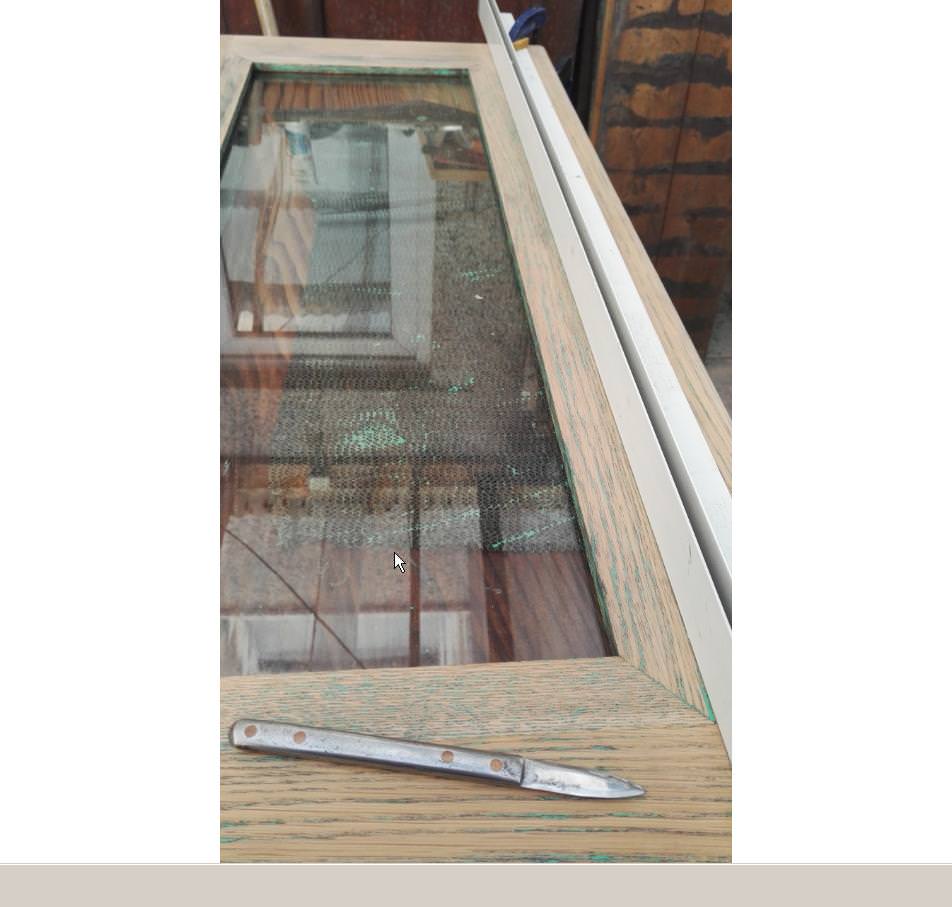
To reduce the chance of bleed through affecting the blocks you want to stain, BEFORE applying the varnish I would suggest scoring a knifeline along the block joints on the table face, good pressure but not so hard to split the joint. This will make it harder for any stain or varnish to bleed onto the adjacent blocks.

Yes it'll take a while.

Yes it'll be a PITA.

Yes you'll have to use a straightedge and a steady hand.

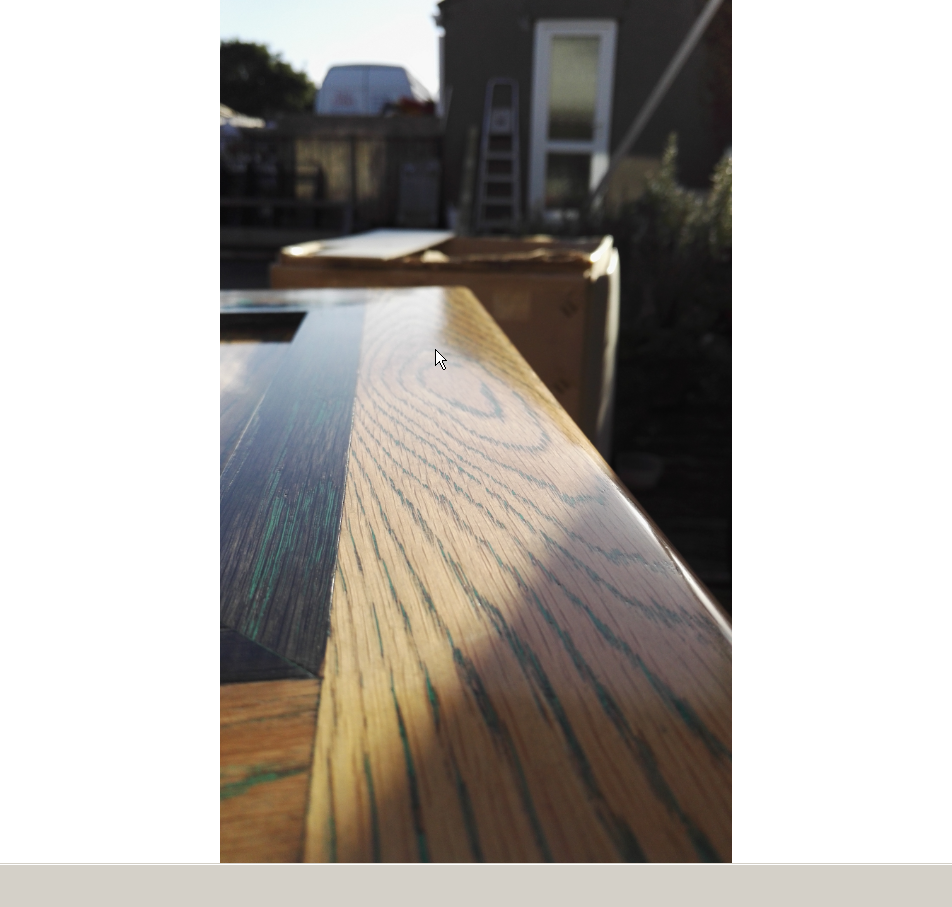
But having used this technique myself when ebonising a section of oak kitchen door, to leave the rest of the door unebonised, I had very good results a dozen doors and no bleedthrough that was obvious.

One thing that might be in your favor is endgrain draws in stain vertically rather than horizontally - mostly - so with a scored knifeline, SHARP KNIFE it'll be enough of a barrier.

No, masking tape WILL NOT WORK - just trust me - even the best tapes won't stop a stain from bleeding underneath.

After you've done the varnish, possibly twice, and you've been careful to follow the block outlines you should be good to stain over the table as a whole, then wipe off the excess.

Once you've achived the colour you want, finish the whole table with several more coats of something hardwearing to protect all that work and effort.

Make sure you finish the underside too to reduce chances of cupping etc.

If that all sounds like too much - try remaking the top as per some suggestions above, the only thing I would add is to soak the endgrain in the same dilute varnish of 50% of the blocks, making sure to sand off the excess from the sides of the block BEFORE glueup - personally I'd sit them in a roasting tray of the stuff for at least 24 hours so it penetrates enough to allow you to sand or plane off a mm if there's discrepancies after the glueup.

You might want to dab a bit on the endgrain after removing from the trayand upending them to dry, to create a smooth endgrain surface if it's a softwood (depending on the wood ofc)

The reason I'm suggesting dilute varnish as opposed to danish oil is the varnish will form a film over the endgrain as danish oil will penetrate but possibly leave open pores on the very surface that the stain will go into and you'll have a difficult job to remove it.

Oh - for the stain I'd suggest an oilbased stain or gel if you are using softwood - waterbased stains WILL swell softwoods and you're back to cracks forming as mentioned by someone else above.

Hope that helps. Heh sorry for the novel, got away from me a bit there :)

PS - here's one I did earlier:

hzfLvZc.jpg


PBDlV3V.png


Each of the dozen doors were old oak doors that had had decorative glass mouldings and I was asked to renovate them, but otherwise given free reign on the style. I had previously tried to ebonise the moulding hoping that the natural border between the 2 pieces of glued wood would stop bleed through. It didn't. However a good sharp knifeline did. (homemade marking knife, scalpel sharp), knifeline did not add any width to the natural joint but went DEEP ENOUGH, and thats the crucial bit to stop bleed through.
 

Latest posts

Back
Top