Edge truing techniques

UKworkshop.co.uk

Help Support UKworkshop.co.uk:

This site may earn a commission from merchant affiliate links, including eBay, Amazon, and others.

dunbarhamlin

Established Member
Joined
8 Jan 2007
Messages
936
Reaction score
2
Location
West Cornforth
Following on from the #7 threads, I'd like to learn the various techniques for truing a board edge, so I can make an informed choice as to which to use and when.

The methods I am aware of are:

1. Jigged - shooting board bed and track tuned parallel and out of wind with a straight blade, set square (or, alternatively, shooting board surfaces tuned with a consistant offset angle along their length, and blade adjusted laterally to compensate.)

(1b. fenced planes - jointer fence, or edging planes (yes, I know these are really for planing angles, but a right angle is an angle))

2. Straight blade with offset blade - using lateral adjuster, first locally to remove any wind, then to bring the whole edge true.

(2a: Match planing - this is jointing, doesn't (necessarily) true the edges, just makes them complementary))

And those I don't use yet:

3. Cambered blade - move plane laterally to take thicker shaving from high edge.
Understand this, I think - lots of good info available from Mr C et al. Just need to try (ahem) it.

4. Lateral pressure - straight blade, apply weight to the side that needs the heavier cut.
Hmmm, want to give this a try, but - could anyone give pointers? For instance:

? Given that I'm a fixed weight (well, OK, it's seasonally variable), is a shorter (jack? shorter?) plane better suited for this technique?

? How is the pressure best applied? My guess would be pushing down hard with the left hand thumb, moving it to one side or the other in front of the mouth. But what about the right hand - should that just drive forwards, or also torque the plane?

? What about stance? Inclination (ahem) says lean to the side of the heavy cut, rather than balanced.

? What else haven't I thought of, that may help get this technique off pat (or any of you, for that matter :)

Thank
Steve
 
Hi,

I have the tendency to edge plane at a slight angle it seems constant and I don't know why! by bench is level, I think is is one of those things I will have to live with. Or have my wrists broken and reset at the right angle.


I use a cambered blade its the best way I have found to correctly square an edge, thanks David C that is the best tip I have come across saved me hours of frustration as I had been your method 4, lateral pressure and it is not easy or effective, when you get the edge square and flat its to narrow as you have planed it down to the thickness of veneer.


Pete
 
Steve,
You have about covered the waterfront there. If I were you, I'd restrict myself to two techniques.

1. Cambered blade for reasonable and large sized edges
2. Shooting board for small and very narrow edges - think small jewellery box and edges less than 8mm thick.

And, as ever, practice makes perfect! The cambered blade technique is just so useful and not difficult really. The other methods are all hit and mostly miss in my opinion.
 
Thanks chaps

Good to have confirmation that I've got the gist.
My reasoning for pursuing the lateral weighting technique is the greater control it will give me generally, whether I end up using the approach on edges or not.

O, and I missed a couple:

1c - Hand jigged - just using left hand instead of a jointer fence to maintain level. Think this is really only useful for getting close, but again probably worth practising to improve general hand skills, pretty much like Rob Cosman's cutting a notch with a DT saw (in the same fashion one might use a table saw to cut the same) isn't a useful technique, but is great practice for saw control.

3a - Step cutting. effectively cutting a rebate on the high side before taking a full width shaving. Really, I suppose this is the straight blade equivalent of the cambered blade technique.

Cheers
Steve
 
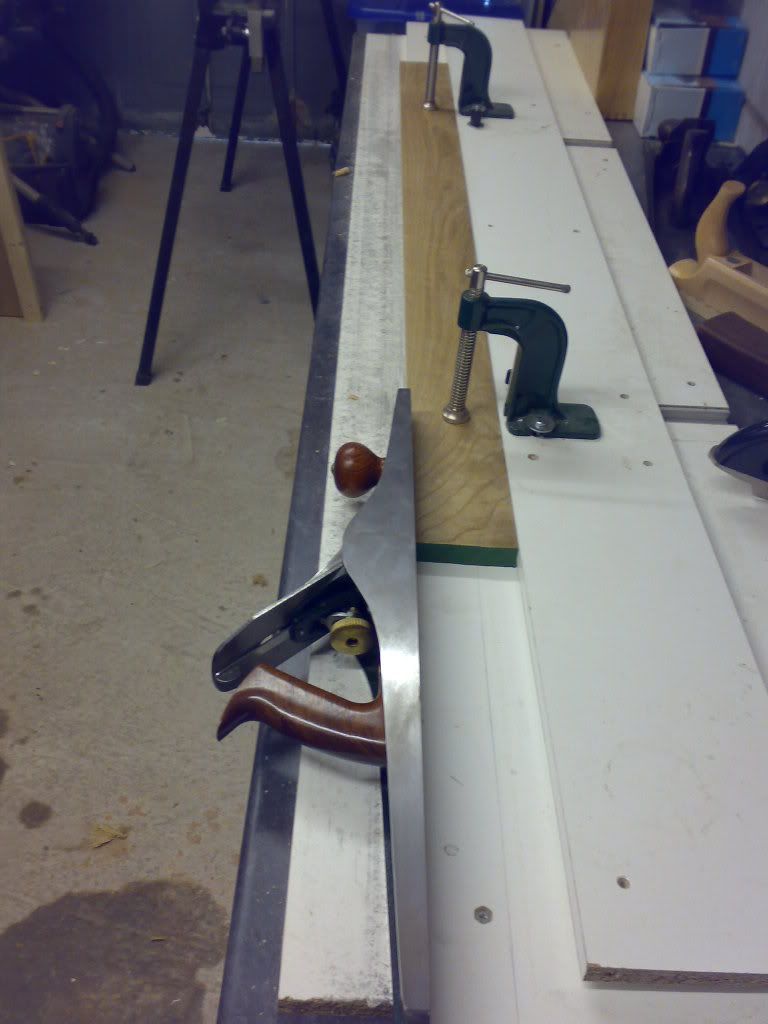
Here's my take on edge jointing.

05102007110.jpg


Here's the full write up

https://www.ukworkshop.co.uk/forums/viewtopic.php?t=19760&highlight=

As long as your bench is flat, and you have one flat face, you can't go wrong with this jig.

Cheers

Karl
 
dunbarhamlin":1spu6rkd said:
(2a: Match planing - this is jointing, doesn't (necessarily) true the edges, just makes them complementary))

In cases where the objective is to joint two or more boards together, and the thickness allows it, I would always match plane with a straight blade. In my experience the method is foolproof, very fast and you remove the least amount of wood, which can be useful if you have only just enough. For thicker boards which need to be planed separately, the cambered blade method is probably better.

Cheers :wink:

Paul
 
Hi Steve,

No one else is talking about the lateral pressure approach, so I will try....

Starting with a roughsawn board, I face joint one face, then start on a reference edge. Using a fore plane with a good bit of camber, I ride the high line until I have knocked down the high places, gotten through the wane, and have a reasonable edge and a full-width shaving. Then shift to a try plane with a basically straight blade. I should say, a blade with ordinary camber for a try plane, say 1 or 2 thou of camber. Once I shift to the try plane, I'm using the lateral pressure method.

A couple of words on camber....once the true edge jointing is underway, I believe the main thing camber does is to make the task less sensitive to the precise horizontal/vertical orientation of the plane. 'X' amount of camber on a blade makes that blade into the arc of a large circle. The cambered blade represents, let us say, 1/4 degree of arc of a large circle. So as long as the user can hold the plane to within 1/4 degree of vertical, then the wood sees the same 'flat' blade attack, and the user has that much tolerance to work within, without creating facets on the edge. At the final pass or two, camber will create a slight hollow across the width of the edge, or at least prevents any sort of crown from being there. In fact, I find that the light camber I have on my try plane will do this as well. But because it is not essential to use heavy camber to edge joint efficiently (many users will attest to this), I conclude that the principal effect of a distinctly cambered blade is to give the user a bit of tolerance with respect to holding the plane vertical.

For me, it is as easy to bias the plane's cut using thumb pressure, as it is to slide the plane left and right on the edge of the board. I use wooden planes for edge jointing, and the thumb of the off hand (the lead hand) is used to apply the bias. The four fingers of that hand are curled underneath to fence the cut, and the thumb is providing the bias on top. The essence of the method is to read the shaving.

Procedure. The key to using the lateral pressure method is to let the shaving tell you about the edge. I keep a small (2" x 3") bevel edge square in my offhand. At the outset, I run this square quickly along the edge, takes about 3 seconds maybe, and get a mental 'snapshot' of what the edge looks like. There is a picture in my head of where it is high, where low, where it crosses over, etc. Then I plane from the inside out, with a 26" or 30" jointer/try plane. I like the 26" plane because its blade is only 2" wide, and it is very responsive to touch. By working from the inside out, I don't need to test the flatness of the edge at the outset--the shaving is telling everything. Work the middle until no shaving can be taken, then lengthen the passes--the basic approach is 'if you want to make something flat, first make it a little hollow'. The only tricky part is this--right at the end, take one pass which starts and ends about a 1/2" in from either end. Otherwise, you can get a little bump just in from either end, rather than a fair curve all the way to the end.

As these flattening passes are being made, you are also reading the shaving widthwise, bearing in mind what the shaving should look like from that initial mental 'snapshot'. In the areas where you are biasing left, you want to see a partial shaving coming up from the left side, and you want to see that shaving widening with each pass. Same thing where you're using right pressure--the shaving should be coming up on the right, and the width of the shaving should steadily get wider. You know you're holding the plane vertical, if the shavings quickly spread across the width of the board, and you're soon taking a full width shaving down the board. As a control, I will use the little bevel to check once more while underway, and once at the end when I think I'm done. Just a quick sweep down the board.

This whole process goes very quickly. Provided you're reading the shaving. Now if you use successive approximations, doing lots of checking with squares and flat things, it will take longer, and surprisingly is less sure. Once you learn to watch the shaving, it will tell you 98%+ of what there is to know--and it does it in real time, meaning while you're planing--which makes for a more directed process than the 'successive approximations' approach. Once you can read the shaving, there's very little down time for checking and control. All your effort goes toward the final result of flat and square.

This same procedure works with a metal plane, but the wooden plane is more responsive, having less momentum (weight) and a higher center of gravity. In fact, I don't think of edge jointing as being a mechanical process any more; when the plane is light but real sharp, it's more like painting or sculpting the edge, if this makes any intuitive sense to you. Getting rid of the momentum of a heavy plane makes the process direct--there's less weight/momentum between you and the wood, and the plane responds to a light touch.

There are different roads to the same place. I get my wooden bench planes from Clark & Williams. Of the two full-time guys there now, Don McConnell is a strong proponent of the cambered blade/high line approach, and Larry Williams is just as much a proponent of the straight-blade lateral pressure approach. I use the lateral pressure approach because it is intuitive to me to do it that way. It is not 'better' in any normative sense.

Wiley
 
Thank you for that, Wiley.
Just the sort of detail I was after, highlighting how and where to strive for mastery of the tool.
Cheers
Steve
 
Wiley,

That's very interesting indeed, thank you for the clear description. I shall definitely try it although having no wooden jointer, it will have to be with a metal plane.
 
Wiley,

That's the first time I got a detailed description of the lateral pressure method with all the whys and hows. I'm impressed - and have to try it out right now.

My Ulmia jointer doesn't allow comfortably for the grip you described. Could you tell me please, what's the height of your plane body at the front?
 
Wiley,

I just tried it out this morning on a single reference edge - alas I hadn't time for more. I have to confirm the technique you describe is fast, accurate and foolproof. I'm working on having it going easier and even more faster. So far I aren't yet driving blind - meaning I often use the square - but let's look at it at the end of the week again...

Thank you for the new learning curve,
 

Latest posts

Back
Top