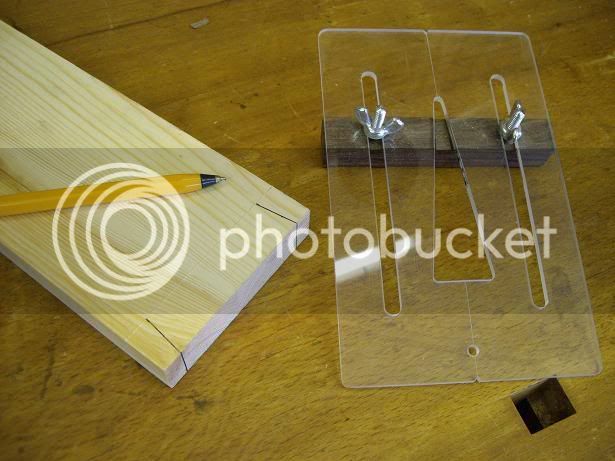
dovetail spacing

UKworkshop.co.uk

Help Support UKworkshop.co.uk:

This site may earn a commission from merchant affiliate links, including eBay, Amazon, and others.
the experts will be along later, but you have two things to think about
looks and strength.

basic strength is in the joint being made properly.

looks depends upon the depth of the wood into which you are putting the dt's. in a drawer side about 75 mm deep you would want min two and max 3 fingers. if they are 100 mm then 3-4.

thinner ones often look better , but to start with, cut wider ones and get them right, then think about style.

don't forget that the angle changes slightly depending on whether you are using soft or hard woods. 1in 6 or 1 in 8 are the best average. coarser for softwood, finer for hard.

hope that helps
:roll:
paul :wink:
 
Rob (Woodbloke) explained it all here https://www.ukworkshop.co.uk/forums/view ... ceb1549388 but the pictures seem to have gone. Don't know if he can post them again? It's a very simple method involving the use of dividers. Alternatively, David Charlesworth explains it in the June 2005 issue of "Furniture & Cabinet Making". It's the method used by many of the best makers, like Alan Peters, Rob Cosman, etc. You might be able to get a copy from the publishers. If all else fails, I could probably do you a photocopy.

Cheers :wink:

Paul
 
As promised I've re-done the sequence and it's shown below in the following pics. Timber should be shot square and the shoulder line knifed in. Begin by marking along the line about half the thickness plus a mm or two and mark out one large d/t:

pica.jpg


Decide how many tails are needed (three narrow ones in this case) and set the dividers to roughly space off the distance needed across the end of the wood to obtain a narrow gap at the top of each pin. Place the point of the divider on the line at the right hand side and step off twice to make 2 dots, in 'O':

picb.jpg


Keeping the divider setting the same, now step off from the left hand line to make two more dots, (the ones marked as 'X')

picc.jpg


picd.jpg


You now have two pairs of dots in the centre of the timber which have simply need to be turned into d/t' thus:

pice.jpg


Clear as mud...easy peasy. Have a go, can't go wrong :lol: - Rob
 
The ruler scaling technique is the tried and tested method but is a genuine pain in the rear end...I never, ever managed to make the dovetails equal. With a little bit of cunningness you can also using the divider method make your dovetails staggered, ie closer at the edges of the board getting wider towards the middle, as advocated by JK - Rob
 
Just to stir things up a bit :twisted: how often do you mark and cut dovetails with uneven spacing?

Personally, while I like symmetry, I find an all-even spread really boring.

Regards from Perth

Derek
 
In a pinch, say I wanted to duplicate some historical piece or other, I'd use the ruler method, very simple; but generally I simply bisect the available space, saw the tail, then bisect the next space, repeat until it looks right. This is fun.

Pam
 
Derek of Oz wrote:
Just to stir things up a bit how often do you mark and cut dovetails with uneven spacing?
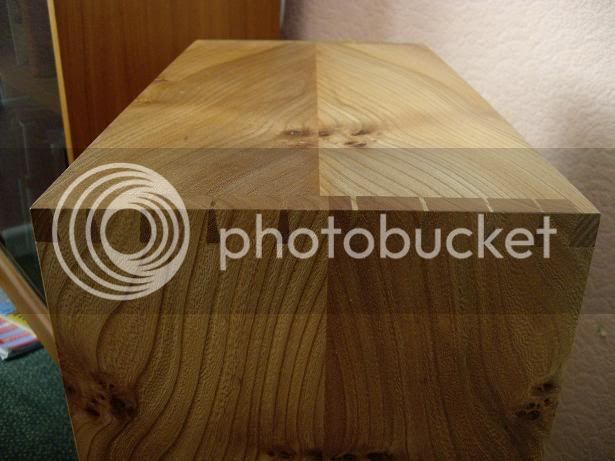
Derek - I generally cut mark and cut them unevenly if I have a reasonably wide project, say anything over 150mm. The advantage is for me anyway that they 'look' better, more in tension and also of course as there are a greater number of tails, there is more gluing area and the joint should ultimately be much stronger:

piciwic.jpg


This is a joint detail from the Elm Chest recently done.
And now for something completely different....am tarting up a Record No4 and have just last night made the cap iron bolt using you're cut off knurled garden centre idea and a coin...very effective when polished up but quite messy :x to put together - Rob
 
woodbloke":2tzfu0p8 said:
The ruler scaling technique is the tried and tested method but is a genuine pain in the rear end...I never, ever managed to make the dovetails equal. With a little bit of cunningness you can also using the divider method make your dovetails staggered, ie closer at the edges of the board getting wider towards the middle, as advocated by JK - Rob

Being a real dinosaur, I always use the rule scaling technique. Never had any pains in the rear end, except when I leave the planer adjuster handle at the 12 o' clock position, and forget it's right behind me when I work at the vice! :D

As for JK no argument. I like asymmetrical dovetails too. (I assume you mean Krenov), although the other JK knew a thing or two, and I could always pick up the phone and bend his ear when I needed to. Good old Jim! Sadly missed.

That's a nice bit of D/tailing too I must add.
Cheers Rob...
John :)
 
Rob

My apologies for not getting back to your post sooner. The truth is I have been stunned into silence by the beauty of your dovetailed chest. No, kidding aside, it is just great.

Regards from Perth

Derek
 
Benchwayze wrote:
the other JK knew a thing or two, and I could always pick up the phone and bend his ear when I needed to. Good old Jim! Sadly missed.
John - Jim K was a very good craftsman, I've got a couple of his books...but as a little aside, we both used to live in the same village (Deepcut, nr Camberley) so he probably wasn't very far away from me, but I never met him, more's the pity :( and I agree, sadly missed - Rob
 
woodturner_ged":g7usihph said:
:lol: I AM TRYING TO TEACH MYSELF tohand CUT dovetails there any easy format for laying them out. please?
woodturner ged

While we're on the subject, I would recommend Philly's tutorial/demonstration as a good introduction to the essential steps of DT cutting.

http://www.philsville.co.uk/hand%20cutdovetails.htm

Don't be too distracted by the rather nice tools he uses - the techniques don't vary.

BugBear
 

Latest posts

Back
Top