Cupboard door not closing equally

UKworkshop.co.uk

Help Support UKworkshop.co.uk:

This site may earn a commission from merchant affiliate links, including eBay, Amazon, and others.

markblue777

Established Member
Joined
2 Dec 2013
Messages
488
Reaction score
1
Location
Waltham Cross
Hi All,
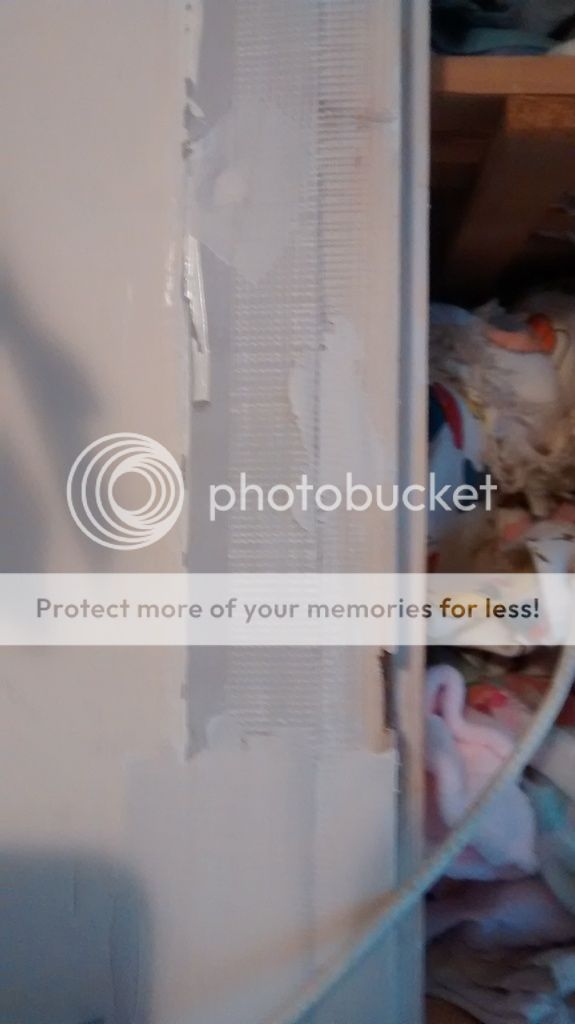
Decorating the bedroom where we have a couple doors (a small storage cupboard and the airing cupboard) and the misses wants a nice flat look across the wall. So I have stripped all the trim off from around the doors (already looking less busy and much nicer) and started to filler the gaps and then going to put some thick lining paper down to full close it off.

Now the issue I have is with the doors they both dont sit equally in the doors but I have read about shimming the hinges which I am hoping will work and square them up that way.

The second issue is that one of the doors sits flat at the bottom of the door but then starts to stick out nearer the top (this is the handle side of the door), could this be caused by the door jamb moving? or could the door have warped, it looks straight enough but ill try a straight edge on it when I get home (I believe the door is hollow with a veneered ply probably a fire door)

I want to get the doors fitting spot on as i want to remove the handles and put some push to open catches on, any ideas appreciated.

Cheers
Mark
 
Either your door is twisted, or you lining is out of wind. You might be able to split the difference on the hinges to make it look nicer. But taking off the architrave is not a good idea. No amount of filler will mask the join between frame and wall. Even if it looks ok now, in six months time it will have cracked.
 
Mar_mite":1h2cm3lg said:
Either your door is twisted, or you lining is out of wind. You might be able to split the difference on the hinges to make it look nicer. But taking off the architrave is not a good idea. No amount of filler will mask the join between frame and wall. Even if it looks ok now, in six months time it will have cracked.

+1 More for the above, architrave removal, probably get quite a bit dusty too!
Don't quite understand fully the door aligning problem, is it possible to put a pic on?
Rodders
 
Hi Both,
Well I'm hoping when the lining paper goes over it, it will hide any cracking that may occur but If it is a problem in a a few months I will just re-trim it with some thin stock to at least look less busy on the wall.

Rod, see the image below hopefully it explains

first issue is door not sitting square in frame like below. I am going to patch up existing hinge cut outs and get some new hinges anyway so it may correct it them if not i will just shim them out until corrected

5794894.jpg


The second issue of it not sitting correctly is shown in the image attached below (from the view of you looking along the wall at the door frame)
Holpfully from the image you can see what Im getting at. The door (the green) sits out more from the top where as at the bottom of the door it is flash with the frame.

Cheers
Mark
 

Attachments

  • doorframe.jpg
    doorframe.jpg
    31.8 KB
Hi Mark, I did exactly the same with two built in cupboards in a bedroom, stripped off the architrave and used lining paper over the join and it has work fine if a bit vulnerable to wear and tear.
The doors like yours did not fit flush to the bare frame so I remade them, hollow doors with 6mm mdf faces this was enough to plane them to the same shape as the walls then lining paper over the faces to match the wall, flush hinges and push to open openers, perfect.
I'll try and find a picture if you like.
 
Hi Chrispy,
A picture would be great to have a bit of a look at. It just makes it so much nicer as previously it was so busy and all the architrave have basically torn off from one another where they were glued to each other. typical council house build bodge job really.

a shot of it so far (done a bit more from this picture but its taking shape)

IMG_20150414_195222577_zpsizeslt0r.jpg


what i done under the filler
IMG_20150414_195156826_zpsuy2swctk.jpg


once i have finished all the filling i need to sand it off smooth and maybe touch up a bit with some more filler and then then ill wack the lining paper over it.

Cheers
Mark
 
Not a very good picture for how to do it but you get an idea what it could end up like.

PA130316 (640x480).jpg
 

Attachments

  • PA130316 (640x480).jpg
    PA130316 (640x480).jpg
    123 KB
markblue777":qavjo38p said:
Hi Both,
Well I'm hoping when the lining paper goes over it, it will hide any cracking that may occur but If it is a problem in a a few months I will just re-trim it with some thin stock to at least look less busy on the wall.

Rod, see the image below hopefully it explains

first issue is door not sitting square in frame like below. I am going to patch up existing hinge cut outs and get some new hinges anyway so it may correct it them if not i will just shim them out until corrected

5794894.jpg


The second issue of it not sitting correctly is shown in the image attached below (from the view of you looking along the wall at the door frame)
Holpfully from the image you can see what Im getting at. The door (the green) sits out more from the top where as at the bottom of the door it is flash with the frame.

Cheers
Mark

Thanks for the pics and diagram.
As you say the doors appear to be badly hung, I suggest you check the two lining stiles for plumb, You may have to "average" any discrepensies by remove the door stops, and try and re-chop the offending hinges in further to wards the stop and thereby, hopefully aligning the striking stile and door on the same plane, should work for the lower
offending door too. The flush doors you seem to have were usually flat and square, another example of rough tradesmen, I guess. Regards Rodders
 
Hey Chrispy,
Yeah that is what im looking to achieve very nice finish and looks so much cleaner. What type of hinge did you use on the doors?


Thanks for the tips Rod, I will re-hang the doors and hopefully that will correct the issue.

Cheers
Mark
 
Hey Chrispy,
Just re-read post and saw you stated flush hinges. How did you hide the hinge as I cannot see it on the pick or is it slightly visible?
Cheers
Mark
 
20150416_191927-1(25).jpg

20150416_191846_25.jpg

20150416_191839-25.jpg

20150416_191947-25.jpg

20150416_192020_25.jpg

I hope these pictures explain better.
 

Attachments

  • 20150416_191927-1(25).jpg
    20150416_191927-1(25).jpg
    79.4 KB
  • 20150416_191846_25.jpg
    20150416_191846_25.jpg
    60.1 KB
  • 20150416_191839-25.jpg
    20150416_191839-25.jpg
    64.2 KB
  • 20150416_191947-25.jpg
    20150416_191947-25.jpg
    82.2 KB
  • 20150416_192020_25.jpg
    20150416_192020_25.jpg
    43.2 KB
Back
Top