Competition entry WIP: writing desk

UKworkshop.co.uk

Help Support UKworkshop.co.uk:

This site may earn a commission from merchant affiliate links, including eBay, Amazon, and others.

stef

Established Member
Joined
16 Jan 2007
Messages
383
Reaction score
0
Location
Normandy
I'll try to document this build:
From the brief description:
I will design and make a smallish writing desk which will be (hopefully) pleasing to the eye, and be able to hold laptop and cable modem, plus keep a shed load of cables and supplies out of sight. And a pen. The design will have to be airy and light so that it doesnt clutter/invade the room but still get noticed for its subtelty. it will be used as a ocasional desk for the laptop, nothing heavy duty. a cross between a desk and a hall table.
level will be intermediate, i think.


Soooo, after thinkering some more with the leg design, the design is well underway. I also took some good advice on the leg/top joins, and decided on most of the others. Time to get going !
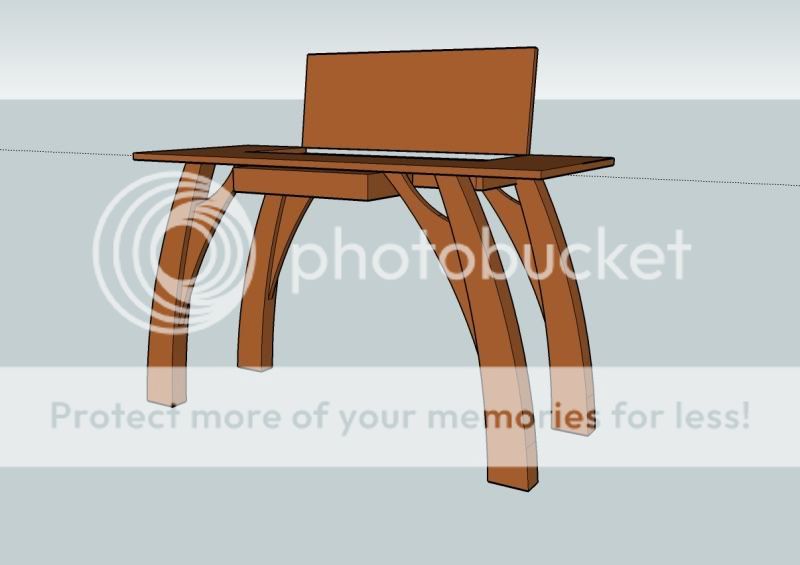
desk01-1.jpg


So the first thing i did this weekend was to get the first template for the legs ready.
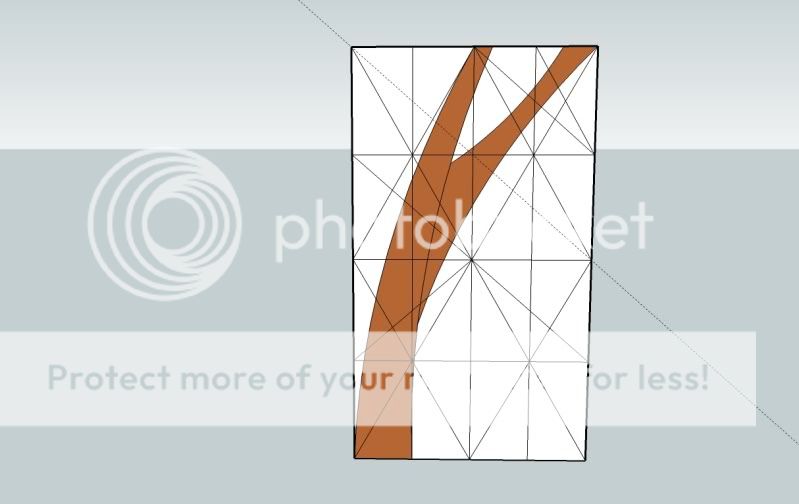
Leg01.jpg


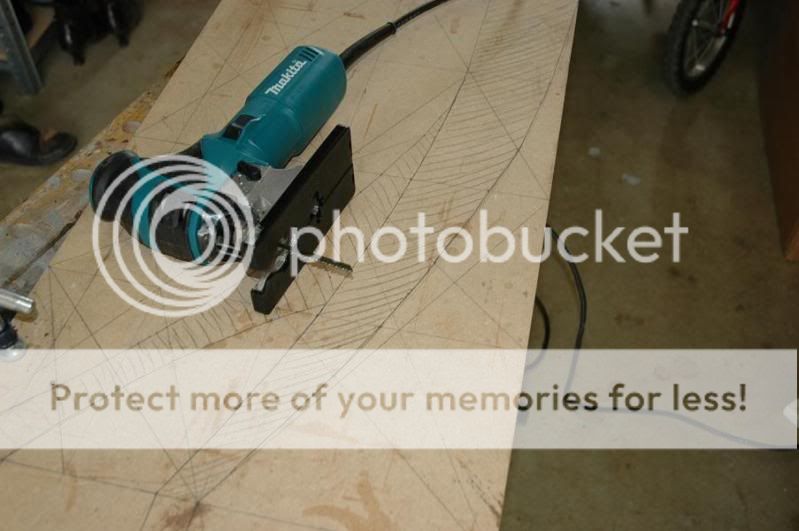
I transfered the design onto some MDF, and used this to mark the oak stock.


DSC_8017.jpg


DSC_8018.jpg


DSC_8019.jpg


DSC_8020.jpg


DSC_8021.jpg


DSC_8022.jpg

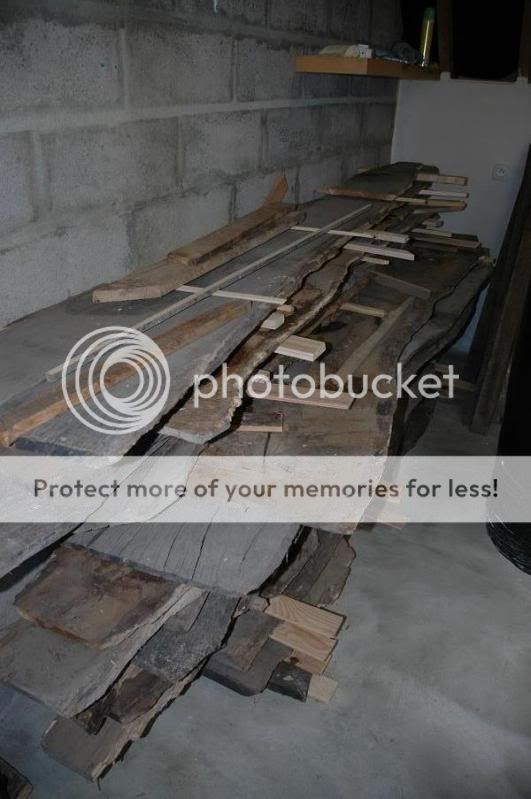
I picked up a suitable piece from the pile. This stock should be enough to get the project finished ! would you beleive i paid only 70euros for this lot (21 plates of well dried oak!)!
I then started cutting the first of four leg "cores". The legs will be made from 3 pieces laminated. only the middle one has the middle brace. So i started cutting those first. Then for the others, i can just trim the extra bit from the MDF template.
I will also use the template as a copying mask and a router bit with a roller bearing.
 
BradNaylor":1sg4430f said:
I'd just written some comments and then realised that I can't - being a judge and all!

#-o

Is that blood on your bench?

:shock:

Brad

err.. oh yes.. i like to give myself completely to my work. Limbs, fingers.. it's only flesh.
(ok, it's just some shellac i cooked up a few days ago)
 
:?:
From your drawing I thought that each leg was going to be made out of two pieces jointed together with the grain carefully selected to follow the curves of each piece.
There is a lot of short grain there that would be a weak point if the leg gets a knock especially as it is also going to be a thinner section.
 
I would agree with the comments on short grain, my compo entry is going to have curved legs and my biggest worry is the grain/curve issue and the weight. I think if you went down the 2 piece route you should be alright.

Do like your design though, very good
 
Ah...yes.
school boy error.
Following your comments, i had a closer look at the work so far, and yes, i can see a nice split along the grain waiting to happen.
so i had a bit of a rethink, and will make the legs in 3 components: 2 for the main support (sandwidtched) and a separate piece for the brace. Each will follow the grain. The brace will be tennoned into the main part of the leg.
This has many advantages: It will use less wood, and the legs will end up thinner.
 
I also share these concerns about the legs. :?

Are you not preparing the timber and only using it as rough sawn?
 
Noticed the jig saw, too - any comments on it? I think I might have ordered one from Axminster last week and would be eager to hear some comments on it... Based on the specs it should be good, but still reasonably priced.
 
JanneKi":76jwceg0 said:
Noticed the jig saw, too - any comments on it? I think I might have ordered one from Axminster last week and would be eager to hear some comments on it... Based on the specs it should be good, but still reasonably priced.

yes, i think it is pretty good.
but then i only have a green bosch to compare it to.
but it went through the 1 inch oak like butter really.
only negativ point i'd have is the bevel adujstement, which requires a allen key (hidden in the base plate) and doesnt look too acurate.
 
stef":38lvb7qc said:
Ah...yes.
school boy error.
Following your comments, i had a closer look at the work so far, and yes, i can see a nice split along the grain waiting to happen.
so i had a bit of a rethink, and will make the legs in 3 components: 2 for the main support (sandwidtched) and a separate piece for the brace. Each will follow the grain. The brace will be tennoned into the main part of the leg.
This has many advantages: It will use less wood, and the legs will end up thinner.
If you make the main leg as two sides glued together you can save some effort in cutting the mortise if you routed out half the mortise in each piece before you glued it together. It will help keep the mortise sides straight and parallel.
Also try to design your joint so that the shoulders of the mortise and the tenon meet on a straight line, preferably also so that the glue lines all come to the surface at or near 90 degrees.

If you glued the secondary piece in following the curved profile and then tried to clean up you will hit the glue line at a shallow skew angle and it will leave a thick glue smear line that you can't hide.
 
If you make the main leg as two sides glued together you can save some effort in cutting the mortise if you routed out half the mortise in each piece before you glued it together. It will help keep the mortise sides straight and parallel.

yes, i was planning to do just that.
Also try to design your joint so that the shoulders of the mortise and the tenon meet on a straight line, preferably also so that the glue lines all come to the surface at or near 90 degrees.

If you glued the secondary piece in following the curved profile and then tried to clean up you will hit the glue line at a shallow skew angle and it will leave a thick glue smear line that you can't hide.

that i dont follow..
i was planning to cut the brace about 2inches longer than required (the depth of the mortice) and then place it on the template, mark the shoulder position. then cut the tenon according to those shoulder marks.
(tenon on 4 sides)
then use the tenon to mark the "half" mortices in each pieces on the legs.
Carve/route the mortices, glue up the leg, and slip the tenon in the leg..
is that what you had in mind ?
 
I was thinking of the actual shoulder of the secondary leg piece tenon. When you cut the tenon on that piece it will have a small shoulder. That shoulder would be easier to cut to fit the main leg if it is straight instead of following the curve of the main leg.

However, no matter if it is straight or curved, at the bottom end of the shoulder it will meet the main leg on a long tapering shoulder that disappears into nothing as you blend in the curve but will leave a glue smear.

To avoid this you can move the shoulder inwards and have it inset into the main leg like this:
Leg01-1.jpg

I don't have any nice drawing packages so this was done in paint! I hope you can see what I mean.
 
I see what you mean.
however, i cannot make the join the way you suggest, because the leg brace is thinner than the leg.
the brace is 1 plank. the leg itself is a 2 plank laminate.
so the shoulder has to stop on the side of the leg.
but yes, the shoulder on the brace will be curved.
in order to cut this shoulder acurately, can use the leg itself has a guide for the router. this way, the curve should be a perfect match. hopefully.
 
If you are laminating the leg, you could pick the inner piece for grain direction running in line with the brace and the outer two running in line with the leg. The glued-up assembly should be strong enough.
 
stef":3micry17 said:
I see what you mean.
however, i cannot make the join the way you suggest, because the leg brace is thinner than the leg.
You can if you treat my rough sketch as a cross section through the middle of the whole assembly.
The brace does not need to go in very deep, maybe only about 4-5mm into a shallow socket with the tenon doing most of the work. Or you can skip the tenon altogether and use the whole of that part of the leg as a tenon with no shoulder. It will be both effective and easy to do especially as the brace is thinner then the leg.
Leg02.jpg
 
Night Train":3p1n8rdj said:
stef":3p1n8rdj said:
I see what you mean.
however, i cannot make the join the way you suggest, because the leg brace is thinner than the leg.
You can if you treat my rough sketch as a cross section through the middle of the whole assembly.
The brace does not need to go in very deep, maybe only about 4-5mm into a shallow socket with the tenon doing most of the work. Or you can skip the tenon altogether and use the whole of that part of the leg as a tenon with no shoulder. It will be both effective and easy to do especially as the brace is thinner then the leg.
Leg02.jpg
ah yes. and this way, the brace will be impossible to pull out.
but then again, i would prefer it to be a shouldered tennon. this way, the brace just looks as if it is resting on the leg, rather than stuck in the leg, as if it did not have shoulders. do you see what i mean ?
I'll do it with a shoulder, and seeming as i have plenty of stock, i'll keep your suggestion in mind, and revert to it if i am not too happy about the shouldered tenon.
 
I'm still intrigued by the same thing olly is, are you using this as a rough finish piece? Not planed down before use?
 
I didn't even bother wondering about the finish :oops:

Sometimes I will make up components that are going to be organic in form without bothering to prepare the timber, except around the joints, if I am going to completely carve the piece afterwards.

But, yes, same concern. Have you thought about planing and flattening the timber first to get a flat and square face/edge before marking out so that you know the work will end up true afterwards?
It will help in locating the joints accurately and squarely on each piece and in getting dimensions equal on all the legs.
 
the piece will be planned before the final shaping takes place. at the moment, it's just a rough cut with the jigsaw. the final shape will be obtained with the router and the mdf template.
I am starting from big oak plates, and i dont have a thicknesser. i dont fancy planing the whole plate down before cuting it in pieces!
 
Back
Top