coffee table

UKworkshop.co.uk

Help Support UKworkshop.co.uk:

This site may earn a commission from merchant affiliate links, including eBay, Amazon, and others.

nabs

Established Member
Joined
24 Aug 2015
Messages
1,456
Reaction score
19
Location
Herts
Fans of inept woodworking will be excited to hear I have decided to have a go at the coffee table I mentioned here:

coffee-table-design-robust-enough-t108810.html

I have tried to do the design so it is in keeping with the side tables I made, but following comments on the above post I am making it with an apron rather than the halving joint which will in theory be more rigid (I say in theory because this will depend on me doing the joints well, erk).
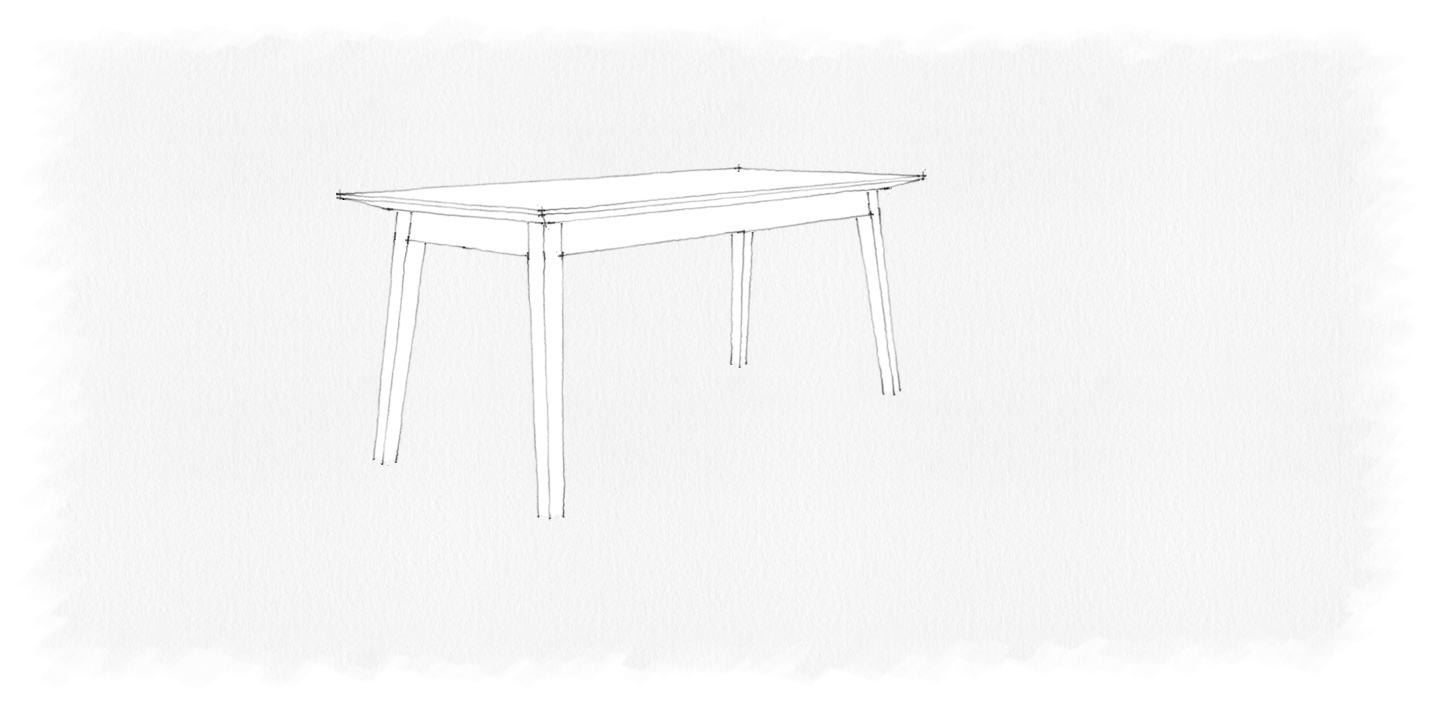
C8RxZI_gTba7OaQX-bP8tMTnZ0ACfYXXG62grNQjHHyKT3kVychtFKr-SIU


The top is American Elm - I could only get 5 1/2'' boards so laminated the top in 4 pieces, doing it in two stages. I roughly flattened each pair of boards before gluing the two halves so hopefully not too much work will be needed to finish it. I'm using oak for the legs and everything is being done from rough sawn boards with hand tools so quite a bit of effort went in to preparing the wood
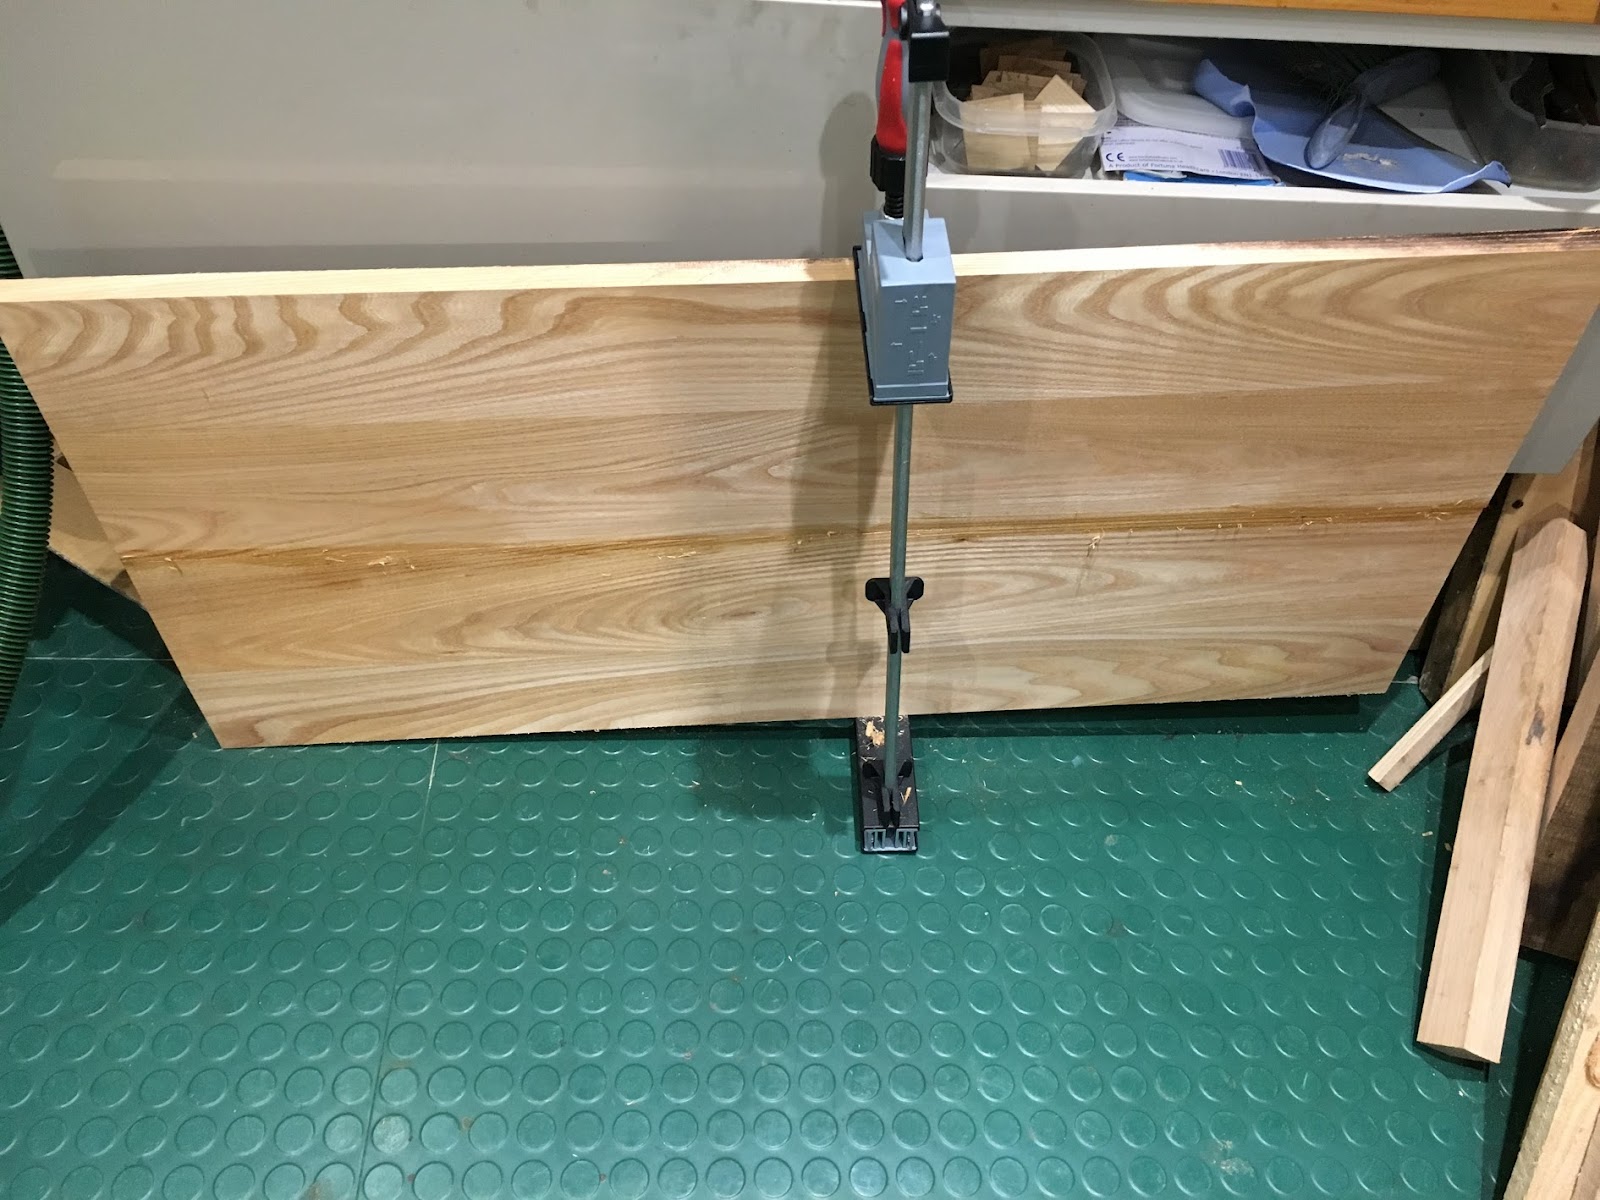
x040uj_A0WrWRITnQPG-qHqcMbgj0yZobVA9LWI7EgGhT5cqSix2C0dWZdk


I do quite enjoy the prep work but it is time consuming and adds to the pressure when you are doing something to the first time (in this case, my first mortice and tenon joints) because in the back of your mind is the prospect of another lengthy exercise to get replacements parts ready when/if you **** up. Thus I am seriously thinking about getting one of those bench top bandsaws from Aldi :)

I have got a bit further along with the joinery now and have a couple of questions about the construction - will do another post later.

toodles
 
with some trepidation I am on to the joinery - here is a summary of what I did followed by a couple of questions.

The plan is that the legs will be splayed 6 degrees and tapered on two sides. I chickened out and decided to keep the top bit square with the taper starting from beneath the aprons.

My reasoning was that if the tapers went straight through to the top I would need to get the tapers exactly the same on each leg to avoid them sticking out at wonky angles, and I was not confident I could do it. The other approach just seems to require you to get the legs square and roughly the same size and then to cut the tenon shoulders at an angle of 6 degrees.

That was my conclusion anyway, but thinking about angles a lot tends to make your brain go wrong so I may be talking out of my a*se!

I did a few test m&t joints, all of which were terrible and then concluded I had just better get on with it. I used a sort of combined "rod"/guide to lay out the mortices (idea pinched from R. Maquire), but they results are still varying degrees of rough, and the inside of the walls all undulate to some degree. At least the guide meant they are all in the right place, and by the 3rd one I had worked out how to get to the right depth in the first pass of chops with the chisel. So some improvement and the guide did help, but I obviously need to do more practice.

rod:
XyEW2P5Esk_lLjCQqBksFh6_fPGFsCtCO8vqePhtOsUk5Oo42fA_-LmxQ7c


I found the tenons a bit easier, and could get a reasonable fit on the face surface but tended to end up with slight gaps on the other edges. I am not sure how strong the joints will be given that the mortices are a bit crappy - we shall see. It is probably a good thing this is a coffee table rather than a chair :).

crappy mortice :
9uU8-GgASlLWLs-ZCtSVGsc_XDuOgDKHvOSvEdaAraQxGPdXIFQlwV8IJo4


A couple of questions - I know I have to flush the top of the aprons down to level (as they will be splayed at the same angle as the legs) but when is the best time to do this ? After the legs and aprons are glued or before?

also, I could not work out how to mark out the haunch on the tenons, so in the end I just marked them out with a pencil and a ruler after I had removed the shoulders. is there a better way of doing this ?
 
Presumably the tenon shoulders will cover the ragged mortice? So I wouldn't worry too much. It will come out fine - just be sure the tenon shoulders are nice and square and you can make everything else work, I think. Yours look OK to me. I will be shaking a wasps nest here, but there really is no magic to it- just stick at it and you will be grand. Regarding the apron query, as long as the glued joint is not going to be stressed in any way by flush cutting afterwards that is what I would do. I might apply a clamp to reinforce. Others may have a better way.
As an aside, I don't see a lot of American elm, and whilst it is certainly an attractive timber, I do prefer English. It is my favorite timber - there is some magic to that! I will be watching your project with great interest, thanks for posting. Hope my comments help.
Www
 
thanks www - in the end I could not think of a way to hold the base still once it was glued so I tapered the tops of the aprons beforehand.
 
I have now glued the legs and aprons. I realised belatedly as I was gluing the long sides that my 2 long clamps were not quite long enough. A pity because on the short sides, which I could clamp, one of the small gaps on the inside of the joint closed up nicely, but I am left with a gap on the inside of one of the long sides. Still all the joints look good from the front and overall it turned out better than I expected.

Lesson learned - I should get some more clamps (which is exactly what I concluded the last time this happened. doh!) . Incidentally, I actually do have some Record cramp heads which I think you traditionally use with timber stretchers (?), but I would quite like to try some aluminium section (1x2'') to make them a bit lighter. However I have not found anywhere that supplies them in small quantities. Has anyone done similar?

Here is the base after I flushed the tops of the legs to the apron but before I cut them to length. Having learned the lesson from one of my slightly wobbly side tables I cut them to the same length carefully and tidied up the saw cut with a block plane to get them spot on.

WldtYXA3lSfK2BjW-TJePTcy2k44Jf5XTiE7z7qoFkgnnzFQujnHo4yhwxE


..and here it is are after several applications of tannin solution and immediately after a splash of rust solution. Ebonizing is most enjoyable and it is very gratifying to see the wood turn deep black as you watch!

47ihHHZp37e89yfz1i2At04ajIgvoA3ccRHQdq9_4RUtiiUvtp1h4SsP1MM


Just got to finish the top and screw it on (I drilled oversized holes in the apron) and then apply the finish which hopefully I'll do this weekend.


toodlepip
 
Excellent work, a very tidy job!

=D>

Add up all the side tables, hall tables, bedside tables, and coffee tables in the average home and what does it come to? Ten, twelve, more?

Enough at any rate that demand for your superbly well made pieces from amongst family and friends is unlikely to dry up for some time to come!
 
Looking nice indeed. I think it has plenty enough stylistically in common with the original design to look matched.

Legs splayed in both directions scare me a bit. I presume the splay here is enough that you can get away with the apron shoulders being angled in the one plane only. When is the splay enough that you need to get into the shenanigans you do with saw horses - choose between shaping the legs so that the horizontal cross section is square (hence perpendicular to their length they aren't) or deal with compound angles in the joinery ?
 
thanks for the encouragement chaps - it really is appreciated! I do think I will have got the whole coffee/side table thing out of my system by the time this is finished. I have grand plans for something a bit more complex for my next project - it may even contain a drawer!

Tony, tbh even having made it I am still not sure I understand how the angles work :shock:
 
nabs":2yo6v5mj said:
...... I realised belatedly as I was gluing the long sides that my 2 long clamps were not quite long enough..........

A rope tied in a loop then wound up with a stick (protect the work first!). Or a ratchet strap. Or draw-bore pegs. Any of these would have pulled the joints up tight.
 
Lovely work, Nabs. Carefully chosen wood, thoughtful design and proper construction - what more could you want!

Re your questions, if you have clamp heads, I suggest you just use them on some suitable timber. Paul Sellers uses cheap aluminium clamps but improves them by putting wood inside the ali - so making something heavier than just wood.
With wood you also have the option of using a deeper, stiffer piece if you need. I mostly use mine on quite short lengths, under 2', and find them very useful.

For marking out haunches on tenons, a carefully chosen chisel can be handy, just laid on its back as a piece of metal of known width, eg 1/4". Or you may find that a small engineer's square will have a stock which is 1/2" x 3/4" and a 1" blade, or some other useful round numbers.
 
MikeG.":33nu2oqj said:
A rope tied in a loop then wound up with a stick (protect the work first!). Or a ratchet strap. Or draw-bore pegs. Any of these would have pulled the joints up tight.

... the first two suggestions would not have occurred to me in a month of Sundays (galling since I have a box full of suitably sized ratchet straps in the garage) - thanks for the tip!

Also thanks Andy for the suggestions on marking out the haunch - now you have said it , a chisel held flat against the tenon would have been perfect (and also would never have occurred to me left to my own devices).

It is good to get some new ideas in addition to the lessons I keep learning and then forgetting. Another classic last week was when I forgot about the face and edge marks on one of the long aprons and cut the tenons at at each end offset from different sides.

I eventually had the brilliant realisation that, since I had not yet cut the top to size, I only had to cut off the offending tenon and shorten the long rails a bit to fix the problem (I say 'eventually' - this thought actually clanged home after I had just finished sawing and dimensioning a replacement rail. doh!).
 
I was looking in Robert Wearing's Essential Woodworker last night and for haunches he shows what is probably a more conventional technique. He marks everything out on the full piece. Then he saws down the tenon cheeks. Next he cuts the haunch. And only then does he saw the cheeks off.
Possibly more accurate than my workaround for marking them after sawing the cheeks, but it's worked for me.
 
finished, and here it is with the two side tables.
qgfMoVKifB5_WHxr5jspCzFQDHHXyo9F6KQbm_Qk_s73JpvHFtAVV8pJBvg


A mixed success I think: there are enough similarities between the side and coffee tables so they seem part of a set, yet the coffee table design is much more sturdy (good enough for a large adult to sit on without any movement - obviously I got a child to stand on it first before to be doubly sure!)

I am a bit disappointed with the top though. Because I only had 5 narrow boards to chose from I did not have a lot of options for matching them together and, although I thought it looked okay when I glued them, now I have oiled it and the grain is more apparent I am not so sure. I did find the side tables appeared a fair bit darker after I waxed them, so hopefully the coffee table will be a bit less garish after I do the same.

A fun project and I am pleased I have made something from my own design, even if it is only a top with 4 legs attached and most of the ideas were pinched from other people :D
 
I think they look really classy. Well done!

As for pinching other people's ideas, I'd say that was the best thing to do.
"Originality" in design can easily mean misunderstanding the fundamentals.

And I'm not the first person to say so on this forum!
 
nabs":501voikm said:
A mixed success I think: there are enough similarities between the side and coffee tables so they seem part of a set

I think you're being a bit harsh on yourself. The ebonised legs echo the woodburner, and the table tops echo the flooring, so your furniture sits harmoniously within the room and looks like it really belongs.
 
AndyT":1vm9ntfb said:
I was looking in Robert Wearing's Essential Woodworker last night and for haunches he shows what is probably a more conventional technique. He marks everything out on the full piece. Then he saws down the tenon cheeks. Next he cuts the haunch. And only then does he saw the cheeks off.
Possibly more accurate than my workaround for marking them after sawing the cheeks, but it's worked for me.

The problem with haunches is you want them to fill the corresponding mortice cavity as completely as possible, but if you're too ambitious in this respect, and make them a whisker too long, then they'll hold the joint apart. This is an asymmetric risk, the benefit of a completely filled haunch cavity is tiny compared to the nightmare of a gappy mortice and tenon joint. So there's a general convention in cabinet making that even on first class work a tiny gap on the haunch is acceptable.
 
looks like a well made, solidly build table that is going to last a lifetime! the ebonised base contrasting with the top is classy
 
Back
Top