chest of drawers WIP

UKworkshop.co.uk

Help Support UKworkshop.co.uk:

This site may earn a commission from merchant affiliate links, including eBay, Amazon, and others.

Jacob

What goes around comes around.
Joined
7 Jul 2010
Messages
31,037
Reaction score
6,462
Location
Derbyshire
Someone asked what I was up to 8)
Just doing a prototype. Recycled softwood. 4 narrow but long drawers in a chest. More of an exercise in DTs than anything and I haven't done many for a long time. It'll do for turning chisels and I'll make some better ones with better wood.
Design based on existing old chest.
DTs: Deep cutting gauge lines to work to - deeper means less likelihood of chisel wedging itself back over the line.
Pin holes laid out with dividers, very quick.
Squared with pencil and/or scribe marks
Shallow DT saw cuts started vertical then tilted freehand for the bevels. n.b. essential to have all saw cuts just over the line by as little as possible, to make easy waste removal - no scraping about in corners.
Two or 3 vertical tenon saw cuts in the waste to make it easier to remove. Easier than fiddling with coping saw the modern way.
n.b. Sawing very quick - all done freehand before you'd even finish marking up bevels.
Chiselled out. A lot of them so you work along from one to the other, same stroke on each, no changing chisel, all around one side. Turn over ditto other side. Turn again and next mallet belts are through.
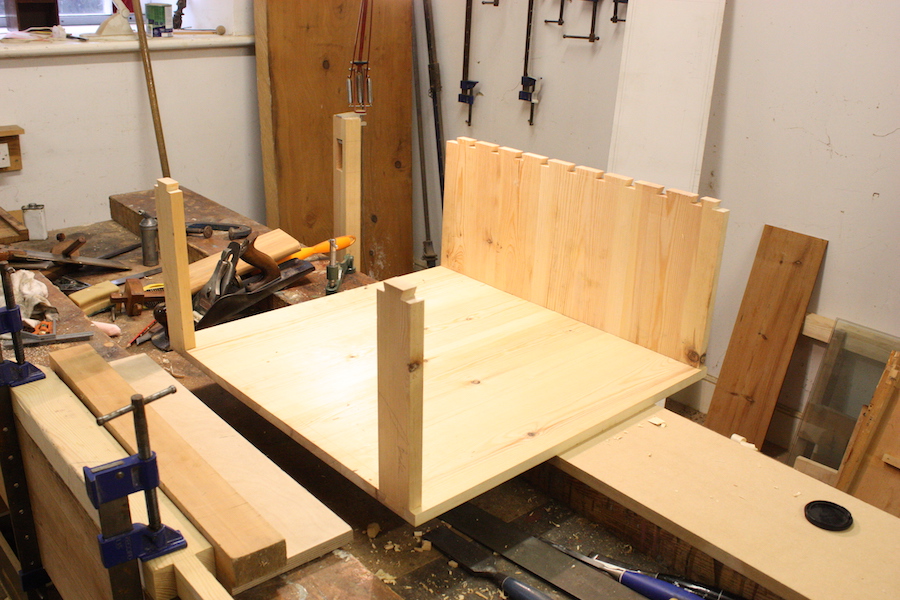
Mark up blind DTs in sides from the bottom piece and the two top rails.
Sawing carefully to the lines here of course, not freehand. Similar systematic chopping - a bit from each, not one at a time.
This all a bit of a novelty for me I've never done so many at the same time.
Then bingo bottom goes straight in to side!! Very pleased - the boards were a bit bendy but they get held in straight.
Now for the other side.
Then the 4 f***g drawers and I'll be good at DTs!
PS it's very interesting how the design I'm copying avoids differential movement stresses in spite of 2ft wide solid boards - the bare carcase as seen here, plus 3 front rails to come, has the grain all going the same way so no prob. But when you get to the runners in housings they go across the grain. Answer - have them loose fitting. Front end loose dry M&T into front rails, back end one screw.


The bottom:
IMG_2469.JPG

Two top rails
IMG_2468.JPG

IMG_2467.JPG

IMG_2466.JPG
 

Attachments

  • IMG_2469.JPG
    IMG_2469.JPG
    344.2 KB
  • IMG_2468.JPG
    IMG_2468.JPG
    325.6 KB
  • IMG_2467.JPG
    IMG_2467.JPG
    291.8 KB
  • IMG_2466.JPG
    IMG_2466.JPG
    371.8 KB
Excellent, Jacob. Nice to see. That looks like decent timber, too, for "recycled" softwood.

Why the half-blind dovetails? That looks like it would have worked with through DTs. As for cutting freehand without marks.....I'm happy to do that on a narrow item, such as a drawer, but for wide boards like that I would quickly put 2 or 3 pencil lines randomly on the work using a bevel gauge just to give me something to roughly line up with to keep a bit of consistency.
 
It's redwood offcuts, some Swedish unsorted and some old floor boards. I saved the best bits for the drawer fronts.
Neater with blind DTs. They disappear completely under the top, or under the bit of a plinth. I didn't even know they were there in the original until I pulled it apart years ago for repair. Freehand just gets more regular with a bit of practice - you can hardly tell but who cares anyway if they are all slightly different? :lol:
PS I've got stacks of reclaimed wood and this is one way of using it up. It's all finished 20mm or thinner and can mostly be got from old floor boards planed up both sides
 
nice work jacob, subscribed, look forward to seeing how this turns out, I like the freehand dovetails.
 
Jacob":1dbc4tsy said:
Two or 3 vertical tenon saw cuts in the waste to make it easier to remove. Easier than fiddling with coping saw the modern way.
n.b. Sawing very quick - all done freehand before you'd even finish marking up bevels.

Thanks for the write up and the photos. I've never thought of putting additional saw cuts in, sounds like a good idea and something I will try.
As for sawing free hand bevels, unfortunately my ocd (I'm not being flippant saying that) doesnt allow such a thing (hammer).
Nice work.
 
Thing with this project is a lot of blind DTs, 50 or so by the time I've done the drawers. In the past I've only ever done two drawers at a time so I'm working on how to do it fast and just good enough, which means freehand wherever possible - and being systematic e.g. cut all the left hand sides in one sequence so you don't change angle or stance, then do the right.
Just doing 2nd side and it's getting faster! Have to see how it fits :roll: .
I reckon that given the components planed up ready I could do all 50 DTs in a good days work. Long time since I last did a good days work though. :lol:
 
Good to see you do a project Jacob. Look forward to this.
 
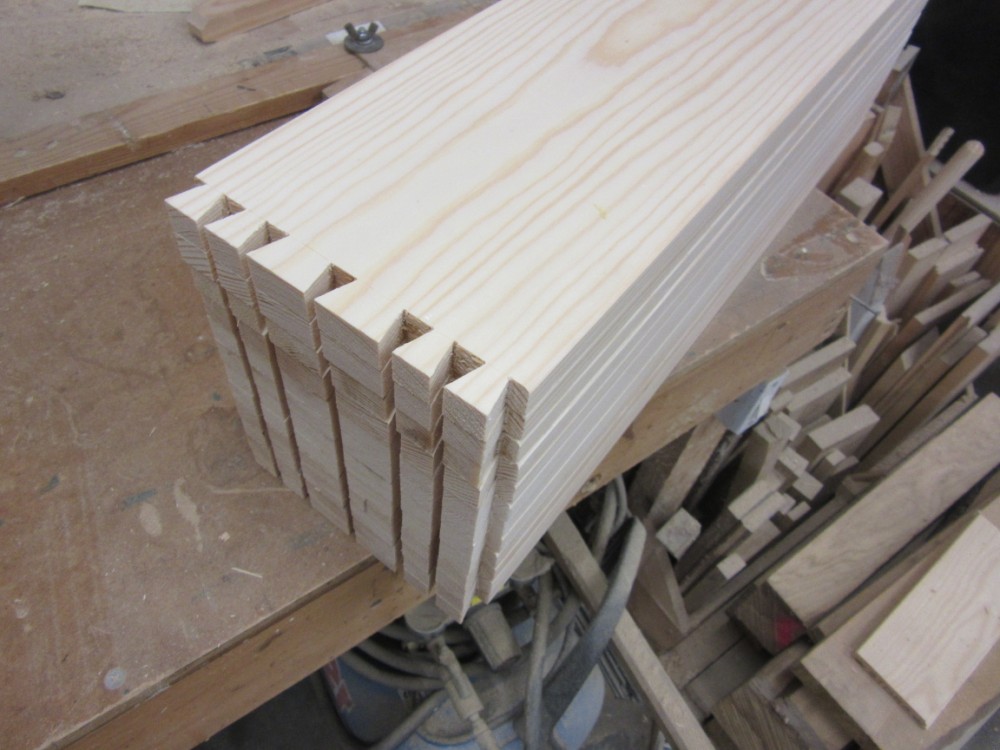
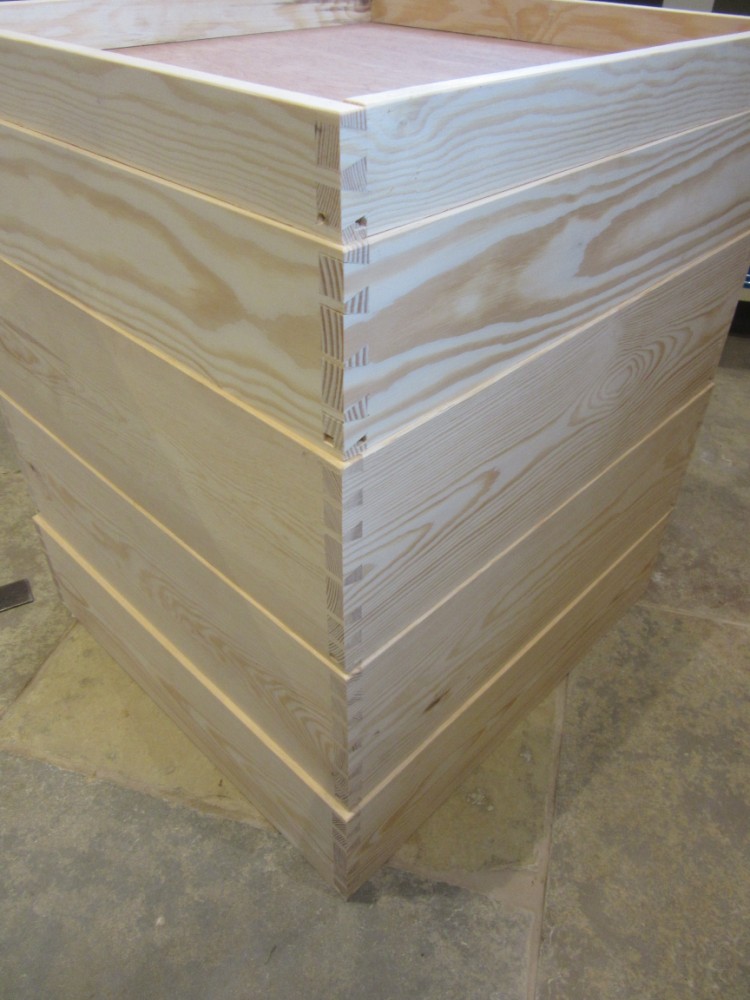
Got carcase made up, 24 blind DTs etc all just good enough.
IMG_2485.JPG

Thrashing away - I'm wondering about how you should chisel them out.
I've done them in the past, am doing them now, with trial and error but I feel that back in the day in production mode they would have had it well sorted ; if you had say 5 of these very ordinary chests to do that would be 250 DTs facing you on a Monday morning!
One thing that's certain is that a big chisel is little use - except for making a clean cut at the back of the socket if waste has already been removed, or paring the bottom.
IMG_2483.JPG

Small chisel?
Is this where those very common 1/8" mortice chisels were used? Cut out a thin slot either side of the waste and then just blast the rest away with a bigger one? Stone mason style? I've only just thought of it that's what I'm going to try next. :shock:
Pin holes no prob couldn't be easier but I'd be interested if anybody has any chiselling ideas about DT sockets - hand tools only.
Am away Tuesday so probably won't post for a week or so
 

Attachments

  • IMG_2483.JPG
    IMG_2483.JPG
    357.3 KB
  • IMG_2485.JPG
    IMG_2485.JPG
    665.4 KB
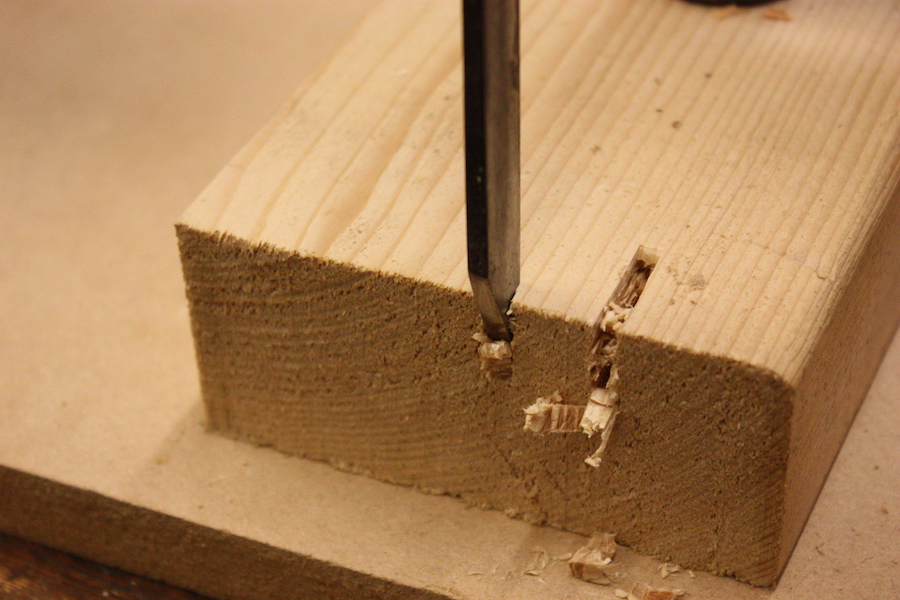
Had a bash on a bit of scrap. 1/8" mortice chisel cuts the slots very quickly.
IMG_2487.JPG

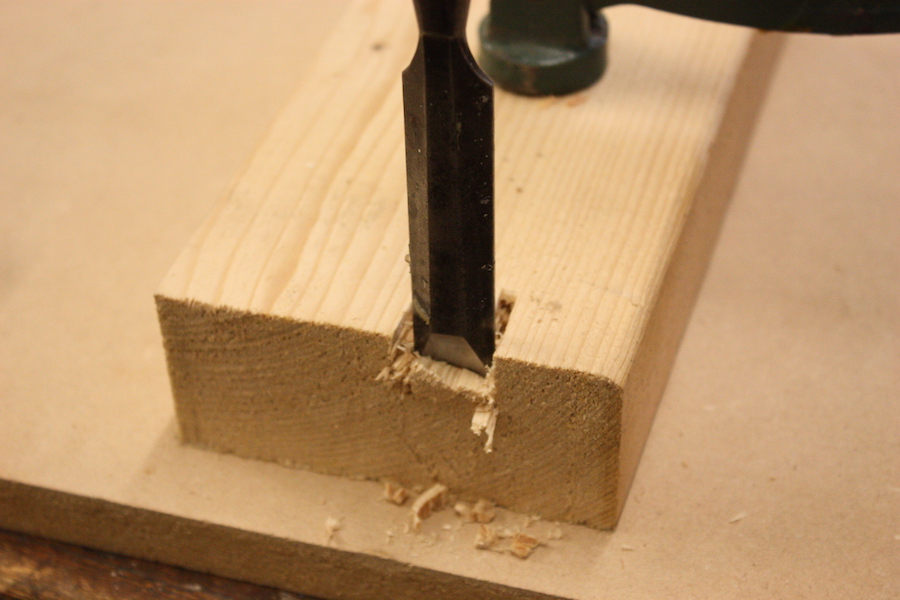
Waste falls out easily
IMG_2489.JPG

Is this the answer?
IMG_2490.JPG

I think it is, to two questions; how to chop out sockets quickly and what those mysterious thin mortice chisels are for.
The next question is how precise can you be with the waste removal to minimise the tidying up. Can you mortice chisel the bevel itself instead of doing a vertical cut?
It also answers the question - if saw cuts in the waste help why have I never seen traces of them in old work pulled apart? Answer, they don't help you don't need them!
PS I think saw cuts do help with the pin holes as they go right through quickly and easily and help the waste to drop out loosely.
PPS Also try firmer chisel instead of bevel edge - the added bulk should help break and push out the waste like a light weight mortice chisel. A bevel edge tends to wedge itself in more.
 

Attachments

  • IMG_2487.JPG
    IMG_2487.JPG
    309.1 KB
  • IMG_2489.JPG
    IMG_2489.JPG
    244.9 KB
  • IMG_2490.JPG
    IMG_2490.JPG
    330.5 KB
thetyreman":72jf8tnf said:
question, why are the faces on the outside?
What faces? Do you mean the tails? They are top and bottom. They will be out of sight, under the top itself and below covered by a plinth. n.b. I'm not into exposed DTs particularly, traditionally they are just structural.
 
Really interesting project and exploration of hand techniques. There's plenty of evidence that hand tool working remained viable even after the advent of machinery. We know that the makers were poorly paid and exploited by the middle men. (See Mayhew on "slop-work" in the London furniture trade.) It's fun to try and find out what was quick enough and good enough.

I often flip between methods during a project in an attempt to find out, but as you say, 250 dovetails on a Monday morning would compel you to work efficiently. When I made a set of five dovetailed boxes (dovetailed-pine-boxes-with-captive-bottoms-t108475.html) I found that it really helped if I was using the same tool in the same way, over and over again. So although your idea of the narrow chisel is fascinating I reckon just holding one tool with no swapping over wins. My money's on a half inch firmer with the corners ground off.
 
Jacob":iu13eqpc said:
thetyreman":iu13eqpc said:
question, why are the faces on the outside?
What faces? Do you mean the tails? They are top and bottom. They will be out of sight, under the top itself and below covered by a plinth. n.b. I'm not into exposed DTs particularly, traditionally they are just structural.

I meant as in face/edge mark, the faces here are on the outside from what I'm seeing, just wondered why that is the case?
 
thetyreman":10hf0czf said:
Jacob":10hf0czf said:
thetyreman":10hf0czf said:
question, why are the faces on the outside?
What faces? Do you mean the tails? They are top and bottom. They will be out of sight, under the top itself and below covered by a plinth. n.b. I'm not into exposed DTs particularly, traditionally they are just structural.

I meant as in face/edge mark, the faces here are on the outside from what I'm seeing, just wondered why that is the case?
Face and edge marks go on best visible face and edge which with a box/chest wants to be on the outside, with a frame usually on the inside. Though a drawer is a box but would have them inside as that's usually the most seen part.
Can get confusing so best to keep it simple and consistent e.g. all the joined up boards have face and edge marks on the out/front facing side. The boards are numbered on their bottom edges of face from left to right. Then each one has its place and orientation made absolutely specific. Sounds fussy but if you don't have a system things can go wrong - e.g. two left hand pieces and no right hand etc. :roll:
Er.. I'll just check my photos to see if I've got it right!
Ooops no I've numbered them from front best edge (which will be front of the finished thing) to back. That's lucky it makes even more sense!
 
AndyT":2osv31jh said:
..... I found that it really helped if I was using the same tool in the same way, over and over again.
Yes definitely, though it may take a bit of swapping and changing before you find which tool. That's what's good about a long run - you get the chance to improve so the last ones are coming out faster and better (in theory :roll: )
So although your idea of the narrow chisel is fascinating I reckon just holding one tool with no swapping over wins. My money's on a half inch firmer with the corners ground off.
I'm on to the 1/2" firmer - just dug one out of a box but I'll persist with the little mortice chisel as well. It seems very fast.
 
Jacob, nothing constructive to add I'm afraid, just wanted to say it's really good to see a WIP from you which I'm following with interest - I've always learned a lot from your other posts, especially - say it quietly - in regard to sharpening!

Tara a bit,

SOTA
 
Thanks for that SOTA!
Sharpening is key with a lot of chopping. A quick rub on the oil stone every time you want a little rest or feel things are flagging a bit! Every ten minutes at least.
Chisels - have gone around the houses and hit on the obvious: a blind DT housing is an open ended mortice. Hence best done with a mortice chisel! Why didn't I think of that sooner? :roll:
That's what I'll be doing with the next lot (drawers). 1/2"
It's also comfortable and convenient - long chisel, big mallet, working at bench height, deep cut gauge lines for visibility, bright light on a stand, standing up relaxed nice and straight etc etc.
PS why mortice chisel didn't occur to me is because I had a vague feeling that eventually the waste would come out as a block, once you've got the technique right. No chance - it has to be chopped to bits.
 
I've googled for DT info. All very variable. Most common is very fussy with all the kit in the world and other b...x. Not for me.
There must have been a well established familiar procedure, they couldn't all have faffed about with little bevel gauges and flattening waterstones!
Best was https://www.core77.com/posts/70642/How- ... ls-By-Hand
but still no mention of production line chopping out, which is the critical thing in terms of speed and productivity.
Am off on other project will be back sometime later for my next steps.
 

Latest posts

Back
Top