Can you make laminated curves from hardwood?

UKworkshop.co.uk

Help Support UKworkshop.co.uk:

This site may earn a commission from merchant affiliate links, including eBay, Amazon, and others.

Dandan

Established Member
Joined
9 Dec 2015
Messages
186
Reaction score
94
Location
Southampton
Hi all,
This might seem a stupid question to those of you with some level of experience (i.e. not me) but is it possible to make a laminated curve using hardwood? All I can recall seeing is people using softwood, so I wasn't sure.
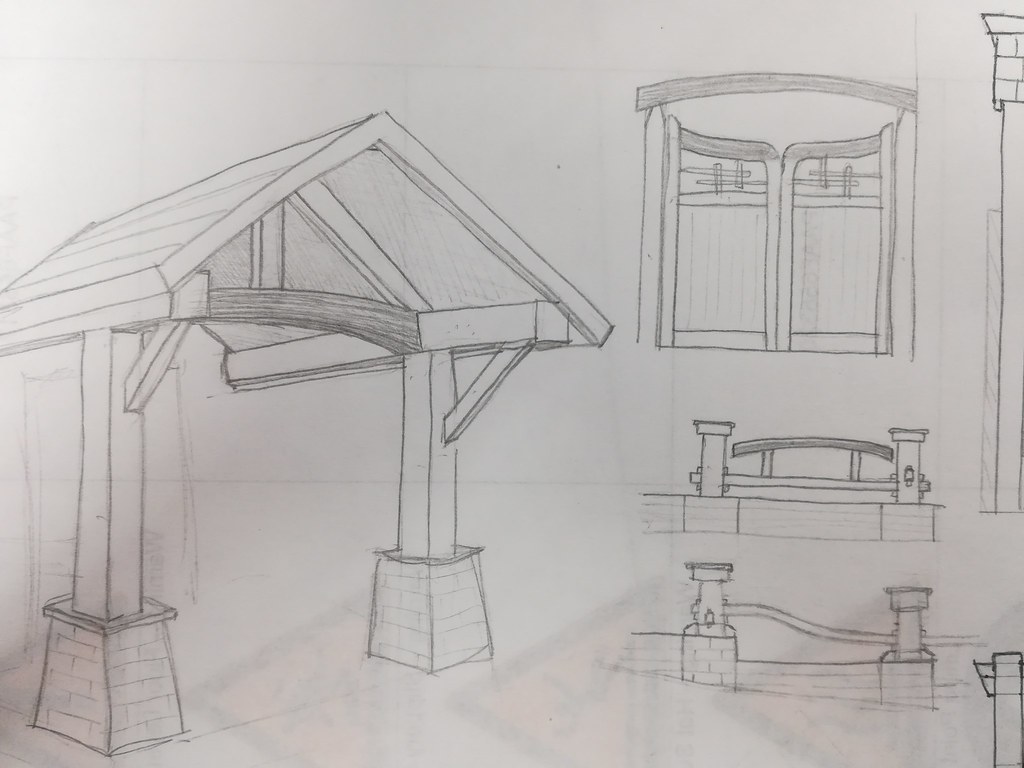
I'm making a low front wall for my garden with a brick base, timber uprights and timber cross beams and I want one of the beams to be gently curved.
If I was to make it from Idigbo (which my local timber place can supply) would it be possible? The other option is to glue up a load of pieces and cut the curves (I want 5 curved pieces so I could stack them up to minimise wastage) but I don't think the grain direction would look half as good.
I've not used a lot of hardwood, I used Sapele for my workshop thresholds and it always gave me the impression of being rather rigid and brittle, like it wouldn't take to bending particularly well, would Idigbo be better? Is it all in the thickness of the laminated pieces?

Suggestions of alternative woods or alternative methods would be appreciated!
 
Yes, you can make laminated hardwood curves for outdoor use. The most widely used glue for all types of lamination work is a UF adhesive (such as Cascamite), so that's already ideal for exterior applications.

I've never used Idigbo for laminating, but I've used plenty of Oak which laminates well and is a good exterior option. I wouldn't anticipate any problems with Idigbo, but a small scale test would soon clarify things.
 
Thanks Custard, that's exactly the kind of answer I was hoping for. Any suggestions on thickness of strips? I only want to put something like a 3000mm radius curve on a piece about 1500mm long and 50mm thick, do you think I could get away with 4 x 12.5mm strips? or even 3 x 17mm, something like that?
 
I'm not saying it's impossible, but they're extremely thick lamina, and so you should expect massive spring back and you'd need some serious cramps.

On precision furniture components I often go down to 1.5mm thick, and the resulting spring back is almost zero. I've occasionally done laminated boat components as a subbie, and the specs called for lamina at about 3-4mm thick. That's as thick as I've ever gone.

I've heard of people laminating components that were pre bent with steam, but it's not something I've ever done. To be honest, a 3m radius on a component like you're talking about, well my first stop might be a bandsaw!
 
Ah ok, that's a lot of strips! Some experimentation may be required, it is a very slight curve and I'm happy to work in a degree of spring back, the final dimension is not crucial.
 
Ermmm ... wouldn't it be easier to cut your curves in the solid (using the cheapest hardwood which would fit the bill, and whatever grain orientation was least wasteful) and then laminate a 4mm slice of your show wood on the front? On a radius that large I'd expect a 4mm slice to bend quite nicely (and if not, 3mm will I'm sure).
 
profchris":1zs0wpks said:
Ermmm ... wouldn't it be easier to cut your curves in the solid (using the cheapest hardwood which would fit the bill, and whatever grain orientation was least wasteful) and then laminate a 4mm slice of your show wood on the front? On a radius that large I'd expect a 4mm slice to bend quite nicely (and if not, 3mm will I'm sure).

For some reason I thought this beam had bricks on top of it, so there would only be one show face. Looking back that might not be so. But if the top surface is visible, I suspect that cutting a beam to shape and laminating a slice on the front face (and back if necessary) would still look better on top and bottom than the lamination glue lines.

Certainly far less work!
 
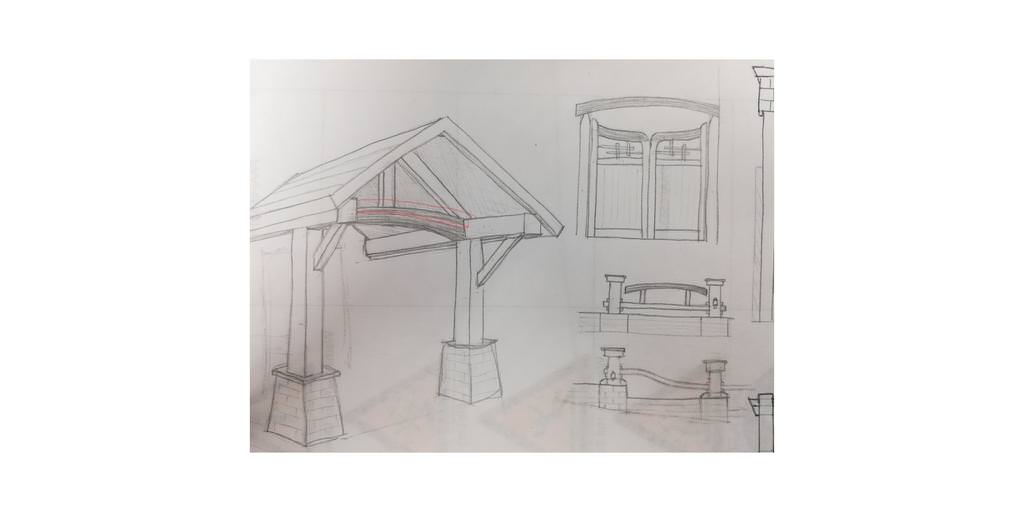
If this helps, the curved piece i'm talking about is the small sketch on the right in the middle, its a purely decorative part visible from almost all sides:


The plan would be to build the gates and porch with the same radius curved piece eventually too.
 
I have found that the limitation on the thickness of the strips is down to what won’t split when bent. Decent clamps can normally pull the curve but the outside face of the stuff often splits if the curve is too much for the thickness of the stuff.

I would laminate rather than cut from solid as this will ensure it’s stable afterwards and won’t twist and reduce the likelihood of it splitting / cracking over time. The only down side may be that you will see the laminations. However I would consider making this a feature by perhaps inserting a contrasting coloured strip(s) into the stack.

Lots of glue and a really robust form along with lots of clamps.

An electric plane is really useful for cleaning up the surfaces at the end.
 
A feature strip is a good idea, although could that then introduce issues with variable expansion from different timbers? I guess not if it's thin enough...

I did a bit of CAD and I think a 4000mm radius or even a 5000mm radius curve will work, which should make the bending easier.
Interestingly I watched a Matthias Wandel video yesterday in which he mentioned that if you want to bend a piece into a simple radius, your form only technically needs to consist of two clamping points as the wood will naturally follow a curve between the two points. Lots of clamps along the length of course but potentially no need to make a complex form...
 
I wouldn't hesitate. I'd cut that from the solid, without question.

As a minor aside, the carved tie beam in your lych gate/ porch would traditionally have been raised from where you have drawn it, fitting as a dovetail half-lap into the top of the longitudinal beams. This way you avoid having meeting mortises and very little remaining timber.
 
MikeG.":2drokz9k said:
I wouldn't hesitate. I'd cut that from the solid, without question.

As a minor aside, the carved tie beam in your lych gate/ porch would traditionally have been raised from where you have drawn it, fitting as a dovetail half-lap into the top of the longitudinal beams. This way you avoid having meeting mortises and very little remaining timber.


I was just about to suggest solid as well before reading you comment. :)
 
I suppose straight grain on such a shallow curve isn't going to look too odd (If it was cut from solid).
To be honest I partly want to do the laminated version simply because i'd like to try it, maybe I could cut this one and try laminating on something less expensive...
 
MikeG.":36in414w said:
As a minor aside, the carved tie beam in your lych gate/ porch would traditionally have been raised from where you have drawn it, fitting as a dovetail half-lap into the top of the longitudinal beams. This way you avoid having meeting mortises and very little remaining timber.

Off topic I know, but I can see the issue you mention with it as it is drawn, but I don't quite understand your solution, any chance of a quick sketch...?
 
Dandan":22gih9my said:
I watched a Matthias Wandel video yesterday in which he mentioned that if you want to bend a piece into a simple radius, your form only technically needs to consist of two clamping points as the wood will naturally follow a curve between the two points. Lots of clamps along the length of course but potentially no need to make a complex form...

That's kind of half correct.

A good way of thinking about curves, at least from a furniture making perspective, is to break curved work down into two parts. There's curved work where the curve is purely decorative, then there's curved work where the curve forms part of mating or jointing surface.

An example of decorative curves might be components like these, stretchers for a pair of side tables,
Side-Table-Tiger-Oak.jpg


Where as a jointing curve can be seen here, the solid timber curved lipping for the front edge of this desk needs to mate precisely with the curved and veneered carcase,
Pear-Desk-Construction-07.jpg


For decorative curves I'd agree with Matthias, bending a wooden lath is close enough, visually it'll deliver an acceptable curve and that's all the accuracy you need.

But for jointing curves that technique is no longer good enough. You find that the radius is ever so slightly tighter at the two points where they're held, plus because wood isn't homogenous throughout the lath there'll be small areas where it's stiffer than in other areas. So for jointing curves you're faced with really quite complex and time consuming jig making process. I won't bore you with the details, but just making the necessary jigs for long, precisely curved joints like that can take me two or three days.

For marking out decorative curves I just use this simple device, a long thin section of straight grained wood that's strung a bit like a bow,
Curve-Drawing-01.jpg


By incorporating a simple tensioning device, similar to the guy rope tensioner on a tent, you can adjust the curve to whatever radius you want,
Curve-Drawing-02.jpg


Incidentally, I'm with MikeG on this, I'd mark out the curve with something like the above "bow", and then bandsaw it to shape. It would be nice to select your timber so the grain echoes the curved shape, and a few minutes searching in a timber yard would get you exactly the piece you need.

Going back to Prof Chris's post, the technique he describes is called "cladding", or at least that's what it's called in the workshops I've worked in. It's typically used where you have, say, some beautiful boards of timber and you're making a table. However, your boards are only 25mm thick, so not thick enough for the legs. What you'd do is make up the legs from another timber, and then cut really thick veneers from your 25mm "show" boards at about 3-5mm thick. You'd then "clad" the legs with this and, hey presto, you've got a completely uniform table all made from the same gorgeous wood. It's simple enough with straight or tapered legs, but I've also done it on curved "sabre" legs. The problem with cladding curves though is in cramping it all up to get a really good glue line, the best solution by far is a vacuum press, otherwise you've got to make some pretty accurate cauls which would add several hours to the build time.
 

Attachments

  • Side-Table-Tiger-Oak.jpg
    Side-Table-Tiger-Oak.jpg
    107.2 KB
  • Pear-Desk-Construction-07.jpg
    Pear-Desk-Construction-07.jpg
    77.9 KB
  • Curve-Drawing-01.jpg
    Curve-Drawing-01.jpg
    82.6 KB
  • Curve-Drawing-02.jpg
    Curve-Drawing-02.jpg
    80.3 KB
There is no reason why you cant laminate quite thick pieces. If you look at large glulam beams they generally use 33mm thick timber. Regarding springback it is the number of laminations that is important not the thickness of each laminate. There are a number of formulas fro calculating spring back but a simple approximation is that springback is related to the square of teh number of laminates. Looking at the curve you are producing which based on yopur figures is about 50mm then using 5 x 10mm laminate will give less than 5mm springback which can be accomodated by making the former slightly more curved. Question is it worth the effort to cut and surface 5 laminates and make a former or just use a 100mm deep board and cut the curve on teh jigsaw. I would go for the solid
 
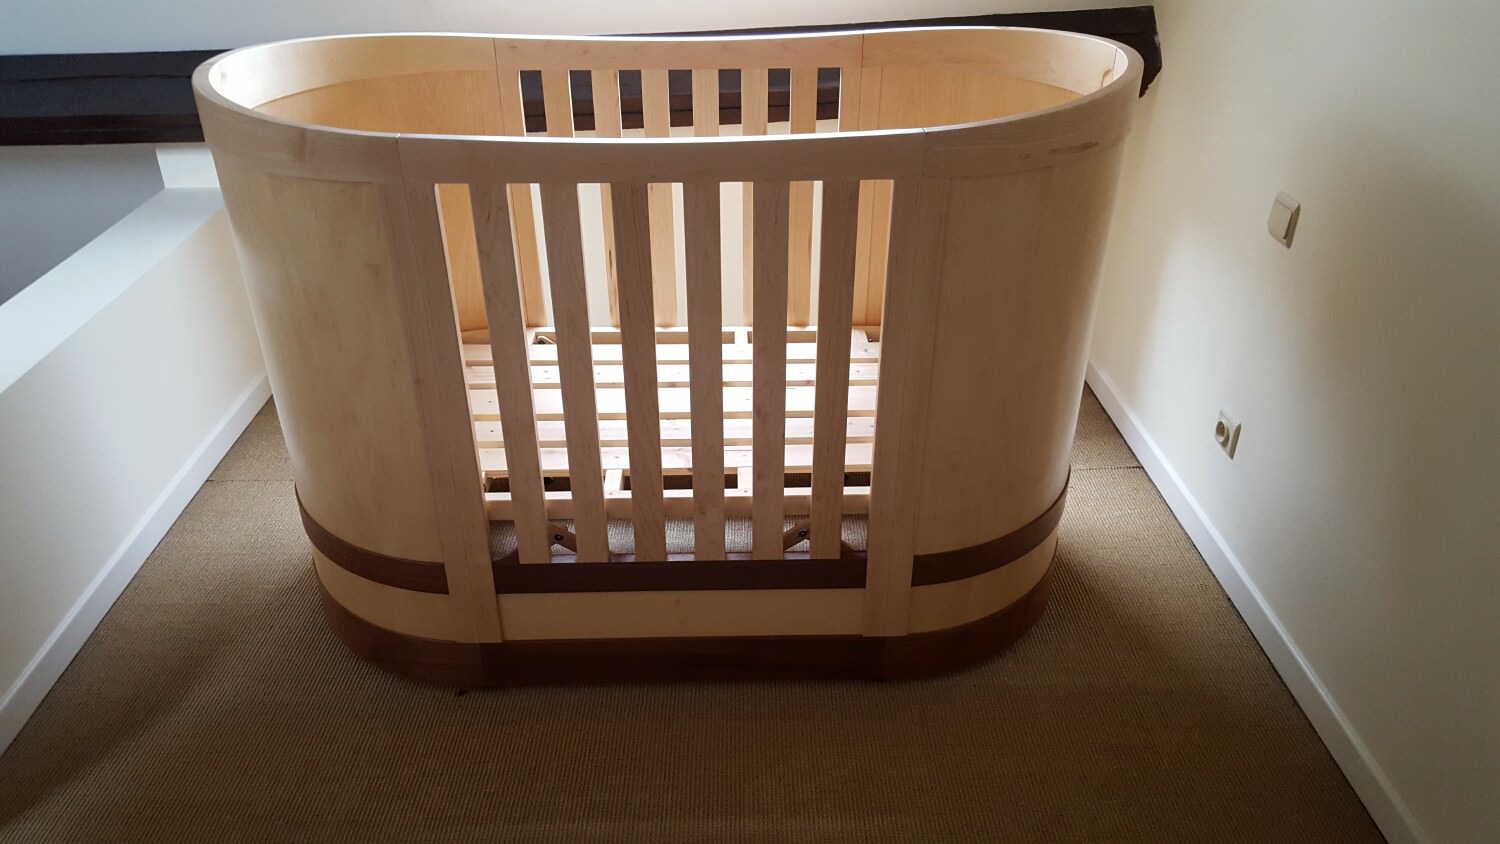
I used bent laminations on one project and it worked out quite well.

I started with a thick board and cut it into 4mm strips, making sure to note the order of each of the strips. I did lightly sand the strips before the glue-up, but I think I ended up using 9 strips to make the rails on the crib I was building. Wood was maple and walnut, glue was Cascamite, and I used a positive and negative form when I did the glue-up.

No spring-back, and aside from the one part of the top rail where I messed up the order of the wood strips when doing the glue-up, you can't really see the seams between the strips. It looks like it's just a single piece of wood that's been bent.

KLMeE9U.jpg
 
Back
Top