Derek Cohen (Perth Oz)
Established Member
After completing furniture building deadlines, I enjoy taking some time to clean the workshop, clean the machines, and build a tool or two. I have recently completed two bedside tables for my son and daughter-in-law, sent them a new base for a chest of drawers (which had been damaged in move from Sydney to Canberra), and then built a new bed for my wife and myself. The latter is below ...
Old bed (solid Jarrah, built 25 years ago) ...
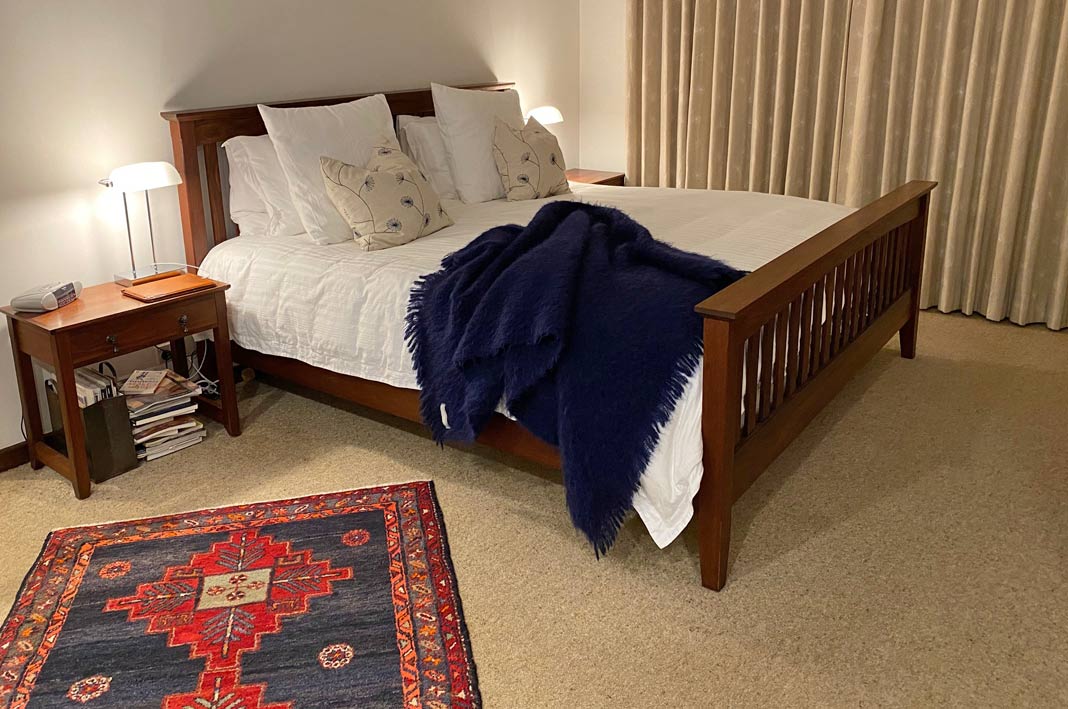
New bed ..

Curved head board ...
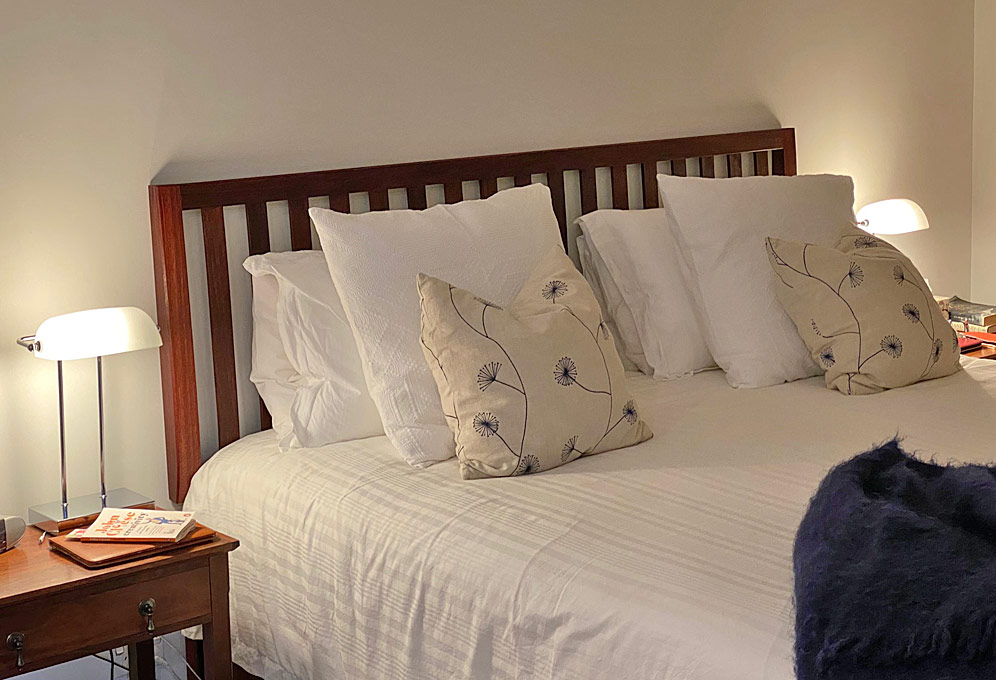
Anyway, I hope some of the following will be interesting and, better still, useful for yourself.
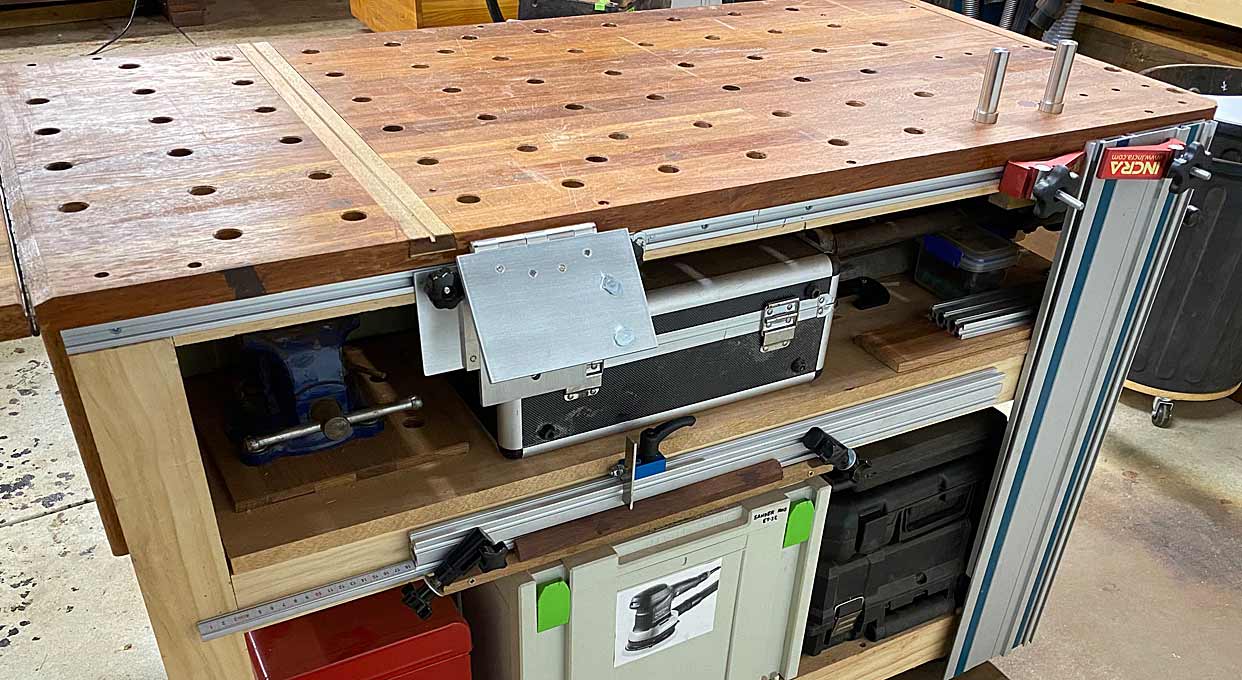
I had purchased a never-used 20 year old Festool tracksaw, and decided to build a MFT to find out what all the fuss is about. I thought that, sawing aside, the MFT would work well for holding small parts for routing and sanding, as well as an assembly table and outfeed for the K3 slider and A3-31 jointer. Details on routing the holes here: http://www.inthewoodshop.com/Powered Tools and Machinery/BuildingMFT1.html
The MFT has a flip up/down extension, as well as an old Record vice. The top is a 25mm thick panel ...
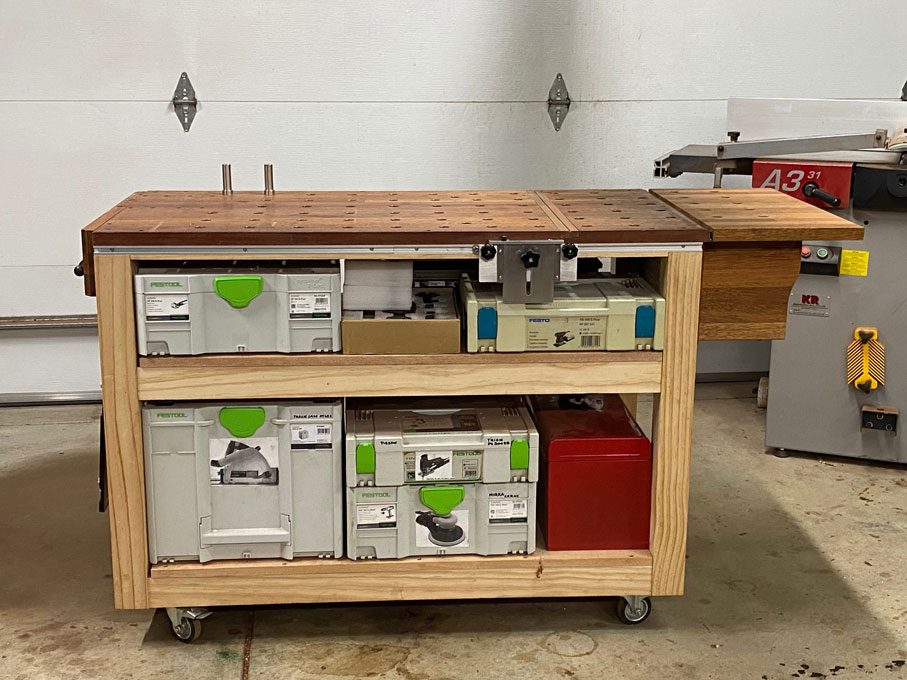
Owing to the exorbitant cost of MFT hinges for tracks in Oz, I decided to build my own in aluminium ...
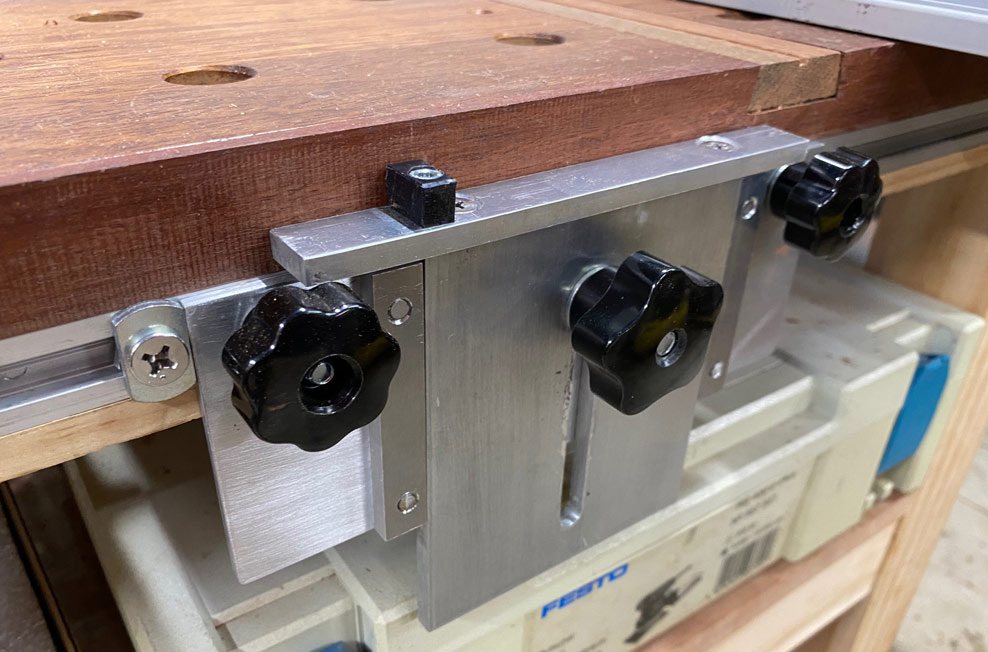
And fence from a 6020 extrusion ...
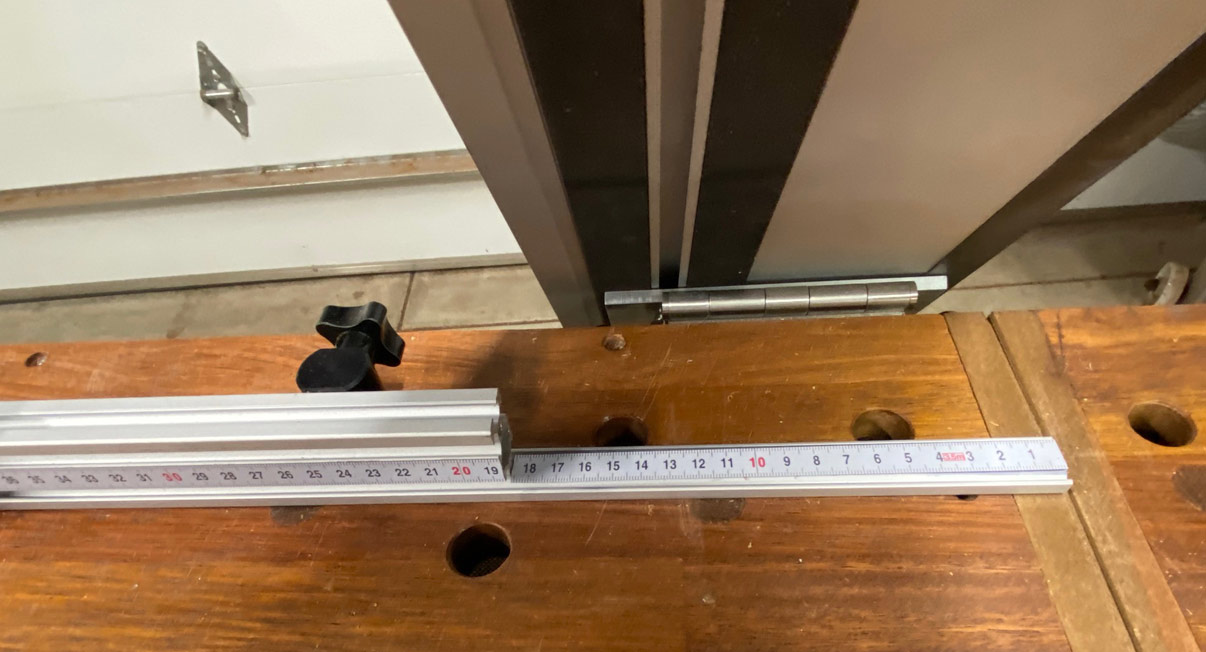
Details for all are here: New MFT rail hinge and fence - Mk 2
I fine-tuned the parallel guide for my Hammer K3 slider. This involved swapping out the connecting hex bolts for knobs, and adding a stop on the fence face. The knobs allow the parallel guide to be moved easily and quickly along the slider for different lengths of boards ...
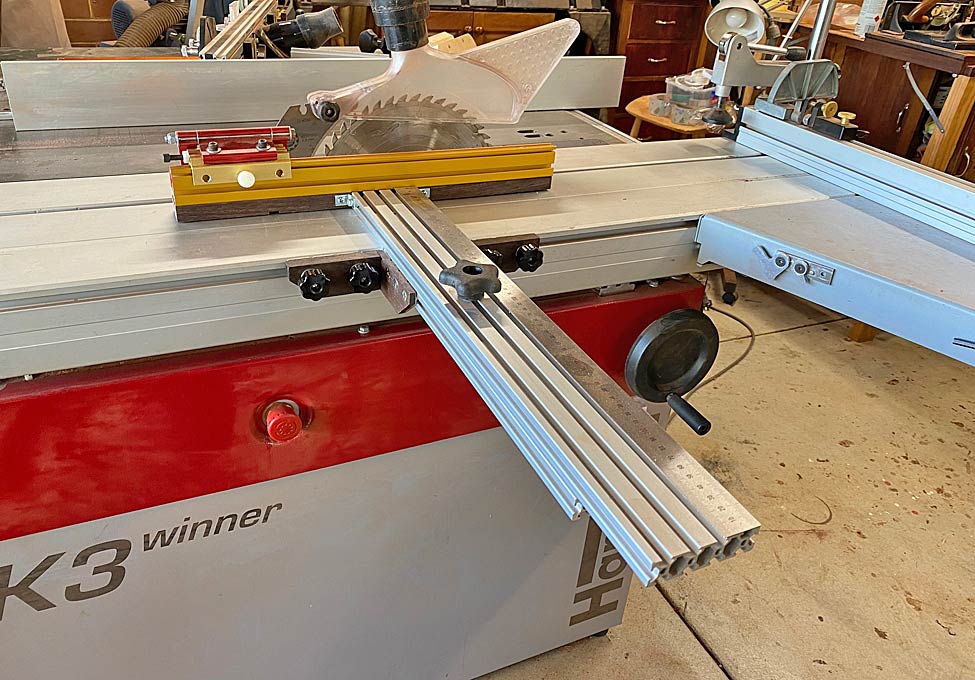
The parallel guide and cross cut stops are calibrated to be equal ...
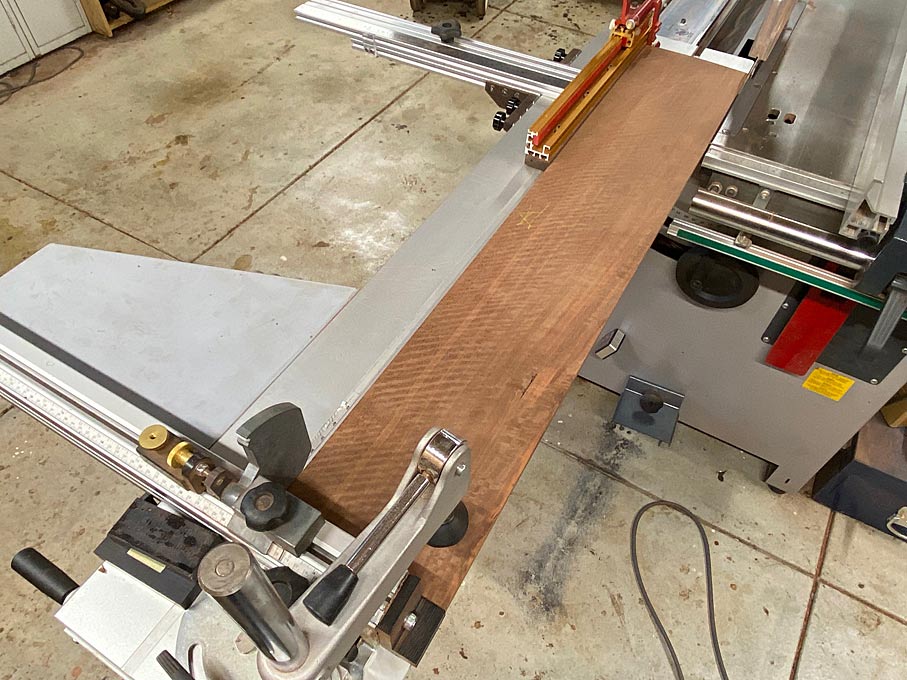
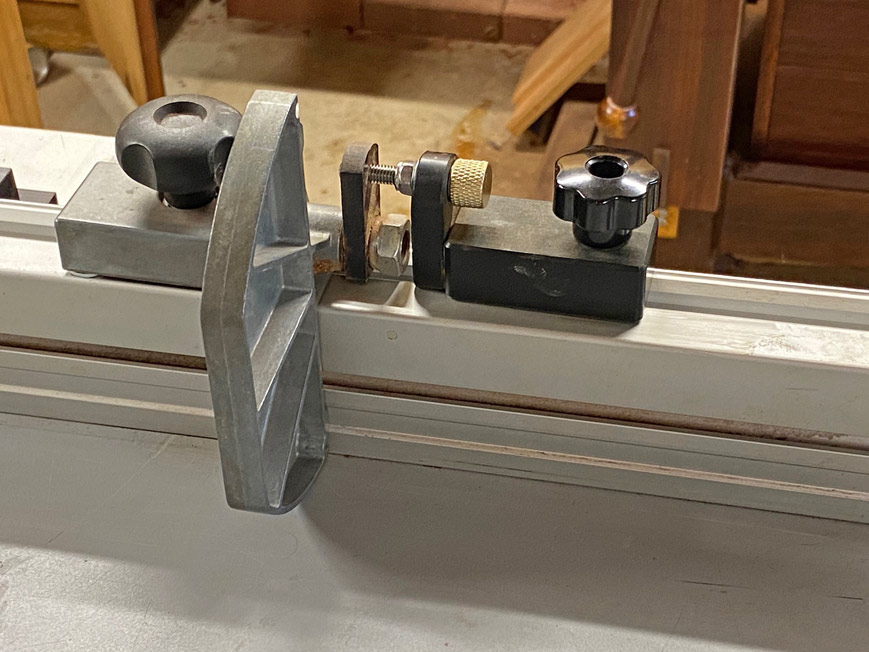
The fine adjuster for the crosscut fence received new knobs ..
Two years ago I completed a new router table and fence in the outfeed of the K3 ...
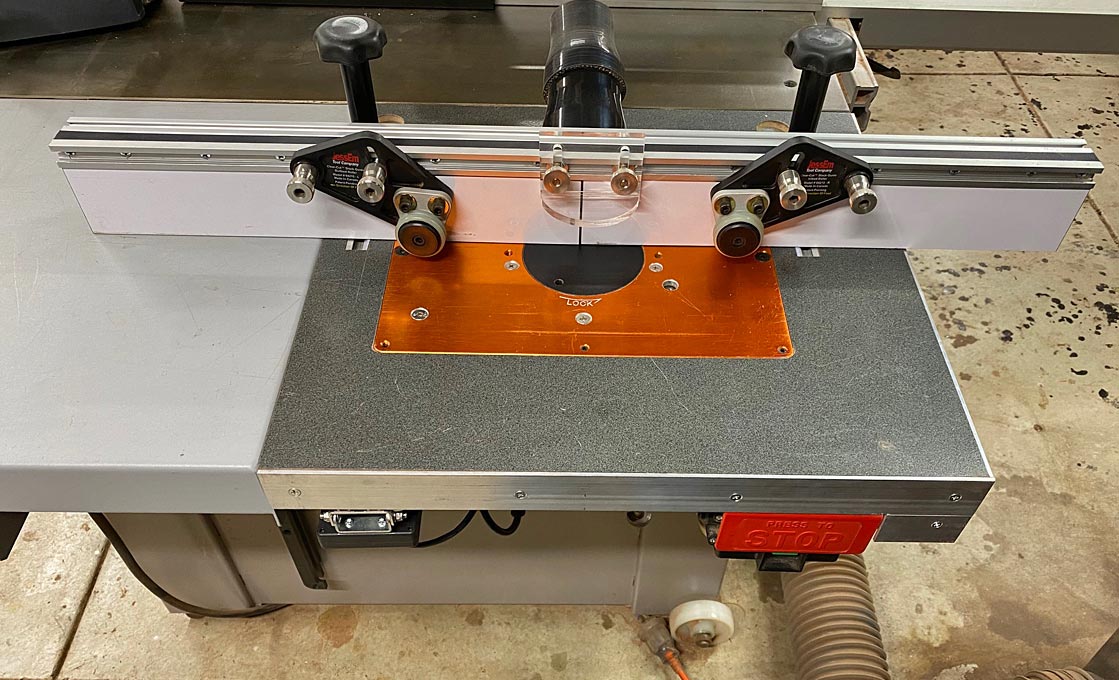
For a while I've been meaning to change the way the fence is adjusted. Here it is running on a track, and the tall knobs clamp it down. But the downside of this system is that there is no micro-adjust.
Today I got around to modifying the router table fence by connecting it to the rip fence ...
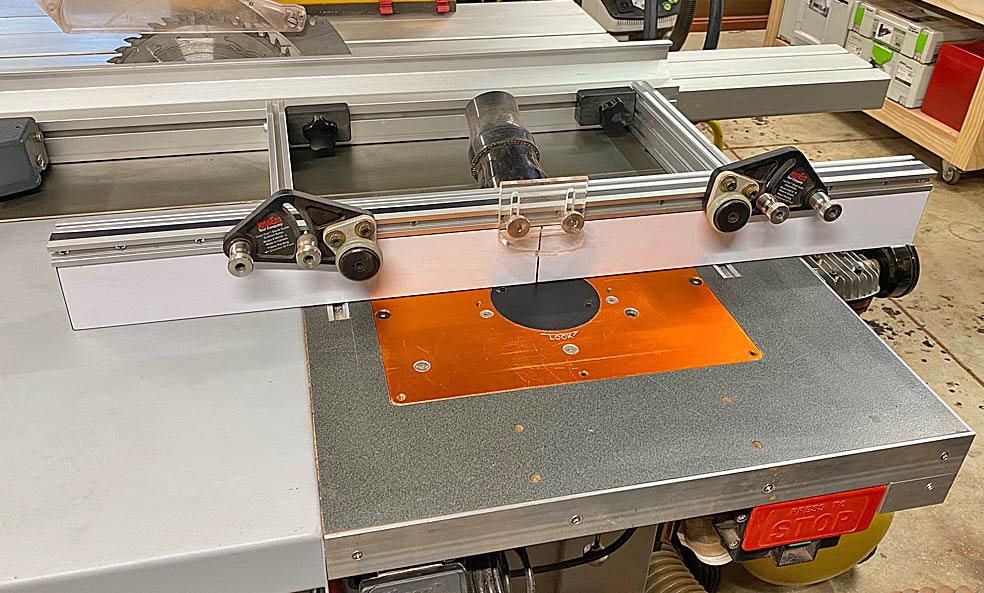
The router table fence was built out of 8040 extrusion, and the side supports are 8020 extrusion attached with brackets ...

The side supports are connected to the K3 rip fence track. This makes it a simple matter to loosen and remove until needed ...
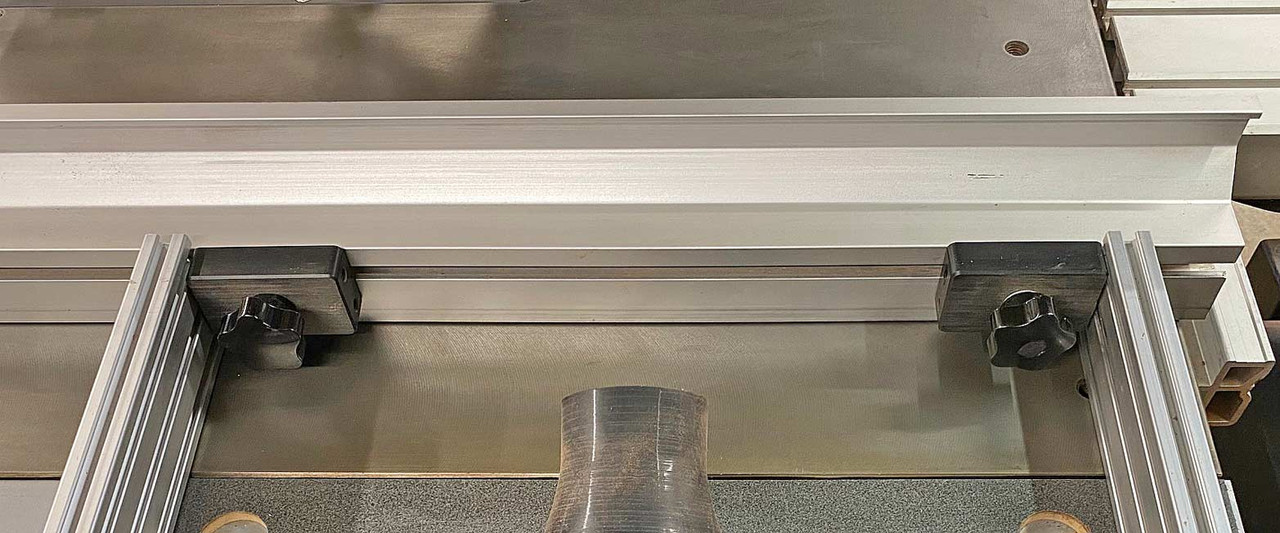
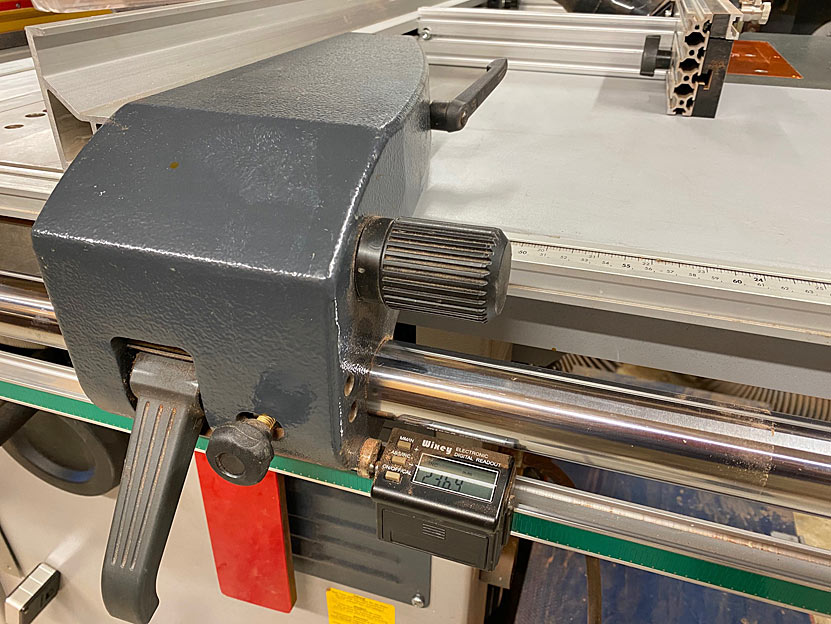
The fence is not only linked to the rip fence, but also adjusted by its micro adjuster. Not only that, but there is a Wixey digital gauge, and this both aids in monitoring the amount of adjustment, as well as marking a position and returning to it ...
Lastly ...
Sooner or later your blade adjuster on your K3 will become stiff and require two hands to turn the wheel. It may take a few years, but it will occur, and then you will need to lube the mechanism.
I know Chris Parks has a modification he has made, but I barely knew where the mechanism was, let alone had the courage to do this.
About a year ago I called in Felder to sort it out, as the local guys are good folk and very responsive. They came out, but I was not that happy with the result. The adjuster felt stiffer still than when original. And it cost me a couple of hundred bucks. The adjuster was so stiff in recent weeks, that even two hands was a struggle.
This weekend I decided to do it myself. The result was very successful, and I wanted to pass on what I did.
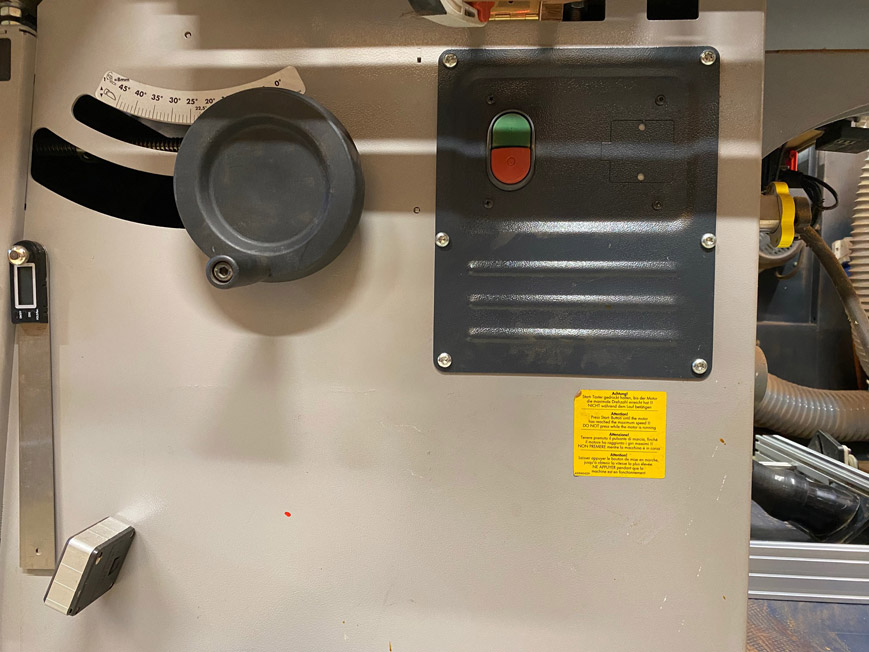
First you have to open up access to the winder. Remove the switch panel ...
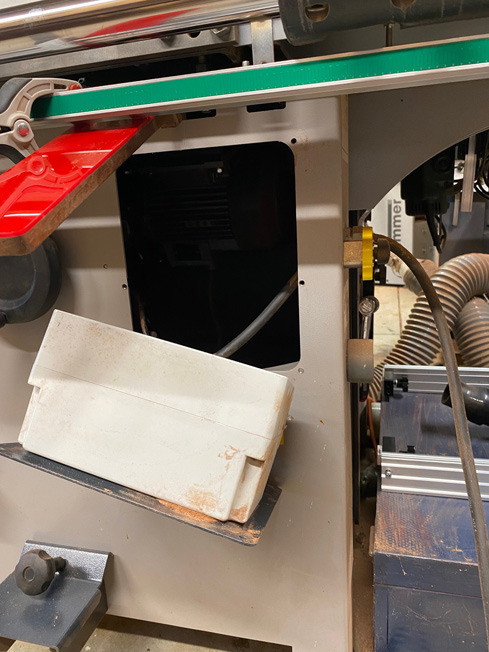
Slide away the box ...
The thread with the blade lowered all the way ...
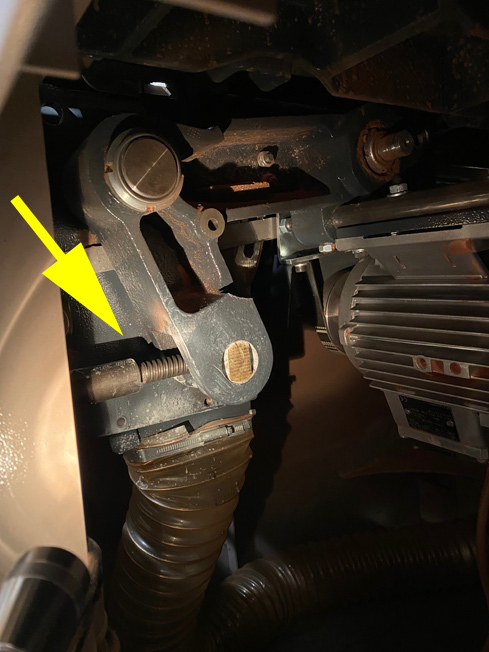
The thread with the blade fully up ...
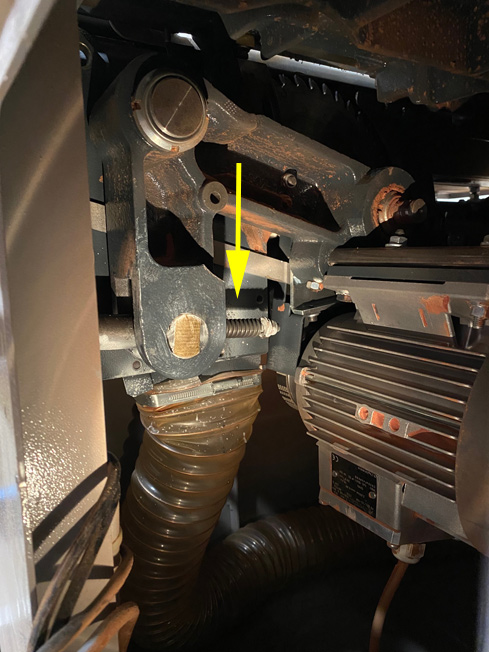
After cleaning all the dust inside the cabinet, and then blowing out any remaining dust, a silicon spray was directed at the thread. This was repeated several times with the winder in-and-out. It made little if any difference.
When Felder were here a year ago, the technician used lithium grease. So I sprayed this on, again repeatedly, and wound the handle in-and-out. A little imrovement, but not much better than Felder achieved.
Finally I added a bunch of graphite to the thread, and wound it in-and-out. This made a big difference. And the more I wound the wheel, the better it got. I am not sure if the graphite helped clear any remaining gunk, or whether it was the lubricant needed. I returned to the wheel later, and it was now winding up (down is always easy) very comfortably with one hand.
Those who have done this might chip in her with anthing else to be done or tried.
I did add some graphite to the slider, and this really smoothed it.
Regards from Perth
Derek
Old bed (solid Jarrah, built 25 years ago) ...

New bed ..

Curved head board ...

Anyway, I hope some of the following will be interesting and, better still, useful for yourself.
I had purchased a never-used 20 year old Festool tracksaw, and decided to build a MFT to find out what all the fuss is about. I thought that, sawing aside, the MFT would work well for holding small parts for routing and sanding, as well as an assembly table and outfeed for the K3 slider and A3-31 jointer. Details on routing the holes here: http://www.inthewoodshop.com/Powered Tools and Machinery/BuildingMFT1.html
The MFT has a flip up/down extension, as well as an old Record vice. The top is a 25mm thick panel ...

Owing to the exorbitant cost of MFT hinges for tracks in Oz, I decided to build my own in aluminium ...


And fence from a 6020 extrusion ...

Details for all are here: New MFT rail hinge and fence - Mk 2
I fine-tuned the parallel guide for my Hammer K3 slider. This involved swapping out the connecting hex bolts for knobs, and adding a stop on the fence face. The knobs allow the parallel guide to be moved easily and quickly along the slider for different lengths of boards ...

The parallel guide and cross cut stops are calibrated to be equal ...

The fine adjuster for the crosscut fence received new knobs ..

Two years ago I completed a new router table and fence in the outfeed of the K3 ...

For a while I've been meaning to change the way the fence is adjusted. Here it is running on a track, and the tall knobs clamp it down. But the downside of this system is that there is no micro-adjust.
Today I got around to modifying the router table fence by connecting it to the rip fence ...

The router table fence was built out of 8040 extrusion, and the side supports are 8020 extrusion attached with brackets ...

The side supports are connected to the K3 rip fence track. This makes it a simple matter to loosen and remove until needed ...

The fence is not only linked to the rip fence, but also adjusted by its micro adjuster. Not only that, but there is a Wixey digital gauge, and this both aids in monitoring the amount of adjustment, as well as marking a position and returning to it ...

Lastly ...
Sooner or later your blade adjuster on your K3 will become stiff and require two hands to turn the wheel. It may take a few years, but it will occur, and then you will need to lube the mechanism.
I know Chris Parks has a modification he has made, but I barely knew where the mechanism was, let alone had the courage to do this.
About a year ago I called in Felder to sort it out, as the local guys are good folk and very responsive. They came out, but I was not that happy with the result. The adjuster felt stiffer still than when original. And it cost me a couple of hundred bucks. The adjuster was so stiff in recent weeks, that even two hands was a struggle.
This weekend I decided to do it myself. The result was very successful, and I wanted to pass on what I did.
First you have to open up access to the winder. Remove the switch panel ...

Slide away the box ...

The thread with the blade lowered all the way ...

The thread with the blade fully up ...

After cleaning all the dust inside the cabinet, and then blowing out any remaining dust, a silicon spray was directed at the thread. This was repeated several times with the winder in-and-out. It made little if any difference.
When Felder were here a year ago, the technician used lithium grease. So I sprayed this on, again repeatedly, and wound the handle in-and-out. A little imrovement, but not much better than Felder achieved.
Finally I added a bunch of graphite to the thread, and wound it in-and-out. This made a big difference. And the more I wound the wheel, the better it got. I am not sure if the graphite helped clear any remaining gunk, or whether it was the lubricant needed. I returned to the wheel later, and it was now winding up (down is always easy) very comfortably with one hand.
Those who have done this might chip in her with anthing else to be done or tried.
I did add some graphite to the slider, and this really smoothed it.
Regards from Perth
Derek


