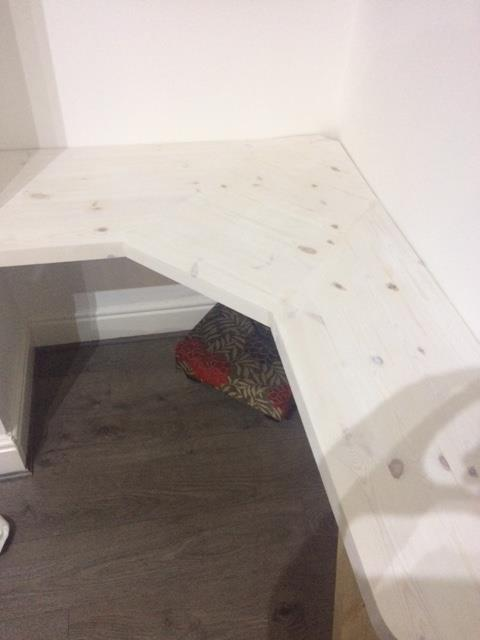
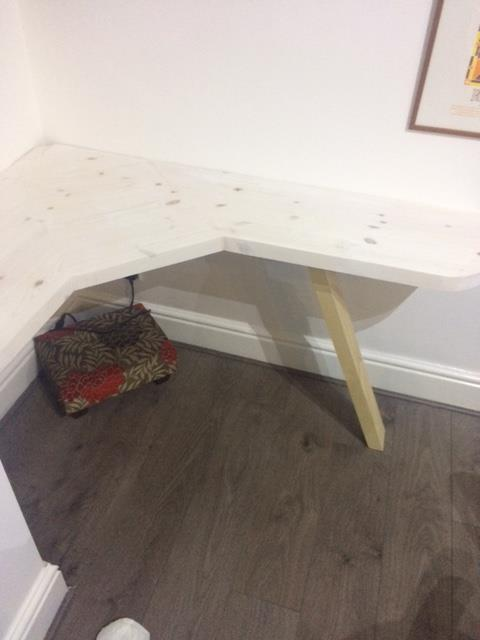
My wife needs a desk in our backroom and a corner style feels like it'd fit the area best.
She initially looked at a couple on Wayfair she really liked but with it going into a bit of an alcove, i thought it would look a little daft since they wouldn't fit exactly. So i convinced her i could make something which would be much better (and cheaper), she groaned and highlighted my numerous other projects which are ongoing and unfinished and questioned when she'd actually get something. Ignoring her concerns i powered on.
I've drawn up an excellent sketch in MS Paint.
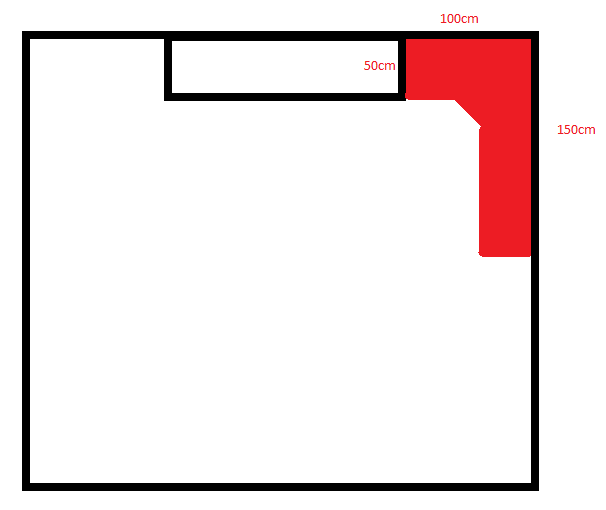
The obvious solution would be to get a worktop piece and cut it into 2 lengths, however i don't have a kitchen router jig to get the join right and i don't want it to look crap.
I then thought about a 900mm deep worktop which would allow me to do the whole top in one piece. This would work but i don't really want to use edging strips so i looked at solid wood worktops. I can get a 2m long oak breakfast bar for about £150, however i'm not sure how my tools would fair cutting out the required piece. Along with the amount of waste that would be created. And the cost of my messing up would be high.
This brings me back to the idea i had above. Getting lengths of 44x44 square (or 44x32) redwood, cutting them into various lengths and then fix them all together into the shape required. I worked out i'd need about 14m in total so it'd only cost about £30 and if it looked rubbish then it's not a lot to lose and it's spare wood for other projects.
I have a few concerns though which i hope you all can help me with
1 - Finishing, oak is a nice hardwood and would only need a few coats of oil to make it look great. Can i get a decent finish with redwood?
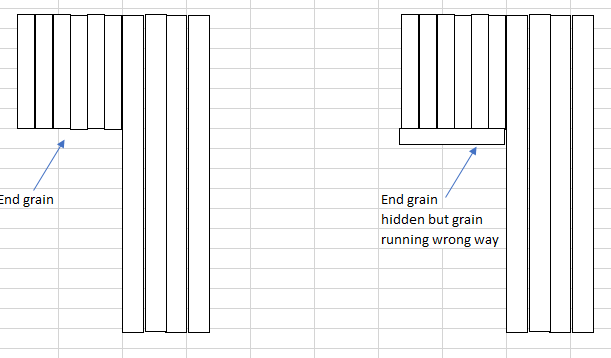
2 - Aesthetically speaking and practically, it would make sense to have all the wood run in the same direction, this means that there's a lot of endgrain on show. Would you leave that, or run a length against this to cover it up like this?
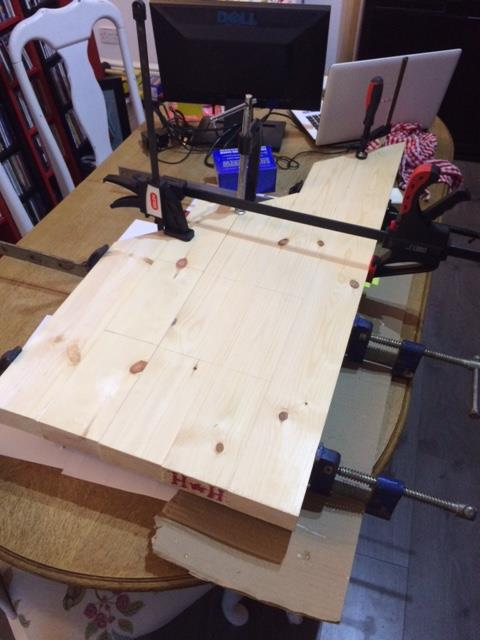
3 - Finally, whats the best way to go about clamping all this up? I've only got 2 sash clamps which are 3ft so i know i'll need to buy more. Should i juset get 3 5ft clamps and mount on some MDF board?
She initially looked at a couple on Wayfair she really liked but with it going into a bit of an alcove, i thought it would look a little daft since they wouldn't fit exactly. So i convinced her i could make something which would be much better (and cheaper), she groaned and highlighted my numerous other projects which are ongoing and unfinished and questioned when she'd actually get something. Ignoring her concerns i powered on.
I've drawn up an excellent sketch in MS Paint.

The obvious solution would be to get a worktop piece and cut it into 2 lengths, however i don't have a kitchen router jig to get the join right and i don't want it to look crap.
I then thought about a 900mm deep worktop which would allow me to do the whole top in one piece. This would work but i don't really want to use edging strips so i looked at solid wood worktops. I can get a 2m long oak breakfast bar for about £150, however i'm not sure how my tools would fair cutting out the required piece. Along with the amount of waste that would be created. And the cost of my messing up would be high.
This brings me back to the idea i had above. Getting lengths of 44x44 square (or 44x32) redwood, cutting them into various lengths and then fix them all together into the shape required. I worked out i'd need about 14m in total so it'd only cost about £30 and if it looked rubbish then it's not a lot to lose and it's spare wood for other projects.
I have a few concerns though which i hope you all can help me with
1 - Finishing, oak is a nice hardwood and would only need a few coats of oil to make it look great. Can i get a decent finish with redwood?
2 - Aesthetically speaking and practically, it would make sense to have all the wood run in the same direction, this means that there's a lot of endgrain on show. Would you leave that, or run a length against this to cover it up like this?

3 - Finally, whats the best way to go about clamping all this up? I've only got 2 sash clamps which are 3ft so i know i'll need to buy more. Should i juset get 3 5ft clamps and mount on some MDF board?


