CHJ
Established Member
__________
__________My first Acrylic on a wood lathe.__________click on image for larger view
_________
Having scattered some acrylic blank samples * amongst turners of pens and other objet d’art that might use them at the Brummie bash I thought it only fair to have a go myself and see what problems, if any, I encountered.
Having read comments about avoiding heat whilst drilling, turning and finishing I proceeded with this very much in mind.
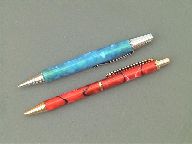
On the drilling front I tackled the Blue blank first, this being a longer single blank kit to see how hot the drill got.
Despite the drill being freshly sharpened it did get very hot even with constant clearing and although I had no indication of melt it was completed at a very leisurely penetration rate compared to a similar piece of hardwood.
Glue-ups were done using thick CA with no problems as far as inserting tube due to long working time with this no moisture substrate.
Trimming the ends was easy, almost within hand tool alone ease it cut so freely.
Removing the corners on the Lathe was accomplished with a freshly sharpened 3/8 spindle gouge (lathe set and held at 2000rpm throughout)
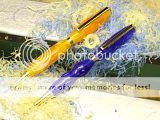
Turning to size was done with an oval skew, main problem being the 5-10 metre long threads of acrylic that wrapped around the mandrel and were the subject of constant stopping to clear.
I experienced no heat problems with the turning but to my surprise did have to stop and sharpen the HSS skew half way through both projects.
Sanding was done with Abranet, thought being any excessive heat buildup would be readily apparent through the mesh, again no heat problems.
Finishing was done with Chestnut Burnishing Cream, having read of using metal polish,wirewool etc. elsewhere I was pleased to see burnishing cream recommended on the sample guide label as this was all that was to hand and to my surprise was more than abrasive enough to satisfy my requirements.
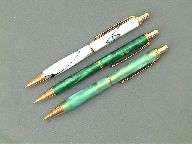
Several of the Sample Acrylics warn of translucency if turned thin, and indeed if you know what you are looking for, any scratches or blemishes on the brass tubes can be seen even at greater than 2mm thickness in the paler sections of the plastic.
A disappointing thing I found with the red sample I turned, is that the uneven coverage/gap filling of the CA glue is visible though the acrylic, in fairness, to those not knowing what to expect the effect could be mistaken for a function of the blank patterning.
I will have to investigate alternate glueing/bonding methods to overcome this in future even if it is only just for my own satisfaction.
Final thoughts; if I'm asked for pretty colours I don't mind turning them, actual turning took me longer than the equivalent wood though, balanced out by the fact that finishing is much quicker than wood with no worries about durability of the finish.
I await with interest the experiences of other recipients of the samples and any tips the regulars with this media care to pass on.
* kindly donated by Terry (Chestnuts) for those in attendance at the bash.
__________My first Acrylic on a wood lathe.__________click on image for larger view
_________

Having scattered some acrylic blank samples * amongst turners of pens and other objet d’art that might use them at the Brummie bash I thought it only fair to have a go myself and see what problems, if any, I encountered.
Having read comments about avoiding heat whilst drilling, turning and finishing I proceeded with this very much in mind.
On the drilling front I tackled the Blue blank first, this being a longer single blank kit to see how hot the drill got.
Despite the drill being freshly sharpened it did get very hot even with constant clearing and although I had no indication of melt it was completed at a very leisurely penetration rate compared to a similar piece of hardwood.
Glue-ups were done using thick CA with no problems as far as inserting tube due to long working time with this no moisture substrate.
Trimming the ends was easy, almost within hand tool alone ease it cut so freely.
Removing the corners on the Lathe was accomplished with a freshly sharpened 3/8 spindle gouge (lathe set and held at 2000rpm throughout)
Turning to size was done with an oval skew, main problem being the 5-10 metre long threads of acrylic that wrapped around the mandrel and were the subject of constant stopping to clear.
I experienced no heat problems with the turning but to my surprise did have to stop and sharpen the HSS skew half way through both projects.
Sanding was done with Abranet, thought being any excessive heat buildup would be readily apparent through the mesh, again no heat problems.
Finishing was done with Chestnut Burnishing Cream, having read of using metal polish,wirewool etc. elsewhere I was pleased to see burnishing cream recommended on the sample guide label as this was all that was to hand and to my surprise was more than abrasive enough to satisfy my requirements.
Several of the Sample Acrylics warn of translucency if turned thin, and indeed if you know what you are looking for, any scratches or blemishes on the brass tubes can be seen even at greater than 2mm thickness in the paler sections of the plastic.
A disappointing thing I found with the red sample I turned, is that the uneven coverage/gap filling of the CA glue is visible though the acrylic, in fairness, to those not knowing what to expect the effect could be mistaken for a function of the blank patterning.
I will have to investigate alternate glueing/bonding methods to overcome this in future even if it is only just for my own satisfaction.
Final thoughts; if I'm asked for pretty colours I don't mind turning them, actual turning took me longer than the equivalent wood though, balanced out by the fact that finishing is much quicker than wood with no worries about durability of the finish.
I await with interest the experiences of other recipients of the samples and any tips the regulars with this media care to pass on.
* kindly donated by Terry (Chestnuts) for those in attendance at the bash.


