Bench Project

UKworkshop.co.uk

Help Support UKworkshop.co.uk:

This site may earn a commission from merchant affiliate links, including eBay, Amazon, and others.
Martin

This is the first time I have seen your threead as it didn't appear in my 'view posts since last visit' list for some reason until today.

Now that is one **** of a bench sir. looking superb and err, adequately sturdy :wink:
 
Martin,

How on earth did you get the glued up top and skirt into position - must have weighed a ton.

Can't wait to see the finished result.


All these posts just keep reminding me of all the things I need to do!! :shock:


Cheers

T
 
Tim

Answer: two unsuspecting neighbours!

Q: Do you want to see a nice piece of wood?
Neigbours answer: Yes please!

Good then get a hold of this! May not work next time!
Cheers
Martin
 
Martin,
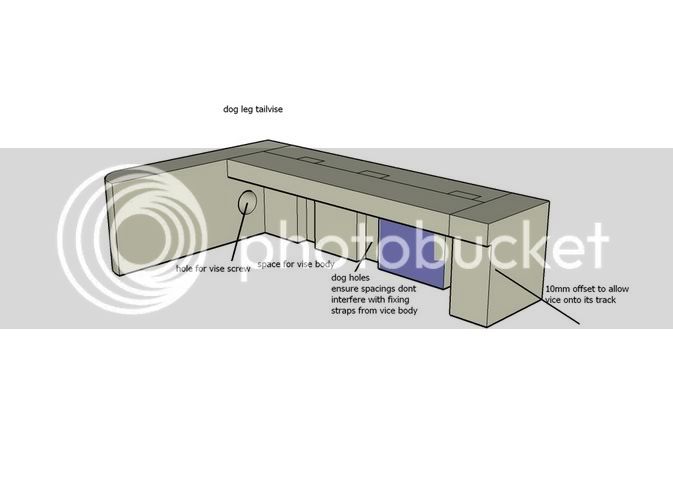
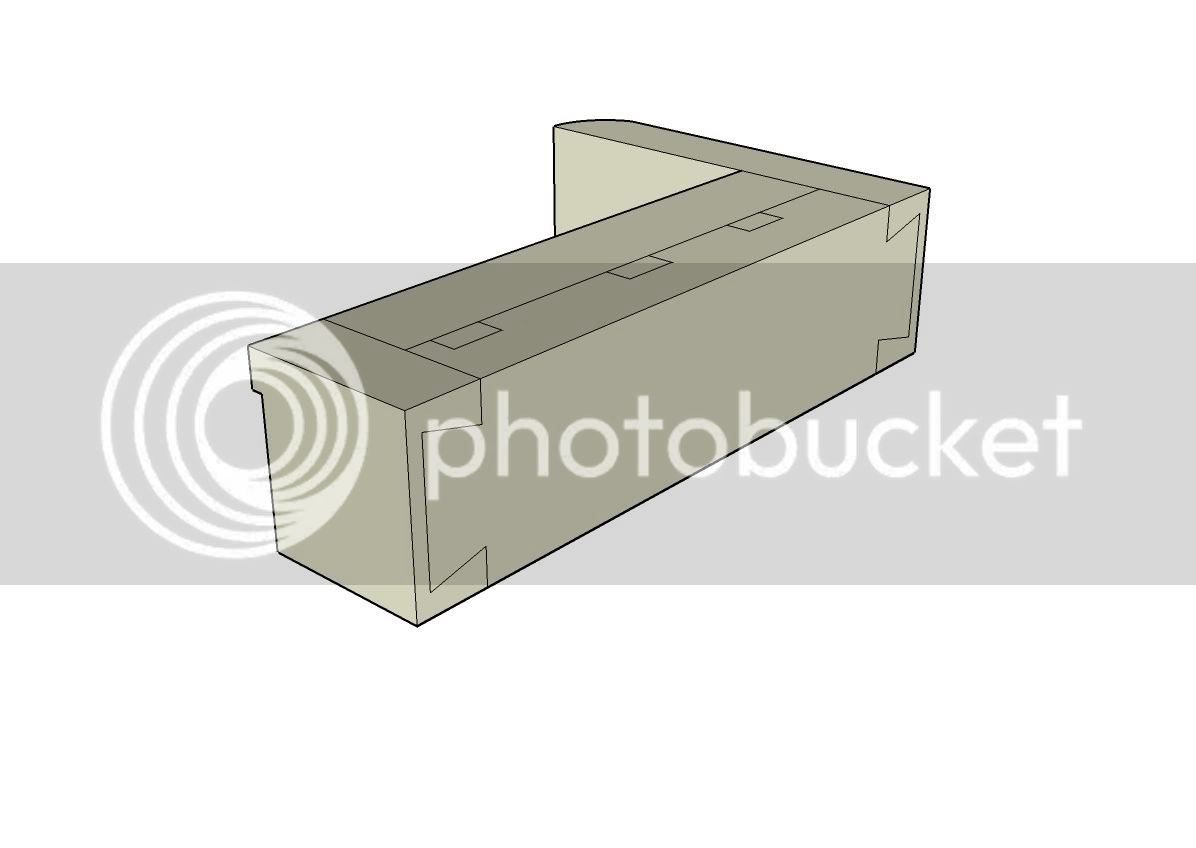
I hope this helps a bit, I haven’t put in any sizes as I don’t know your bench dimensions but it should hopefully shed a bit more light. If you need more pm me
tailvise1.jpg

tailvise2.jpg


Ian
 
Answer: two unsuspecting neighbours!

Q: Do you want to see a nice piece of wood?
Neigbours answer: Yes please!

Good then get a hold of this! May not work next time

Smart work - agree with your last point!

Cheers


Tim :D
 
Well its nearly there!
Added the rear toolwell support and tool tray. Did not want a ramp so am going to cut a hole with removable cover and bin underneath. Why didn't I cut hole first? Good question! Will add a sliding removable tool rack along rear support later.
MKBench11.jpg

MKBench12.jpg


Cut a single large dovetail rather than two small ones as they are not my stong point and greenheart tears out easily. Sawed to lines and routed out waste carefully. Still a fair bit of fine chiselling needed to fit.
MKBench10.jpg


There is a tiny bit of fine tuning to do on the chain vice and then the only task left is the tail vice. Thanks to Ian Dalziel this is starting to make a bit of sense but will have to go slowly so as not to screw up. That IS my strong point!

The holes in the top will be filled with Non glued plugs in case the end caps need adjustment and I have used a single large lag bolt from the top side to secure the whole top.

I am really looking forward to using this in anger as TLOML keeps saying sarcastically that its the best bit of furniture we have!
 
Martin,

What Alf said :D a very nice bench.

Slopes of to shop to look at pile of ash, no the fairies still haven't cut the joints and put it together, bum. [-o<
 
Hi all,
The bench is now just about finished. The tail vice was a tricky thing to get right but got there in the end. Many thanks to all who gave advise and help.
Here it is:
MKBench16.jpg

Just got the handle to do now, not entirley happy with the ones that came with the Chain vise either so will make three better ones in something nice.

MKBench15.jpg

MKBench14.jpg

MKBench13.jpg


The finish is Danish Oil with extra coats on end grain. This has been a real testing project for me but a great confidence builder!
 
:shock:

I'd be afraid to use a bench that looks as good as that. What a beautiful job.

Gill
 
:shock: :shock: :shock:

That is really some piece of work! Lovely job. Did you ever get round to the moving it around solution, 'cause it sure looks heavy!

Les
 
Martin
It looks truly fabulous!!
Might have to take up your offer on the Greenheart now, looking at this!
Cheers
Philly :D
 
Les
re moving it around, I can just lift one end at a time and sort of shuffle it
to where I want it.
I would really like to be able to get it outside to work in the sun so despite the expense (£35 a corner!!) I may have to get the jacking castors I looked at at the start of the project.

Also I am slightly embarrased to say that I took a leaf from Andy Boyd's Tool case and got a brass plate made to 'sign' the bench:
MKBench17.jpg

MKBench18.jpg

A bit vain but, what the ****! 8)
Regards
Martin
 
Martin,
That is a stunning bench, it looks absolutely terrific. You can be rightly proud of it and that brass plate is the icing on the cake.
 
Back
Top