Bandsawn veneers

UKworkshop.co.uk

Help Support UKworkshop.co.uk:

This site may earn a commission from merchant affiliate links, including eBay, Amazon, and others.

Mr Ed

Established Member
Joined
4 Nov 2007
Messages
1,859
Reaction score
3
Location
Derbyshire
I am planning to embark on a project using bandsawn veneers shortly. Not something I ever tried before as I hadn't got the kit, but with my super bandsaw it should now be a doddle.

Anyone have any tips...

Thanks in anticipation, Ed
 
Use a fresh sharp blade, double-checking the blade for square and the fence for blade drift. Better yet, you may want to use single point fence... Or, you may not. If you go with the straight rip fence, adding a wider face for vertical support would also help.
 
Hi Ed,

Don't underestimate how many bandsaw blades you will need - standard ones last next to no time when resawing wide boards. Once the blade gets blunt the job becomes a nightmare. You will find that blades which are too blunt to resaw properly will still work fine on thinner stock, so don't throw them out!

Consider buying a TCT blade - I recommend Lenox Trimaster. There are expensive but last ages and can be resharpened. Whether you use tct or not, get proper resaw blades, with as few TPI as possible.

Sawn veneer is way nicer to use than commercial veneer (looks better too!) in my experience, so have fun!

Cheers

Marcus
 
Ed - I agree with Marcus...lots of new blades. Don't forget the super high re-saw fence to go with the super new bandsaw, not that I'm jealous in any way :^o :whistle: Bandsawn veneer is far superior to the normal paper thin stuff...it can be treated as a solid timber surface when glued so is easily planed. My next project will involve a lot of the same :wink: - Rob
 
Thanks guys - I should have been a bit clearer perhaps. I'm OK with the resawing part having done that a fair bit, it was more the process of applying the veneer, what thickness, tips on joints, clamping and so on.

Ed
 
You cant beat a vacumn press for laying veneers on a small scale using pva, titebond or cascamite. If you want to experiment you could use hide glue and a veneer hammer

For bandsawn veneers i usually cut the timber to about 3mm and sand the faces smooth on a drum sander with the veneers fed through on a backing board so they end up at about 2.5mm. You can use the thicknesseer but be prepared for a few pieces shattering or you can lay bandsawn face up and plane/sand after laying

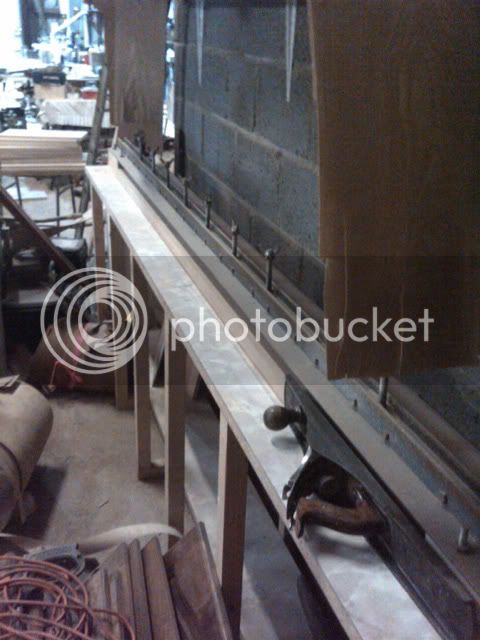
For jointing i use a shooting board and a no7 plane. This is my shooting board for commercial 0.6mm veneers where the clamping along the bed holds the veneer tight between two sheets of mdf so you can concentrate on cutting a nice tight joint.

Veneer-01.jpg


cheers

Jon
 
Ed,

I am using some homemade veneer in my Pearwood clock project. I used some pearl glue for the first time and was generally impressed by it's attributes. This glue is recommended for veneer.

The big problem I have encountered is warping / cupping of the veneered board. I only applied the veneer to one side and suspect that this may be the problem.

I used as many clamps as I could find, however the pearl glue had an initial tack/stick which was very effective.

I would experiment a little before using that lovely bookmatched piece and making a ****.

Good luck

Tony.
 
for a really good bandsaw blade give Dragon a c... oh, no. Damn! :cry:
 
I do like cascamite for veneering for its long open time. I use Resinmite from AG Woodcare (same stuff as Polymite from Axminster but cheaper and ag are good).

I use an Airpress but the important thing to remember with any vacuum system is that it pulls the edges down first, unlike a veneer press, so it is doubly important to get a good even film of glue. A 19mm ply caul with all edges well rounded helps even out the pressure which is only around 14psi at best so will not squeeze out air and glue pockets under the veneer like a traditional press will with its much higher pressures.

Jim
 
I usually make the veneers about 2mm thick, sometimes more depending on what I'm making. It doesn't make veneering any harder, in fact I find it easier if the veneers are on the thickish side. It makes edging the veneers together easier than the thin commercial ones imho.
 
What size layups are you planning? If its just small pieces you can use 18mm mdf board with brown vinyl tape on to press down the veneer, just make sure you use plenty of clamps.
If you are planning on joining veneers a good straight edge and plenty of new stanley knife blades does the job. I've just finished veneering aircraft tables in american oak at work today and it has been a nightmare, getting the joins just right is the tricky bit if you don't get the joint just right you get a nasty black line and looks crap.
 
Smeg":x9vul82j said:
plenty of new stanley knife blades does the job. I've just finished veneering aircraft tables in american oak at work today and it has been a nightmare, getting the joins just right is the tricky bit if you don't get the joint just right you get a nasty black line and looks crap.

Using a Stanley knife to cut veneers is very hard going, 'specially in an open grained timber like oak and something I would never do. I reckon you need to give yourself at least a fighting chance of a decent joint line by shooting them in on some sort of dedicated jig. What is a difficult job becomes easy with a veneer shoot - Rob
 
Hi Ed

Recently I have been using the method recommended by Robert Ingham for jointing veneers. Shoot the edges then tape them on one side using masking tape. The tape acts as a hinge to open the joint to apply a fine bead of adhesive. Close the joint and tape the other side. When the adhesive has set remove all tape to leave a continuous sheet of veneer ready for laying.

I have recently be working with 1.5mm oak veneer and find this techniuqe useful.

Chris
 
Hi Ed,

If I am going to re-saw timber into veneer, then I make what I call 'real-veneer'. Something like 1/8" thickness.

Assuming a sharp, skip-tooth blade, then for small jobs, I clean up the face that is going to be applied to the carcass. I saw off the veneer, with the planed face against the fence.

I repeat this for each piece of veneer, so when I have applied them, I am left with a good glue-joint between veneers and carcass, with the rough faces showing. The thick veneer then allows me to clean up with a sharp plane without worrying about 'planing through'.

HTH

Regards
John :)
 
This was mentioned in passing.

It is essential to veneer both sides of a panel if you want to avoid cupping.

David Charlesworth
 
Some great tips here - thanks guys.

(apologies for not responding but I've been flat out doing late nighters on my latest project which handed over successfully today)

Cheers, Ed
 
I agree with David C, especially for a door panel, or other larger areas of thinner stuff.

So far though, with small boxes (E.g. Writing slopes and like sizes.) I have had no trouble in 'going commando', with the balancer. Whether or not this has something to do with the thickness of my re-sawn veneers, I don't know. This isn't to say I never will have problems of course. Either way, the best of luck Ed.

John
 
I've got a theory brewing, can anyone tell me why the board cups when it is veneered? I'm thinking that with a dry veneer, a non-shrinking glue like PVA and a vacuum press, the residual stress will be fairly low...

Aidan
 
Unfortunately this theory is flawed.

The waterbased glue swells the veneer across it's width.

As it dries it will cup the board. The veneered side will go hollow in it's width.

David C
 

Latest posts

Back
Top