- Joined
- 19 Mar 2007
- Messages
- 5,295
- Reaction score
- 410
Ball in a cube.
I saw this while looking through some turning web sites and was really interested in the idea. Iv'e got some nice spalted cherry so I though why not? I love a challenge after all?
Well, I got there and I'm really pleased with the result!!
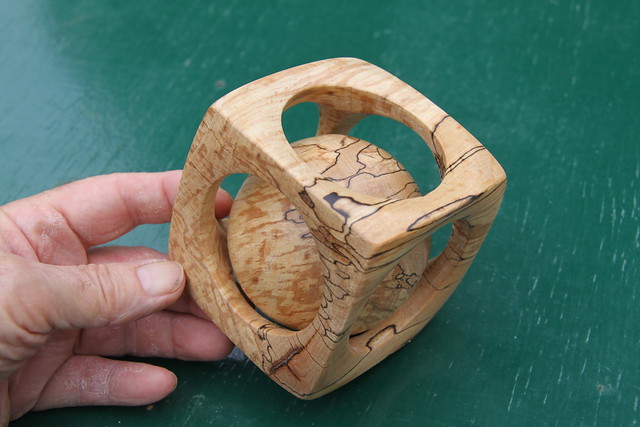 IMG_1476 by John, on Flickr
I started with a lump of Merusiers, wild cherry, given to me a few years back by a friend here. Cut it into a perfect, well nearly perfect, cube and started to wonder how the **** I was going to hold it in the lathe. The guy who I got the idea from had a complicated home made ply chuck. Then I remembered the 'button jaws I have, perfect!
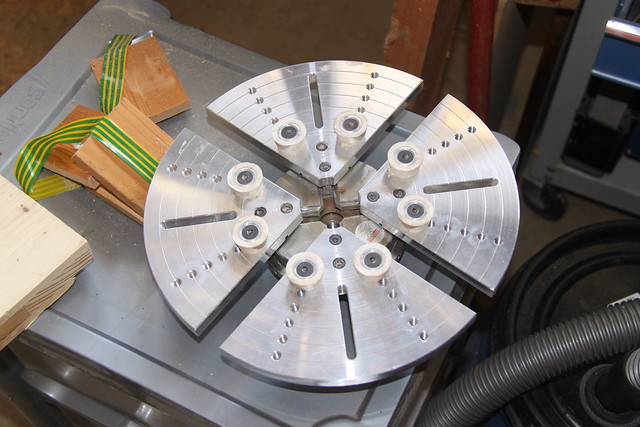 IMG_1459 by John, on Flickr
The squares of wood with the stripy tape on the left are shaped to hold the ball in place when the 6th side is turned out. Othewrwise it would break away and float around at the wrong time and probably do daamage? They worked well too.
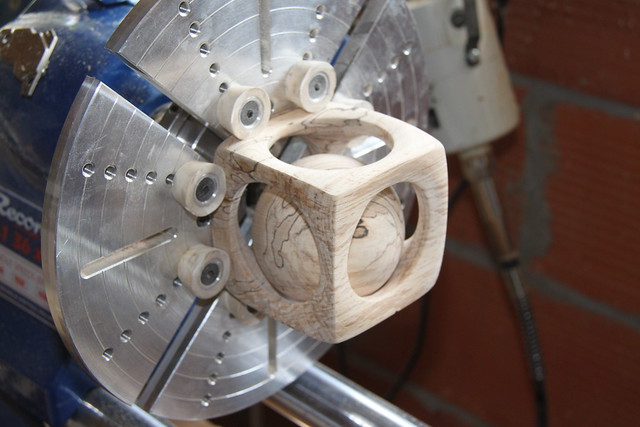 IMG_1468 by John, on Flickr
So with a lot of trepidation I gingerly started cutting, just down to 3mm depth as that is the diameter of the ball. Then shaping that section of said ball. 5 times of doing that and I was fairly confident, but the 6th and all of a sudden the ball isn't held anymore!! :shock: So lots of checks to make sure all was well and ahead went I. It looked pretty good, but 8 lumps on the ball from the corners.
Somehow I was going to have to turn the ball inside the cube whilst holding the cube, good game, good game as Brucie would say. Holding the ball was no problem, I have done it before making my Lazy Susan.
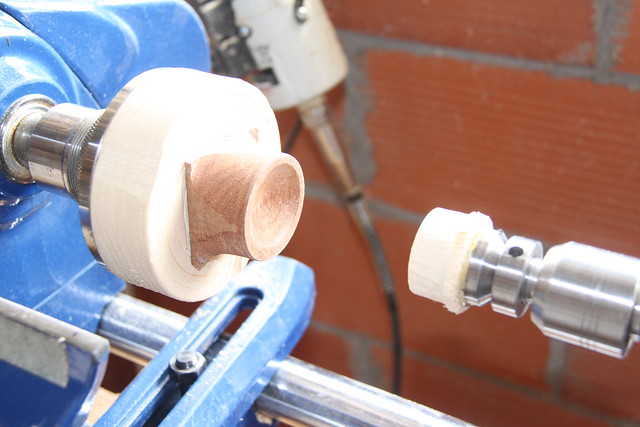 IMG_1472 by John, on Flickr
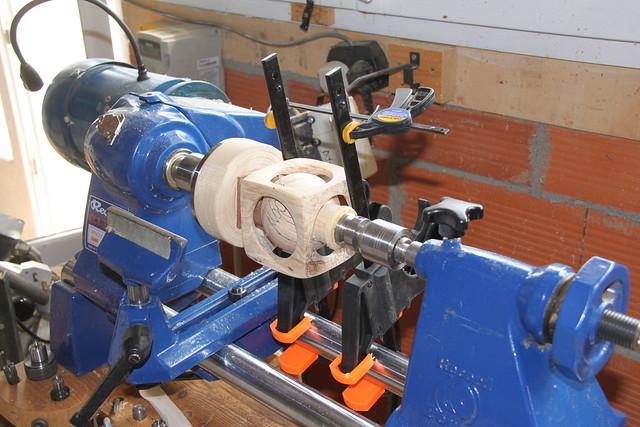
I came up with the idea of a couple of clamps on the bed bars and a cross clamp to hold the cube. It worked perfectly! And I was able to lightly turn the lumps to round with my 1” round nose scraper
 IMG_1473 by John, on Flickr
That shows when I was sanding the ball and the tool rest was between the clamps for the turning bit. The sanding was really easy with the same setup.
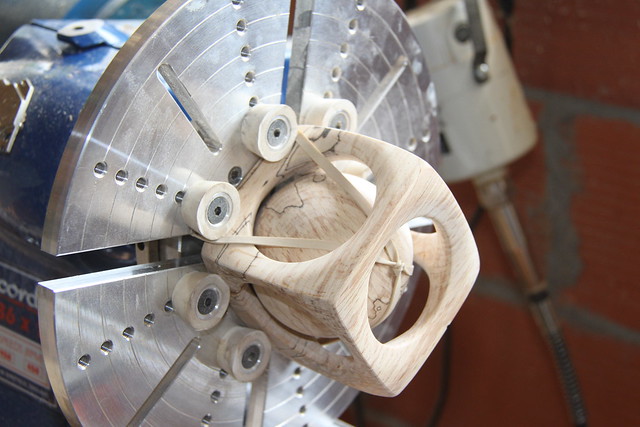
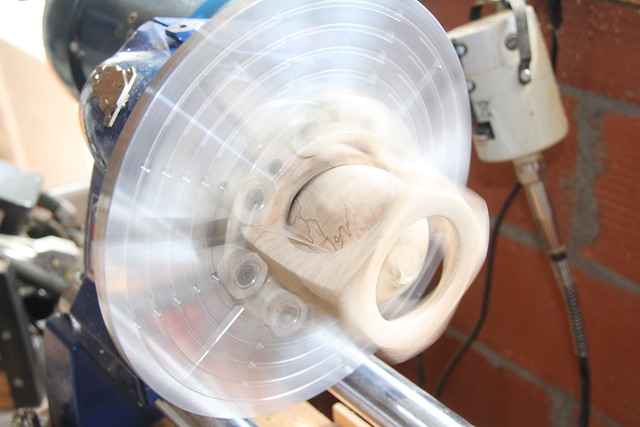
Next was the finishing of the outside of the cube, so back in the button jaws again and very carefulle turn a slight shape to the cube. It made a huge difference. But, the first thing that crossed my brain cell was that the ball was going to be loose in the cube, so a couple of elastic bands did the trick
 IMG_1470 by John, on Flickr
 IMG_1471 by John, on Flickr
And the shaping and sanding were quite easy. One of the main difficulties was that the rubber buttons pushed the cube out slightly when they were tightened, so I had to get a soft faced dead weight hammer and BASH, gently, back against the face plate. And, as they say that was the finishing touch apart from sealing it with hard wax oil and polishing with Intercrystaline wax from Rustins. That hard wax oil is wonderful stuff! Anything from bowls to hotel reception wooden floors!
I saw this while looking through some turning web sites and was really interested in the idea. Iv'e got some nice spalted cherry so I though why not? I love a challenge after all?
Well, I got there and I'm really pleased with the result!!
 IMG_1476 by John, on Flickr
I started with a lump of Merusiers, wild cherry, given to me a few years back by a friend here. Cut it into a perfect, well nearly perfect, cube and started to wonder how the **** I was going to hold it in the lathe. The guy who I got the idea from had a complicated home made ply chuck. Then I remembered the 'button jaws I have, perfect!
 IMG_1459 by John, on Flickr
The squares of wood with the stripy tape on the left are shaped to hold the ball in place when the 6th side is turned out. Othewrwise it would break away and float around at the wrong time and probably do daamage? They worked well too.
 IMG_1468 by John, on Flickr
So with a lot of trepidation I gingerly started cutting, just down to 3mm depth as that is the diameter of the ball. Then shaping that section of said ball. 5 times of doing that and I was fairly confident, but the 6th and all of a sudden the ball isn't held anymore!! :shock: So lots of checks to make sure all was well and ahead went I. It looked pretty good, but 8 lumps on the ball from the corners.
Somehow I was going to have to turn the ball inside the cube whilst holding the cube, good game, good game as Brucie would say. Holding the ball was no problem, I have done it before making my Lazy Susan.
 IMG_1472 by John, on Flickr
I came up with the idea of a couple of clamps on the bed bars and a cross clamp to hold the cube. It worked perfectly! And I was able to lightly turn the lumps to round with my 1” round nose scraper
 IMG_1473 by John, on Flickr
That shows when I was sanding the ball and the tool rest was between the clamps for the turning bit. The sanding was really easy with the same setup.
Next was the finishing of the outside of the cube, so back in the button jaws again and very carefulle turn a slight shape to the cube. It made a huge difference. But, the first thing that crossed my brain cell was that the ball was going to be loose in the cube, so a couple of elastic bands did the trick
 IMG_1470 by John, on Flickr
 IMG_1471 by John, on Flickr
And the shaping and sanding were quite easy. One of the main difficulties was that the rubber buttons pushed the cube out slightly when they were tightened, so I had to get a soft faced dead weight hammer and BASH, gently, back against the face plate. And, as they say that was the finishing touch apart from sealing it with hard wax oil and polishing with Intercrystaline wax from Rustins. That hard wax oil is wonderful stuff! Anything from bowls to hotel reception wooden floors!


