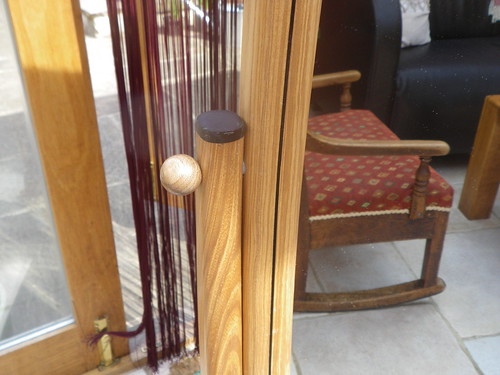
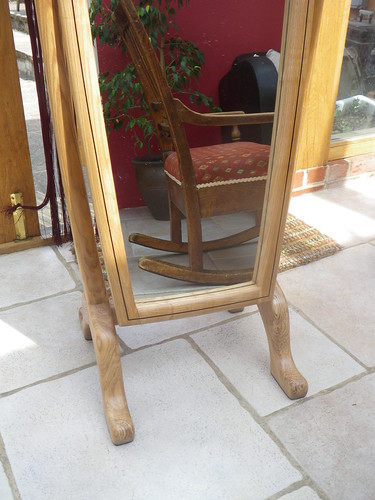
Ash / ebony Cheval mirror

UKworkshop.co.uk

Help Support UKworkshop.co.uk:

This site may earn a commission from merchant affiliate links, including eBay, Amazon, and others.

gasman

Established Member
Joined
14 Nov 2006
Messages
1,011
Reaction score
337
Location
Near Oxford
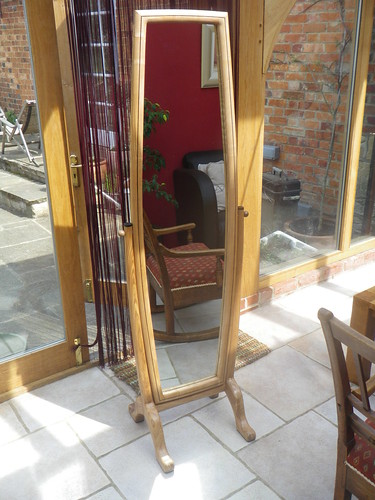
The brief was for a traditional cheval mirror with some modern touches. So I thought I would continue my ash/ebony line which has had favourable reception previously.
I looked very hard at Steve Maskery's beautiful oval Cheval mirror in bubinga as I thought an oval mirror would be great. I have the smaller trend ellipse cutting jig (which would have been hopeless as it is too small) - and the problem with those ellipse cutting jigs is that you are constrained by the design of the jig so that there can only be about an 8" difference between the major and minor axes of the ellipse. I made my own version of it which enables about a 12 inch difference - but it would still be too fat a mirror overall.
The other problem I had with an ellipse is that unless I was going to veneer the front, it would be not possible to get a continuous flow of grain around the ellipse - there would have to be joints which, from previous experience have always opened a fraction sometime later on.
Anyway a long-winded way of explaining why I am copping out on the whole ellipse idea - instead I decided to make it a rectangle, but with curved sides so that it is fatter in the middle than the top and bottom... sort of like a coffin but rounded. I made a template and dropped it off at the glaziers - will pick up the mirror from them today
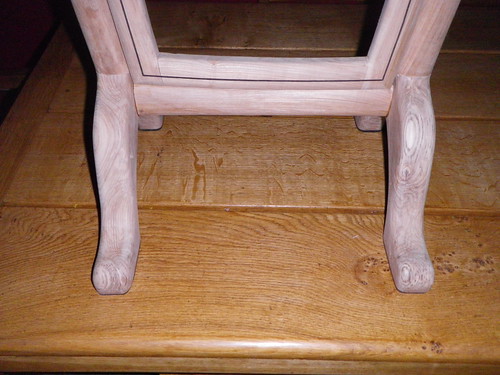
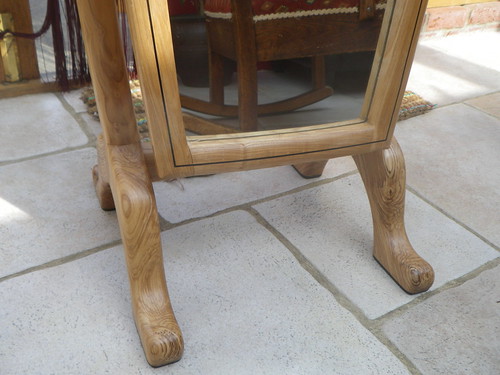
The legs are going to be fairly traditional, with the 'arms' that support the mirror curved.
This is about as good as my plans get I am afraid
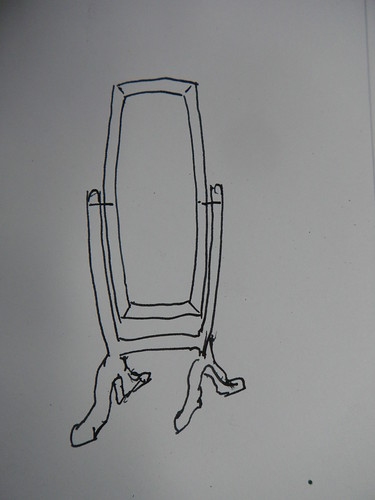
4522195925_e2bcca1074.jpg

So I started with the legs - made a template from ply, then roughly cut with a bandsaw, then a flush trim router bit then a roundover bit then sanding to get the basic leg shape:
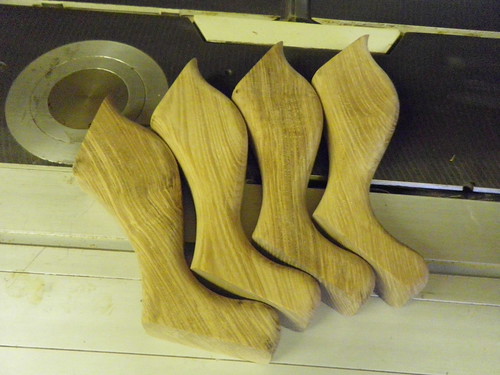
4522169853_e09dc7163a.jpg

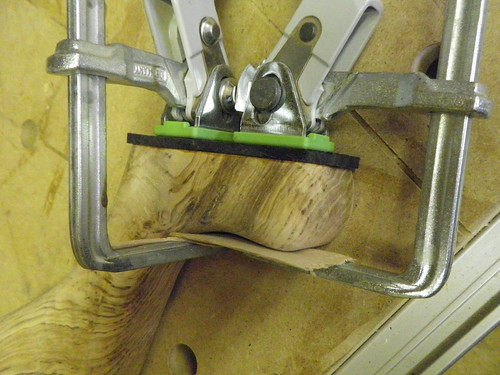
To these I glued a 5mm thick ebony 'sole'
4522171403_45bf3f4537.jpg

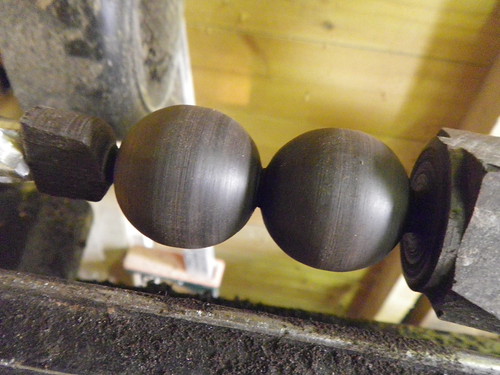
I could not really start the sides until I actually had the mirror in my hands (although I have found a 2" ash board with a curve which should be good for the sides), so I turned 2 of 35mm spheres on the lathe which will be the decoration for the top of the arms
4522804190_2b9abe3169.jpg

Hopefully will be able to start on the frame later today
 
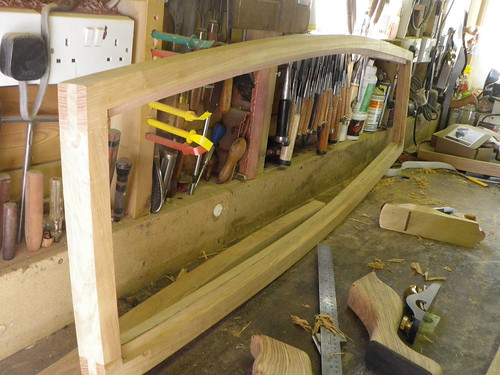
Got the frame finished over the weekend - 2" ash board which helpfully had a curve in the grain so the curved side has grain 'parallel' all the way along most of it. Curved top and bottom too. Decided on rabbit joints for the 4 corners which I cut roughly with a bandsaw then finished off the edges with a groove cutter on the spindle moulder part of the Record C26.
4533308957_408e9975be.jpg

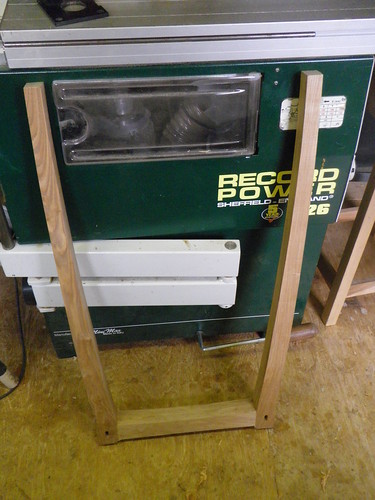
Then cut the stand pieces, shaped and glued up the stand
4533311349_b911f1cd62.jpg

The slots you can see 8mm dominos which will be used to attach the legs
Today I have a morning off work so I will do an inlay round the frame, then waiting for a small thumb-moulding cutter from Wealden to do the curved edges of the frames.
I still have to work out how to attach frame to stand and enable it to tilt and then be easily locked..... Rob (Woodbloke) suggested M6 screws tapped into the wood but I am not certain this will work in ash as it might be too soft - I may get some M6 inserts and use them - then need to come up with a knob or handle to tighten the screw. Any better ideas?
 
gasman":2y7yy69c said:
.... Rob (Woodbloke) suggested M6 screws tapped into the wood but I am not certain this will work in ash as it might be too soft - I may get some M6 inserts and use them - then need to come up with a knob or handle to tighten the screw. Any better ideas?
Correct if I'm wrong, but I don't recollect that recommendation GM :? Ash would certainly be too 'woolly' to hold a thread. To tap directly into timber you need a very hard, dense timber (I used African Blackwood for Karl's Secret Santa present) which worked well. I'd go for some M6 or even M8 inserts for a job like this...looking good btw - Rob
 
Rob my humble apologies - I mis-recollected the comments of Mr Maskery as your own - he tapped a thread in some bubinga for the mounts of a very beautiful oval cheval mirror he made recently
Inlay around mirror finished today - awaiting thumb moulder cutter to get the whole thing finished
Regards
Mark
 
Very bad day in the shed... not sure if this mirror is salvageable - too cross to speak much last night - feel a little bit better today
Thumb-moulding cutter arrived yesterday from Wealdens - so prompt and such good service.
I eagerly went out at 7pm after work to cut the curved profiles on the mirror and stand. All went well...... until... on the mirror, the bearing ran over the hole where I had previously drilled an M6 insert for the mounting bolt - and the insert was not flush with the surface... so the router bit dug in and caused a 5mm profiled indent where I really did not want it - ie half way up on front of one side.
I was far too cross to take photos - sorry - so I very carefull shaved off about 3 mm off that side with a plane which I thought I could get away with without it being obvious and ran it past the thumb-moulding bit again..... this got rid of most of the 'divot', without making it too obvious that the side is now 3mm thinner - hooray
However the router cutter took away about 2mm of the surface too - which meant that the inlay which I had done on monday evening was removed completely in a couple of places - aaarrrggghhh
So, I very carefully and slowly recut the inlay of about half that side and glued it up. Planed it away this morning before work and it looks OK. I might have got away with that mistake
However worse was still to come.....
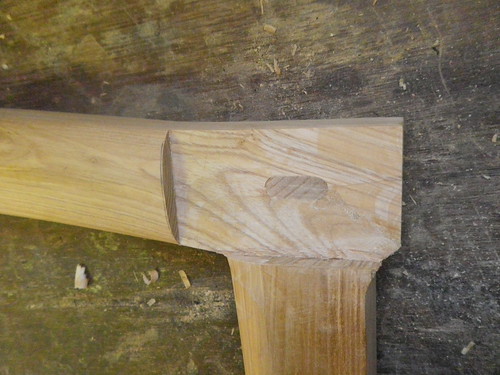
I then ran the 3-sided frame over the same router bit - and in my excitement / fatigue / anger at previous mistake / whatever, I failed to remember not to cut curved profiles in the parts which will mate with the legs (where the domino hole is in the photo above). So now I no longer have a flat surface to join the legs to.
I think I have thought of a plan in the cold light of day and will post photos later
Moral of the story - think more before using big sharp fast-moving metal bits!
 
Gasman

what b*****r - but, on the bright side, you seem to be finding solutions.

In my experience such errors come in groups and are indications of "wrong time, wrong place" ! You did the right thing in taking time out to think!

I recently made a simple wall-mounted mirror and used M6 bolts/inserts plus shop-made knobs for the swivel mechanism, it works very well - I will try to take a photo.

Keep up the good work, I love the legs and I'm sure that the frame will be fine

Dave
 
gasman":td3ugofv said:
... think more before using big sharp fast-moving metal bits!
GM...no worrie over the mistooken identity :wink: I hope the job can be salvaged somehow, but if not, it may be time to 'do a Rob' and start again.
I've said on a couple of occasions that much of making a job is about thinking your way through it before a tool goes anywhere near the timber. I also try not to do anything critical after a long day at work when I'm cream crackered...the number of times mistakes have been made :oops: :oops: - Rob
 
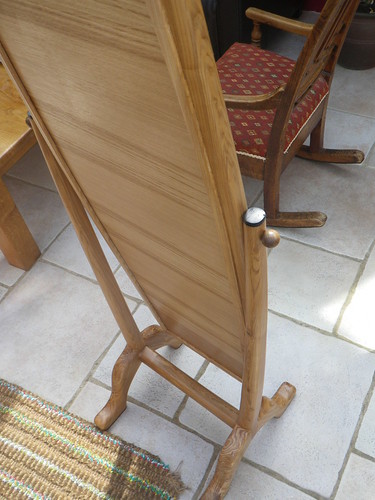
Thank you both for your words of consolation. Sportique I would love to see a photo of your shop-made knobs as this is one thing (assuming the mirror is salvageable) that I have not firmly decided on - and I can't find any decent hardware such as thumbb-bolts or similar to use... At the momenet I am considering using the 2 ebony balls I truned as the knobs with which to tighten the M6 bolts securing the mirror at the hinge
Rob thanks - the trouble is, I have a job which sometimes has very long days and usually I find being out in the shed very relaxing and soothing at the end of the day - not quite sure what happened last night though!
 
Gasman,

will post some photos separately on projects forum (don't want to hi-jack this interesting post! :oops: )

But be warned - mine was a much simpler design and is wall mounted.

Dave
 
I spent 2 hours after work last night and might have got things back on track - not certain yet though
First for the mirror itself I took another mm or 2 off the side where the 'dink' was and then planed / sanded / scraped until the dink had virtually gone.
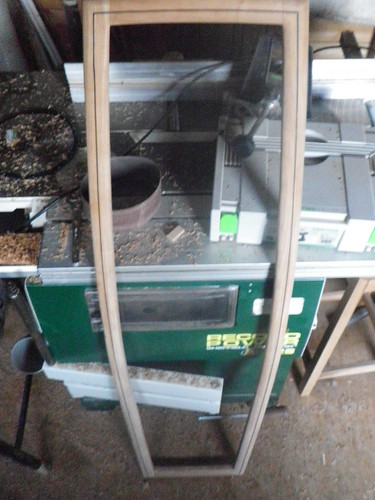
So here is the frame. which is almost complete and I think I am happy with it
4542048413_c19f6e053b.jpg

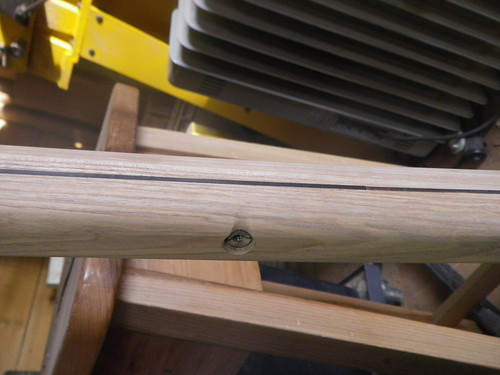
Here is a close up of the offending 'dink' and you can just also see where I had to redo the inlay
4542051361_1ddf4ee174.jpg

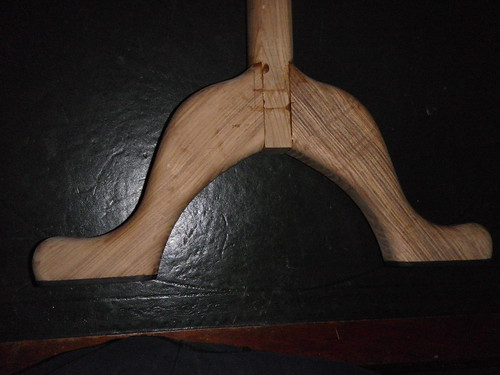
Then I took the stand frame and with a straight router bit protruding 8mm from the router table cut 8mm off the areas where I had rounded over and shouldn't have... I did this very slowly climb-cutting by hand on both sides of each side of the frame
4542684142_815c97c88e.jpg

Then I cut the 2 arms of the frame off the connecting piece so I had 3 separate pieces of the stand frame again
I cut about 10mm off the top of each leg and then glued them together as they were - alot of sanding / riffling / scraping will be needed but I hope this will come out OK. If it does not I just need to remake the stand frame which was the easiest bit
Anyway after drying overnight here is the result
4542053373_a46afb8523.jpg

So I will make a final decision once I have started sanding it down tonight to see if it is acceptable
 
So after a long struggle and being generally quite 'down' for the last couple of days about having c****d up this mirror I spent another 3 hours late last night and I think it is going to be OK. Cleaned up the 2 sides of the stand with a compnation of curved & straight chisels, scraper, sanders etc and then joined the 2 halves together. Dowel-jointed it together with TB3 and then clamped overnight.
This morning it looks good and the mirror fits very well and swivels without friction.
Just need to clean up, final sanding / scraping, fit mirror and sort out hardware etc
Thanks for looking
4545251452_caa21d1c84.jpg
 
Finally finished today and it has been a very long haul. Usually I am a bit sad at the end of a project as I enjoy the whole process so much - this time I felt relieved as there had been so many problems.
Anyway here it is finished (and now delivered to the client).
4548497639_76b7848ebf.jpg

4548491999_aa36bb1773.jpg

4549128806_824eb1c24e.jpg

4548493507_7983d39bfc.jpg

4548496227_1548ac3ee0.jpg
 
Looks really good. I've been 'round here for more years than I care to remember and I don't recall anyone who turns out stuff as quick as you. I don't know whether to be enthused or depressed :lol:
 

Latest posts

Back
Top