Derek Cohen (Perth Oz)
Established Member
I have been asked by my WW club to do a demonstration on the Veritas Combination Plane. It seemed like a good reason to overhaul my sticking board this afternoon - this is one I use for smaller pieces and drawer parts. I thought that if it turned out well, I would make a long version.

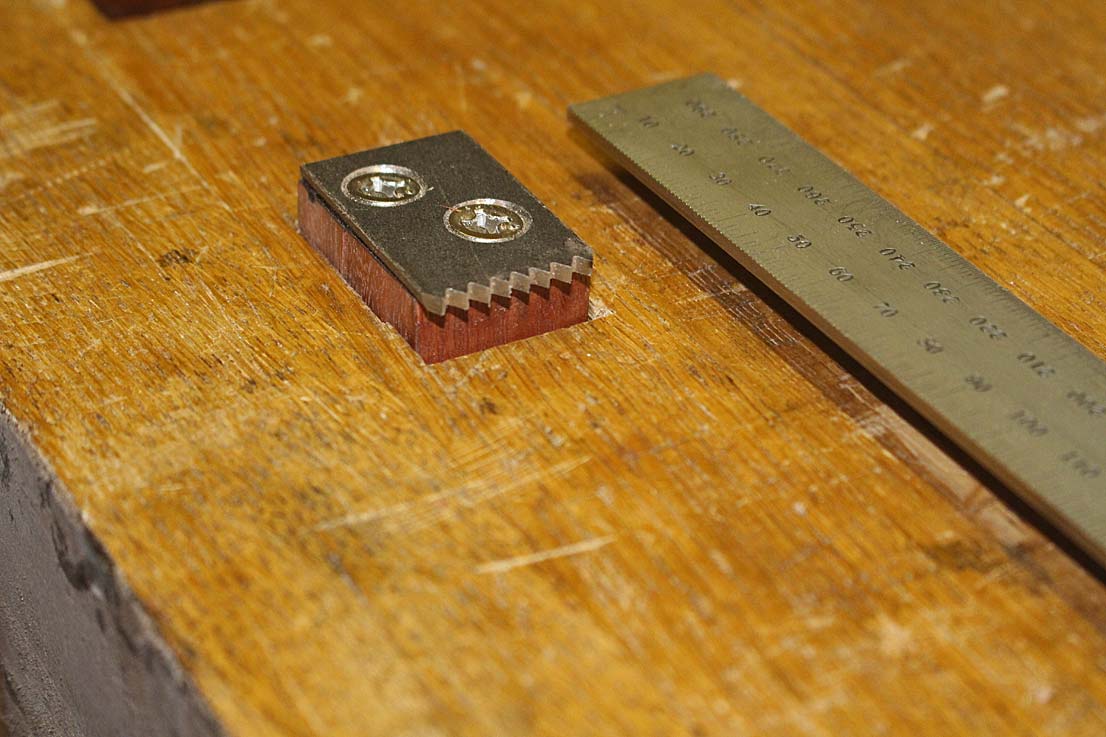
What's new? Well, the screws at the left front, that acted as stops, have been replaced with a solid serrated stop ...


This was inspired by a recent modification to my bench, when I added a serrated steel planing stop to a dog ...

The article is here: http://www.inthewoodshop.com/ShopMadeTo ... gStop.html
The underside of the sticking board now has non-slip. This is available in rolls for stair treads.

I needed to try the sticking board out with the Veritas Combo Plane. The first demonstration would be a simple groove for a drawer side or drawer front. The wood is Hard Maple ...

Start with thin shavings at the end, and work back to the beginning. Once the groove is established, take coarser cuts ...

This is a very straightforward joint with the grain. Easy peasy ...

I turned the board around to complete the second demonstration, which will be a bead ...

... and noted that the last third of the side was reversed grain ...

The board was just a piece from the scrap box, and it had been milled with a helical thicknesser/planer. I had not planed it after this, and when I ran a block plane up the side edge to create a slight bevel to reduce the work for the beading blade, I noticed this tearout ...

Now if I went at this with a standard plough setup (45 degree cutting angle), I am pretty certain that the board would suffer a lot more tearout. This is the difficulty with using plough planes to create beads (or other mouldings) - you really need to selected straight grain boards. Its the reason I tend to use a beader, such as the Staney/LN #66, or a scratch stock.
Recently I had the idea to add a 15 degree micro backbevel to these blades to create a 60 degree cutting angle. This is written up here: http://www.inthewoodshop.com/ToolReview ... Plane.html
So, trying this out here: Again, starting at the end, and taking light cuts ...

I thought that I had got it all. The surface looked pretty good ...

... but with raked lighting I could see it was still torn out. I think that this was the original tearout. It is hard to tell if I added more.

The tearout was a lot shallower than it appears here, and only needed a few passes with a scraper to be gone ...

I was happy with the results so far ..

Now can I do dados on a sticking board?
Regards from Perth
Derek

What's new? Well, the screws at the left front, that acted as stops, have been replaced with a solid serrated stop ...


This was inspired by a recent modification to my bench, when I added a serrated steel planing stop to a dog ...

The article is here: http://www.inthewoodshop.com/ShopMadeTo ... gStop.html
The underside of the sticking board now has non-slip. This is available in rolls for stair treads.

I needed to try the sticking board out with the Veritas Combo Plane. The first demonstration would be a simple groove for a drawer side or drawer front. The wood is Hard Maple ...

Start with thin shavings at the end, and work back to the beginning. Once the groove is established, take coarser cuts ...

This is a very straightforward joint with the grain. Easy peasy ...

I turned the board around to complete the second demonstration, which will be a bead ...

... and noted that the last third of the side was reversed grain ...

The board was just a piece from the scrap box, and it had been milled with a helical thicknesser/planer. I had not planed it after this, and when I ran a block plane up the side edge to create a slight bevel to reduce the work for the beading blade, I noticed this tearout ...

Now if I went at this with a standard plough setup (45 degree cutting angle), I am pretty certain that the board would suffer a lot more tearout. This is the difficulty with using plough planes to create beads (or other mouldings) - you really need to selected straight grain boards. Its the reason I tend to use a beader, such as the Staney/LN #66, or a scratch stock.
Recently I had the idea to add a 15 degree micro backbevel to these blades to create a 60 degree cutting angle. This is written up here: http://www.inthewoodshop.com/ToolReview ... Plane.html
So, trying this out here: Again, starting at the end, and taking light cuts ...

I thought that I had got it all. The surface looked pretty good ...

... but with raked lighting I could see it was still torn out. I think that this was the original tearout. It is hard to tell if I added more.

The tearout was a lot shallower than it appears here, and only needed a few passes with a scraper to be gone ...

I was happy with the results so far ..

Now can I do dados on a sticking board?
Regards from Perth
Derek


