A Go Kart for a 2 year old...

UKworkshop.co.uk

Help Support UKworkshop.co.uk:

This site may earn a commission from merchant affiliate links, including eBay, Amazon, and others.

DBT85

Established Member
Joined
19 Dec 2015
Messages
1,853
Reaction score
654
Location
Pershore, Worcester
My little girl turns 2 very soon and is very keen on trying to drive our cars down the 100m driveway to her grandparents. With that in mind and after seeing this youtube video a while back I was inspired to do something very similar. We're blessed with space for her to drive around so space isn't a problem, more the rain!

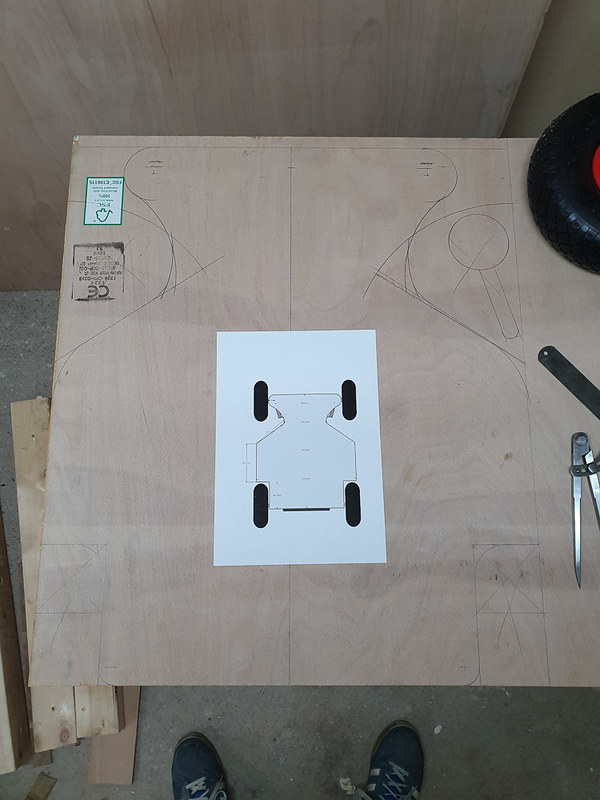
The creator of that particular cart had no plans available, only some dimensions once it was all built and some photos. I headed to Sketchup to make something in a similar vein to give me a rough guide to work towards.
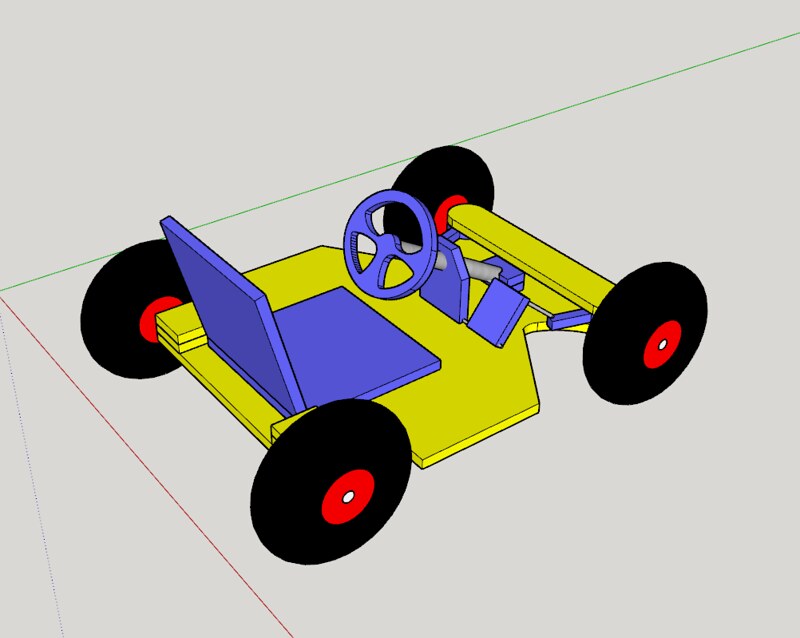
48407870292_b88b84c031_c.jpg


The original was done in 21mm ply and used the guys drill and some old bike sprockets to drive it. I planned to use some 18mm hardwood ply and a Lidl 20v drill, only really changing once I missed the Lidl 20v drills in store and didn't want to ruin my Bosch blue one! The ply ended up being something better than planned, about 11 ply (someone ordered it at Travis, never collected, they let me have it for the normal 5 ply price).

More to follow...
 
I also needed to source lots of bits for the build. I've listed everything I bought below. Sadly I had to kind of podge this together as I went along which slowed progress a bit. But such is the nature of a bespoke go kart (hammer)

4x sack truck wheels/tyres - Ebay - £27.64
8x bearings for the wheels Ebay £7.79 for 10
M6 rod for the steering linkages eBay £2.35
Ball ends for steering linkages eBay £4.80
2x 12v 7Ah batteries (possibly run as 14ah or 24v 7ah or just to always have one charged) ebay £31.14
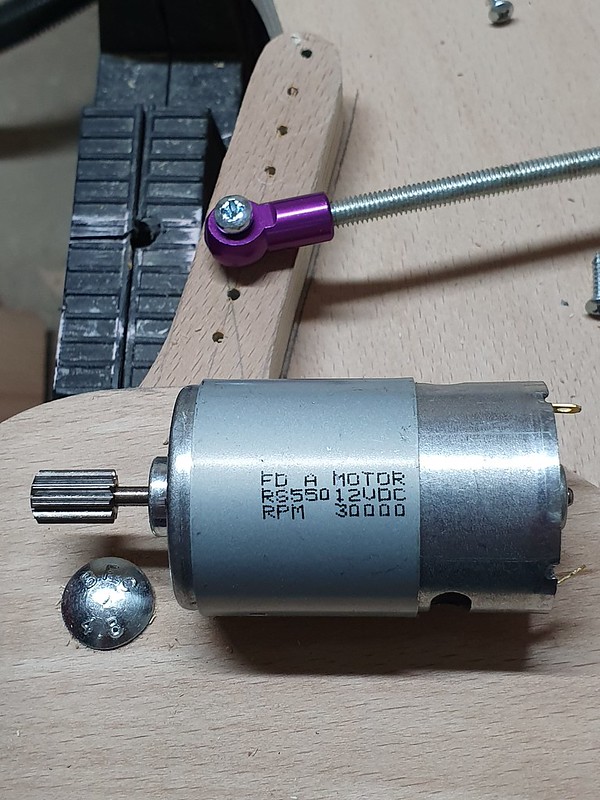
2x 550 30k RPM motors + gearboxes eBay £23.22
speed controller eBay £9.99
18mm ply Travis £45 for the whole sheet, used less than a quarter.
M8 bolts for the front wheels eBay £3.62
M6 bolts for the steering arms eBay £1.96

From my stores I had the 19mm clothes rail for the steering column, M8 rod for rear axle, some M3 & 4 bolts and spacers/bolts from a TV mount kit. That's it.

With a rough plan and a board, lets go!
48407870142_dc5f014b93_c.jpg


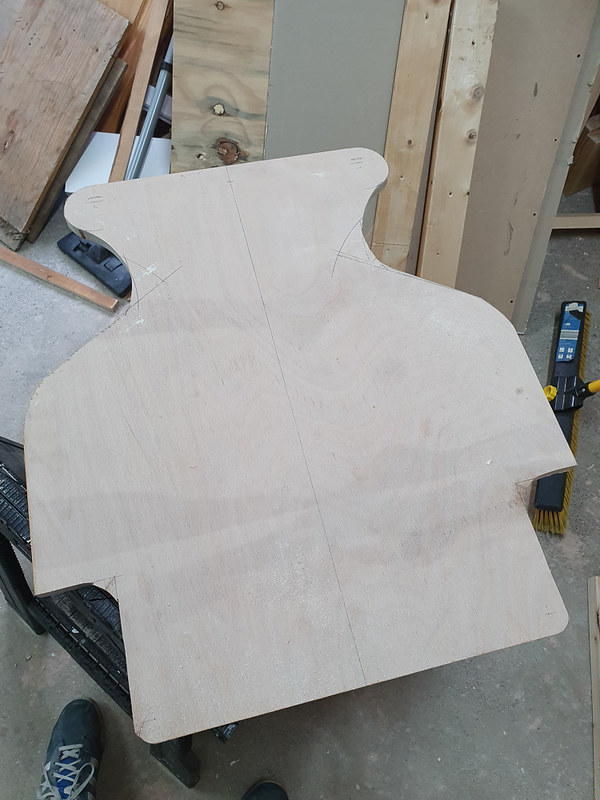
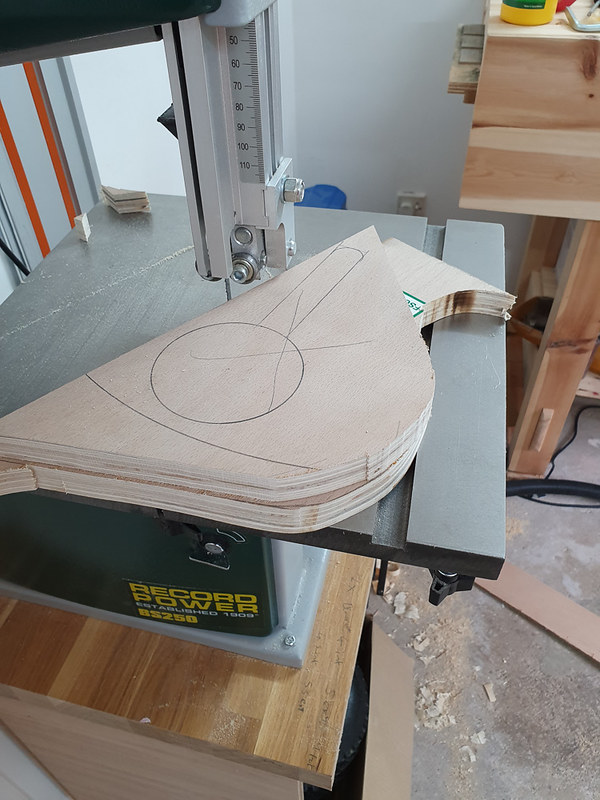
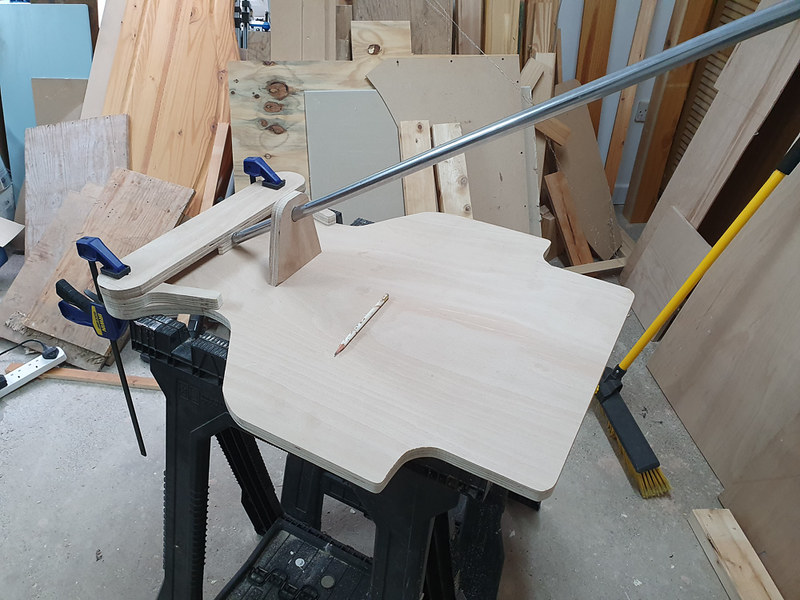
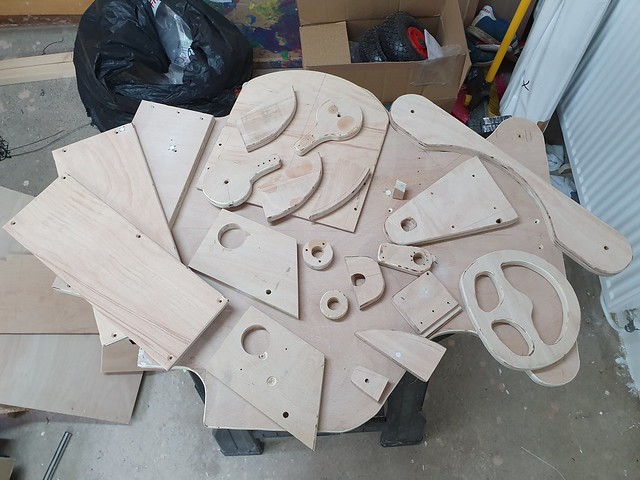
I cut out the base from my fancy ply and from the offcuts created the steering arms. 2 offcuts were lightly superglued together, a template drawn and then the bandsaw took care of cutting both to size.
48407866152_e8e0548358_c.jpg

48407839877_433e103372_c.jpg


Another scrap was used to make the top plate for the steering, again the bandsaw put to good use here. Later it was thinned in the middle to help move the steering forward a little. Also a steering column holder was created and bored. Later replaced by a taller unit.

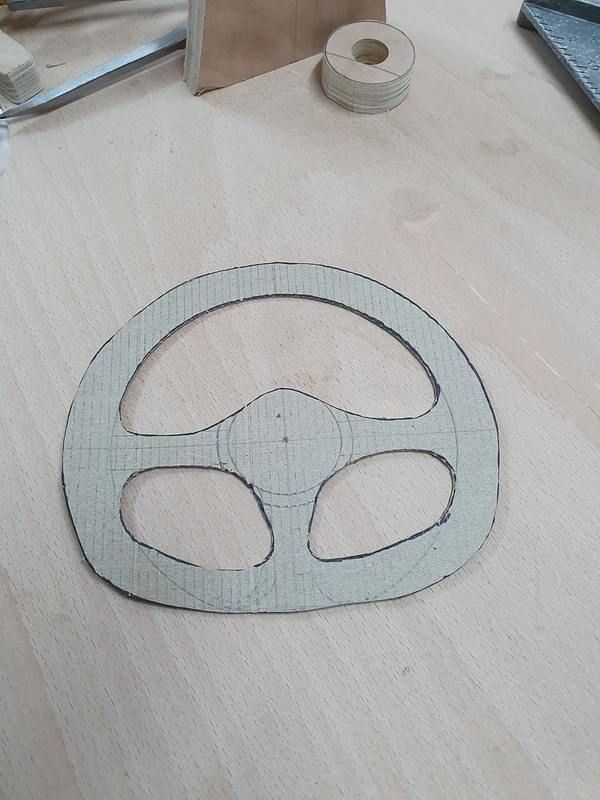
Some advanced CAD (cardboard aided design) got me a template for the steering wheel, and that too was cut on the bandsaw and then the inners cut with a coping saw. All neatly finished off with the disk sander and spindle sander.

48407829932_c2a1a3a9c7_c.jpg


The Steering column was a tad long, so needed some modification
48407832937_a6cb7d4e3e_c.jpg


In the next episode, Wheels, steering and whatever else I did next!
 
Looks great, I'll follow the build with interest love projects like this. :D

My granddaughter is now 6 and I took the easy way out last year, bought a nearly new Kettler go cart for £22, stripped out the pedal mechanism, made up a battery tray and swapped out the back axle from an old electric golf trolley, simple push pedal switch but speed kept down through a rheostat.

One addition she loves but everyone else hates is the horn which is the 2 tone internal sounder from a house alarm. :lol:
 
Very cool!!
Thanks for all the detail! Watching with interest.

I have no clue about DIY electronics. I hope to learn one day.

Sent from my SM-G973F using Tapatalk
 
Lons":3gzwvko3 said:
Looks great, I'll follow the build with interest love projects like this. :D

My granddaughter is now 6 and I took the easy way out last year, bought a nearly new Kettler go cart for £22, stripped out the pedal mechanism, made up a battery tray and swapped out the back axle from an old electric golf trolley, simple push pedal switch but speed kept down through a rheostat.

One addition she loves but everyone else hates is the horn which is the 2 tone internal sounder from a house alarm. :lol:

Oh a horn or something should probably be on there at some point!


sammy.se":3gzwvko3 said:
Very cool!!
Thanks for all the detail! Watching with interest.

I have no clue about DIY electronics. I hope to learn one day.

The electronics for this are very very simple. 2 motors that come already mated to gearboxes, a control box and a battery. You just need to connect them all together which is easy. Total cost about £47 plus the wire. You'll see a bit more later on!
 
Lons":1vdy5en2 said:
Looks great, I'll follow the build with interest love projects like this. :D

Same here. Looks like a very interesting project and I'm looking forward to seeing the progress.
 
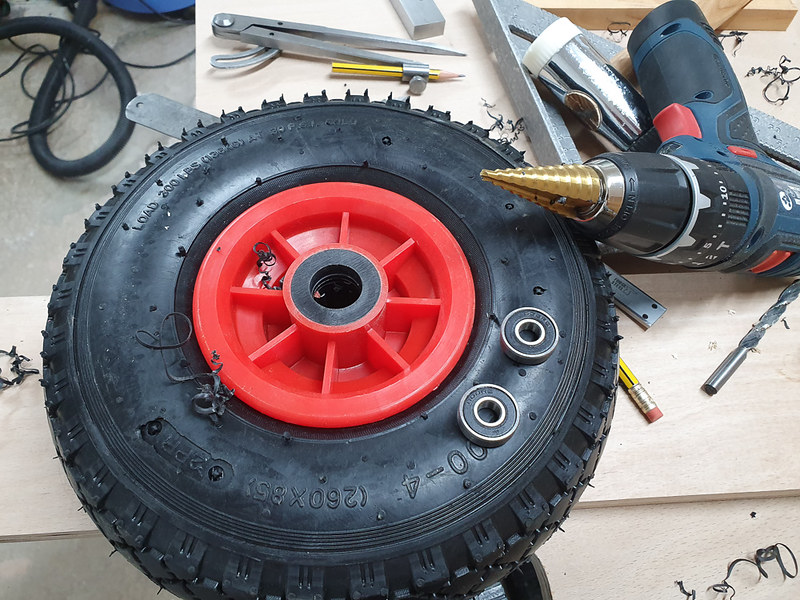
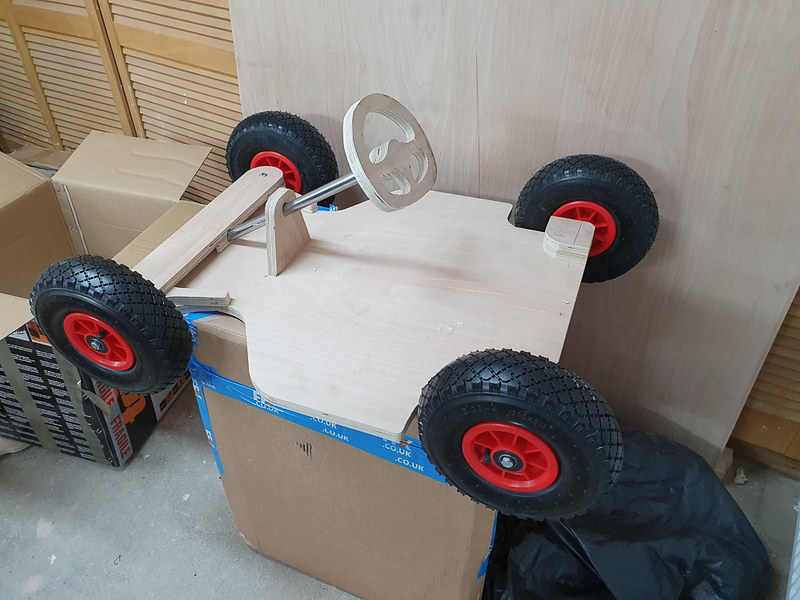
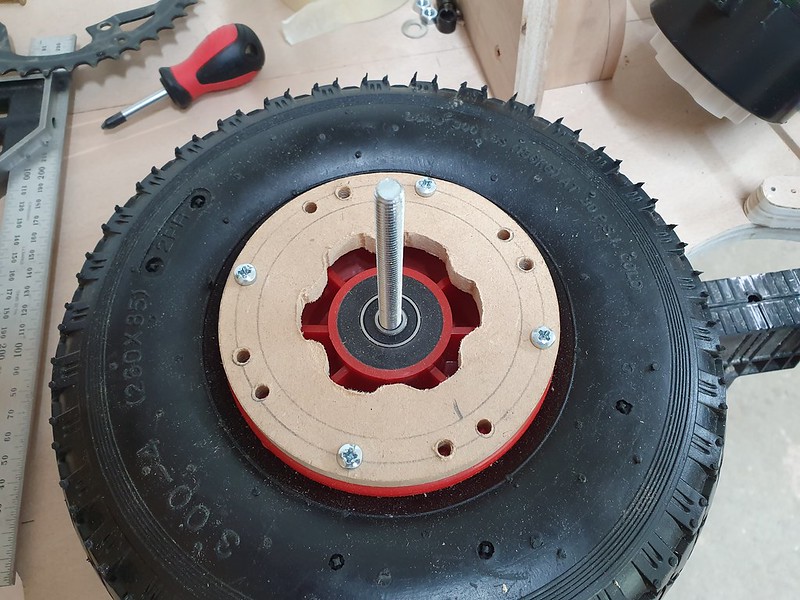
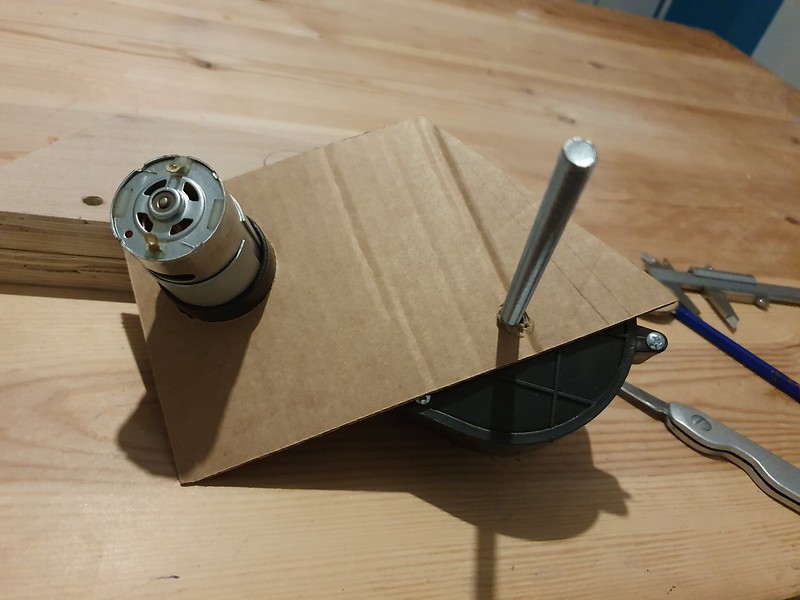
Next I used my newly acquired step drill bit to drill out the wheel hubs to 22mm from the 21ishmm they came as. That allowed a 608RS bearings to drop in either side, reducing the wheel bore from 20mm to 8mm. Other scraps were cut up to make some blocks to hold the rear axles (M8 bolts). This part was later revised after changing from sprocket driven to the new motor/gearbox parts as new mounts were needed for the gearboxes.

48407682191_4cd37a1196_c.jpg

48407677091_8d27ed1fd0_c.jpg


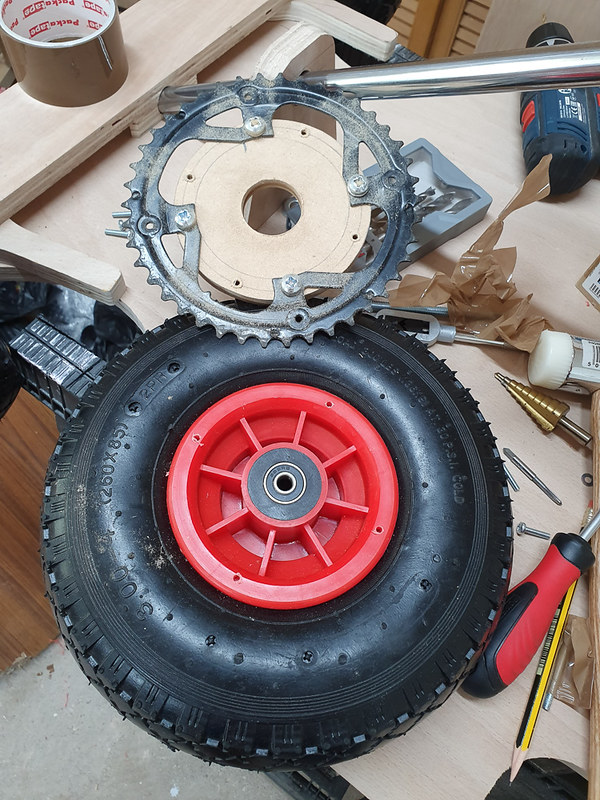
I had actually gotten as far as removing the bike sprockets and starting to attach them to the left rear wheel before swapping over to the motor/gearbox/speed controller config. Fortunately it was a scrap bike left in the farmyard, so nothing lost other than time.

48407668986_a5fd87992a_c.jpg


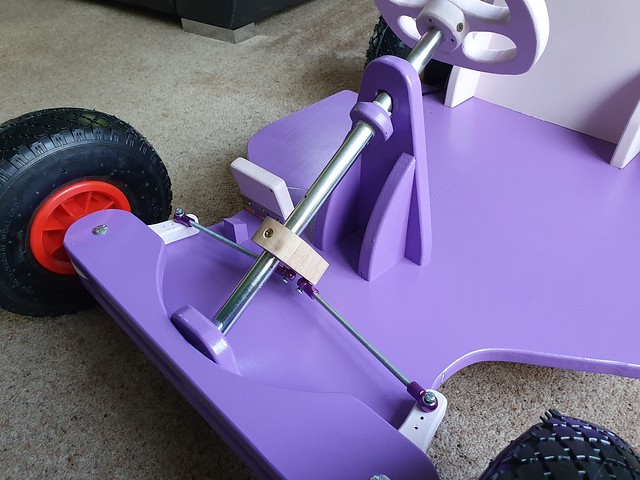
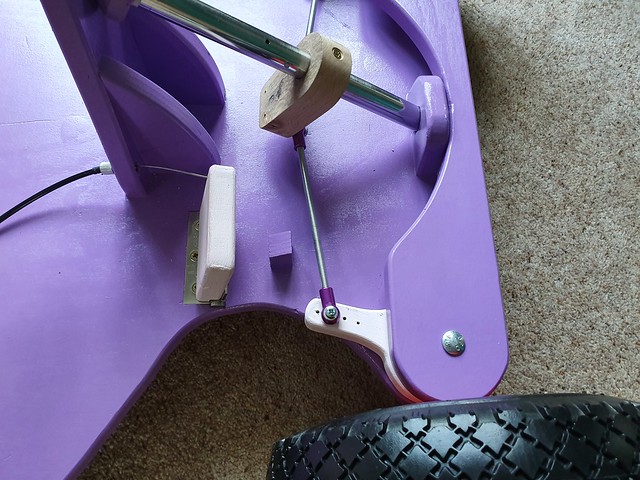
Some 6mm aluminium rod was purchased and drilled out to accept some M3 screws into the the steering arms with extra holes in the arms added for adjustment as needed (for more or less lock), and a block crafted to attach them to the steering column in the same way as in the above video. With the arms angled toward the centre of the rear axle, a vague ackerman steering arrangement is created helping to turn the inside wheel more than the outside one.

Owing to the nature of having to drill holes at some funky angles because of how the steering works, and also needing to be precise with the distances between holes, I abandoned this once the proof of concept was done and instead bought some ball ends and threaded rod. The ball ends are from an RC car of some kind, but one that took M6 rod so a fair bit stronger than the ones I used to use a decade ago!

You'll see those linkages later as for some reason I didn;t get any photos at this stage.

As an apology, here's a teaser for the next installment!

https://streamable.com/14dbp
 
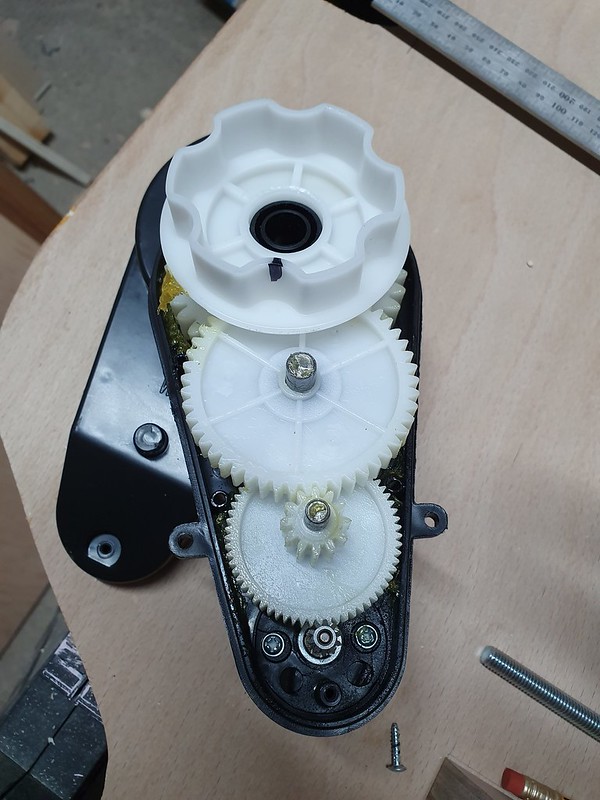
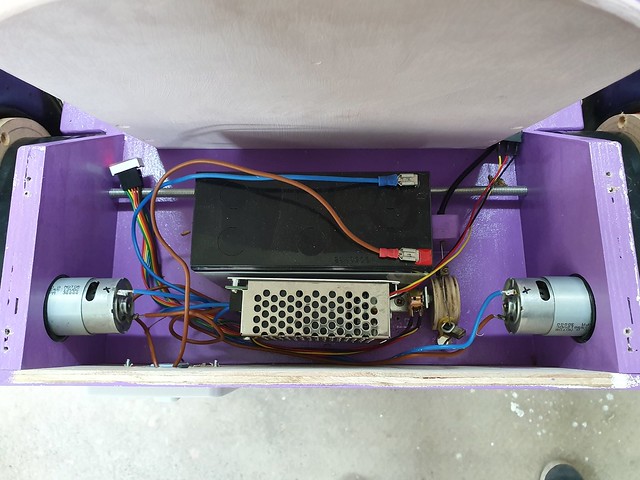
The motors/gearboxes arrived from eBay and are simply replacement parts for ready made ride on cars. They come in lots of different ratings with the most common seeming to be a 390 or 550 motor (550 is bigger) and then at different RPMs rated. Since they are rated at simply 30k RPM but no finals drive speed is given. Sadly that useful bit of information was nowhere to be seen so I'd just have to see what we ended up with. Not to mention whether they would have enough grunt to push a 12kg kart and a similarly weighty child.

A short video demoing the motors and speed controller in action
https://streamable.com/14dbp

48568841617_faee2b63b2_c.jpg

48568844097_57206c2170_c.jpg


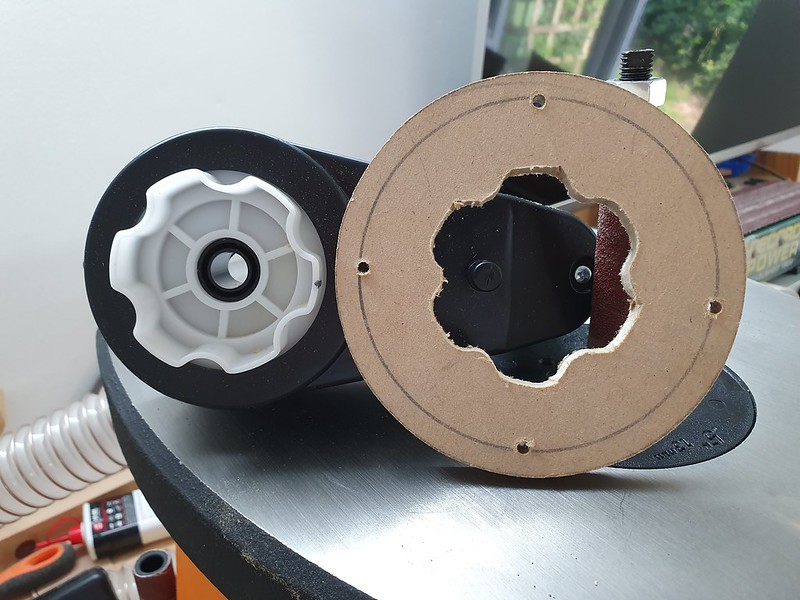
With the motors in hand I could assemble an adapter to connect them to the rear hubs in the same way they connect to the shop bought cars, I could have bought these parts but would have had to adapt them to fit to my wheels anyway, so figured a little time would give me a neater result. With everything bolted together, we now have drive.

48568839887_23a5ebcaf9_c.jpg

48568695191_eb43ddd283_c.jpg


The DC speed controller comes with a switch for reverse/forward as well as a dial potentiometer. From what I can gather, shop bought ride ons just have a switch under the pedal. The speed has already been set elsewhere. I wanted something a little better than that.

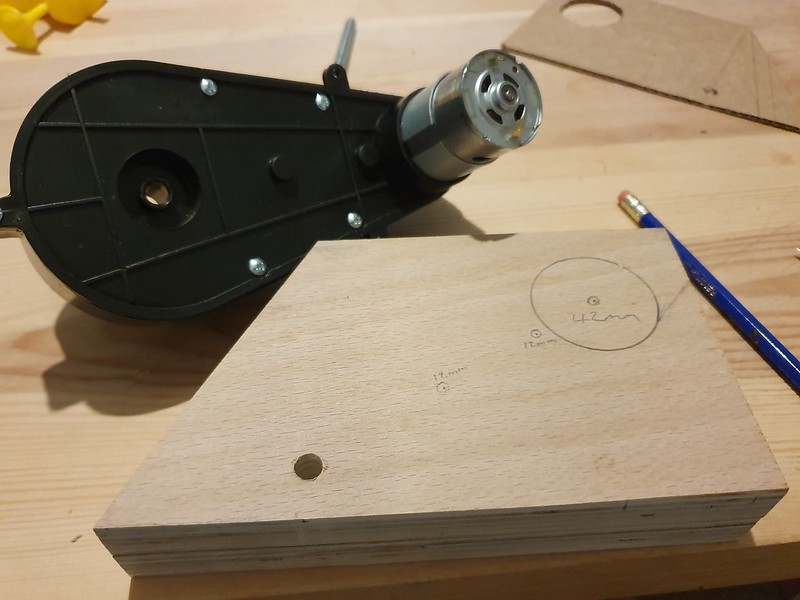
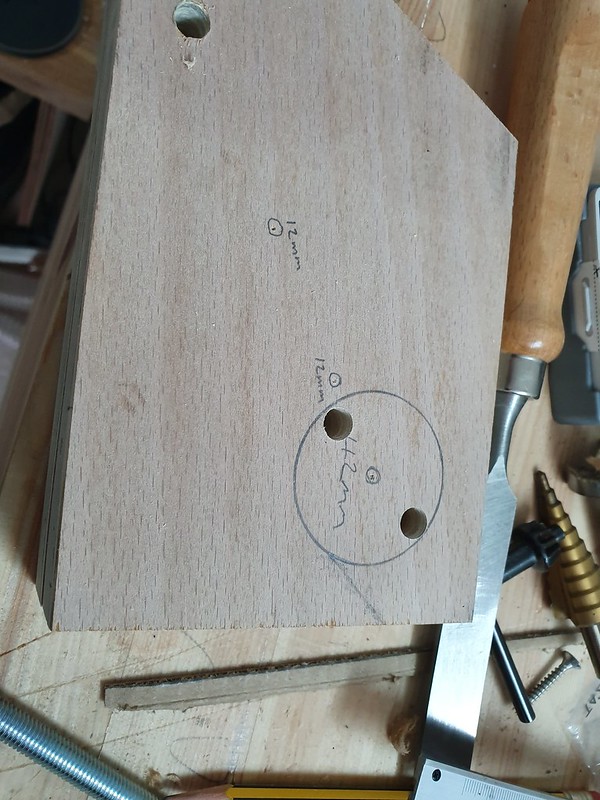
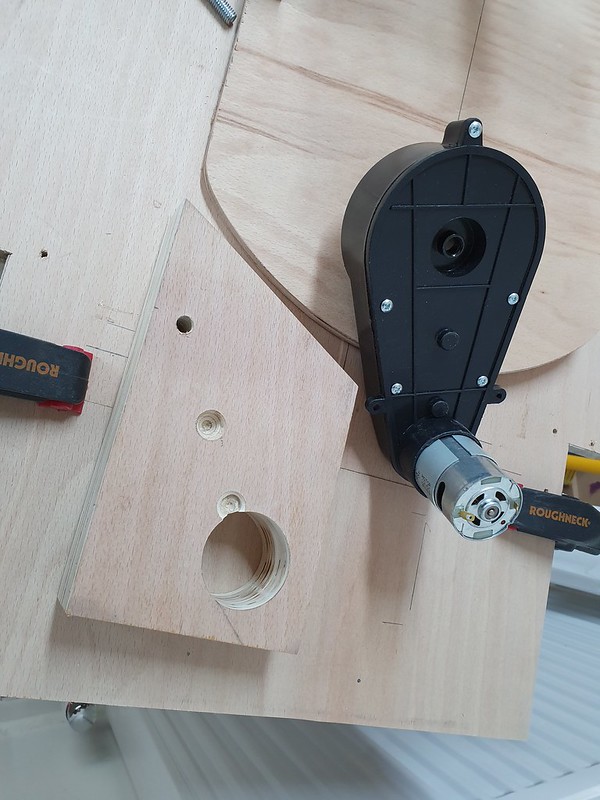
With the change of plan from drill drive to proper motors, I needed to extend the chassis and make up some way of holding the gearboxes in place. More CAD was used to sort out a template, and again 2 blocks of ply were superglued together, cut, shaped and drilled. The two holes in the third photo are drilled simply to help the core bit do its job. Without them, it has no way to eject waste. A little tip I picked up from AvE on Youtube (highly recommended).

48568837852_cfb309bfa5_c.jpg

48568837347_fd25c03af4_c.jpg

48568836387_63e6e667f0_c.jpg

48568689136_f343021aac_c.jpg


A short video of it actually running on the ground. You can see the rear extension mounted as well as the speed controller and battery just lashed on there.

https://streamable.com/uq4ej

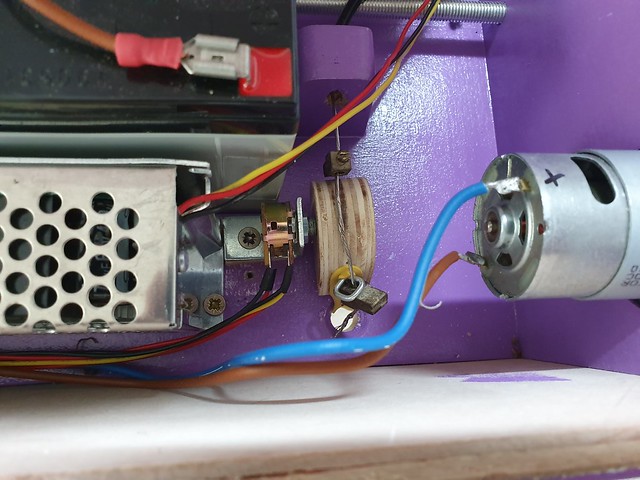
I want her to be able to lift off the pedal and the car slow down and also have the option to increase or decrease the maximum speed as she grows more comfortable. To me it made most sense to connect the pedal to a bit of bike brake line, make a disk to sit over the potentiometer and connect the two together. By increasing the size of the disk the pedal travel will translate to less speed, and vice versa. In the end, the elastic band was not needed. Sorry, this is literally all I have on the pedal until it was all done!

Short video of pedal moving, not actually connected to anything!
https://streamable.com/q4qjx

Ultimately I want her to be able to put it into reverse easily, but right now I've just left that bit hidden away. Time was running out and revere is something she can get as an upgrade later on!

A seat back and brackets were also made up, as well as a rear and top cover for the extension at the back. I didn;t get any photos of these bits in the making but they are largely uninteresting anyway.

Up next, time to dismantle it all, clean it up and get some paint on! There will be more photos of bits I didn't get photos of as I went along as well. Apologies for maybe skipping ahead, there were some bits I just clean forgot to take photos of as i went!
 
Watching with great interest!
I am, personally, not very keen on electric cars, but there's a spare 2hp lawnmower motor kicking about in the garden shed. :twisted:
 
Forgive me for the delay, lots of things to do at home and work!

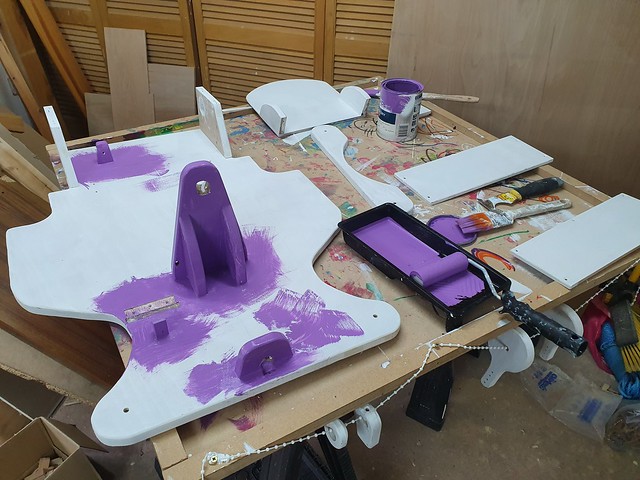
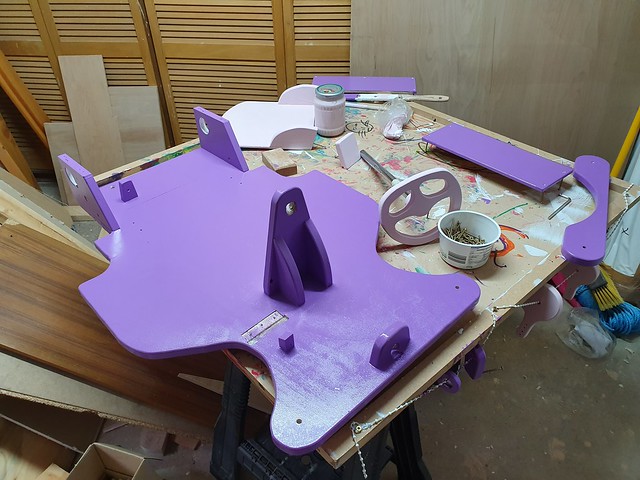
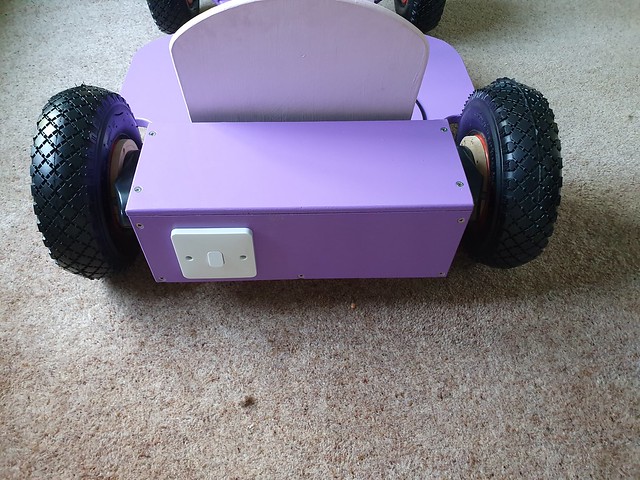
A back and top was made for that rear tray to keep the electricals away from little fingers, and then the whole thing dismantled and put through the finishing process. That's some time on the disk or spindle sander, a little with a random orbital, a roundover bit in the palm router and some finishing off by hand where needed. A little 2 part filler was also used to fill in a few extra screw holes, gaps in the ply etc.

48568681001_ce76028029_z.jpg


1 coat of primer, 2 coats of colour. In this case, some purple gloss and pink emulsion left over from our spare bedroom. Handy that the kid likes both!

48568679781_7910708b7a_z.jpg

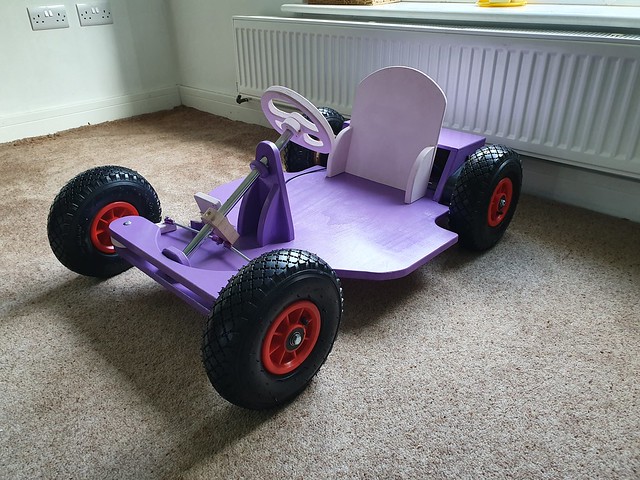
Some assembly required

48568677961_fb14b082df_z.jpg

48549986337_2862413041_z.jpg


A spare light switch used as a nice easy on off for everything
48568843022_746b20d30b_z.jpg


A video of the steering and throttle working
https://streamable.com/29o4n

A video of the gubbins in the rear working from the pedal
https://streamable.com/rn77u

A few closer shots
48568655291_f9a8c9e219_z.jpg

48568799652_81722a1c0e_z.jpg

48617505798_b5576287db_z.jpg

48617999967_7574b70bb2_z.jpg


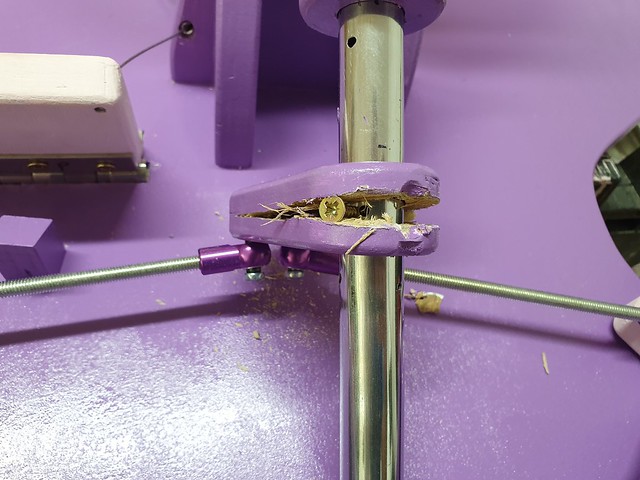
You may have noticed that at some point the connection from steering column to steering linkages has changed, thats becase this happened 2 minutes after my nephew got his hands on it (my daughter was a bit scared when she sat on it and it moved =D> )
48617506973_73f0b8b6fd_z.jpg

This was a 100% expected failure as I actually split th eply just doing the screw up. This doesn't happen on where the steering wheel meets the column simply because the steering boss is screwed to the column AFTER the boss is secured to the back of the wheel, so the ply cannot split apart.

I figured I didn't need to bother with this part and knew I was wrong as soon as I did it up. Never fear, 20 minutes with a lump of hardwood (a foot from my old DFS armchair) and a new fatter stronger part was fabbed. Left unfinished as we go through the development stages (hammer) .

It took about 10 days for my 2 year old to get comfortable with it moving and now she loves it. She's a big fan of full lock and foot down to just do 4m diameter donuts on the patio, but it has actually driven the 100 yards down our driveway to her grandparents. Naturally she only wanted to drive it 1/3 of the way back, so daddy had to carry her...and it.

When I put that battery on to charge it was down to about 30% as judged by my lead acid charger. Since then I have also actually put air in the tyres (forgot about that bit, they just had in them what they came supplied with haha), fixed the puncture (just on the seam where the inner tube was manufactured) and increased the throttle from about 31% up to 40%, though it might go back down to say 35%.

I've also put a hook on the back so we can keep her under moderate control #-o

I do have some video of her on it but we're not ones for sharing photos and stuff of her online (not our privacy to give away) but I'll try and get something for you.
 
My brother is seriously considering getting me to make a slightly larger one for my nephew to drive on the common. Would need larger wheels (probably 300-350mm) and to be slightly longer.

Didn't expect to get to mkII this soon!
 
But wheres the breeze block and three feet of anchor chain???

=D> =D> =D> =D> =D> =D> =D> =D> =D> =D>
 

Latest posts

Back
Top